
1. Introduction
This manual provides essential information for the safe and proper use of your HyperMotion TRINGO 3-Wheel Scooter. Please read all instructions carefully before assembly and use. This scooter is designed for children aged 3 to 8 years with a maximum weight capacity of 50 kg.

Image 1.1: The HyperMotion TRINGO 3-Wheel Scooter in black.
2. Safety Information
To ensure the safety of the user and others, always adhere to the following guidelines:
- Always wear a helmet and appropriate protective gear, including knee pads and elbow pads.
- Adult supervision is required at all times when the scooter is in use.
- Do not ride on public roads, uneven surfaces, wet surfaces, or near vehicle traffic.
- Ensure all locking mechanisms are securely engaged before each use.
- Before each ride, check the wheels, handlebar, and brake for proper function and any signs of damage.
- The maximum weight capacity for this scooter is 50 kg (110 lbs).
- This scooter is suitable for children aged 3 to 8 years.
- Avoid sharp turns at high speeds.
- Do not modify the scooter in any way.
3. Product Components
The HyperMotion TRINGO scooter typically includes the following main components:
- Scooter Deck with integrated front wheels and rear wheel assembly.
- Adjustable Handlebar Stem with grips.
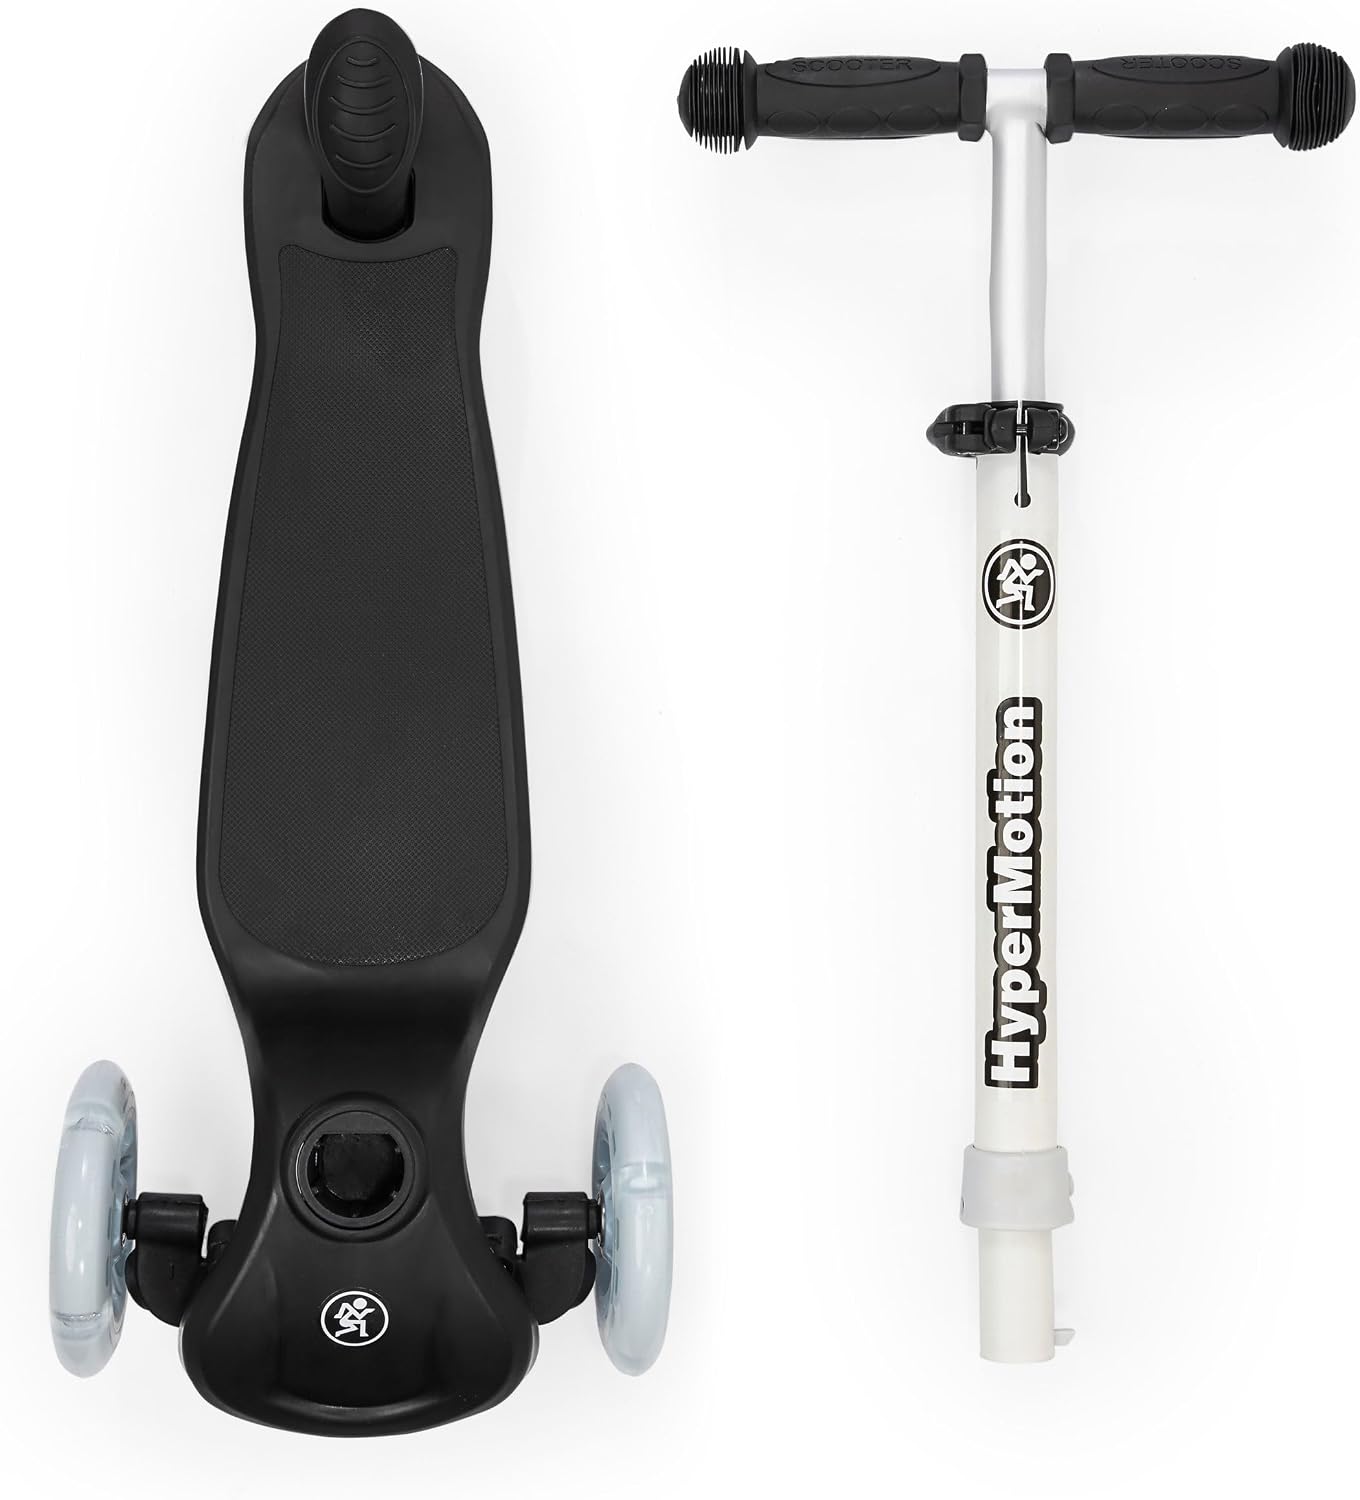
Image 3.1: Main components of the HyperMotion TRINGO Scooter, showing the deck and handlebar stem separated.
4. Setup and Assembly
Follow these steps to assemble your HyperMotion TRINGO Scooter:
- Unpacking: Carefully remove all components from the packaging. Ensure all parts are present and undamaged.
- Handlebar Installation: Insert the handlebar stem into the designated opening on the scooter deck. Push down firmly until you hear a click, indicating that the locking mechanism is securely engaged. Verify that the handlebar is firmly attached and does not wobble.
- Handlebar Height Adjustment: Locate the adjustment button on the handlebar stem. Press the button and slide the handlebar to the desired height. The handlebar can be adjusted to multiple levels: 55 cm, 60 cm, 65 cm, and 70 cm. Release the button to lock the handlebar in position. Ensure the handlebar is securely locked at the chosen height before use.

Image 4.1: Illustration of the handlebar height adjustment mechanism, showing different height settings.
5. Operating Instructions
The HyperMotion TRINGO Scooter is designed for intuitive and stable riding:
- Riding Position: Place one foot firmly on the anti-slip deck of the scooter. Use your other foot to push off the ground to gain momentum.
- Steering: The TRINGO scooter features a lean-to-steer mechanism. To turn, simply lean your body in the direction you wish to go (left or right). The front wheels will respond to your body's lean, providing smooth and controlled turns. There is no need to turn the handlebars manually for steering.

Image 5.1: Diagram illustrating the lean-to-steer functionality of the scooter.
- Braking: To slow down or stop, press down firmly on the rear brake pedal located above the rear wheel with your foot.
- LED Wheels: The scooter is equipped with LED light-up wheels. These lights activate automatically when the wheels are in motion, enhancing visibility and adding a visual element to the ride.

Image 5.2: A close-up view of the scooter's LED wheels illuminating during motion.
6. Maintenance
Regular maintenance ensures the longevity and safe operation of your scooter:
- Cleaning: Wipe the scooter with a damp cloth after use. Do not use abrasive cleaners, solvents, or harsh chemicals, as these can damage the materials.
- Storage: Store the scooter in a dry place, away from direct sunlight and extreme temperatures. The handlebar can be easily removed for more compact storage if needed.
- Regular Checks: Periodically inspect all screws, bolts, and connections to ensure they are tight. Check the wheels for any signs of wear, cracks, or damage. Verify that the rear brake functions correctly and that the handlebar locking mechanism engages securely.
7. Troubleshooting
If you encounter any issues with your HyperMotion TRINGO Scooter, refer to the following common solutions:
- Scooter not steering smoothly: Check for any debris or obstructions in the steering mechanism. Ensure the handlebar is correctly installed and not bent or damaged.
- Wheels not lighting up: The LED lights are powered by kinetic energy, meaning they only illuminate when the wheels are in motion. Ensure the scooter is being ridden. If they still do not light up, inspect the wheel bearings for any obstruction or damage.
- Handlebar feels loose: Re-engage the handlebar locking mechanism by pressing the button and ensuring it clicks firmly into place. If the mechanism does not lock, inspect it for damage. Do not use the scooter if the handlebar is loose.
8. Specifications
| Brand | HyperMotion |
| Model Name | TRINGO |
| Recommended Age | 3-8 years |
| Maximum Load | 50 kg (110 lbs) |
| Number of Wheels | 3 (2 front, 1 double rear) |
| Handlebar Height Adjustment | 55 - 60 - 65 - 70 cm (21.6 - 23.6 - 25.6 - 27.6 inches) |
| Product Dimensions (L x W x H) | 55 x 26 x 70 cm (21.6 x 10.2 x 27.6 inches) |
| Weight | 2 kg (4.4 lbs) |
| Wheel Material | Polyurethane (PU) with LED lights |
| Frame Material | Aluminum |
| Handle Type | Rubber |
| Brake Type | Rear foot brake |
| Special Features | Light-up wheels, adjustable handlebar, anti-slip deck, easy balance control |

Image 8.1: Detailed diagram showing the dimensions of the HyperMotion TRINGO Scooter.
9. Warranty
The HyperMotion TRINGO Scooter comes with a 2-year limited warranty. This warranty covers manufacturing defects under normal use. Please retain your proof of purchase for any warranty claims. The warranty does not cover damage resulting from misuse, accidents, unauthorized modifications, or normal wear and tear.
10. Support
For further assistance, technical support, or inquiries regarding your HyperMotion TRINGO Scooter, please contact HyperMotion customer support through your retailer or visit the official HyperMotion website. Please have your model number (TRINGO) and proof of purchase ready when contacting support.