1. Introduction
This manual provides comprehensive instructions for the installation, operation, and maintenance of your HTU MagSafe Car Mount. This versatile 5-in-1 magnetic phone holder is designed for secure attachment to your vehicle's dashboard, windshield, or air vent, offering flexible viewing angles for various smartphone models.

Image 1: HTU MagSafe Car Mount components.

Image 2: Multiple mounting options for the HTU car mount.
2. Package Contents
Please verify that all items are present in your package:
- Magnetic Mount x1
- Suction Cup x1
- Hook Clip x1
- Stabilizer x1
- Metal Ring x2 (for non-MagSafe compatible devices/cases)
- User Manual x1
3. Safety Information and Important Notes
- Surface Compatibility: Waxed, leather, or textile dashboard surfaces are not suitable for suction cup mounting. Use the mount on the windshield or air vent instead.
- Stabilizer Adjustment: Ensure the silicone pad of the stabilizer touches the dashboard to provide adequate support for the suction cup arm.
- Case Compatibility: The mount is not compatible with uneven phone cases, such as those with built-in rings or textured surfaces, unless the metal ring is applied to a flat area.
- Metal Ring Placement: For phones without MagSafe compatibility (e.g., Samsung, iPhone 11, Android phones) or cases without built-in MagSafe, attach the included metal ring to the exterior back of your phone case, not inside the case.
4. Installation Guide
4.1 Preparation Before Installation
Before installing the mount, identify a suitable mounting surface and prepare the mount arm.

Image 3: Surface selection and arm adjustment.
- Choose a Surface: Select a flat, smooth surface such as glass, plastic, or flat wood grain. Avoid genuine leather, suede, or coated surfaces.
- Bend the Arm: Gently bend the flexible arm of the suction cup mount to your desired initial shape.
- Adjust Arm Shape: Fine-tune the arm's curvature to ensure optimal positioning and stability.
4.2 Suction Cup Installation (Dashboard/Windshield)
Follow these steps to install the mount using the suction cup:

Image 4: Suction cup installation steps.
- Clean Surface: Thoroughly clean the chosen mounting surface with an alcohol wipe and allow it to dry completely.
- Position and Press: Place the suction cup on the cleaned surface and press down firmly for 5 seconds to expel air.
- Adjust Angle: Rotate the mount to achieve your desired viewing angle.
- Adjust Stabilizer Pad: Adjust the silicone pad on the arm so it rests against the dashboard, providing additional support. Keep pressing the suction cup during this step.
- Lock Suction: Press the locking lever down firmly for 5 seconds until it clicks into place, securing the suction cup.
4.3 Vent Clip Installation
To install the mount on an air vent:

Image 5: Detailed view of the vent hook clip.

Image 6: Upgraded steel hook clip for enhanced stability.
- Attach Hook Clip: Connect the hook clip to the magnetic mount's ball joint.
- Insert Hook: Carefully insert the hook into one of your car's air vent blades.
- Tighten: Rotate the tightening knob clockwise until the hook firmly grips the vent blade. The mechanism is designed to click when sufficiently tightened, preventing overtightening.
- Adjust Angle: Adjust the magnetic head to your preferred viewing angle.
4.4 Applying the Metal Ring (for non-MagSafe devices)
If your phone or case is not MagSafe compatible, use the included metal rings:

Image 7: Compatibility guide for MagSafe and non-MagSafe devices.
- Clean Case: Ensure the back of your phone case is clean and dry.
- Position Ring: Carefully peel the adhesive backing from one metal ring. Center the ring on the exterior back of your phone case.
- Apply Firmly: Press the ring firmly onto the case for several seconds to ensure a strong bond.
- Wait: Allow the adhesive to cure for at least 24 hours before attaching your phone to the mount.
5. Operation
Once installed, operating your HTU MagSafe Car Mount is straightforward.
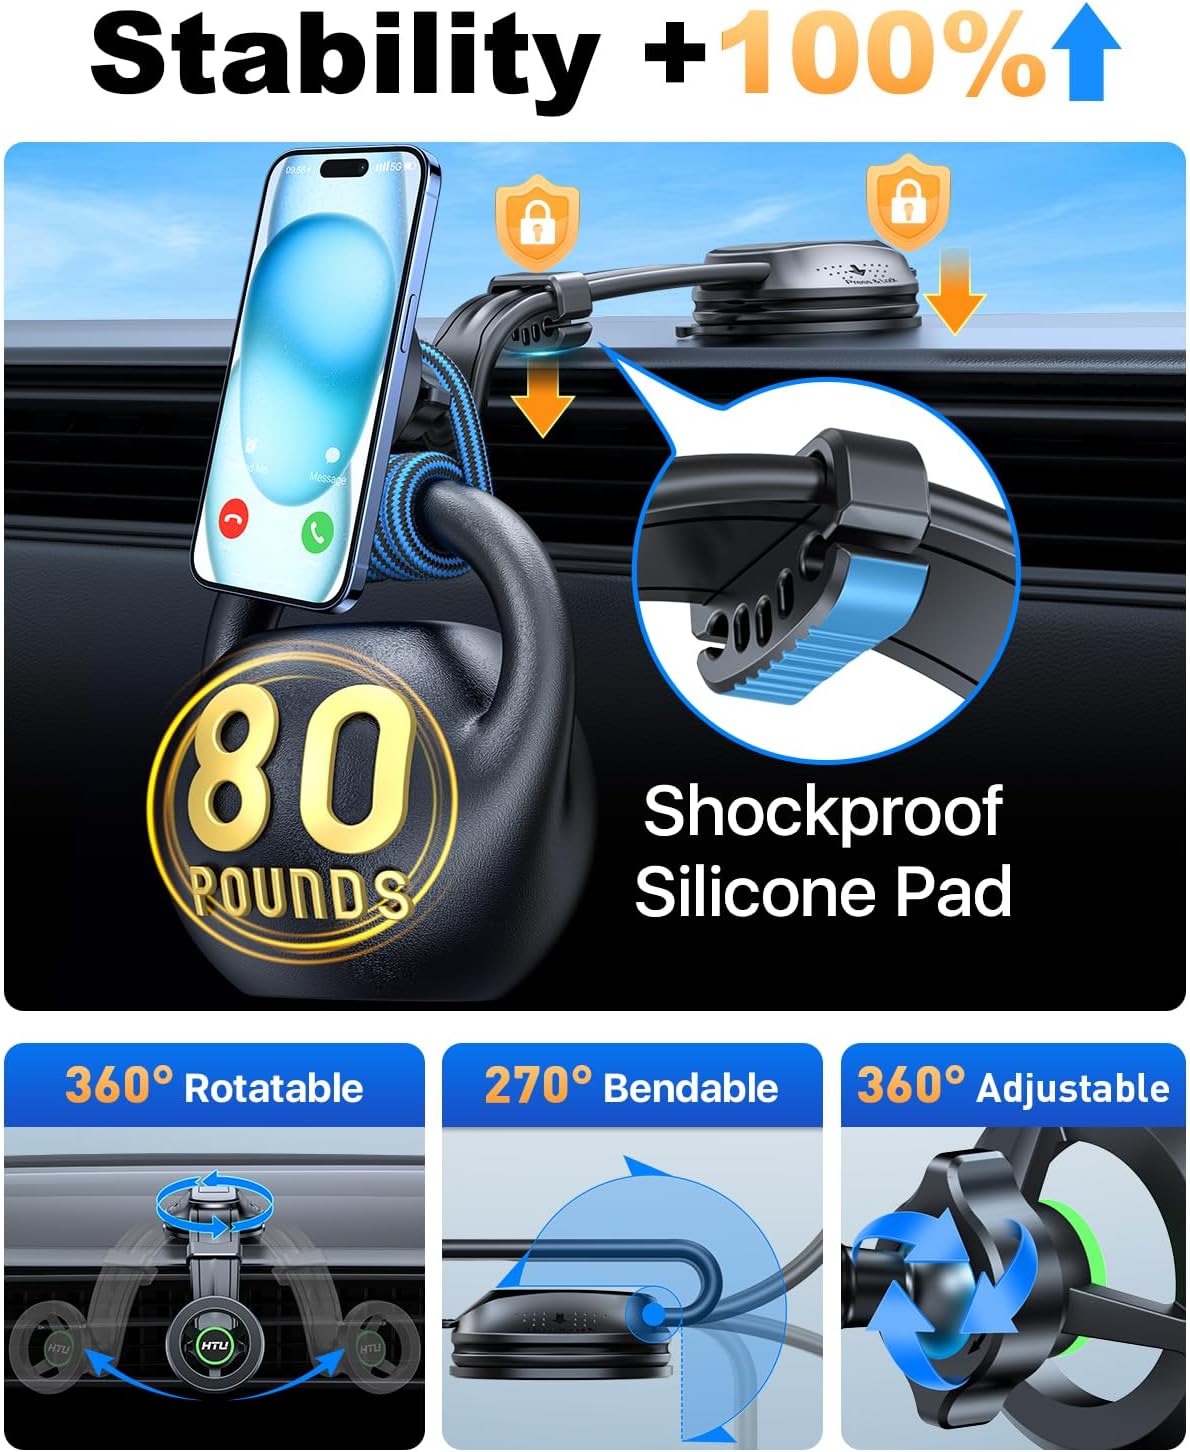
Image 8: Adjustable features for optimal viewing.
- Attaching Your Phone: Simply bring your MagSafe-compatible phone (or phone with an applied metal ring) close to the magnetic head. The magnets will automatically align and secure your device.
- Detaching Your Phone: Gently pull your phone away from the magnetic head.
- Adjusting Viewing Angle: The mount features a 360-degree rotatable magnetic head and a 270-degree bendable arm, allowing you to adjust your phone to any desired orientation (portrait or landscape) and angle for optimal visibility.
- Cable Management: The suction cup arm includes a cable organizer to keep your charging cables tidy and out of the way.
6. Maintenance
To ensure the longevity and optimal performance of your car mount:
- Cleaning the Suction Cup: If the suction cup loses its grip, rinse it with warm water and let it air dry. This will restore its adhesive properties.
- General Cleaning: Wipe the mount with a soft, damp cloth to remove dust and grime. Avoid harsh chemicals or abrasive cleaners.
- Storage: When not in use for extended periods, detach the mount and store it in a cool, dry place away from direct sunlight.
7. Troubleshooting
7.1 Suction Cup Not Sticking
- Check Surface: Ensure the surface is flat, smooth, and clean. Avoid porous, textured, waxed, leather, or textile surfaces.
- Clean Suction Cup: Rinse the suction cup with water and air dry to remove dust and restore stickiness.
- Reapply Firmly: Press down on the suction cup for at least 5 seconds while engaging the lock lever.
- Use Stabilizer: Ensure the stabilizer pad is adjusted to firmly support the arm against the dashboard.
7.2 Phone Wobbles or Falls Off
- Magnetic Connection: Ensure your phone or case is MagSafe compatible or has the metal ring properly attached to the exterior of a flat case.
- Case Type: Uneven cases (e.g., with rings, thick textures) may interfere with the magnetic connection. Consider using a flat case or applying the metal ring to a flat area.
- Mount Stability: For suction cup mounts, verify the suction is secure and the stabilizer is providing adequate support. For vent mounts, ensure the hook clip is tightened sufficiently.
7.3 Vent Clip Not Secure
- Vent Type: The hook clip is designed for straight fin vents. It may not be suitable for round or unusually shaped vents.
- Tightening: Ensure the tightening knob is rotated clockwise until it clicks, indicating a secure grip on the vent blade.
8. Specifications
- Model Number: 682f1f86-9f20-4b65-89c6-6847a2f65c24
- Brand: HTU
- Mounting Type: Dashboard, Windshield, Air Vent
- Compatible Devices: Smartphones (MagSafe compatible or with metal ring)
- Compatible Phone Models: iPhone 12/13/14/15/16 series (MagSafe), other smartphones with metal ring
- Special Features: Adjustable (360° rotatable magnetic head, 270° bendable arm), Strong Neodymium Magnet, Stabilizer, Cable Organizer
- Item Weight: 8.6 ounces
- Package Dimensions: 8.58 x 3.93 x 2.95 inches
- Color: Light Orange
- Manufacturer: HTU
- Date First Available: April 15, 2024
9. Warranty and Support
HTU provides a 5-year warranty for this product, ensuring quality and customer satisfaction. For any questions, technical assistance, or warranty claims, please contact HTU customer support through the retailer's platform or the official HTU website.