1. Introduction
This instruction manual provides essential information for the safe and correct installation, operation, and maintenance of your Auto-Hak fixed rigid tow bar and its specific 13-pin electrical wiring harness. Please read this manual thoroughly before beginning installation or use. Keep this manual for future reference.
2. Product Overview
The Auto-Hak fixed rigid tow bar is designed for reliable towing, offering a robust and permanent solution for your vehicle. It is supplied with a vehicle-specific 13-pin electrical wiring harness to ensure full compatibility with your vehicle's electrical system and trailer lighting.
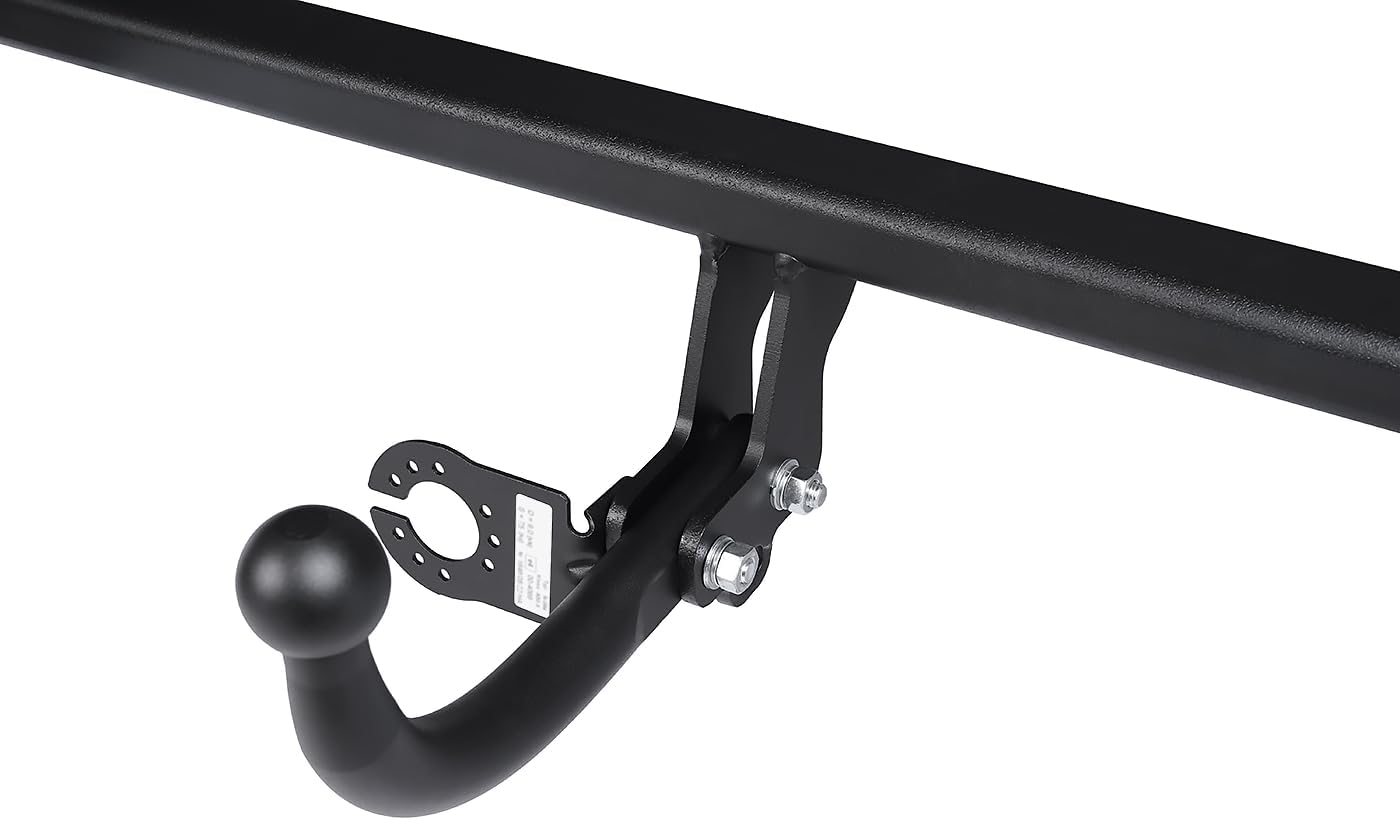
Figure 2.1: Close-up view of the fixed rigid tow bar ball and its mounting plate. This image shows the robust construction and the attachment points for the tow ball.
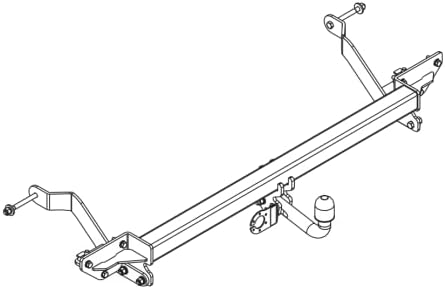
Figure 2.2: An illustrative diagram of the complete tow bar assembly, showing its structural components and how it integrates with the vehicle's chassis.

Figure 2.3: The packaging for the vehicle-specific electrical wiring kit, labeled 'Elektrosatz fahrzeugspezifisch'. This kit ensures proper electrical connection for trailer functions.

Figure 2.4: A detailed view of the 13-pin electrical socket, which provides power and signal connections to the trailer's lights and other electrical systems.
3. Compatibility
This tow bar and wiring harness combination is specifically designed for:
- Vehicle Model: Fiat Ducato L1, L2, L3 Van/Minibus
- Production Date: From June 2021 onwards
Ensure your vehicle matches these specifications for proper fitment and functionality.
4. Specifications
4.1. Tow Bar Specifications (Model: R39)
- Tow Ball Type: Fixed Rigid (bolted)
- Lockable Tow Ball: No
- D-Value (kN): 16.9
- Max. Towing Capacity (kg): 3000
- Max. Vertical Load (kg): 150
- Bumper Removal Required: Yes
- Bumper Cut Required: No
- Weight (kg): 21
- Manufacturer: Auto-Hak
4.2. Wiring Harness Specifications (Model: 21500694)
- Type: Vehicle-specific
- Number of Pins: 13
- Electronic Module: Yes (included in the kit)
- Cable Length: Adapted to the vehicle
- Coding Required: No
- Rear Parking Sensor Deactivation: Yes
- Compatibility with LED Lights (Vehicle & Trailer): Full compatibility
- Integrated Plus Fixed Power: No (additional kit 22400001 available separately)
- Charging Function: No (additional kit 22400509 available separately)
- Manufacturer: ConWys AG
5. Setup and Installation
Installation of the tow bar and wiring harness requires mechanical and electrical expertise. It is highly recommended that installation be performed by a qualified professional.
5.1. General Installation Steps
- Preparation: Ensure the vehicle is on a level surface, engine off, and parking brake engaged. Disconnect the vehicle's battery.
- Bumper Removal: The vehicle's rear bumper must be removed to access the mounting points. Refer to your vehicle's service manual for specific instructions on bumper removal.
- Tow Bar Mounting: Position the tow bar according to the included installation instructions. Secure it using the provided fasteners, ensuring all bolts are tightened to the specified torque settings.
- Wiring Harness Installation: Follow the detailed instructions provided with the specific 13-pin wiring harness. This typically involves connecting to the vehicle's rear light clusters and routing cables to the front of the vehicle if necessary. The electronic module should be securely mounted in a dry location.
- Bumper Reinstallation: Reinstall the bumper. No cutting of the bumper is required for this specific model.
- Testing: Reconnect the battery. Test all trailer lighting functions (indicators, brake lights, tail lights, reverse light, fog light) with a suitable trailer or test board. Verify that the rear parking sensors are deactivated when a trailer is connected.
Important: Detailed installation instructions are included in the product packaging. Always refer to these specific documents for precise steps and safety warnings.
6. Operating Instructions
Once installed, the fixed rigid tow bar is ready for use. Always adhere to the maximum towing capacity and vertical load limits specified in this manual and your vehicle's documentation.
6.1. Connecting a Trailer
- Ensure the tow ball is clean and free from grease or dirt.
- Carefully reverse your vehicle to align the tow ball with the trailer hitch.
- Lower the trailer hitch onto the tow ball, ensuring it is securely latched.
- Connect the 13-pin electrical plug from the trailer to the vehicle's 13-pin socket. Ensure a firm connection.
- Attach the trailer's breakaway cable to the designated attachment point on the tow bar.
- Perform a visual check of all trailer lights and indicators before driving.
6.2. Disconnecting a Trailer
- Park the vehicle and trailer on a level surface and engage the parking brake on both.
- Disconnect the breakaway cable.
- Carefully disconnect the 13-pin electrical plug from the vehicle's socket.
- Raise the trailer hitch to detach it from the tow ball.
7. Maintenance
Regular maintenance ensures the longevity and safe operation of your tow bar.
- Cleaning: Keep the tow ball and electrical socket clean from dirt, rust, and debris.
- Lubrication: Periodically apply a thin layer of grease to the tow ball to reduce wear and friction, unless using an anti-snaking hitch that requires a dry ball.
- Inspection: Regularly inspect all bolts and fasteners for tightness. Check for any signs of corrosion, cracks, or damage to the tow bar structure and wiring.
- Electrical Connections: Ensure the 13-pin socket pins are clean and free from corrosion. Use a contact spray if necessary.
8. Troubleshooting
If you encounter issues, refer to the following common problems and solutions:
- No Trailer Lights:
- Check the trailer's light bulbs.
- Ensure the 13-pin plug is fully inserted and securely connected.
- Inspect the wiring harness for visible damage or loose connections.
- Check vehicle fuses related to trailer lighting.
- Parking Sensors Not Deactivating:
- Ensure the 13-pin plug is correctly and fully inserted into the vehicle socket.
- Verify the wiring harness electronic module is correctly installed and functioning.
- Excessive Noise/Movement from Tow Bar:
- Check all mounting bolts for tightness.
- Inspect the tow bar structure for any signs of damage or wear.
For persistent issues, consult a qualified mechanic or contact Auto-Hak customer support.
9. Warranty and Support
Both the Auto-Hak tow bar and the ConWys AG wiring harness come with a 2-year warranty from the date of purchase.
This warranty covers manufacturing defects under normal use. It does not cover damage resulting from improper installation, misuse, neglect, accidents, or unauthorized modifications.
For warranty claims or technical support, please contact your retailer or the respective manufacturer with your proof of purchase and product model numbers (Tow Bar: R39, Wiring Harness: 21500694).