Sprobil CJY-LW
Sprobil Golf Rangefinder User Manual
Model: CJY-LW
Brand: Sprobil
1. Introduction
Thank you for choosing the Sprobil Golf Rangefinder. This device is designed to provide precise distance measurements for golf, hunting, and other outdoor activities. It features high-transmittance lenses, 7x magnification, slope compensation, flag pole lock with vibration, and a magnetic mount for convenience. This manual will guide you through the setup, operation, and maintenance of your new rangefinder.

Image 1.1: Sprobil Golf Rangefinder. This image displays the compact, black rangefinder with its two optical lenses and textured grip.
2. Package Contents
Please verify that all items listed below are included in your package:
- Rangefinder x1
- Portable Soft Case x1
- Hand Rope x1
- Charging Cable (USB-C) x1
- Microfiber Cloth x1
- User Manual x1

Image 2.1: Package List. This image illustrates all components included in the Sprobil Golf Rangefinder package.
3. Product Overview
The Sprobil Golf Rangefinder is designed for ease of use and durability. Key features include:
- High Transmittance Lenses: Provides a bright and clear field of view, even in varying light conditions.
- 7x Magnification: Allows for precise targeting of distant objects.
- Slope Switch: Enables or disables slope compensation for legal tournament play.
- Flag Locking with Vibration: Confirms target acquisition with a subtle vibration.
- Magnetic Mount: Conveniently attaches to golf carts or clubs.
- USB-C Charging: For easy and efficient recharging of the built-in battery.

Image 3.1: Rangefinder Features Overview. This image highlights the key features of the rangefinder, including high transmittance, 7x magnification, slope switch, flag locking, magnetic mount, and USB-C charging.

Image 3.2: High Transmittance Lenses and Mode Displays. This image shows the high-transmittance lenses and examples of the M1 (Standard), M2 (Golf), and M3 (Speed) display modes.
4. Setup
4.1 Initial Charging
Before first use, fully charge your Sprobil Golf Rangefinder. Connect the provided USB-C charging cable to the rangefinder's charging port and plug the other end into a compatible USB power source (e.g., computer, wall adapter). The charging indicator will show the charging status. A full charge provides approximately 10 hours of continuous use or over 40,000 measurements.
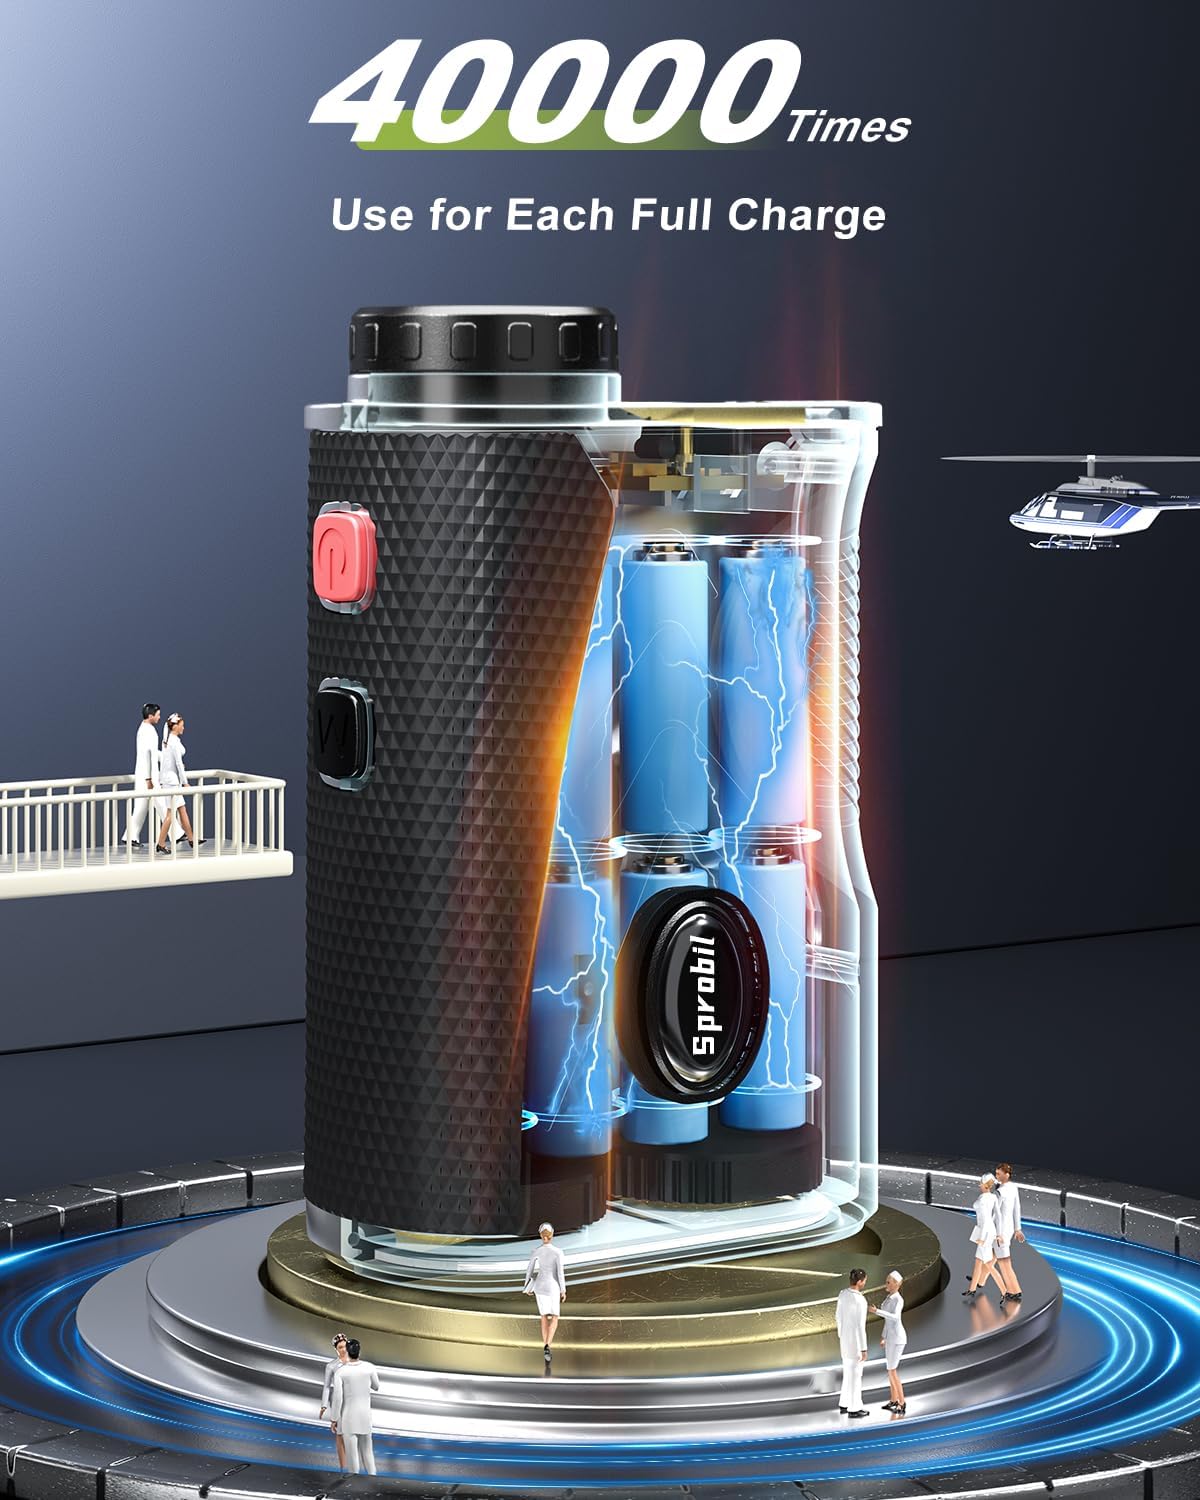
Image 4.1: Rangefinder Charging Illustration. This image visually represents the internal battery structure and the USB-C charging capability of the rangefinder.
4.2 Power On/Off
To power on the device, press the power button. The display will illuminate. To power off, press and hold the power button, or the device will automatically power off after a period of inactivity to conserve battery.
5. Operating Modes
The Sprobil Golf Rangefinder offers multiple operating modes to suit various measurement needs. Press the 'Mode' button to cycle through the available modes.
5.1 Standard Mode (M1)
In Standard Mode, the rangefinder measures the direct line-of-sight distance to the target. This mode is suitable for general distance measurements where slope compensation is not required.
5.2 Golf Mode with Slope (M2)
Golf Mode calculates the adjusted distance based on the incline or decline of the terrain. This feature helps golfers select the correct club for uphill or downhill shots. The slope compensation can be toggled on or off using the dedicated slope switch on the side of the device.

Image 5.1: Slope Adjustment Diagram. This diagram illustrates how the rangefinder calculates adjusted distances for uphill and downhill shots using slope compensation.
5.3 Speed Mode (M3)
Speed Mode allows for the measurement of the speed of a moving object. Follow the instructions on the display to accurately measure speed.
6. Usage Instructions
6.1 Measuring Distance
- Look through the eyepiece and aim the reticle at your desired target.
- Press the power/measurement button once to activate the laser.
- The distance will be displayed on the LCD screen within the eyepiece.

Image 6.1: Long Range Targeting. A user is shown aiming the rangefinder, with an inset displaying the clear view and distance measurement within the eyepiece.
6.2 Flag Pole Lock with Vibration
When in Golf Mode, aim at the flagstick. The rangefinder will automatically lock onto the flag and provide a short vibration to confirm the measurement, ensuring you get the distance to the flag and not objects behind it.
6.3 Legal Tournament Mode
To comply with championship competition rules, ensure the slope compensation button is switched to the 'OFF' position. This will prevent the display of slope values, allowing for legal play.
7. Maintenance
7.1 Cleaning
Use the provided microfiber cloth to gently clean the lenses and the body of the rangefinder. Do not use abrasive materials or harsh chemicals, as they may damage the optics or casing. For stubborn spots on the lenses, a small amount of lens cleaning solution designed for optical instruments can be applied to the cloth, not directly to the lens.
7.2 Storage
Store the rangefinder in its portable soft case when not in use to protect it from dust, dirt, and physical damage. Keep the device in a cool, dry place, away from direct sunlight and extreme temperatures.
7.3 Water Resistance
The Sprobil Golf Rangefinder has an IP54 water-resistant rating, meaning it is protected from dust and splashing water from any direction. While it can withstand light rain, it is not designed for submersion in water. Avoid exposing the device to heavy rain or prolonged wet conditions.
8. Troubleshooting
| Problem | Possible Cause | Solution |
|---|---|---|
| No display/Device won't turn on. | Low battery; Device malfunction. | Charge the device fully. If problem persists, contact customer support. |
| Inaccurate readings or difficulty locking onto targets. | Dirty lenses; Unstable aiming; Environmental interference (fog, heavy rain); Target too small or reflective. | Clean lenses with microfiber cloth. Ensure a steady hand. Avoid using in extreme weather. Aim at a larger, more defined target if possible. Try scanning mode. |
| Flag lock vibration not working or inconsistent. | Not in Golf Mode; Target not clearly isolated; Low battery. | Ensure you are in Golf Mode (M2). Try to isolate the flagstick from background objects. Ensure battery is sufficiently charged. |
| Magnetic mount feels weak. | Surface not fully magnetic; Device not securely attached. | Ensure the mounting surface is flat and fully magnetic. Place the rangefinder carefully to maximize magnetic contact. Consider using the soft case and hand rope for added security. |
9. Specifications
| Feature | Detail |
|---|---|
| Brand | Sprobil |
| Model Name | Golf Rangefinder-183 |
| Part Number | CJY-LW |
| Measuring Range | 5-1200 yards |
| Measurement Accuracy | ±0.5 yards |
| Magnification | 7x |
| Lens Transmittance | 80% |
| Battery Type | Built-in 900mAh Lithium-Ion |
| Charging Port | USB-C |
| Battery Life (Continuous Use) | Approx. 10 hours |
| Measurements per Charge | Over 40,000 |
| Water Resistance Rating | IP54 (Water Resistant) |
| Material | Acrylonitrile Butadiene Styrene |
| Color | Black |
| Item Weight | 0.77 Ounces |
| Product Dimensions (LxWxH) | 5.7" x 2.75" x 4.33" |
10. Warranty and Support
10.1 Warranty Information
This Sprobil Golf Rangefinder comes with a 1-year manufacturer's warranty. This warranty covers defects in materials and workmanship under normal use. It does not cover damage caused by misuse, accidents, unauthorized modifications, or natural disasters. Please retain your proof of purchase for warranty claims.
10.2 Customer Support
For any questions, technical assistance, or warranty claims, please contact Sprobil customer support. Refer to the contact information provided on the product packaging or the official Sprobil website for the most up-to-date support channels.
Related Documents - CJY-LW
 |
Epson 標籤機透過 Label Editor 匯入 Excel 連續列印指南 學習如何使用 Epson Label Editor 軟體,將 Excel 資料匯入並連續列印標籤,適用於 LW-600P 等多款標籤機型,提升標籤製作效率。 |
 |
Epson Magnetic Tape: How to Disable Auto-Cut for Printer Protection Detailed instructions for Epson LABELWORKS printers on how to disable the auto-cut function when using thicker magnetic tape. This guide provides model-specific instructions and best practices to protect your printer's cutting mechanism. |
 |
Epson Self-Laminating Overwrap Label Tape Instructions (224VSLPX, 236VSLPX) Detailed instructions for using Epson Self-Laminating Overwrap label tapes (models 224VSLPX and 236VSLPX) with various Epson LabelWorks printers and software, including standalone printers, mobile apps, and PC/Mac software. Covers tape specifications, printing procedures, and software setup. |
 |
Cerwin-Vega Powered Subwoofers Operation Manual Operation manual for Cerwin-Vega HT-S and LW series powered subwoofers, covering safety instructions, warranty information, control descriptions, connection methods, troubleshooting, and detailed specifications. |
 |
MasterSpas Legacy Whirlpool 2026 Owner's Manual & Limited Warranty Comprehensive owner's manual and limited warranty for the MasterSpas Legacy Whirlpool 2026. Covers installation, operation, maintenance, safety, and warranty details. |
 |
Master Spas Legacy Whirlpool Owner's Manual & Limited Warranty Comprehensive guide for Master Spas Legacy Whirlpool hot tubs, covering installation, operation, maintenance, safety, and limited warranty information for models like LW 730L, LW ENTERPRISE 3500, LW INSPIRE 3600, LW INTREPID 3400, and LW ACCLAIM 9913. |
Ask a question about this manual
Ask about setup, troubleshooting, compatibility, parts, safety, or missing instructions. Manuals+ will review the question and use this page’s manual context to help answer it.