IK.103.891.42
UTDRAG 60 cm Stainless Steel Built-in Extractor Hood User Manual
Model: IK.103.891.42 | Brand: Generic
Introduction
This user manual provides essential information for the safe and efficient operation, installation, and maintenance of your UTDRAG 60 cm Stainless Steel Built-in Extractor Hood. Please read this manual thoroughly before installation and use, and keep it for future reference.
The UTDRAG extractor hood is designed to remove smoke, steam, and cooking odors from your kitchen, ensuring a fresh and comfortable environment. It features a durable stainless steel construction and LED lighting for optimal visibility.
Safety Information
Always follow basic safety precautions when using electrical appliances to reduce the risk of fire, electric shock, and injury to persons.
- Ensure the power supply matches the voltage specified on the rating plate.
- Installation must be performed by a qualified person in accordance with all applicable codes and standards.
- Do not operate the hood with a damaged cord or plug.
- Clean grease filters regularly to prevent grease build-up and fire hazards.
- Do not flambé under the range hood.
- Adequate ventilation is required for proper combustion and exhausting of gases through the flue of fuel-burning equipment to prevent back-drafting.
Setup and Installation
Before beginning installation, ensure all components are present and undamaged. Refer to the included mounting template for precise positioning.
Included Components:
- Extractor Hood Unit
- Filter(s)
- Mounting Template
- Fixing Screws
- Back Plate/Trim Kit
Installation Steps:
- Prepare the Cabinet: Ensure the cabinet opening is correctly sized for the 60 cm hood.
- Mounting Height: Maintain the minimum and maximum clearance distances from the cooking surface. For electric cooktops, a minimum clearance of 50 cm is required. For gas cooktops, a minimum clearance of 65 cm is required.
- Secure the Hood: Use the provided fixing screws and mounting template to securely attach the hood to the underside of the cabinet.
- Connect Ducting: Connect the hood to your ventilation system using appropriate ducting. The hood supports ducted/vented operation.
- Electrical Connection: Connect the hood to a suitable power outlet. The cord length is 109 cm.
- Install Filters: Insert the baffle filters into their designated slots.
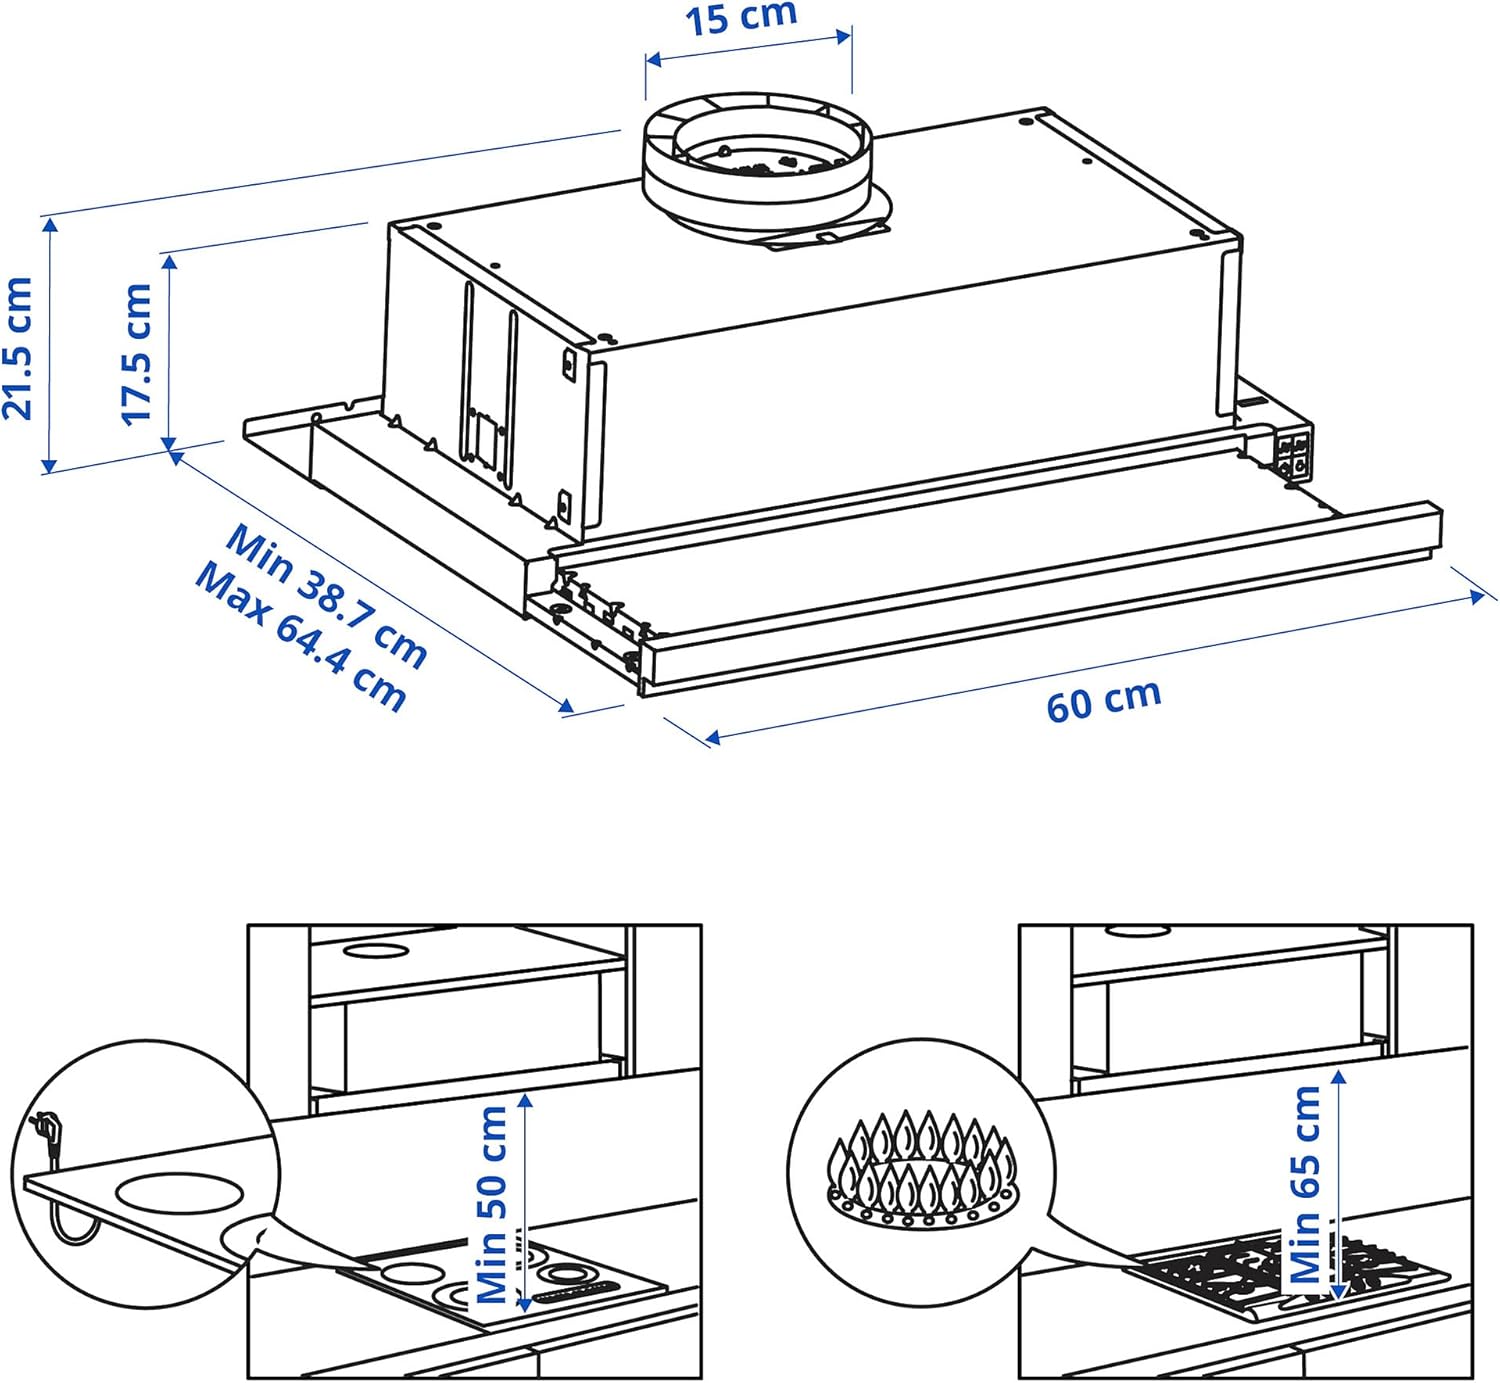
Figure 1: Technical drawing with dimensions (Width: 60 cm, Min Depth: 38.7 cm, Max Depth: 64.4 cm, Height: 21.5 cm) and recommended installation clearances above electric (Min 50 cm) and gas (Min 65 cm) cooktops.
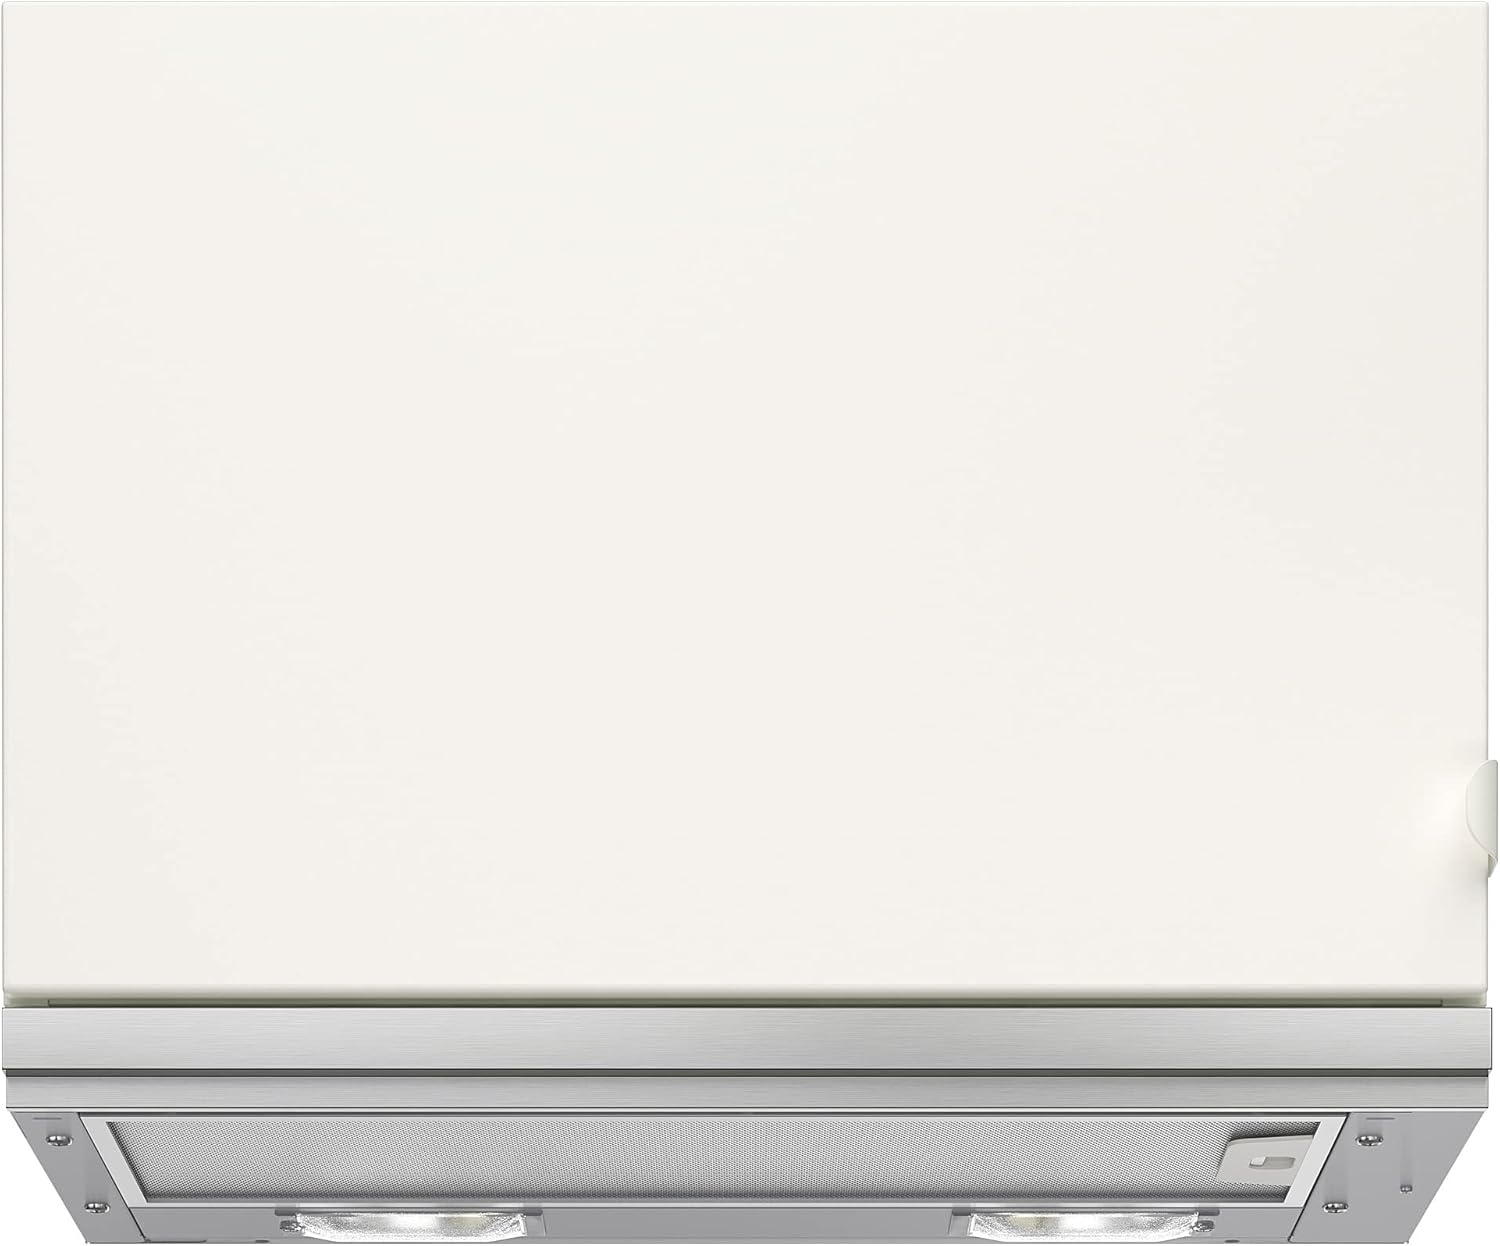
Figure 2: The UTDRAG extractor hood shown in its retracted position, seamlessly integrated into a kitchen cabinet.

Figure 3: The UTDRAG extractor hood in a kitchen environment, demonstrating its sleek, retracted profile under a cabinet.
Operating Instructions
The UTDRAG extractor hood features simple button controls for ease of use.
Basic Operation:
- Extend the Hood: Gently pull the front panel of the hood outwards to extend it over the cooking area. This action typically activates the fan and lights.
- Fan Speed Control: Use the control buttons to select the desired fan speed. Higher speeds are recommended for heavy cooking, while lower speeds are suitable for simmering.
- Light Control: Press the light button to turn the LED lights on or off.
- Retract the Hood: After cooking, gently push the front panel back into the cabinet to retract the hood. This will turn off the fan and lights.

Figure 4: The UTDRAG extractor hood shown in its extended position, ready for operation above a cooktop.
Maintenance
Regular maintenance ensures the longevity and optimal performance of your extractor hood.
Cleaning the Baffle Filters:
The baffle filters should be cleaned regularly, ideally every 3-4 weeks depending on usage, to maintain effective grease capture and airflow.
- Remove Filters: Locate the release latches on the filters and carefully unclip them. Slide the filters out of their slots.
- Wash Filters: Wash the filters by hand in hot soapy water or in a dishwasher. For stubborn grease, a degreasing agent can be used.
- Dry and Reinstall: Ensure the filters are completely dry before reinstalling them. Slide them back into place and secure the latches.

Figure 5: A detailed view of the removable baffle filters and integrated LED lighting within the hood.
Cleaning the Exterior:
Wipe the stainless steel exterior with a soft cloth dampened with mild detergent. Avoid abrasive cleaners or scouring pads, which can scratch the surface.
LED Light Replacement:
The hood uses LED lights. If a light needs replacement, consult a qualified technician or refer to specific instructions for LED module replacement, as these are often integrated units.
Troubleshooting
| Problem | Possible Cause | Solution |
|---|---|---|
| Hood not operating | No power supply; Plug not inserted; Circuit breaker tripped. | Check power connection; Ensure plug is fully inserted; Reset circuit breaker. |
| Poor suction | Grease filters clogged; Ducting obstructed; Incorrect installation height. | Clean or replace filters; Check ducting for blockages; Verify installation height against specifications. |
| Excessive noise | Loose components; Ducting issues; Motor malfunction. | Check for loose screws or parts; Inspect ducting for kinks or damage; Contact customer support if motor noise persists. |
| Lights not working | LED module failure; Electrical connection issue. | Check electrical connections; Contact customer support for LED module replacement. |
Specifications
| Feature | Detail |
|---|---|
| Model Number | IK.103.891.42 |
| Brand | Generic |
| Dimensions (W x Min D x Max D x H) | 60 cm x 38.7 cm x 64.4 cm x 21.5 cm |
| Weight | 7.60 kg |
| Material | Stainless Steel |
| Motor Power | 110 W |
| Voltage | 110 Volts |
| Sound Level | 64 dB |
| Light Source Type | LED |
| Filter Type | Baffle |
| Ventilation Type | Ducted/Vented |
| Mounting Type | Under Cabinet Mount |
| Control Type | Button |
| Cord Length | 109 cm |
Warranty and Support
Warranty Information:
This product comes with a 5-year warranty. Please refer to the separate warranty brochure for detailed terms and conditions regarding coverage, limitations, and claims procedures.
Customer Support:
For technical assistance, spare parts inquiries, or warranty claims, please contact your retailer or the manufacturer, ProTuning. Information regarding spare parts availability is currently unavailable. Please retain your proof of purchase for warranty service.