1. Introduction
Thank you for choosing the ORICO Daisy Chain 4 Bay Hard Drive Enclosure (Model 9948C3). This high-performance external storage solution is designed to provide massive storage capacity and high-speed data transfer for your digital needs. It is ideal for professionals requiring extensive data management, such as video editors, or anyone needing reliable, expandable storage. This manual provides detailed instructions for setup, operation, and maintenance to ensure optimal performance and longevity of your device.

Image: Front view of the ORICO 4 Bay Hard Drive Enclosure, showcasing its sleek aluminum design and four drive bays.
2. Product Features
- Daisy Chain Expansion: Supports up to 22 TB 3.5-inch SATA hard disks per bay, with a maximum capacity of 88TB for a single enclosure. Expand your storage up to 264 TB by daisy-chaining up to 3 devices. This feature is ideal for managing large datasets and is facilitated by a 10Gbps USB 3.1 Gen 2 interface, ensuring efficient bulk data processing.

Image: Illustration of multiple ORICO enclosures connected via daisy chain, demonstrating flexible capacity expansion.
- USB C Hub Functionality: The enclosure includes a USB-C hub, providing flexible storage management. This allows for regular backup of crucial files and supports plug-and-play functionality without the need for additional driver installations. It is compatible with various mainstream operating systems.

Image: The ORICO enclosure connected to a computer setup, highlighting its 10Gbps transmission speed for efficient data handling.
- Single Disk Replacement Support: Each of the 4 independent disk slots supports an eject function for individual disks. This allows for convenient and quick replacement or upgrade of a single drive without interrupting the workflow of other active disk slots.
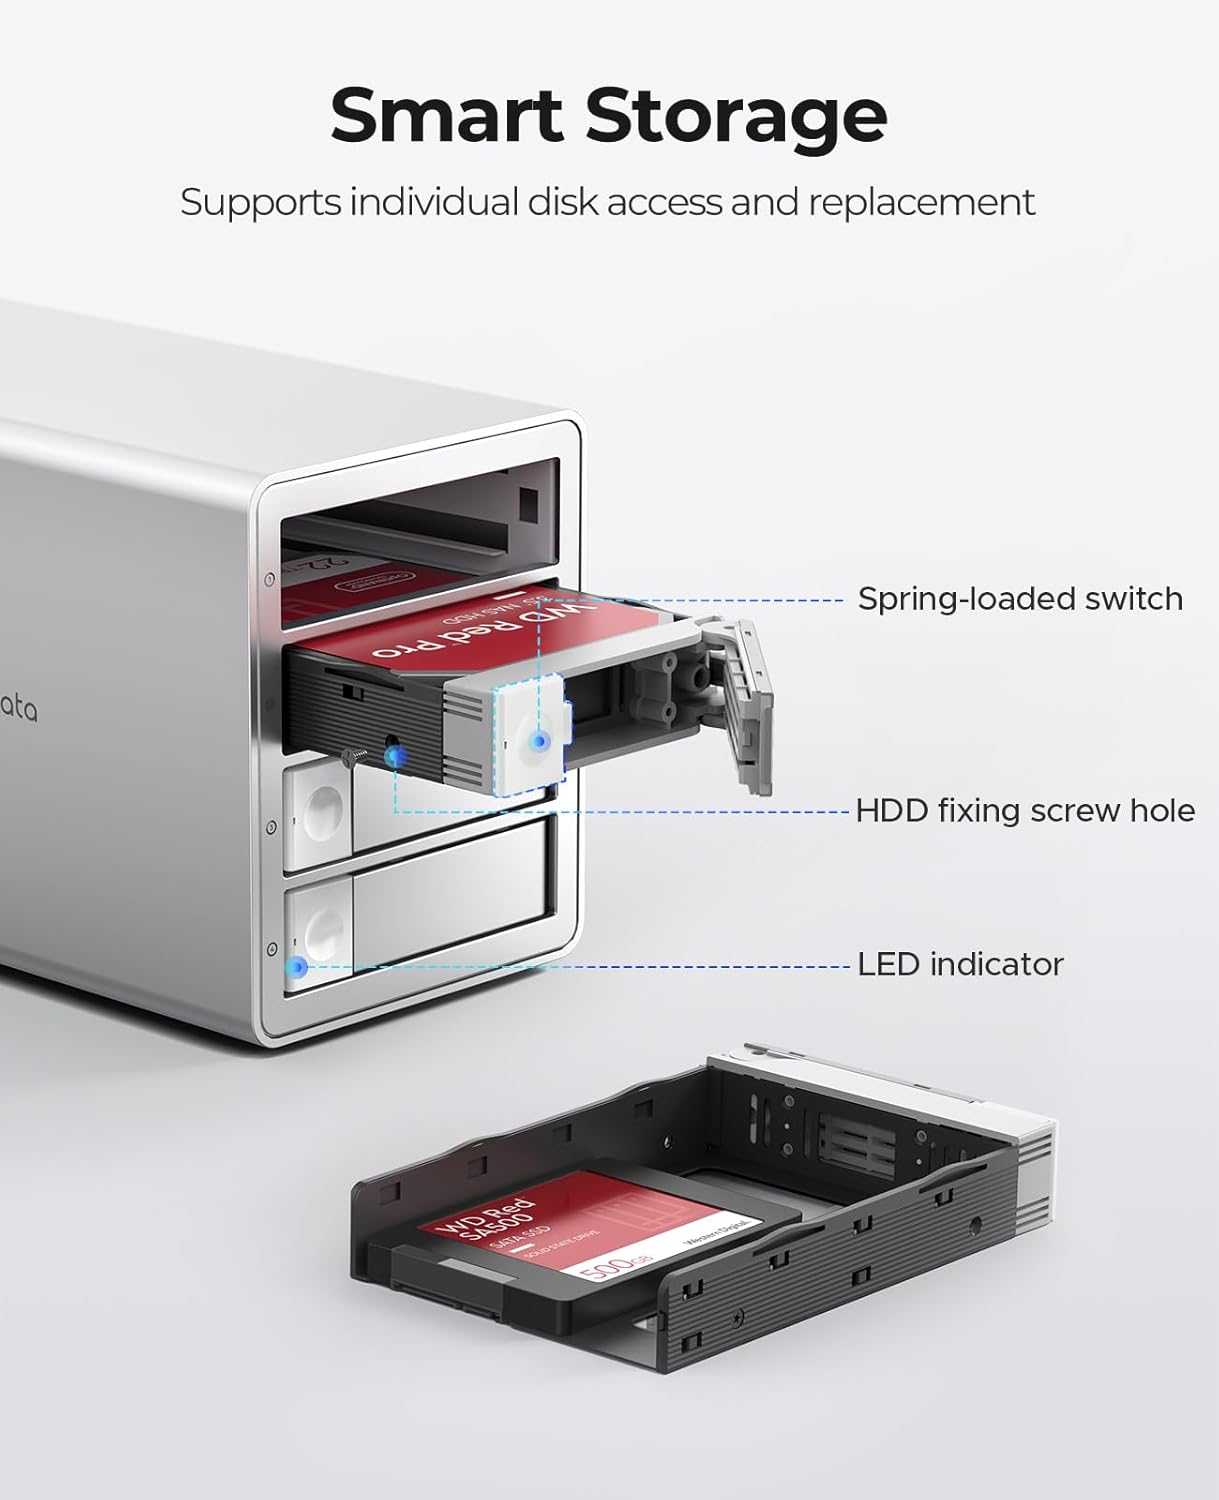
Image: A detailed view of a hard drive being inserted into one of the bays, illustrating the smart storage and individual disk access feature.
- High Power Supply: A built-in 150W power supply ensures smooth data transfer, especially when multiple disks are being read simultaneously. This eliminates the need for bulky external power adapters, contributing to a cleaner and more organized workspace.
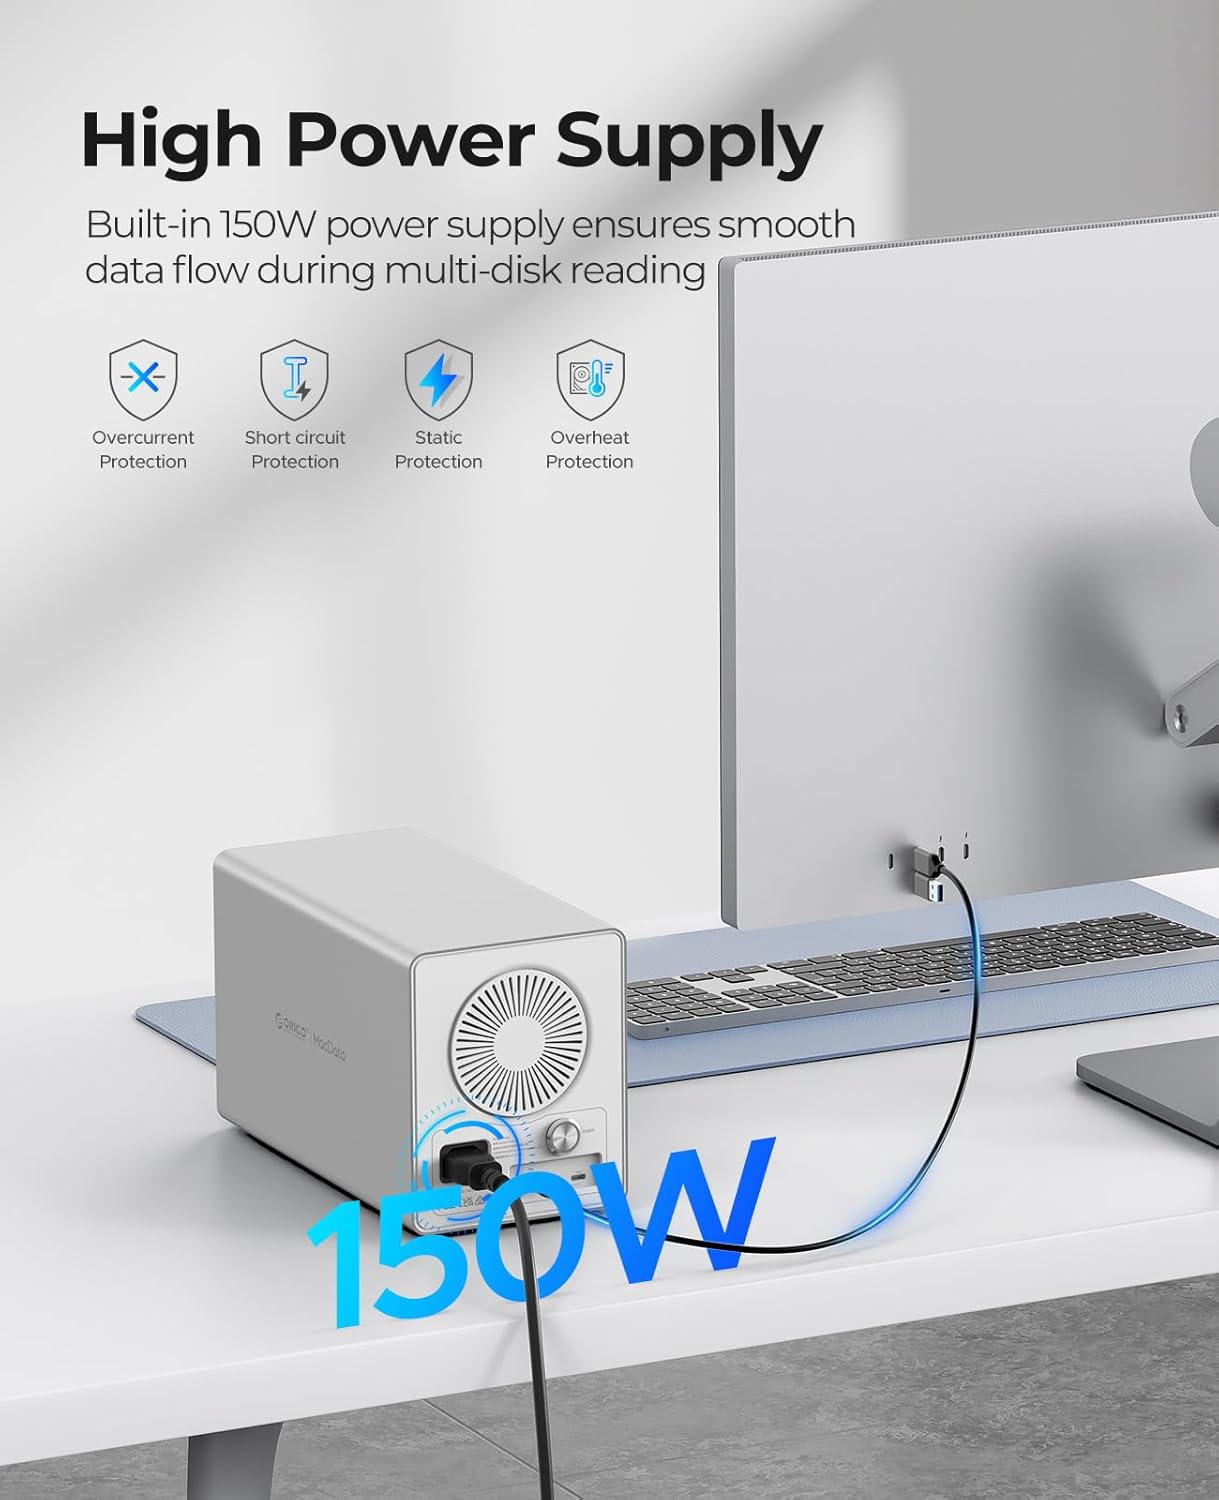
Image: The rear view of the ORICO enclosure, highlighting the built-in 150W power supply and its compact design.
- Well-done Heat Dissipation: Constructed with an aluminum alloy metal shell and an 80mm cooling fan, the enclosure features front and rear heat dissipation airflow design. This effectively discharges heat, ensuring stable and efficient operation even under high load conditions.
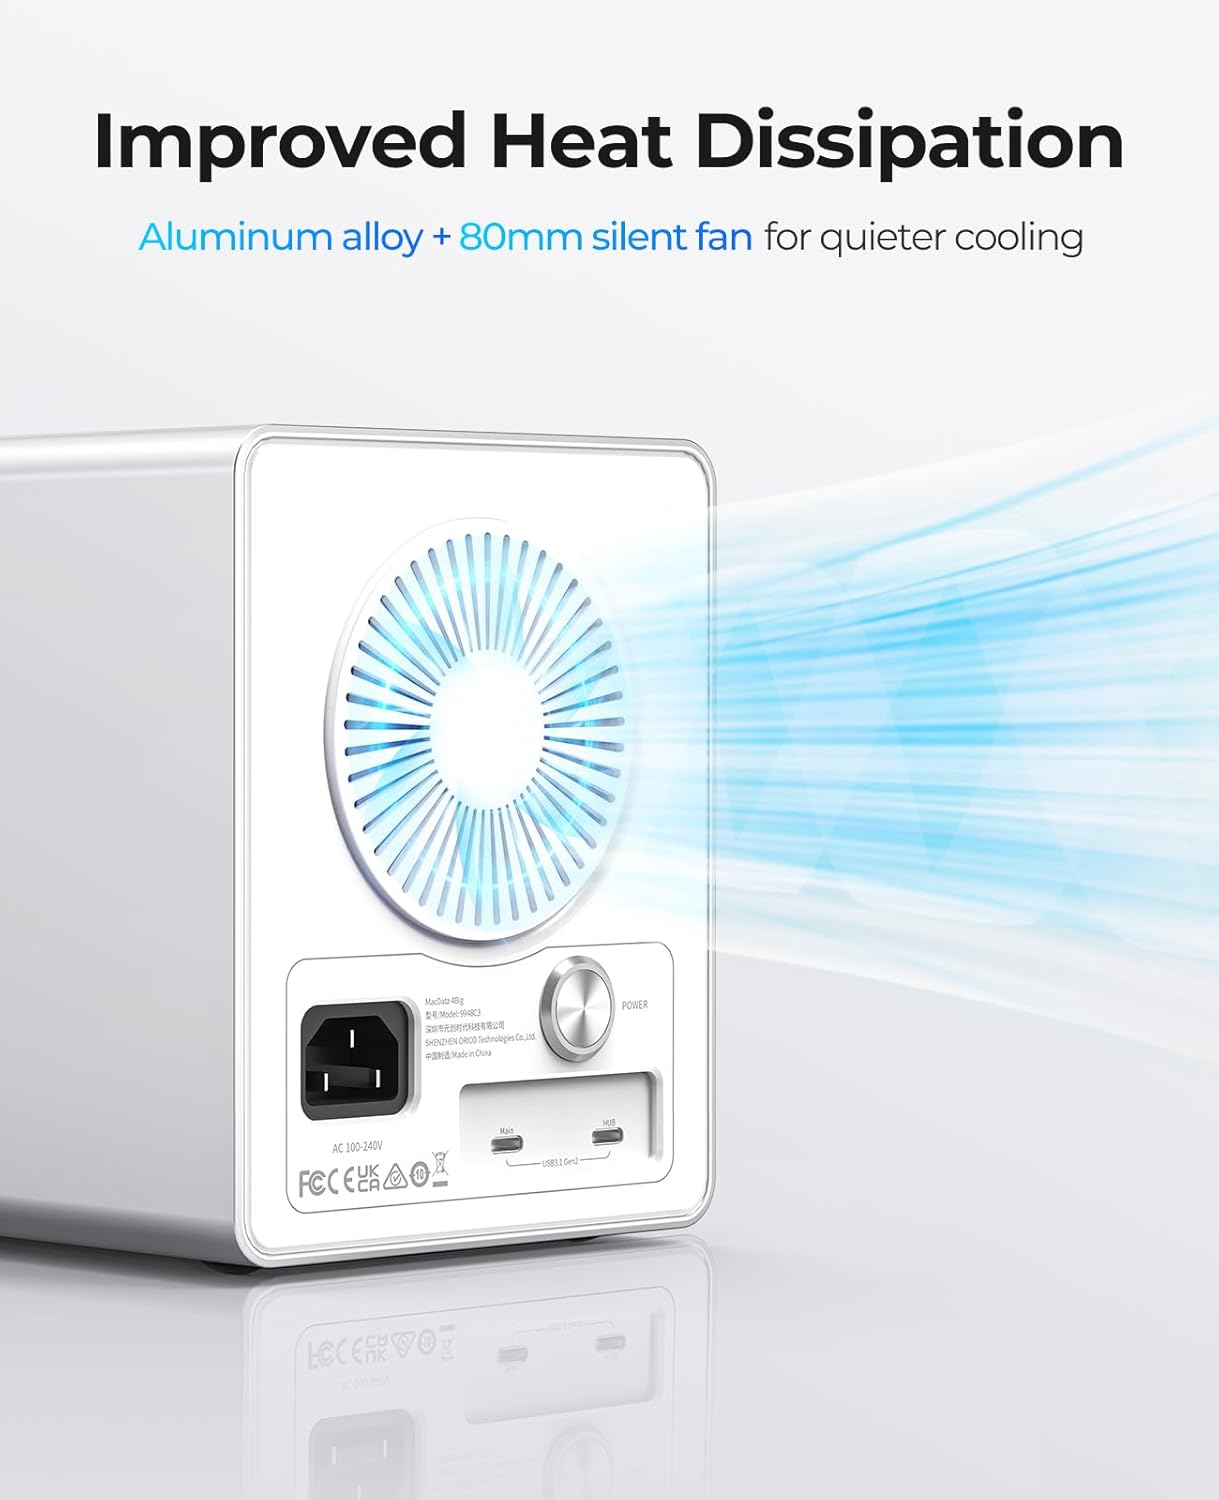
Image: A visual representation of the airflow generated by the 80mm silent fan, demonstrating the effective heat dissipation of the enclosure.
- Smart Sleep Mode: The device automatically enters hibernation after 10 minutes of data-free interaction. This feature helps reduce hard drive wear and power consumption, contributing to the longevity of your drives and energy efficiency.

Image: The ORICO enclosure on a desk, illustrating its smart sleep mode feature for power saving and drive protection.
Product Overview Video
Video: An official introduction to the ORICO 99 Series, showcasing its design, features, and functionality.
3. Package Contents
Please verify that all items listed below are included in your package:
- 1 x ORICO 4 Bay Daisy Chain Hard Drive Enclosure
- 1 x 1M USB3.2 Gen2 Type-C Cable
- 1 x Power Cable
- 1 x Screwdriver
- 1 x Screw Pack
- 1 x User Manual
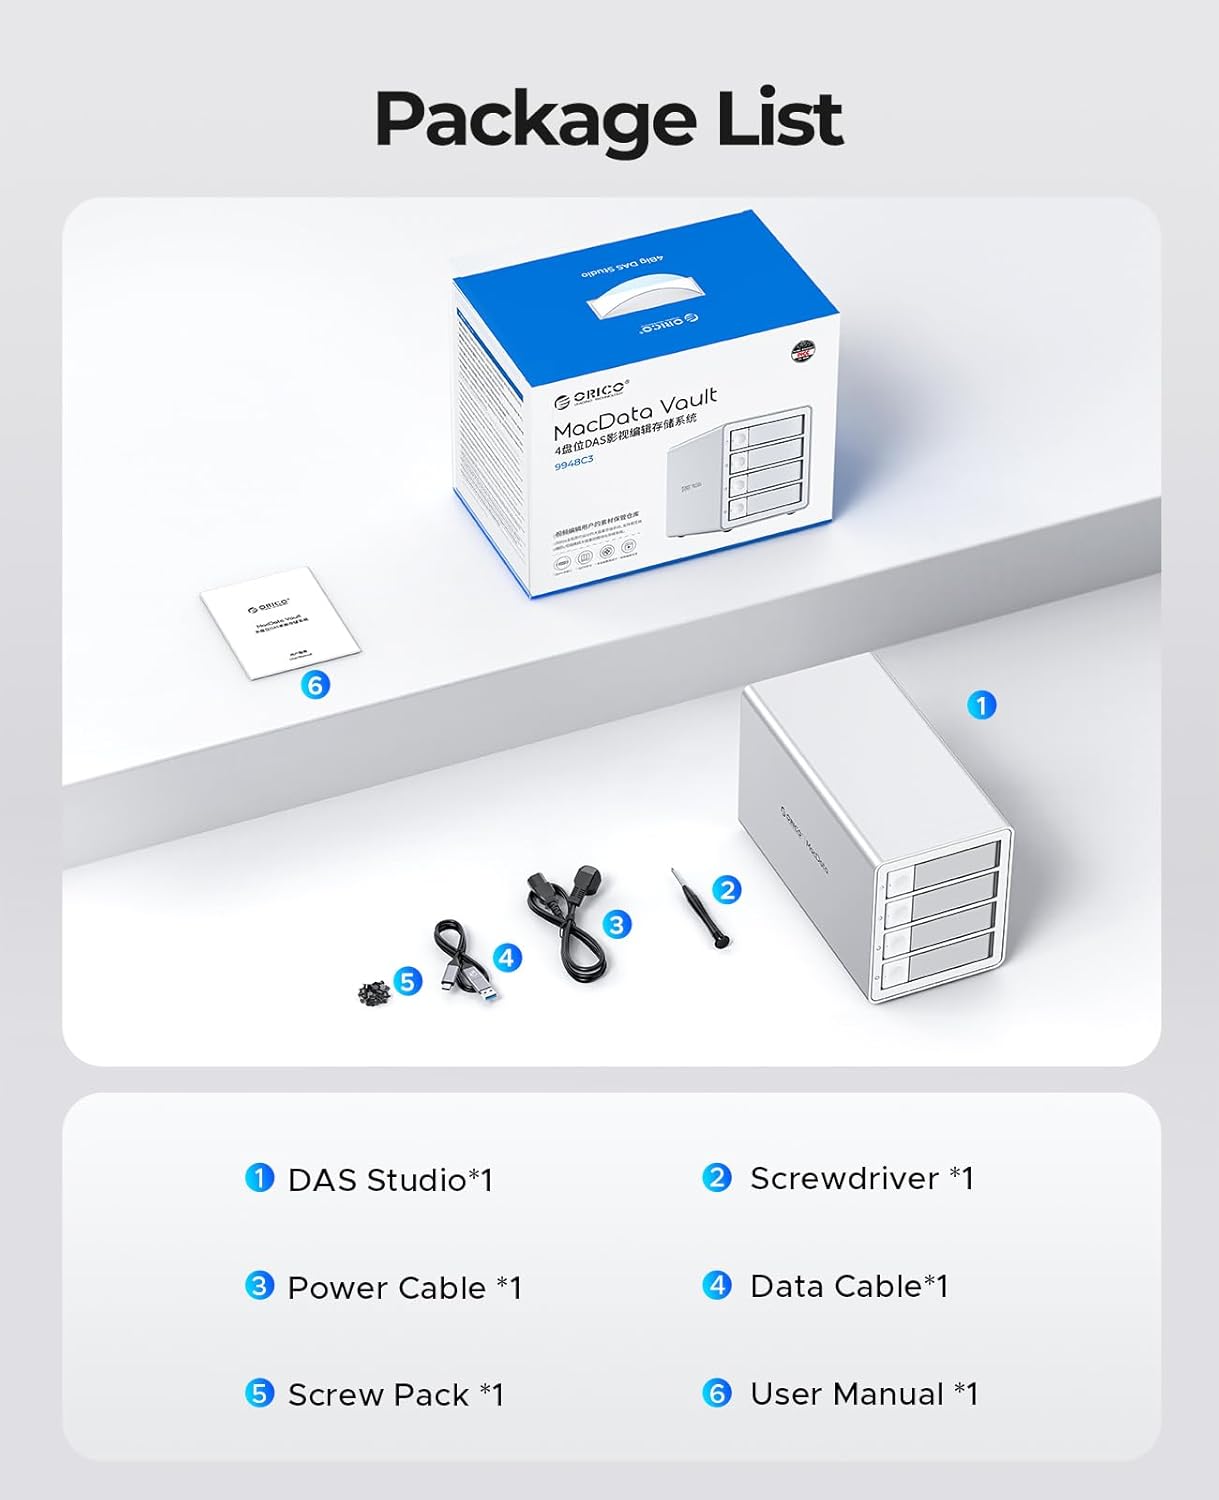
Image: A visual representation of all items included in the ORICO 4 Bay Hard Drive Enclosure package.
4. Setup Guide
4.1 Hard Drive Installation
- Open the Tray: Press the door button on the left side of the enclosure to release and pull out the hard drive tray.
- Mount the Hard Drive:
- For 3.5-inch HDDs: Place the 3.5-inch hard drive into the tray. Align the screw holes on the hard drive with the fixing holes on the tray and secure it with the provided screws using the screwdriver.
- For 2.5-inch SSD/HDD: Place the 2.5-inch SSD or HDD into the tray. Align the screw holes on the drive with the fixing holes on the tray and secure it with the provided screws.
- Insert the Tray: Gently slide the loaded tray back into the hard disk cabinet until it clicks securely into place.

Image: Visual instructions detailing the three steps for installing a hard drive into the enclosure's bay.
4.2 Connecting to Your Computer
- Connect one end of the provided USB3.2 Gen2 Type-C cable to the "Main" USB-C port on the back of the ORICO enclosure.
- Connect the other end of the USB3.2 Gen2 Type-C cable to an available USB-C port on your computer (Laptop or Desktop).
- Connect the power cable to the enclosure's power input and then to a power outlet.
- Press the power button on the back of the enclosure to turn it on. The LED indicators on the front will illuminate.
The enclosure is plug-and-play compatible with Windows, Mac OS, and Linux operating systems. Your computer should automatically detect the connected drives.

Image: Diagram illustrating the universal compatibility of the ORICO enclosure with laptops, desktops, iMacs, Mac Minis, and tablets, across Windows, Mac OS, and Linux.
5. Operating Instructions
5.1 Power On/Off
- To power on, press the power button located on the rear of the enclosure. The power indicator light will turn on.
- To power off, press the power button again. Ensure all data transfers are complete before powering off to prevent data loss.
5.2 Disk Management
- Accessing Drives: Once connected and powered on, the installed hard drives will appear as individual drives on your computer. You can access them like any other connected storage device.
- Ejecting a Single Disk: To safely remove a single hard drive, first ensure no data is being accessed from that specific drive. Then, use your operating system's safe eject feature for that drive. Once safely ejected, you can press the door button to remove the tray.
- Hot-Swapping: The enclosure supports hot-swapping for individual drives. After safely ejecting a drive via your operating system, you can remove and replace it without powering down the entire enclosure or other drives.
5.3 Daisy Chain Functionality
To expand your storage capacity, connect additional ORICO Daisy Chain enclosures using the USB-C HUB port on one enclosure to the Main USB-C port of the next. This allows for modular data management and significant storage expansion.

Image: A visual guide on how to connect multiple ORICO enclosures in a daisy-chain configuration for expanded storage.
5.4 Direct Attached Storage (DAS) vs. Network Attached Storage (NAS)
It is important to note that the ORICO 9948C3 is a Direct Attached Storage (DAS) device, not a Network Attached Storage (NAS). This means it connects directly to a single computer via USB and does not have a built-in LAN port for network access. Data access is managed directly by the connected host computer.

Image: A clear distinction between Direct Attached Storage (DAS) and Network Attached Storage (NAS), indicating that the ORICO enclosure is a DAS device without a LAN port.
6. Maintenance
- Cleaning: Use a soft, dry cloth to clean the exterior of the enclosure. Avoid using liquid cleaners or aerosols directly on the device.
- Ventilation: Ensure the cooling fan and ventilation holes are free from dust and obstructions to maintain optimal heat dissipation. Regularly check for dust buildup and clean as necessary.
- Environmental Conditions: Operate the enclosure in a well-ventilated area, away from direct sunlight, excessive heat, humidity, or corrosive substances.
- Safe Handling: Handle the enclosure and installed drives with care. Avoid dropping or subjecting the device to strong impacts.
7. Troubleshooting
If you encounter issues with your ORICO Daisy Chain 4 Bay Hard Drive Enclosure, please refer to the following common problems and solutions:
| Problem | Possible Cause | Solution |
|---|---|---|
| Enclosure not powering on. | Power cable not connected, power outlet issue, power button not pressed. | Ensure power cable is securely connected to both the enclosure and a working power outlet. Press the power button firmly. |
| Hard drives not detected by computer. | USB cable loose/faulty, drive not properly installed, drive not formatted, operating system issue. | Check USB cable connection. Re-install drives ensuring they are seated correctly. For new drives, ensure they are initialized and formatted in your operating system's Disk Management (Windows) or Disk Utility (Mac). Try a different USB port or cable. |
| Slow data transfer speeds. | Using a lower speed USB port (e.g., USB 2.0), cable issue, drive performance limitations, system load. | Ensure you are connected to a USB 3.2 Gen 2 (10Gbps) compatible port on your computer. Use the provided high-quality USB-C cable. Check the health and speed of your installed hard drives. Reduce other demanding tasks on your computer during transfers. |
| Drives unexpectedly disconnect. | Loose cable connection, power fluctuations, drive overheating. | Verify all cable connections are secure. Ensure the enclosure is in a well-ventilated area and the fan is operating. Avoid placing the enclosure near heat sources. |
If the problem persists after trying these solutions, please contact ORICO customer support for further assistance.
8. Specifications
| Feature | Detail |
|---|---|
| Brand | ORICO |
| Model Number | 9948C3 |
| Memory Storage Capacity | 88 TB (Max per enclosure) |
| Compatible Devices | Laptop, Desktop |
| Hard Disk Form Factor | 3.5 Inches (also supports 2.5 Inches with adapter/tray) |
| Max Number of Supported Devices | 4 (bays) |
| Data Transfer Rate | 10 Gigabits Per Second (USB 3.2 Gen 2) |
| Manufacturer | SHENZHEN ORICO TECHNOLOGIES CO.,LTD |
| Product Dimensions | 10.55 x 5.31 x 6.42 inches |
| Item Weight | 8.68 pounds |
| ASIN | B0D1BB6VPK |
| Hardware Interface | USB 3.1 Type C, USB 3.2 Gen 2 |
| Color | Silver |
| Material | Aluminum |
| Power Supply | Built-in 150W |
9. Warranty and Support
ORICO products are manufactured to the highest quality standards. This product is covered by a limited warranty from the date of purchase. Please refer to the warranty card included in your package for specific terms and conditions.
For technical support, product inquiries, or warranty claims, please visit the official ORICO website or contact their customer service team through the contact information provided on their website or in your product packaging.
ORICO Official Website: www.orico.com.cn (Please check for regional websites for specific support.)


