1. Introduction
The Portkeys HS8 is an 8-inch high-brightness camera field monitor designed for professional video production. It features an 1100nit display, 3D LUT support, 4K HDMI input, and 3G SDI input/output, all housed in a durable aluminum body. This manual provides detailed instructions for setting up, operating, and maintaining your HS8 monitor.

Image 1.1: Front view of the Portkeys HS8 Camera Field Monitor.
2. Package Contents
Please check the package contents upon opening to ensure all items are present.
- Portkeys HS8 Monitor
- D-TAP B to Screw-in DC Power Cable
- Screen Cleaning Wipe
- Customer Feedback Card
- M3 Allen Screw*4
- M2 Allen Key
- Cup head gasket*4
- Micro USB Flash Drive

Image 2.1: Visual representation of the Portkeys HS8 package contents.
3. Setup Guide
3.1 Mounting the Monitor
The Portkeys HS8 features VESA 100 x 100 mounting points for secure attachment to various camera rigs or stands. It also includes standard 1/4-inch screw threads for flexible mounting options.
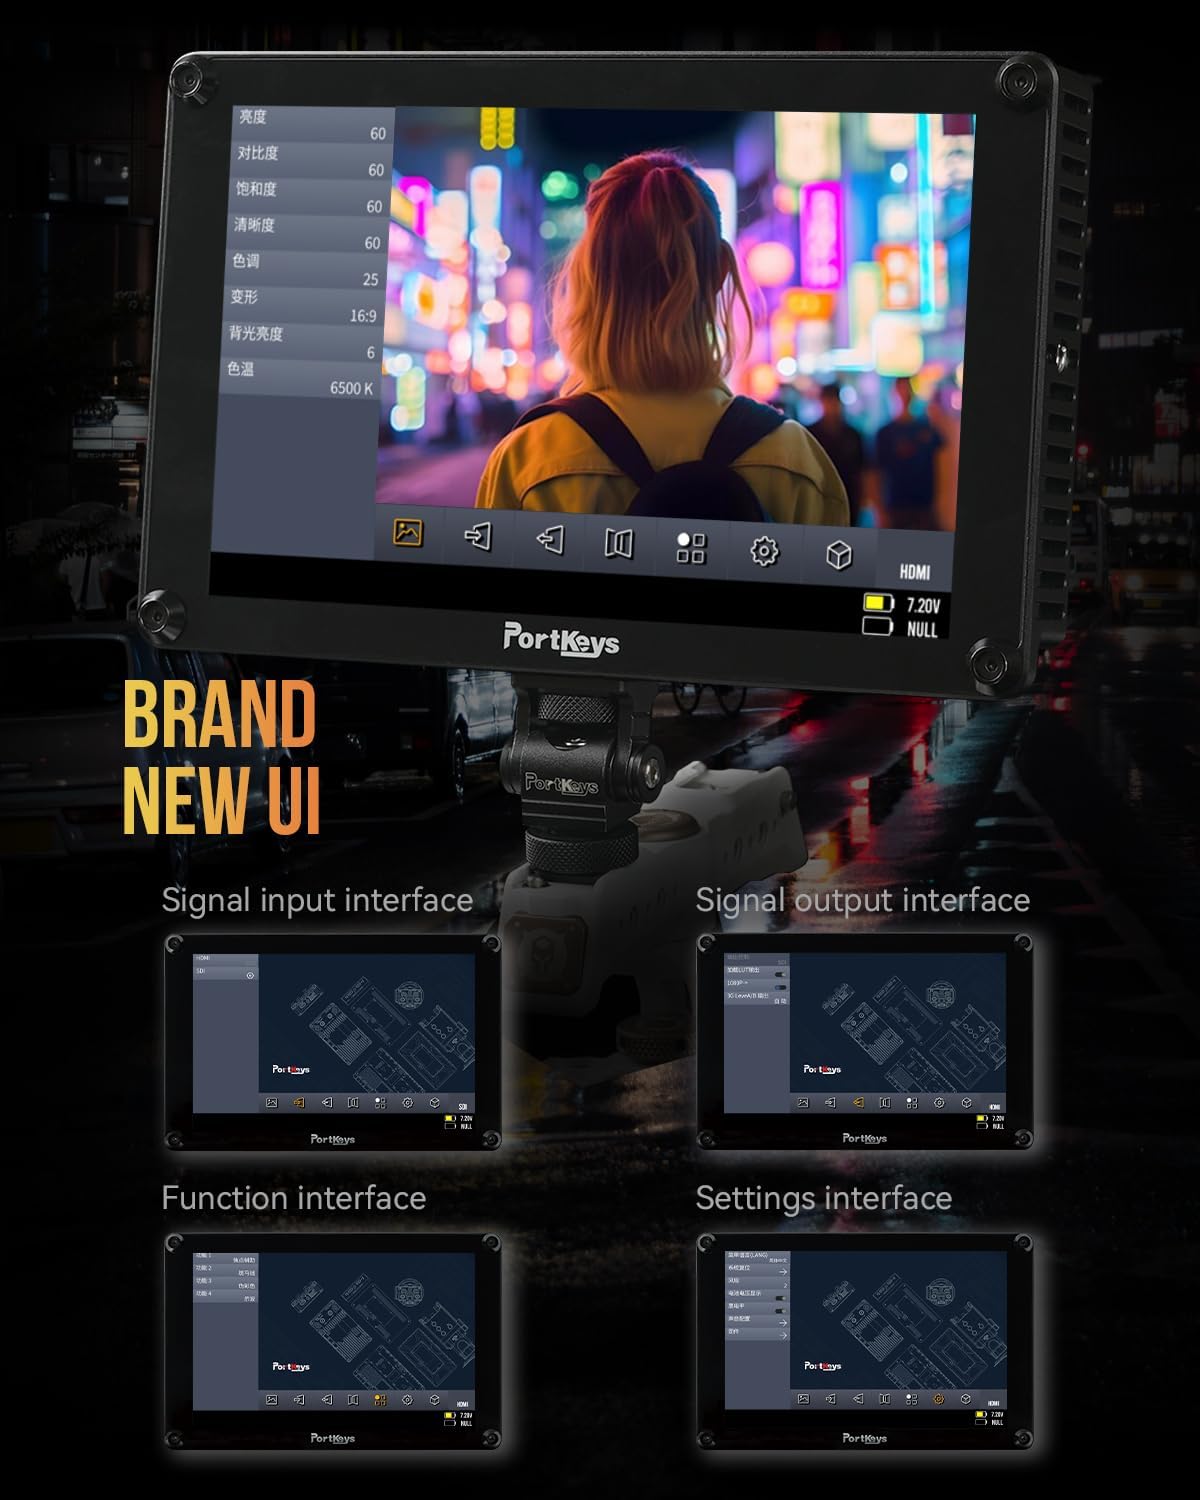
Image 3.1: Rear view of the monitor highlighting VESA mounting points and dual NP-F battery plates.
3.2 Powering the Monitor
The HS8 monitor offers multiple power options:
- Dual NP-F Battery Plates: Insert two compatible Sony NP-F style batteries into the dedicated slots on the back of the monitor.
- DC 7-20V Input: Connect an external power source using the provided D-Tap cable to the 5.5mm barrel connector.
- VESA 100 x 100 Mounting Points: These points can be used with V-Mount or Gold-Mount battery plates (sold separately) for extended power.
- NP-F Dummy Battery Plate with Power Passthrough: A built-in dummy battery plate provides 8V/10W power passthrough, allowing you to attach and power a wireless transmitter directly from the monitor.

Image 3.2: Detail of the NP-F battery plates and power passthrough for accessories.

Image 3.3: Illustration of the dual NP-F battery plate configuration.
3.3 Connecting Video Sources
The HS8 monitor supports both HDMI and SDI video inputs and outputs.
- HDMI Input: Connect your camera or video source to the HDMI IN port. The monitor supports up to 4K HDMI input.
- 3G SDI Input/Output: Use the SDI IN port for SDI video sources. The SDI OUT port can be used to loop out the signal to another monitor or device.
- HDMI Output: The HDMI OUT port allows simultaneous output of the video signal.

Image 3.4: Overview of the monitor's input and output ports.
4. Operating Instructions
4.1 Power On/Off
Locate the power switch on the side of the monitor. Slide it to the "ON" position to power on the device. Slide to "OFF" to power down.
4.2 User Interface (UI) Navigation
The Portkeys HS8 features a custom operating system with a user-friendly interface. Navigate through menus and settings using the touch screen or the physical buttons.

Image 4.1: The monitor's intuitive user interface for accessing functions and settings.
4.3 Professional Monitoring Tools
The HS8 includes a suite of professional monitoring tools accessible via the UI:
- Waveform: Visualizes the luminance and chrominance levels of your video signal.
- Histogram: Displays the distribution of tones in your image.
- Zebra: Highlights overexposed areas to prevent clipping.
- Peaking: Assists with focus by highlighting sharp edges.
- False Color: Uses color overlays to represent exposure levels.
- Anamorphic Image De-squeeze: Corrects the aspect ratio of anamorphic footage.
- Audio Meters: Displays audio levels for monitoring sound.
- 3D LUT: Supports loading custom 3D Look-Up Tables for accurate color representation and creative grading.

Image 4.2: The monitor showcasing its professional monitoring features.

Image 4.3: Detailed view of waveform and histogram tools on the HS8 monitor.

Image 4.4: False color display on the HS8 for precise exposure control.

Image 4.5: Peaking function in action on the HS8 monitor to aid focusing.

Image 4.6: Key features of the Portkeys HS8 monitor.

Image 4.7: The monitor's display quality with REC.709 color and high brightness.
5. Maintenance
5.1 Cleaning the Monitor
To clean the screen, use the provided screen cleaning wipe or a soft, lint-free cloth. For stubborn smudges, lightly dampen the cloth with a screen-safe cleaning solution. Avoid harsh chemicals or abrasive materials.
5.2 Storage
When not in use, store the monitor in a dry, cool place, away from direct sunlight and extreme temperatures. It is recommended to use a protective case to prevent damage during transport or storage.
6. Troubleshooting
6.1 No Power
- Ensure batteries are fully charged and correctly inserted.
- If using DC power, verify the power cable is securely connected and the power source is active.
- Check the power switch is in the "ON" position.
6.2 No Video Signal
- Confirm the video source (camera) is powered on and outputting a signal.
- Check that the HDMI or SDI cables are securely connected to both the monitor and the source.
- Verify the correct input source is selected on the monitor.
- Test with different cables or video sources if possible.
6.3 Image Lag (HDMI)
Some cameras, such as the Canon R5, may experience a delay when switching between playback and shooting modes via HDMI. This is often a characteristic of the camera's HDMI output processing rather than the monitor itself. Ensure your camera's firmware is up to date and check its settings for HDMI output options.
7. Specifications
| Feature | Description |
|---|---|
| Brand | Portkeys |
| Model Number | HS8 |
| Screen Size | 8 Inches |
| Native Resolution | 1920 x 1200 |
| Display Type | LCD |
| Brightness | 1100 nits |
| Contrast Ratio | 1000:1 |
| Viewing Angle | 170 Degrees |
| Color Depth | 10-bit (8+2 FRC) panel |
| Connectivity | HDMI (4K input), 3G SDI In/Out |
| Power Input | Dual NP-F Battery Plates, DC 7-20V (5.5mm barrel) |
| Power Passthrough | 8V/10W NP-F dummy battery plate |
| Mounting Points | VESA 100 x 100, 1/4-inch screw threads |
| Housing | Aluminum |
| Item Weight | 0.68 Kilograms (1.48 lbs) |
| Color Calibration | Rec.709 |

Image 7.1: Visual summary of Portkeys HS8 specifications.
8. Official Product Video
Video 8.1: Official product video for the Portkeys HS8 Camera Monitor, demonstrating its features and connectivity options.
9. Warranty and Support
9.1 Warranty Information
The Portkeys HS8 Camera Field Monitor comes with a 1-year manufacturer's warranty from the date of purchase. This warranty covers defects in materials and workmanship under normal use. Please retain your proof of purchase for warranty claims.
9.2 Customer Support
For technical assistance, troubleshooting, or warranty inquiries, please contact Portkeys Official Store customer support. Refer to the contact information provided with your product or visit the official Portkeys website.