Yunir Yunirhf79y8am0o-13
Yunir Mini Projector User Manual
Model: Yunirhf79y8am0o-13
1. Introduction
Thank you for purchasing the Yunir Mini Projector. This compact and versatile projector is designed to provide a high-quality visual experience for various applications, including home entertainment, outdoor activities, and educational purposes. Please read this manual carefully before using the product to ensure proper operation and maintenance.
2. Safety Information
- Do not look directly into the projector lens when the lamp is on. The intense light can cause eye damage.
- Ensure proper ventilation around the projector. Do not block ventilation openings.
- Keep the projector away from water or other liquids. Do not expose it to rain or moisture.
- Use only the power adapter supplied with the projector.
- Do not attempt to disassemble or repair the projector yourself. Refer all servicing to qualified personnel.
- Keep out of reach of children.
3. Package Contents
Please check the package contents upon opening. If any items are missing or damaged, contact your retailer.
- Yunir Mini Projector
- Power Adapter (US Plug)
- Remote Control
- AV Cable
- User Manual

Image: The Yunir Mini Projector shown with its included accessories: a remote control, power adapter, and AV cable.
4. Product Overview
Familiarize yourself with the different parts of your Yunir Mini Projector.

Image: Side view of the Yunir Mini Projector, highlighting the projection lens and ventilation grille.

Image: A diagram illustrating the dimensions of the projector (126.4mm / 4.98in length, 85.8mm / 3.38in width, 47.7mm / 1.88in height) and showing its back, front, side, and top views with port locations.
Ports and Controls:
- DC In: Power input port.
- USB Port: For connecting USB drives.
- HD Multimedia Interface (HDMI): For connecting devices like laptops, TV boxes, gaming consoles.
- AV Port: For connecting devices using the included AV cable.
- Headphone Jack: For external audio output.
- Memory Card Slot: For inserting memory cards.
- Focus Ring: Adjusts image clarity.
- Control Buttons: Power, navigation, and input selection buttons on the top panel.
5. Setup
5.1 Power Connection
- Connect the power adapter to the DC In port on the projector.
- Plug the power adapter into a wall outlet.
- The projector can also be powered by a 5V/2A power bank via the micro USB port for portable use.

Image: Illustration of the mini projector being powered by an external power bank, demonstrating its portability.
5.2 Connecting to Devices
The projector supports multiple input sources:
- HD Multimedia Interface (HDMI): Connect an HDMI cable from your laptop, PC, TV box, gaming console, or streaming stick to the projector's HDMI port.
- USB: Insert a USB flash drive into the USB port to play media files directly.
- AV: Use the provided AV cable to connect to devices with AV output (e.g., older DVD players).
- Memory Card: Insert a memory card into the designated slot to play media files.
5.3 Focus Adjustment
After powering on the projector and selecting an input source, rotate the focus ring near the lens until the projected image is clear and sharp.
5.4 Placement
Place the projector on a stable, flat surface. For optimal viewing, project onto a smooth, light-colored wall or a projector screen. The projector is suitable for both indoor and outdoor use, including home theater setups, camping, and gaming.

Image: Depicts various usage scenarios for the mini projector, including a family watching a movie at home, outdoor camping projection, watching a sports game, and gaming.
6. Operating Instructions
6.1 Power On/Off
- Press the power button on the projector or the remote control to turn the unit on.
- Press the power button again to turn the unit off.
6.2 Menu Navigation
Use the navigation buttons on the projector or remote control (Up, Down, Left, Right, OK) to navigate through the on-screen menu. The 'Return' button typically takes you back to the previous screen.
6.3 Input Source Selection
Press the 'Source' button on the projector or remote control to cycle through available input sources (HDMI, USB, AV, Memory Card). Select the desired input source corresponding to your connected device.
6.4 Image and Audio Settings
Access the projector's menu to adjust settings such as:
- Picture Mode: Standard, Bright, User, etc.
- Aspect Ratio: 16:9, 4:3, Auto.
- Brightness/Contrast: Adjust for optimal viewing.
- Color Temperature: Warm, Cool, Standard.
- Sound Mode: Standard, Music, Movie, User.
- Volume: Adjust audio output level.

Image: Demonstrates the projector's capability to produce clear and vivid images, restoring original film color with DCI-P3 standard.

Image: Illustrates the benefit of HDR high dynamic technology, providing better contrast and more natural, realistic, and vivid pictures with enhanced detail.
6.5 Visual Protection Feature
The projector is designed with a relatively weak light strength to be softer on the eyes, effectively reducing potential damage to children's eyesight during extended viewing.
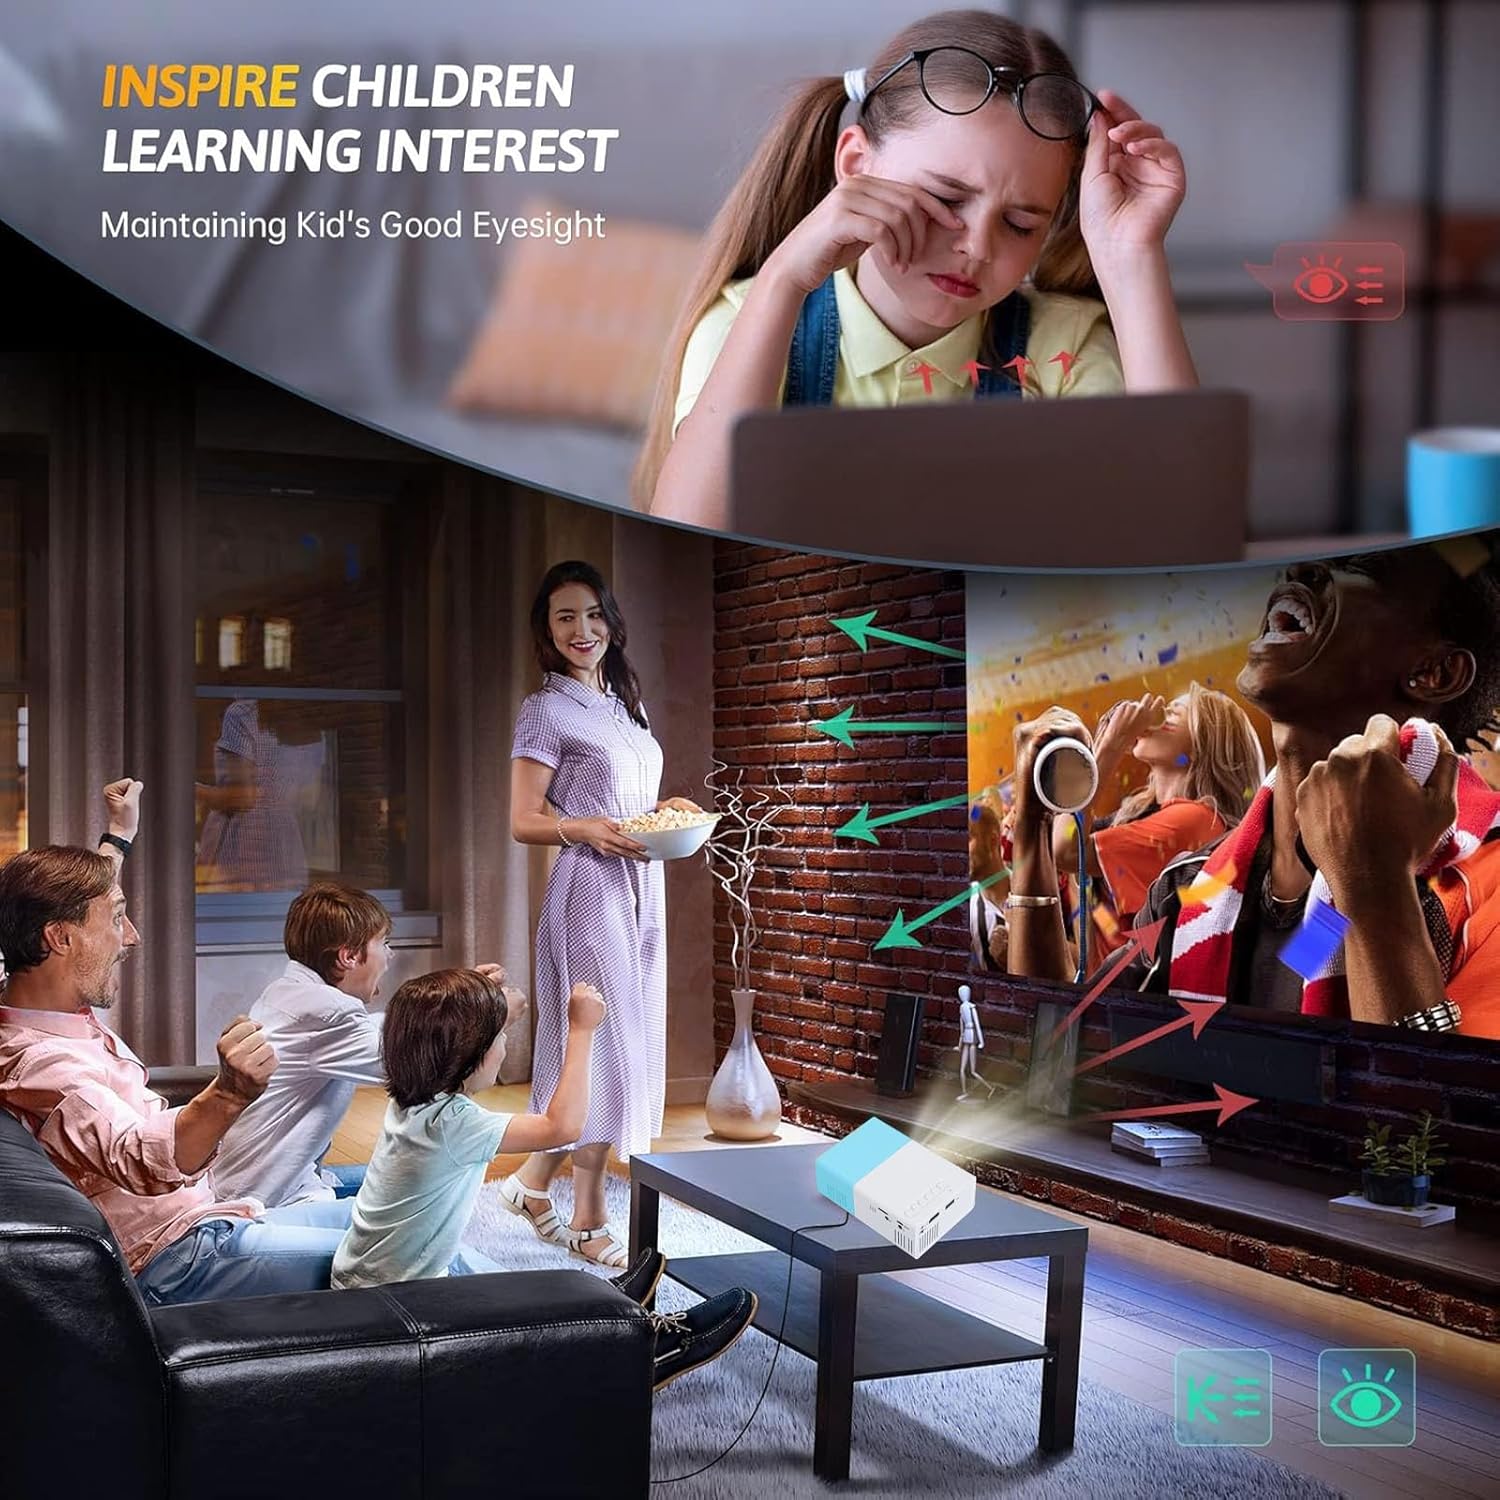
Image: Highlights the projector's feature of maintaining good eyesight, particularly for children, by avoiding direct light source view and reducing eye strain.
7. Maintenance
7.1 Cleaning the Lens
Use a soft, lint-free cloth specifically designed for optical lenses to gently wipe the projector lens. Do not use abrasive cleaners or excessive force, as this can scratch the lens.
7.2 Cleaning the Vents
Regularly check and clean the ventilation openings to prevent dust buildup, which can affect cooling performance. Use a soft brush or a can of compressed air to remove dust from the vents.
7.3 Storage
When not in use, store the projector in a cool, dry place, away from direct sunlight and extreme temperatures. If storing for an extended period, consider placing it in its original packaging or a protective case to prevent dust accumulation.
8. Troubleshooting
| Problem | Possible Cause | Solution |
|---|---|---|
| No image projected | Power not connected; Incorrect input source; Device not powered on. | Check power connection; Select correct input source; Ensure connected device is on. |
| Image is blurry | Focus not adjusted; Projector too close/far from screen. | Adjust the focus ring; Adjust projection distance. |
| No sound | Volume too low; Muted; External audio device not connected properly. | Increase volume; Unmute; Check audio cable connections. |
| Remote control not working | Batteries low/dead; Obstruction between remote and projector. | Replace batteries; Remove obstructions; Point remote directly at projector's IR receiver. |
| Projector overheats | Blocked ventilation; Prolonged use in hot environment. | Ensure vents are clear; Operate in a well-ventilated area; Allow to cool down. |
9. Specifications
| Feature | Detail |
|---|---|
| Brand | Yunir |
| Model Number | Yunirhf79y8am0o-13 |
| Display Resolution | 1920 x 1080 (Full HD) |
| Connectivity Technology | USB, HD Multimedia Interface (HDMI), AV, Memory Card |
| Recommended Uses | Indoor/Outdoor |
| Item Weight | 14.9 ounces (approx. 422g) |
| Product Dimensions | 7.87 x 7.08 x 3.14 inches (approx. 20 x 18 x 8 cm) |
| Visible Screen Diagonal | 60" / 153 cm |
| Special Features | Adjustable, Visual Protection, Compact Design, Cooling Fan System, Portable (supports power bank charging) |
10. Warranty and Support
This product comes with a standard manufacturer's warranty. Please refer to the warranty card included in your package for specific terms and conditions. For technical support, troubleshooting assistance, or warranty claims, please contact the retailer or manufacturer's customer service.
Keep your purchase receipt as proof of purchase for warranty purposes.
Ask a question about this manual
Ask about setup, troubleshooting, compatibility, parts, safety, or missing instructions. Manuals+ will review the question and use this page’s manual context to help answer it.