1. Product Overview
The DNLK 1/2-inch Drill Chuck is a heavy-duty replacement accessory designed for use with drilling machines, specifically compatible with the BAUER 58782 10-inch drill. This chuck is engineered for dependable performance, offering a secure grip for various drill bits. It is manufactured in the USA to high-quality standards, ensuring durability and resistance to wear under demanding conditions.
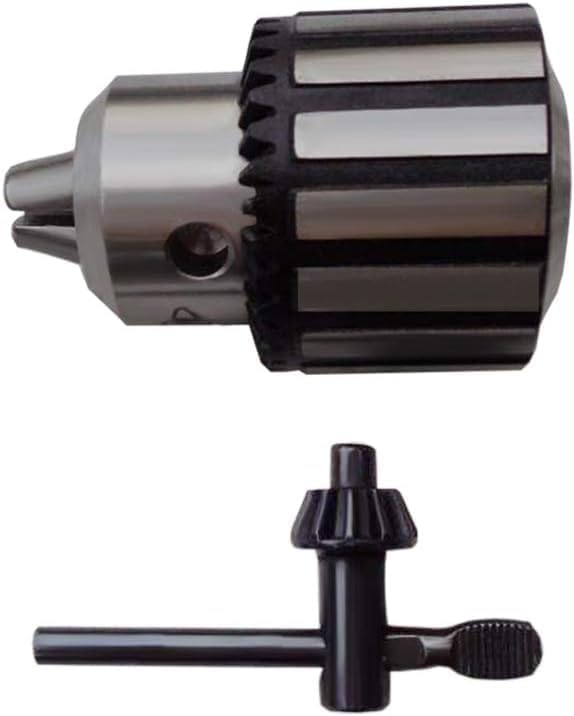
Figure 1: DNLK 1/2-inch Drill Chuck and Key. This image displays the complete drill chuck assembly alongside its accompanying key, ready for installation and use.
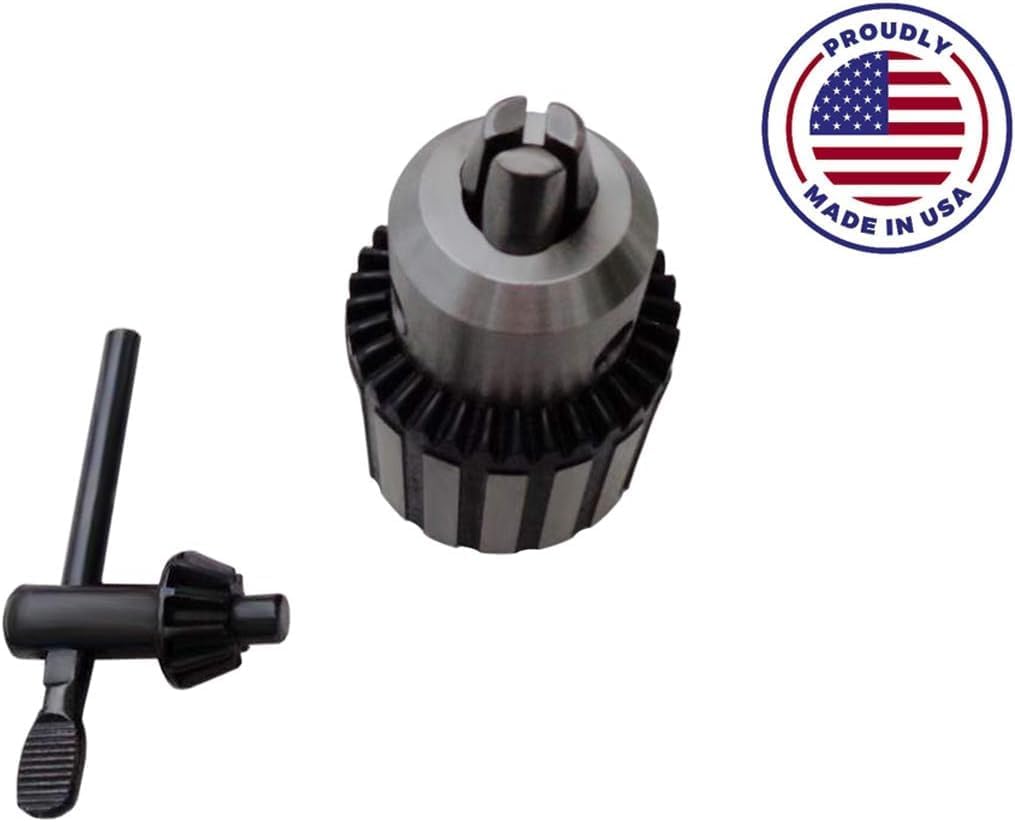
Figure 2: DNLK 1/2-inch Drill Chuck with "Proudly Made in USA" seal. This image highlights the product's origin and quality manufacturing.
Key Features:
- Compatibility: Specifically designed to fit BAUER 58782 10-inch drill presses.
- Durability: Constructed from metal to withstand high shocks and heavy-duty loads in various environments.
- Precision: Ensures a tight fit and flawless operation for secure bit retention.
- Quality Manufacturing: Exclusively designed and produced in the USA.
2. Safety Information
Always prioritize safety when working with power tools. Read and understand all instructions before installing or operating the drill chuck. Failure to follow these safety guidelines may result in injury or damage to equipment.
- Personal Protective Equipment: Always wear safety glasses or goggles. Consider hearing protection and gloves when operating drilling machinery.
- Power Disconnection: Ensure the power tool is disconnected from its power source before performing any installation, adjustment, or maintenance.
- Secure Workpiece: Always secure the workpiece firmly before drilling to prevent movement and potential injury.
- Correct Bit Selection: Use only drill bits that are appropriate for the material being drilled and within the chuck's capacity.
- Remove Chuck Key: Always remove the chuck key from the chuck before starting the drill.
- Inspect Equipment: Before each use, inspect the drill chuck and drill for any signs of damage or wear. Do not use damaged equipment.
3. Package Contents
Verify that all items are present and undamaged upon opening the package.
- 1 x DNLK 1/2-inch Drill Chuck (Model 58782)
- 1 x Drill Chuck Key
4. Installation Instructions
This section outlines the steps for replacing an existing drill chuck with the DNLK 1/2-inch Drill Chuck. Ensure the drill press is unplugged before beginning.
4.1 Removing the Old Chuck
- Disconnect Power: Unplug the drill press from the electrical outlet.
- Lower Spindle: Lower the drill press spindle as far as it will go.
- Access Retention Screw (if applicable): Some chucks have a retention screw inside the chuck jaws. Open the jaws fully and check for a screw. If present, use an appropriate screwdriver (often left-hand thread) to remove it.
- Insert Drift Key: Insert a drift key or a wedge-shaped tool into the slot on the drill press spindle, above the chuck.
- Tap to Release: Gently tap the drift key with a mallet or hammer to dislodge the chuck from the tapered spindle. The chuck should fall free. Support the chuck to prevent it from dropping to the floor.
4.2 Installing the New DNLK Chuck
- Clean Spindle: Thoroughly clean the tapered end of the drill press spindle and the inside taper of the new DNLK chuck. Any dirt or debris can prevent a secure fit.
- Align Chuck: Align the tapered hole in the new DNLK chuck with the tapered spindle of the drill press.
- Seat Chuck: Push the chuck firmly onto the spindle. For a secure fit, you may need to apply pressure. Some users gently tap the bottom of the chuck with a rubber mallet or a block of wood to ensure it seats properly. Alternatively, open the chuck jaws fully, place a piece of wood on the drill press table, and lower the spindle firmly onto the wood to seat the chuck.
- Install Retention Screw (if applicable): If your drill press uses a retention screw, insert and tighten it (remembering it might be a left-hand thread).
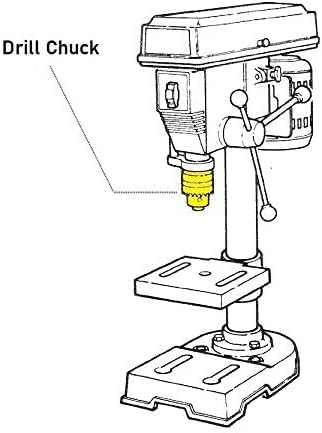
Figure 3: Diagram illustrating a drill press with the drill chuck component highlighted. This shows the typical location of the chuck on a drill press spindle.
5. Operating Instructions
Once the DNLK drill chuck is securely installed, follow these steps for proper operation.
- Insert Drill Bit: Open the chuck jaws by turning the chuck collar counter-clockwise or using the chuck key. Insert the drill bit into the chuck jaws, ensuring it is seated as deeply as possible without touching the bottom of the chuck.
- Tighten Chuck: Hand-tighten the chuck collar clockwise until the jaws firmly grip the drill bit. Then, insert the chuck key into one of the keyholes and tighten securely. For optimal grip, tighten in all three keyholes, rotating the chuck slightly between each tightening.
- Remove Chuck Key: CRITICAL: Always remove the chuck key immediately after tightening the drill bit. Never leave the chuck key in the chuck when the drill press is powered on.
- Begin Drilling: With the bit secured and the key removed, you can now safely operate your drill press according to its manufacturer's instructions.
- Remove Drill Bit: To remove the drill bit, insert the chuck key and turn it counter-clockwise to loosen the jaws. Remove the bit and store it safely.
6. Maintenance
Regular maintenance ensures the longevity and optimal performance of your DNLK drill chuck.
- Cleaning: Periodically clean the chuck jaws and internal mechanisms to remove dust, chips, and debris. Use a brush or compressed air. Avoid using harsh solvents that could damage components.
- Lubrication: Apply a small amount of light machine oil to the chuck jaws and threads occasionally to ensure smooth operation. Do not over-lubricate.
- Inspection: Regularly inspect the chuck for signs of wear, damage, or corrosion. Check that the jaws close evenly and securely. If any damage is observed, replace the chuck immediately.
- Storage: Store the drill chuck and key in a clean, dry place when not in use.
7. Troubleshooting
This section addresses common issues you might encounter with your drill chuck.
| Problem | Possible Cause | Solution |
|---|---|---|
| Drill bit slips in chuck. | Chuck not tightened sufficiently; jaws worn or dirty; incorrect bit shank. | Ensure chuck is tightened securely using the key in all three positions. Clean jaws. Use bits with appropriate shank for the chuck. |
| Chuck is difficult to open or close. | Dirt or debris in jaws/threads; lack of lubrication; damaged threads. | Clean chuck thoroughly. Apply light machine oil to jaws and threads. If damaged, consider replacement. |
| Chuck wobbles or runs out of true. | Chuck not properly seated on spindle; damaged spindle taper; bent drill bit. | Re-seat the chuck firmly on the spindle. Inspect spindle taper for damage. Check if the drill bit itself is bent. |
8. Specifications
- Brand: DNLK
- Model Number: 58782
- Chuck Size: 1/2-inch
- Thread Size: 1/2-20 UNC
- Material: Metal
- Compatible Devices: Drilling Machine (specifically BAUER 58782 10-inch drill)
- Power Source: Hand Powered (referring to chuck operation, not the drill itself)
9. Warranty and Support
DNLK stands by the quality of its products. This drill chuck comes with a Lifetime Assurance, reflecting our commitment to dependable performance and customer satisfaction. For any questions, technical assistance, or warranty claims, please contact DNLK customer support.
Contact Information:
- Website: Visit the DNLK Store on Amazon
- Email: Refer to product packaging or the DNLK store for specific contact details.
- Phone: Refer to product packaging or the DNLK store for specific contact details.