Product Overview
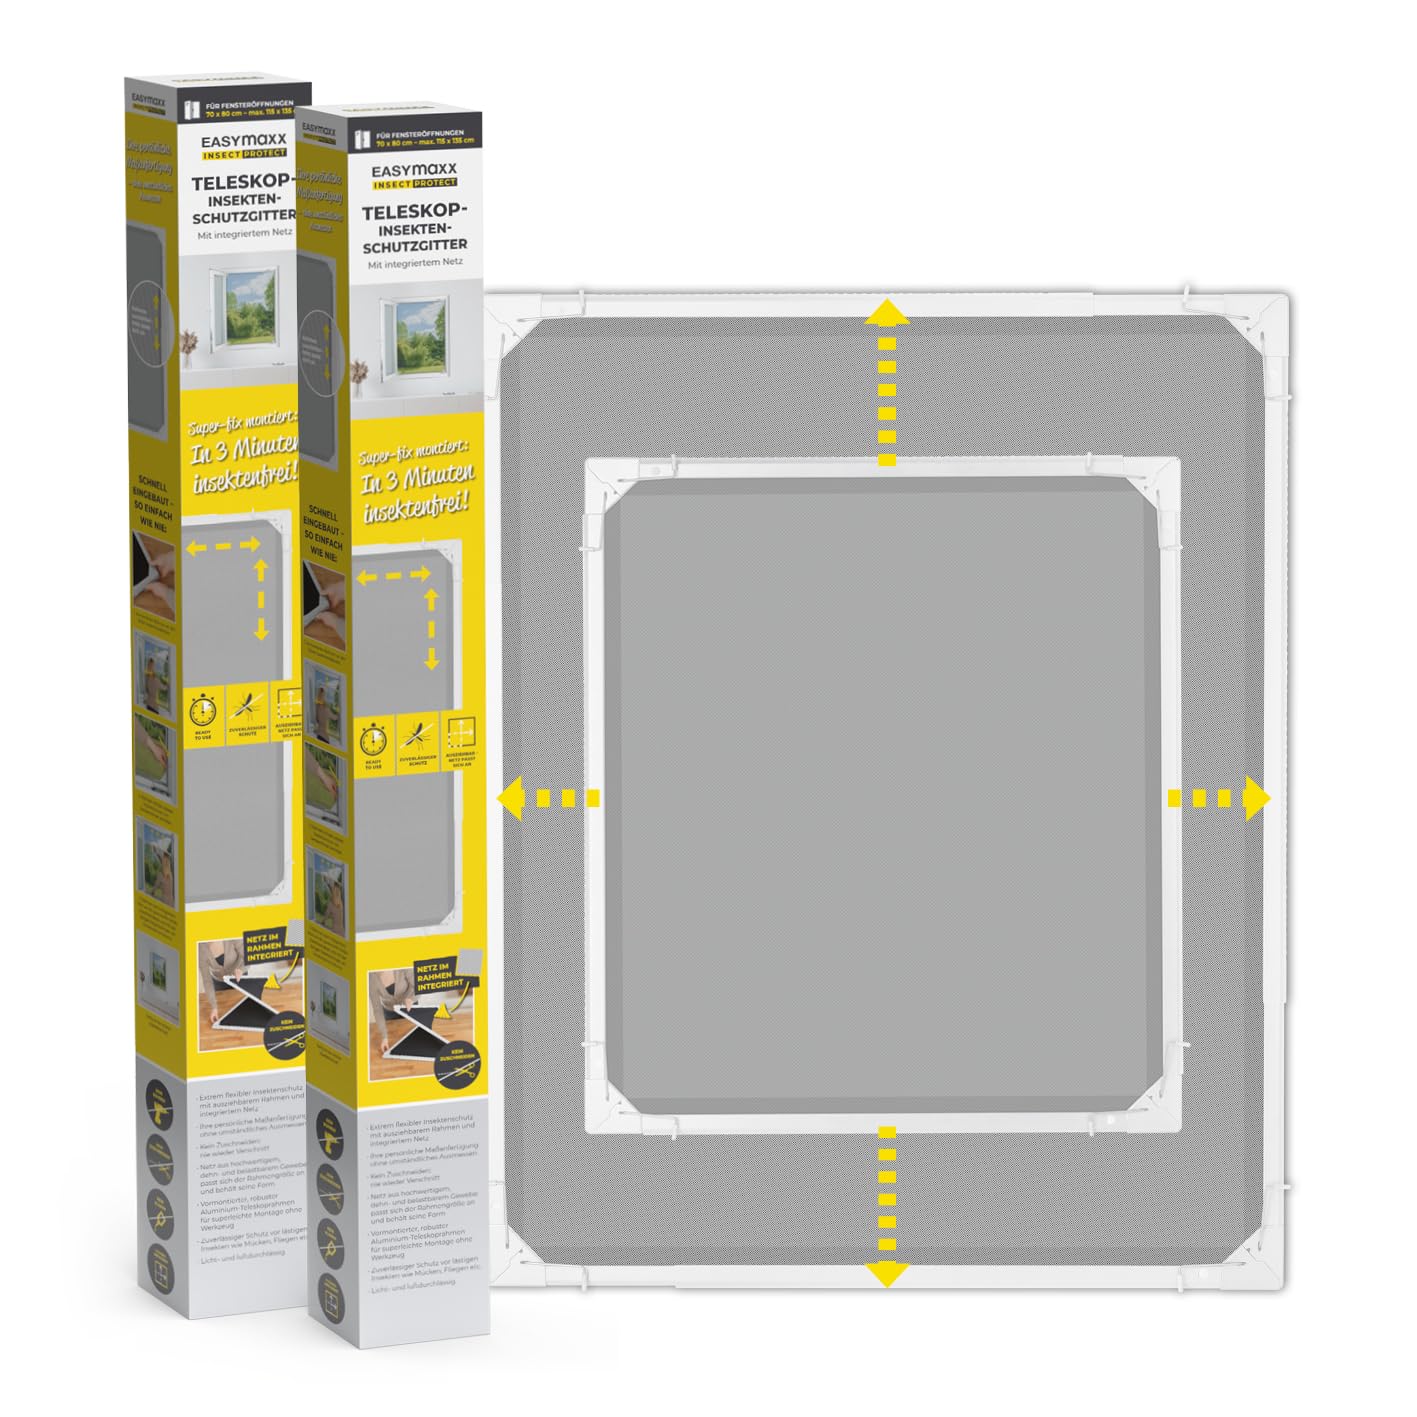
The EASYmaxx Insect Protect Telescopic Insect Screen provides a quick and effective solution for keeping insects out of your home. Designed for easy installation without the need for tools, drilling, or screws, this screen features a pre-assembled, extendable frame with integrated mesh.
Key features include:
- Installation in 3 Minutes: Unfold, extend, and secure the screen quickly.
- Flexible Customization: The telescopic frame adjusts to various window sizes, from a minimum of 73 x 83 cm to a maximum of 120 x 140 cm.
- No Cutting Required: The mesh is integrated into the frame, eliminating the need for custom cutting and reducing waste.
- Stretchable and Resilient Mesh: Made from high-quality, weather-resistant fabric that adapts to the frame size and maintains its shape.
- Optimal Visibility: The special black fabric is nearly invisible, allowing for clear views and excellent air permeability without darkening the room.
The EASYmaxx Telescopic Insect Screen, ready for use in a window.

Overview of the EASYmaxx Telescopic Insect Screen, emphasizing quick and tool-free installation for immediate insect protection.
Setup and Installation
Follow these steps for quick and easy installation of your telescopic insect screen:
- Check Window Compatibility: Ensure your window frame has sufficient space for installation. You need at least 25 mm of support surface on the outside of the window frame and a minimum of 16 mm of space for the spring clips on the inner frame. Also, ensure there is at least 30 mm of space between the window frame and any roller blinds. The screen is compatible with plastic (PVC), aluminum, and wooden window frames.
- Prepare the Screen: The screen comes with a pre-assembled frame and integrated mesh. No cutting or gluing is required.
- Position the Frame: Push the pre-assembled frame into the corners of your window opening.
- Secure with Clips: Position the screen in the window frame and secure the lower spring clips into the corners.
- Extend to Fit: Simply extend the telescopic frame to the desired size until it fits snugly and securely within your window opening. The mesh will adapt automatically. The screen can be adjusted from min. 73 x 83 cm to max. 120 x 140 cm.

Compatibility check for various window frame types (PVC, Aluminum, Wood) and required clearances for installation.

Detail of the pre-assembled frame with integrated mesh, highlighting that no cutting or waste is involved.

A visual guide to the four-step installation process: push into corners, position, secure clips, and extend to fit.

Technical diagram illustrating the adjustable dimensions of the screen (min. 73x83 cm to max. 120x140 cm) and key features.
Operating Instructions
Once installed, the EASYmaxx Insect Protect Telescopic Insect Screen functions as a static barrier against insects. Its telescopic design allows for easy adjustment to fit your window opening. To remove or re-install, simply retract the frame slightly and detach it from the window. The resilient mesh maintains its shape even with repeated adjustments.
Maintenance
To ensure the longevity and effectiveness of your insect screen, follow these simple maintenance guidelines:
- Cleaning the Mesh: Gently wipe the mesh with a damp cloth to remove dust and debris. For stubborn dirt, a mild soap solution can be used, followed by rinsing with clean water.
- Cleaning the Frame: Clean the aluminum frame with a damp cloth. Avoid abrasive cleaners that could damage the finish.
- Storage: When not in use, especially during colder months, the screen can be easily retracted and stored in a dry place to protect it from extreme weather conditions.
Troubleshooting
| Problem | Possible Cause | Solution |
|---|---|---|
| Poor air or light passage | Screen not fully extended, causing the mesh to be too dense. | Ensure the screen is fully extended to its maximum possible dimensions within the window opening to allow for optimal air and light flow. |
| Difficulty in making further adjustments after initial installation | The screen is designed for a snug fit. Adjustments can be challenging once fully extended and secured. | Make sure to adjust the screen to the precise desired dimensions during the initial installation. If further adjustment is needed, carefully retract the frame slightly before re-extending. |
| Screen does not fit the window opening | Window dimensions are outside the screen's adjustable range or insufficient clearance. | Verify your window dimensions are within the screen's range (min. 73x83 cm - max. 120x140 cm) and that you have the required 25mm outer support and 16mm inner clip space. |
Specifications
| Feature | Detail |
|---|---|
| Model Number | 14885 |
| Product Dimensions | 120 x 140 x 3 cm (fully extended) |
| Adjustable Size Range | Min. 73 x 83 cm - Max. 120 x 140 cm |
| Weight | 3.84 Kilograms |
| Color | White |
| Material | ABS, Aluminum, Nylon, Elastane, Steel |
| Installation Method | Clamps (tool-free) |
| Special Features | Telescopic, Integrated Mesh, Pre-assembled |
| Components Included | 2 aluminum frames with integrated insect screen |
Warranty Information
Warranty information for the EASYmaxx Insect Protect Telescopic Insect Screen is not provided in the available product data. Please refer to your purchase documentation or contact the retailer for details regarding warranty coverage.
Support
Specific support contact information for the EASYmaxx Insect Protect Telescopic Insect Screen is not provided in the available product data. For assistance, please contact the seller or the manufacturer, DS Produkte GmbH, through their official channels.