1. Product Overview
The Kyosho Egg TS057 Micro Helicopter Mosquito is a compact, remote-controlled helicopter designed for stable indoor flight. It features a high-performance gyro for enhanced stability and an altitude adjustment sensor (barometric pressure sensor) to maintain a consistent height. Its small size allows for easy portability, with the main unit designed to be stored within its transmitter.
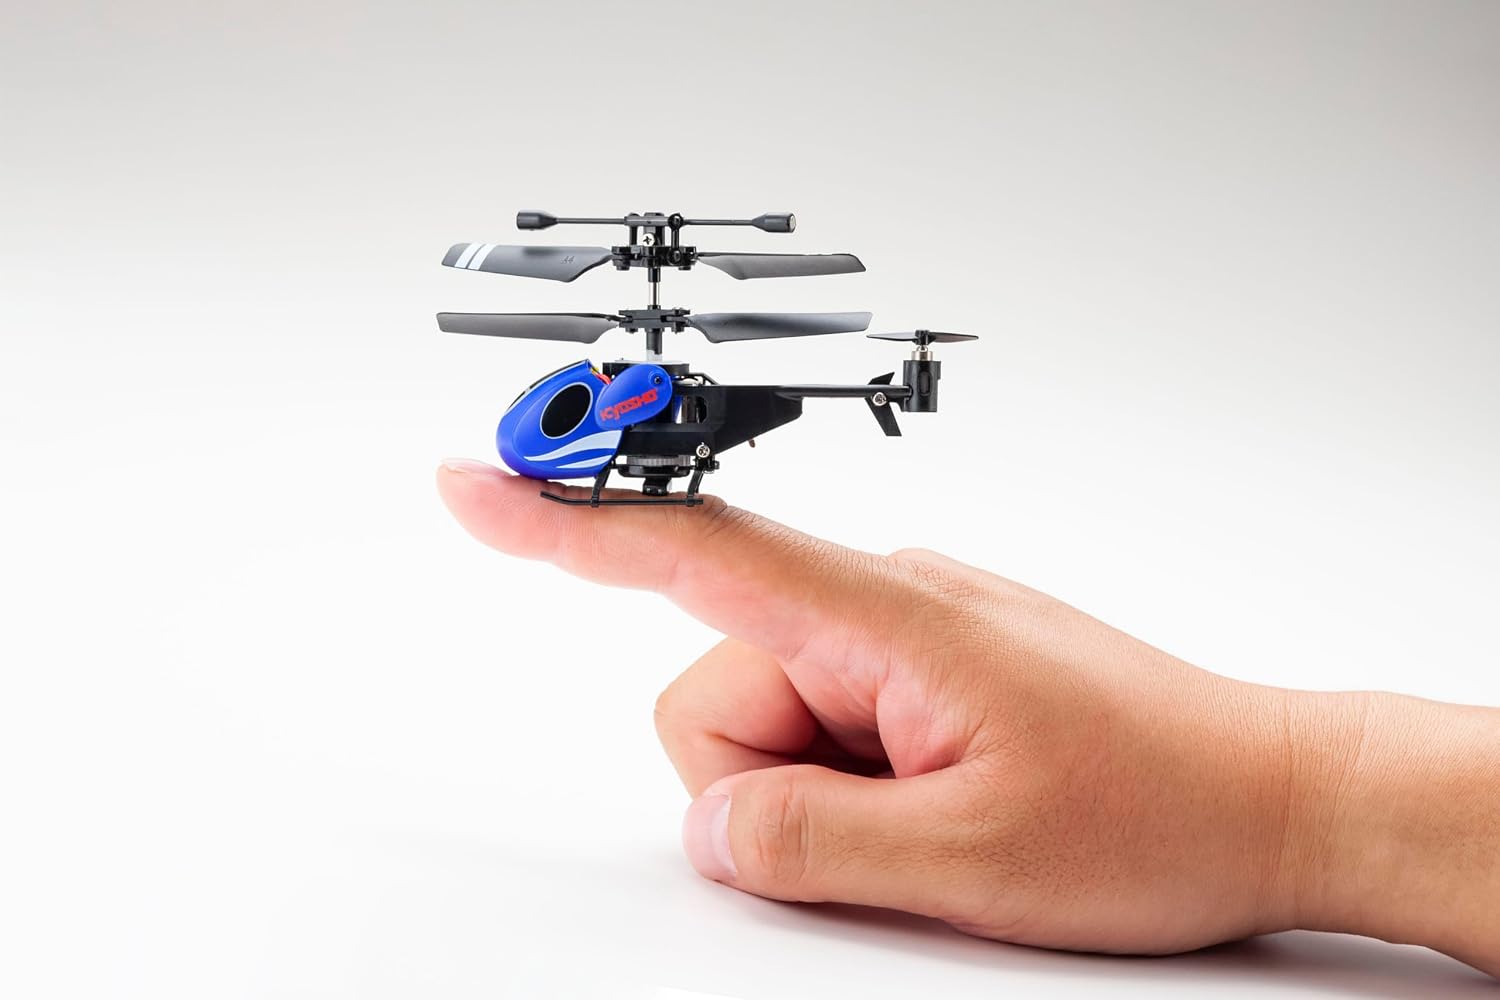
The Kyosho Egg TS057 Micro Helicopter Mosquito is designed to be small and portable, easily fitting on a fingertip.

The helicopter can be conveniently stored inside the transmitter for easy transport and protection.
2. Package Contents
Before beginning, please verify that all items listed below are included in your package:
- Kyosho Egg TS057 Micro Helicopter Mosquito (Main Unit)
- Remote Control Transmitter
- Rotor Set (pre-installed)
- Screwdriver
- 2 x Replacement Propellers (A and B type)
- USB Rechargeable Cable
- Instruction Manual
- Helipot (paper landing pad)
- Fuselage Identification Sticker
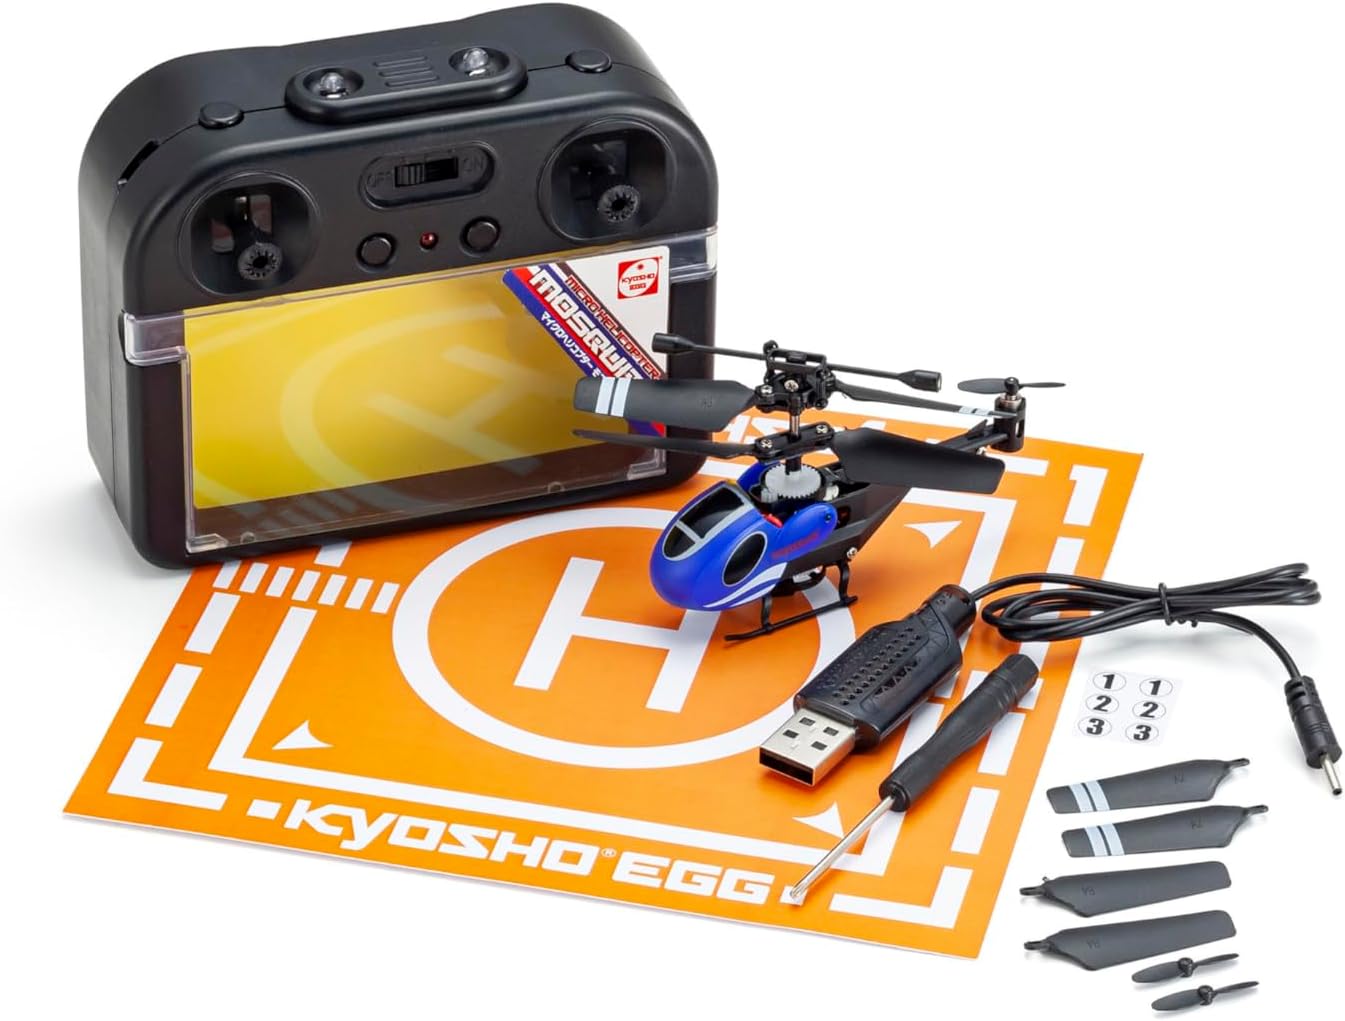
Contents of the Kyosho Egg TS057 Micro Helicopter Mosquito package.
3. Getting Started (Setup)
3.1. Transmitter Battery Installation
- Locate the battery compartment on the back of the remote control transmitter.
- Open the battery compartment cover.
- Insert 4 x AA alkaline batteries (sold separately), ensuring correct polarity (+/-).
- Close the battery compartment cover securely.
3.2. Helicopter Charging
The main unit is equipped with a built-in Li-Po 3.7 V 100 mAh rechargeable battery.
- Connect the small end of the USB rechargeable cable to the charging port on the helicopter.
- Connect the larger end of the USB cable to a powered USB port (e.g., computer, USB wall adapter).
- The charging indicator light on the USB cable or helicopter will illuminate during charging and turn off (or change color) when fully charged.
- Do not overcharge the battery. Disconnect once charging is complete.
3.3. Power On and Pairing
- Ensure both the helicopter and transmitter are fully charged.
- Place the helicopter on a flat, level surface.
- Turn on the helicopter's power switch.
- Turn on the transmitter's power switch.
- The helicopter and transmitter will automatically attempt to pair. Wait for the indicator lights to stabilize, indicating a successful connection.

The helicopter and its transmitter after successful pairing.
4. Flight Operation
The Kyosho Egg TS057 uses infrared (IR) control. Ensure the transmitter is pointed towards the helicopter during operation for optimal response.
4.1. Basic Controls
- Throttle Stick (Left Stick): Controls altitude. Push up to ascend, pull down to descend.
- Directional Stick (Right Stick): Controls forward, backward, left, and right movement.
- One-Button Take-off/Landing: Press the designated button for automatic take-off and landing. This feature simplifies operation for beginners.
- Altitude Hold: The built-in barometric pressure sensor helps maintain a stable altitude once achieved, reducing the need for constant throttle adjustments.
4.2. Flight Tips
- Operate in a spacious indoor area free from obstacles, drafts, and strong air currents.
- Start with gentle control inputs. Small movements on the sticks are often sufficient.
- Practice hovering at a low altitude to get accustomed to the controls before attempting complex maneuvers.
- If the helicopter drifts, use the trim buttons on the transmitter to adjust its stability.
5. Care and Maintenance
5.1. Cleaning
- Turn off the helicopter and transmitter before cleaning.
- Use a soft, dry cloth to wipe down the helicopter and transmitter.
- Do not use harsh chemicals or solvents, as these may damage the plastic components.
5.2. Propeller Replacement
If a propeller is damaged, replace it using the included screwdriver and spare propellers.
- Identify the damaged propeller (A or B type).
- Carefully unscrew the small screw holding the propeller in place.
- Remove the damaged propeller.
- Align the new propeller (matching A or B type) and secure it with the screw. Do not overtighten.
5.3. Storage
- Always turn off both the helicopter and transmitter before storing.
- Store the helicopter inside its transmitter compartment to protect it from damage.
- Remove AA batteries from the transmitter if storing for extended periods to prevent leakage.
- Store in a cool, dry place away from direct sunlight and extreme temperatures.
6. Troubleshooting
| Problem | Possible Cause | Solution |
|---|---|---|
| Helicopter does not respond to transmitter. | Low battery in helicopter or transmitter; Not paired; Transmitter not pointed at helicopter. | Charge helicopter battery; Replace transmitter batteries; Re-pair helicopter and transmitter; Ensure direct line of sight for IR control. |
| Unstable flight or drifting. | Uneven surface at take-off; Strong air currents; Propeller damage; Trim settings incorrect. | Take off from a level surface; Operate in a calm environment; Replace damaged propellers; Adjust trim buttons on the transmitter. |
| Helicopter does not take off. | Low battery; Obstruction to rotors. | Charge helicopter battery fully; Ensure rotors are clear and spinning freely. |
| Short flight time. | Battery not fully charged; Old battery. | Ensure battery is fully charged before each flight; Battery life naturally decreases over time. |
7. Technical Specifications
- Brand: Kyosho
- Model Name: TS057
- Control Type: Remote Control (Infrared)
- Main Unit Battery: Built-in Li-Po 3.7 V 100 mAh (Rechargeable)
- Transmitter Batteries: 4 x AA Alkaline (Sold Separately)
- Charging: USB Rechargeable Cable
- Special Features: High-performance gyro, Altitude adjustment sensor, One-button take-off/landing, Flashing light, Shock-resistant design
- Maximum Range: Approximately 5 Meters
- Material: Plastic
- Age Range: Adult
- Skill Level: All
8. Safety Information
- This product is not a toy. Adult supervision is recommended for all users.
- Do not operate near people, pets, or fragile objects.
- Keep fingers, hair, and loose clothing away from rotating propellers.
- Do not fly in strong winds or outdoors. This helicopter is designed for indoor use.
- Never attempt to modify the helicopter or its components.
- Always turn off the helicopter and transmitter when not in use.
- Follow all battery safety guidelines, including proper charging and disposal.
9. Warranty and Support
This product includes a product manual. For specific warranty information or technical support, please refer to the documentation provided in the original packaging or contact Kyosho customer service directly. Contact details can typically be found on the manufacturer's official website.