Ubervia YJ-5038
Ubervia YJ-5038 Triangular Wooden Alarm Clock User Manual
Model: YJ-5038
Introduction
This manual provides detailed instructions for the setup, operation, maintenance, and troubleshooting of your Ubervia YJ-5038 Triangular Wooden Alarm Clock. Please read this manual thoroughly before using the product to ensure proper function and longevity.
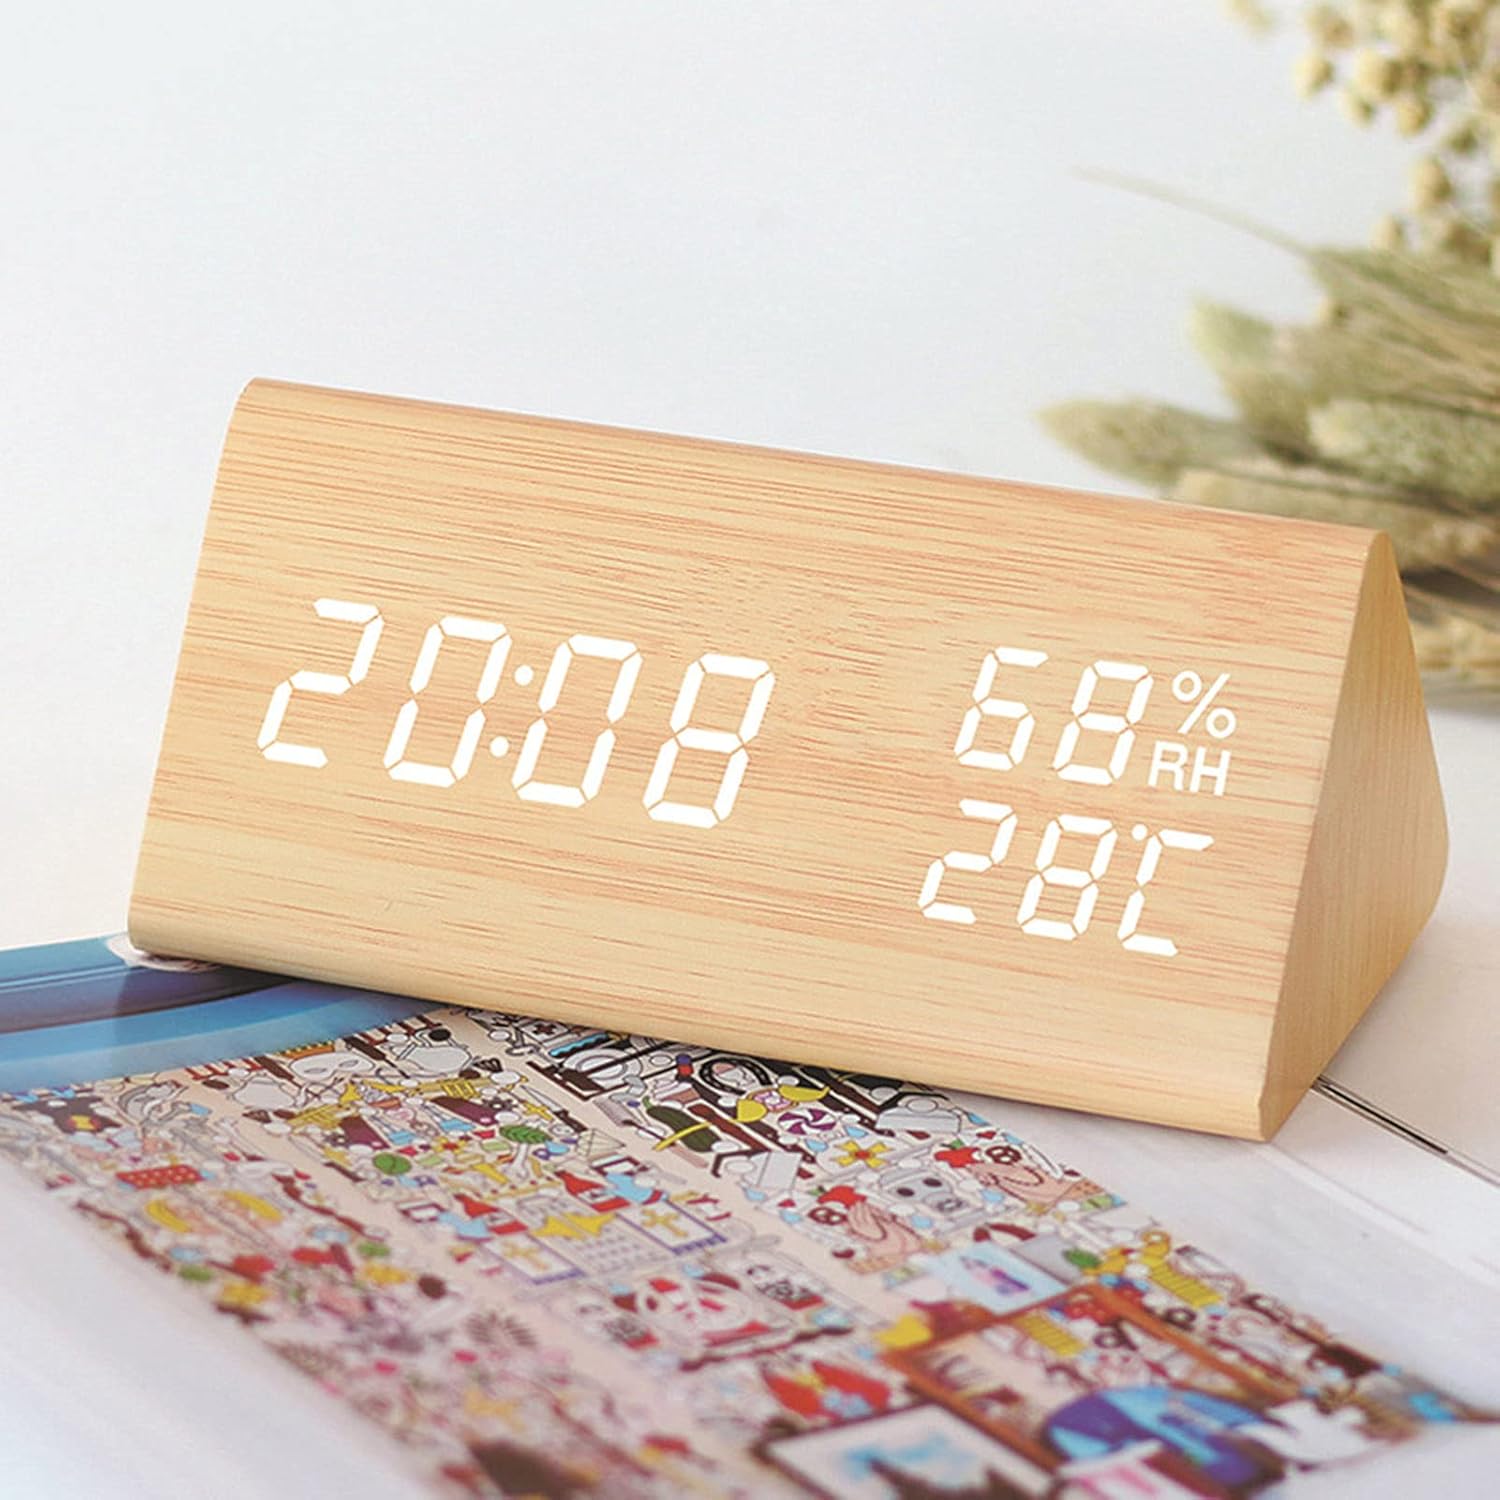
Figure 1: Front view of the Ubervia YJ-5038 alarm clock, showing the digital display with time (20:08), humidity (68% RH), and temperature (28°C).
Setup
1. Power Supply
The Ubervia YJ-5038 alarm clock can be powered by either AAA batteries or a DC 5V power adapter.
- Battery Power: Insert 4 'AAA' batteries (included) into the battery compartment located on the back of the clock. Ensure correct polarity.
- DC Power: Connect a DC 5V power adapter (not always included) to the DC jack on the back of the clock and plug it into a power outlet.

Figure 2: Rear view of the alarm clock, highlighting the DC power supply hole and the battery compartments for 4 'AAA' batteries.
2. Initial Power On
Once power is supplied, the digital display will illuminate. The clock will typically default to a 24-hour format and display the current temperature and humidity.
Operating Instructions

Figure 3: Diagram illustrating the product keys (SET, UP, DOWN, RESET), the three-level brightness adjustment, and the three alarm settings (A1, A2, A3).
1. Basic Controls
- SET Button: Used to enter setting modes (time, alarm) and confirm selections.
- UP Button: Used to increase values or navigate through options. Also functions as brightness adjustment when long-pressed.
- DOWN Button: Used to decrease values or navigate through options. Also functions as voice control adjustment.
- RESET Button: Resets the clock to factory defaults.
2. Setting Time
- Press the SET button once to enter time setting mode. The hour digits will flash.
- Use the UP or DOWN buttons to adjust the hour.
- Press SET again to move to minute setting. Use UP or DOWN to adjust minutes.
- Press SET a third time to exit time setting mode.
3. Setting Alarms (A1, A2, A3)
The clock supports up to three independent alarms.
- Press the SET button repeatedly until "A1" appears on the display.
- Press SET again to enter A1 alarm time setting. The hour digits will flash.
- Use UP or DOWN to adjust the alarm hour. Press SET to confirm.
- Use UP or DOWN to adjust the alarm minute. Press SET to confirm.
- After setting the time, use UP or DOWN to turn the alarm ON or OFF. Press SET to save and exit A1 setting.
- Repeat steps for A2 and A3 if desired.
4. Display Modes
The clock can cycle through different display modes:
- Time Display: Shows current time.
- Temperature & Humidity Display: Shows current ambient temperature and relative humidity.
- Cycle Display: Automatically cycles between time and temperature/humidity.
Press the UP button (short press) to switch between display modes.
5. Temperature Unit Conversion (Celsius/Fahrenheit)
To switch between Celsius (°C) and Fahrenheit (°F) temperature units:
- In time display mode, press and hold the DOWN button to toggle between °C and °F.

Figure 4: Two alarm clocks demonstrating the temperature and humidity dual display, with one showing temperature in Celsius and the other in Fahrenheit.
6. Brightness Adjustment
The display has three levels of brightness.
- Long press the UP button to cycle through the three brightness levels. Release the button when the desired brightness is achieved.
7. Voice Control Feature
The clock features a voice control mode to conserve power. In this mode, the display will turn off after a short period of inactivity. To activate the display, make a sound (e.g., clap hands, tap the clock) above a certain decibel level (e.g., 60dB).
- To enable or disable voice control, short press the DOWN button. The display will show "ON" or "OFF" for voice control.

Figure 5: Illustration of the voice sensing function. The display activates when sound levels exceed 60dB and turns off when sound is below 60dB.
Maintenance
- Cleaning: Wipe the clock with a soft, dry cloth. Do not use abrasive cleaners or solvents, as they may damage the wooden finish or display.
- Battery Replacement: If using battery power, replace all 4 'AAA' batteries when the display dims or functions become erratic. Ensure proper polarity when inserting new batteries.
- Storage: If storing the clock for an extended period, remove the batteries to prevent leakage.
Troubleshooting
| Problem | Possible Cause | Solution |
|---|---|---|
| Display is blank or dim. | No power, low batteries, or voice control enabled. | Check power connection or replace batteries. If voice control is on, make a sound to activate the display. |
| Alarm does not sound. | Alarm not set correctly or alarm is turned OFF. | Verify alarm time and ensure the alarm is set to ON in the alarm settings. |
| Voice control not responding. | Voice control is disabled or ambient noise is too low. | Ensure voice control is enabled (short press DOWN button). Increase sound level to activate. |
| Incorrect time/date. | Time was not set or power interruption occurred. | Reset the time following the "Setting Time" instructions. |
Specifications
- Model: YJ-5038
- Display Type: Digital LED
- Material: Wood
- Shape: Triangular
- Power Source: DC 5V (adapter not always included) or 4 x AAA Batteries (included)
- Special Features: Alarm, Voice Control, Temperature Display (°C/°F), Humidity Display, Three Brightness Levels
- Dimensions (Approx.): 15 cm (Length) x 8 cm (Width) x 7 cm (Height)

Figure 6: Product dimensions: 15cm length, 8cm width, and 7cm height.
Warranty and Support
This product may be eligible for an extended warranty plan. Please refer to your purchase documentation or retailer for details on available warranty options, such as the "1 Year Extended Warranty Plan by Onsitego" mentioned during purchase.
For technical support or inquiries, please contact your retailer or the manufacturer's customer service. Keep your purchase receipt and product model number (YJ-5038) handy for faster assistance.