MAX DISPOSER MAX-4
MAX DISPOSER 3/4 HP Garbage Disposal (MAX-4) Instruction Manual
Model: MAX-4 | Brand: MAX DISPOSER
1. Introduction
This manual provides detailed instructions for the safe and efficient installation, operation, and maintenance of your new MAX DISPOSER 3/4 HP Continuous Feed Food Waste Disposer, Model MAX-4. Please read all instructions carefully before installation and use to ensure proper function and safety.
2. Important Safety Instructions
WARNING: Read all instructions before using this appliance.
- Always turn off power to the disposer before attempting to clear a jam or clean the disposer.
- Do not put hands or fingers into the disposer.
- Do not dispose of large bones, corn husks, artichokes, or other fibrous materials that can jam the disposer.
- Do not pour grease or fat down the disposer.
- Ensure the splash guard is in place during operation to prevent splashing.
- This appliance must be properly grounded.
- Supervise children to ensure they do not play with the appliance.
3. What's in the Box
Verify that all components are present before beginning installation:
- Disposer unit
- Stopper
- Pre-installed power cord and plug
- L-tube (drain elbow)
- Gasket
- Hex wrench (for clearing jams)
- Installation instructions (this manual)
- Screws
Note: Air switch or downpipe assembly are not included.

Image: MAX DISPOSER 3/4 HP Garbage Disposal unit, showing the main body, pre-installed power cord, and the included stopper.
4. Product Specifications
| Feature | Specification |
|---|---|
| Model Number | MAX-4 |
| Horsepower | 3/4 HP |
| Grinding System | 2-stage grinding, Stainless Steel components |
| Feed Type | Continuous Feed |
| Motor Type | AC Motor |
| Capacity | 34 oz (1000 mL) |
| Dimensions (L x W x H) | 7.09" x 7.09" x 12.6" |
| Item Weight | 17.6 pounds |
| Voltage | 120V |
| Power Source | Corded Electric (pre-installed power cord) |
| Sink Mount Type | Standard 3-bolt sink mounts (not EZ-mount) |
| Drain Pipe Compatibility | Fits 1.5" drains |
| Dishwasher Connection | Yes, 0.9 inch dishwasher port |

Image: Key features of the MAX DISPOSER, highlighting stainless steel grinding parts, ultra-quiet technology, AC motor, easy installation, and the pre-installed 3ft power cord.
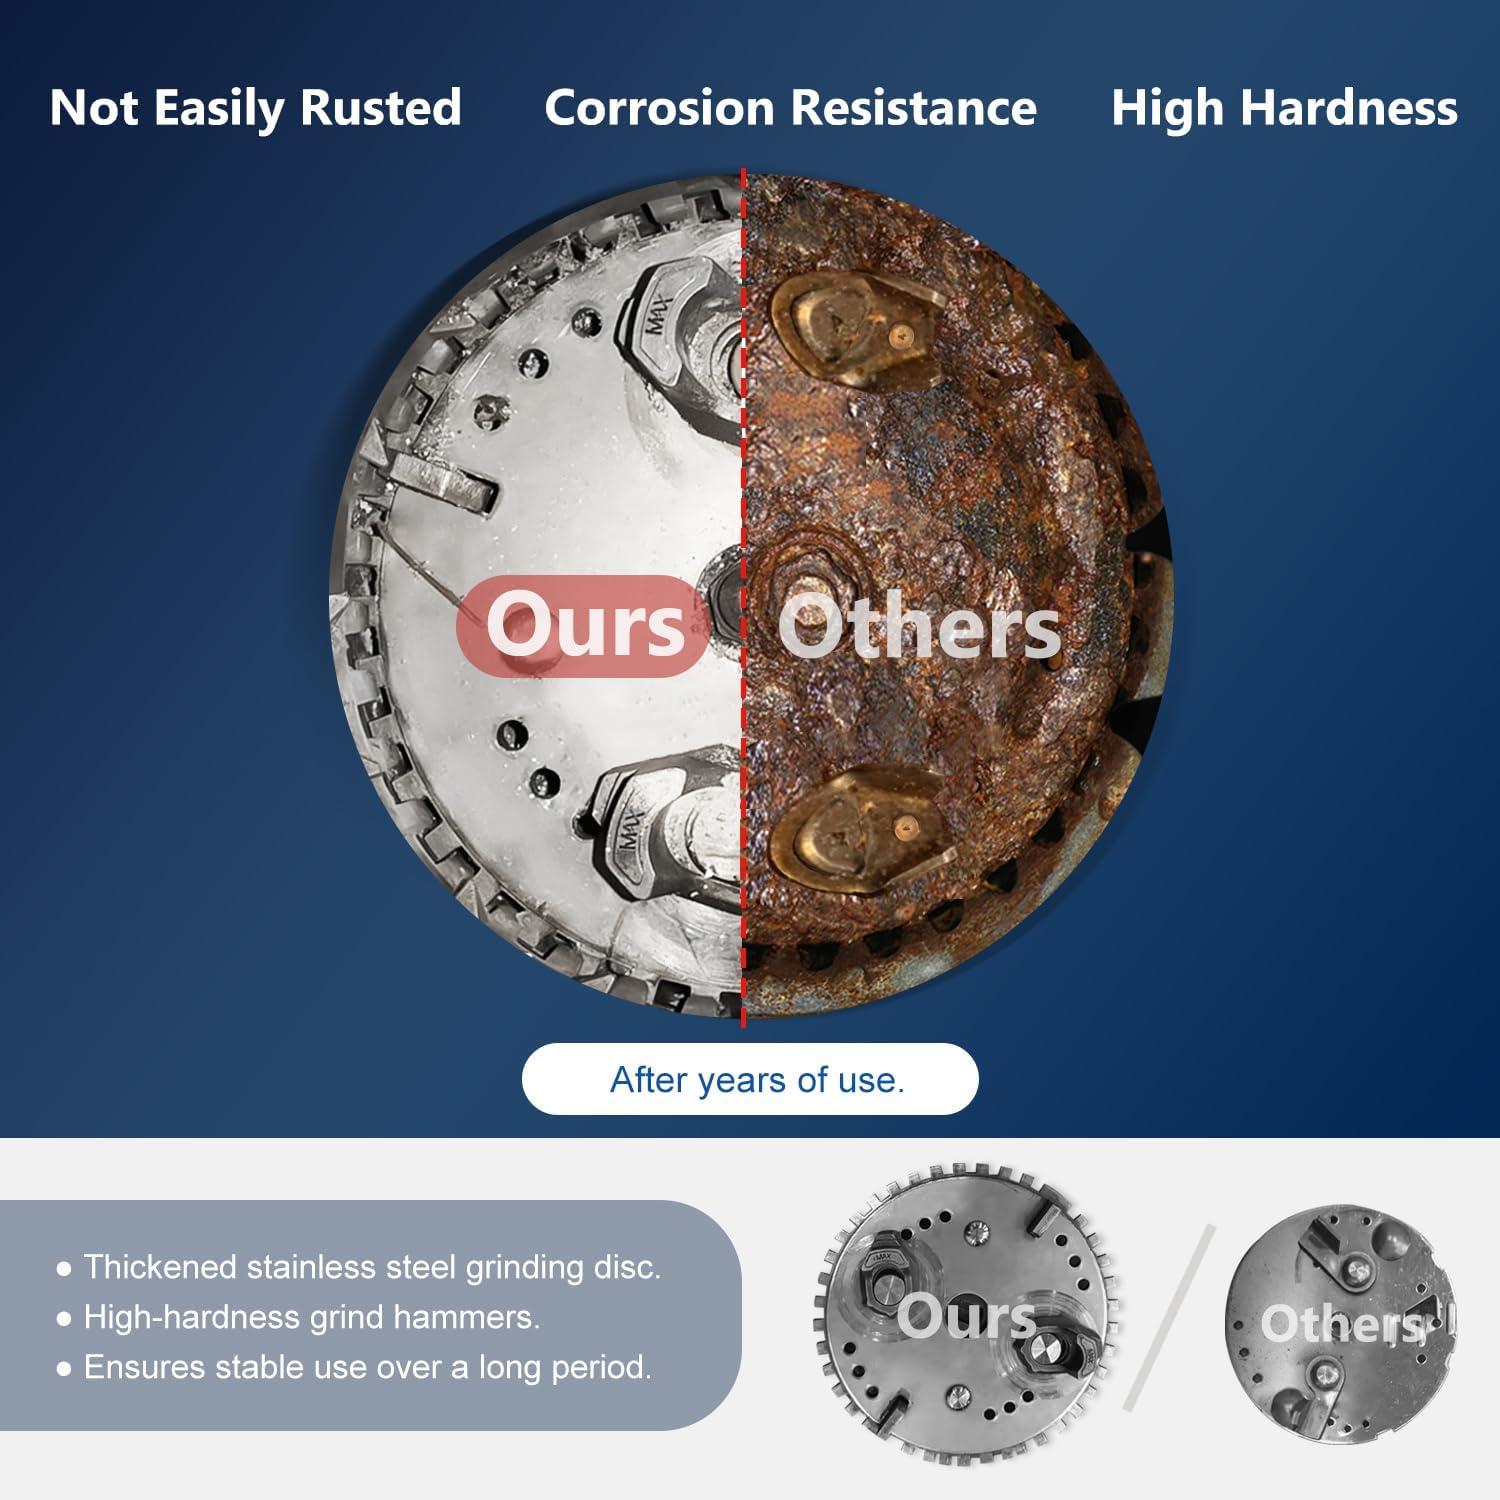
Image: Detailed product dimension diagram for the MAX DISPOSER 3/4 HP unit, showing height, width, and drain connections.
5. Setup and Installation
The MAX DISPOSER is designed for easy installation, especially when replacing an existing 3-bolt mount disposal. It comes with a pre-installed power cord for plug-and-play convenience.
5.1 Tools Required
- Screwdriver (Phillips and Flathead)
- Hammer (if connecting a dishwasher)
- Plumber's putty
- Adjustable wrench or pipe wrench
- Safety glasses
5.2 Removing Old Disposer (if applicable)
- Turn off electrical power to the disposer at the circuit breaker.
- Disconnect the drain trap from the disposer discharge tube.
- Disconnect the dishwasher drain hose (if applicable).
- Support the disposer from below, then loosen the mounting screws on the mounting ring and twist the disposer to detach it from the sink flange.
- Remove the old sink flange assembly from the sink opening. Clean the sink opening thoroughly.
5.3 Installing the New Disposer
- Prepare the Sink Flange: Apply a bead of plumber's putty around the underside of the new sink flange. Insert the flange into the sink opening.
- Assemble Mounting Hardware: From underneath the sink, slide the fiber gasket, backup flange, and mounting ring onto the sink flange. Secure with the snap ring. Tighten the three mounting screws evenly until the assembly is firm and watertight.
- Dishwasher Connection (if applicable): If connecting a dishwasher, use a screwdriver and hammer to knock out the dishwasher inlet plug on the disposer unit. Ensure the plug is completely removed.
- Attach Drain Elbow: Connect the L-tube (drain elbow) to the disposer's discharge outlet using the provided gasket and screws.
- Mount Disposer: Align the disposer's mounting lugs with the mounting ring. Lift the disposer and twist it clockwise until the lugs lock into place on the mounting ring. Use the hex wrench to tighten the mounting ring if needed.
- Connect Plumbing: Connect the drain trap to the disposer's L-tube. Connect the dishwasher drain hose to the dishwasher inlet port (if applicable). Ensure all connections are tight and leak-free.
- Connect Power: The disposer comes with a pre-installed power cord. Plug it into a standard 120V outlet under the sink.
- Test for Leaks: Fill the sink with water and then drain it while checking all connections for leaks.

Image: Diagram illustrating the simple 3-bolt mounting system for the MAX DISPOSER, showing the sink flange, gaskets, and mounting ring components.

Image: An illustration of the MAX DISPOSER 3/4 HP garbage disposal installed under a kitchen sink, showing plumbing and electrical connections.
5.4 Installation Video
Video: Official MAX DISPOSER installation guide for the 3/4 HP food waste disposer. This video demonstrates the step-by-step process of installing the unit under a kitchen sink, including preparing the sink flange, connecting the drain, and securing the disposer.
6. Operating Instructions
The MAX DISPOSER is a continuous feed unit, designed to grind food waste while water is running.
- Ensure the splash guard is properly seated in the sink opening.
- Turn on a medium stream of cold water.
- Turn on the disposer by flipping the wall switch (or air switch, if installed).
- Slowly feed food waste into the disposer opening. Use the stopper/pusher to guide food into the disposer, but never your hands.
- Allow the disposer to run until all food waste is ground and only the sound of water and the motor is heard.
- Turn off the disposer, then turn off the water after a few seconds to flush the drain line.
6.1 Acceptable Food Waste
The MAX DISPOSER is designed to handle most common food waste, including:
- Vegetable scraps (e.g., potato peels, carrot peels, lettuce)
- Fruit scraps (e.g., apple cores, citrus rinds)
- Small bones (e.g., chicken bones, fish bones)
- Coffee grounds
- Plate scrapings
6.2 Unacceptable Food Waste
Avoid disposing of the following items to prevent damage and jams:
- Large bones (e.g., beef, pork)
- Fibrous materials (e.g., corn husks, artichokes, celery stalks, onion skins)
- Grease, fats, and oils
- Glass, metal, plastic, rubber, or fabric
- Seafood shells (e.g., oyster, clam)
- Fruit pits (e.g., peach, avocado)

Image: A visual guide categorizing food waste into common disposable, easily clogged, and non-treatable items for garbage disposals.
6.3 Operation Video
Video: A demonstration of the MAX DISPOSER food waste disposer in action, showing how to feed food waste into the unit and the effectiveness of its grinding mechanism.
7. Maintenance
7.1 Cleaning the Disposer
- To clean the disposer, grind small pieces of citrus peels (lemon, orange) to freshen the unit.
- For deeper cleaning, pour a mixture of baking soda and vinegar into the disposer, let it sit for 10-15 minutes, then flush with cold water while running the disposer.
- Regularly clean the removable splash guard with warm, soapy water.
7.2 Preventing Odors
- Always run cold water for a few seconds after turning off the disposer to ensure all food particles are flushed away.
- Avoid putting grease or fatty substances down the drain, as they can solidify and trap food particles, leading to odors.

Image: An illustration showing the MAX DISPOSER installed under a kitchen sink, highlighting its role in maintaining a clean and hygienic kitchen by efficiently disposing of food waste.
8. Troubleshooting
| Problem | Possible Cause | Solution |
|---|---|---|
| Disposer does not start | No power, tripped circuit breaker, or tripped overload protector. | Check power supply. Reset circuit breaker. Press the red reset button on the bottom of the disposer. |
| Disposer hums but does not grind | Jam in the grinding chamber. | Turn off power. Insert the hex wrench (provided) into the center hole on the bottom of the disposer and turn it back and forth to free the jam. Remove the object with tongs or pliers. Never use hands. |
| Leaks under the sink | Loose plumbing connections or improper seal. | Check all plumbing connections (sink flange, discharge tube, dishwasher connection) and tighten as necessary. Reapply plumber's putty if the sink flange seal is compromised. |
| Odors from disposer | Food particles trapped in the grinding chamber or splash guard. | Clean the disposer as described in the Maintenance section. Ensure sufficient cold water is run after each use. |

Image: The bottom of the MAX DISPOSER unit, showing the red overload protector reset button and the hex wrench insertion point for clearing jams.
9. Warranty and Support
For warranty information or technical support, please contact MAX DISPOSER customer service. Refer to your purchase documentation for specific warranty terms and contact details.
If you need assistance with installation or troubleshooting, please contact us directly. Our team is ready to help.
You can visit the official MAX DISPOSER store for more information: MAX DISPOSER Store
Ask a question about this manual
Ask about setup, troubleshooting, compatibility, parts, safety, or missing instructions. Manuals+ will review the question and use this page’s manual context to help answer it.