Introduction
This manual provides detailed instructions for the DONGKER CO2 Solenoid Valve with Timer Controller, designed to automate CO2 supply in aquatic environments for optimal plant growth. Please read this manual thoroughly before installation and operation to ensure safe and efficient use.
Safety Information
- Always disconnect power before performing any maintenance or installation.
- Ensure the power supply voltage matches the product's specifications (DC 12V output).
- Do not immerse the timer controller or power adapter in water. The solenoid valve itself is designed to be waterproof.
- Keep out of reach of children.
- Use only with compatible CO2 regulators and air tubing (4mm inner diameter, 6mm outer diameter).
- Install a check valve to prevent water backflow into the solenoid valve or CO2 system.
Product Overview
The DONGKER CO2 Solenoid Valve system consists of three main components:
- CO2 Solenoid Valve: Made from durable aluminum alloy, designed for precise CO2 flow control. Available in single or double head configurations.
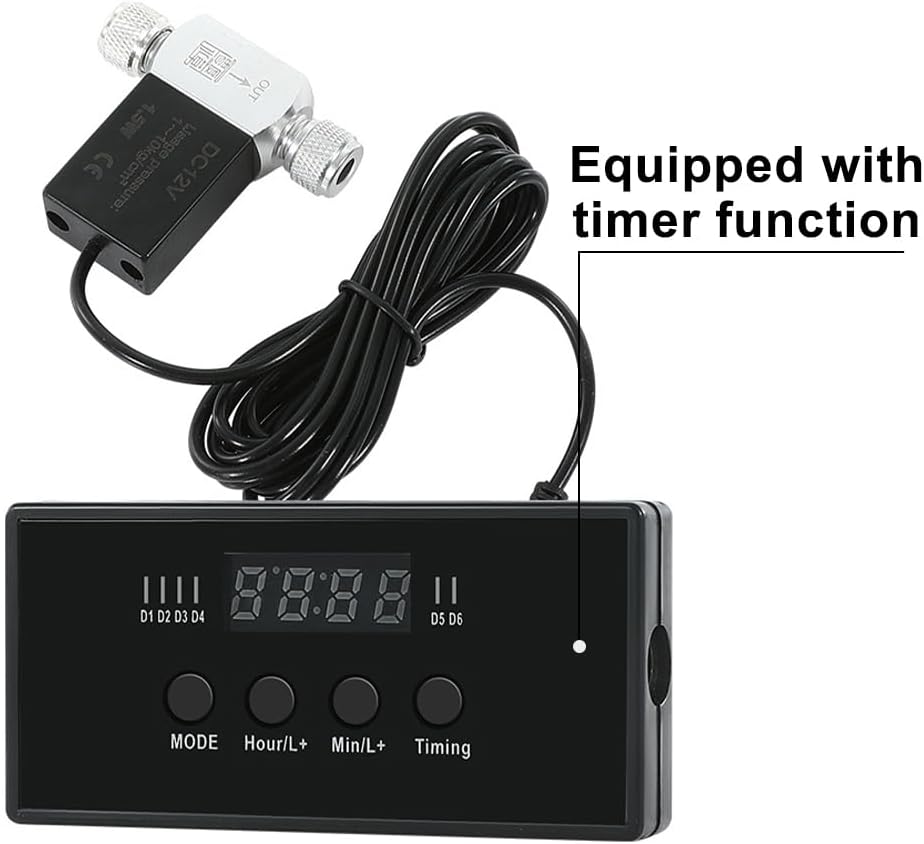
- Timer Controller: A digital timer for automated on/off scheduling of the CO2 supply.
- DC 12V Power Adapter: Provides the necessary power to the system.

Solenoid Valve Details
The solenoid valve features a robust design with excellent sealing performance.


Setup
- Connect the Solenoid Valve:
- For single-head models, connect one end to your CO2 regulator (M10 x 1 male thread or fine adjustment valve) and the other end to a 4mm x 6mm air tube leading to your bubble counter or diffuser.
- For double-head models, connect both ends to 4mm x 6mm CO2 air tubing.
- Tip: For optimal performance, position the solenoid valve as close to the CO2 diffuser as possible.
- Install a Check Valve: Always install a check valve between the solenoid valve and the diffuser to prevent water from flowing back into the CO2 system, which can damage the solenoid or regulator.
- Connect to Timer Controller: Plug the solenoid valve's cable into the designated port on the timer controller.
- Power Connection: Connect the DC 12V power adapter to the timer controller, then plug the adapter into a suitable AC outlet (100V-240V, 50/60Hz).


Operating Instructions
The timer controller allows for automated CO2 supply, eliminating the need for manual operation.
Setting the Timer
- Power On: Once connected, the timer display will light up.
- Set Current Time: Use the "MODE" button to cycle through settings. Use "Hour/L+" and "Min/L+" to adjust the current time.
- Program On/Off Times: Press "Timing" to enter program mode. You can typically set multiple ON/OFF periods (e.g., D1-D6 as indicated on the timer). Use "Hour/L+" and "Min/L+" to set the desired start and end times for CO2 delivery.
- Save Settings: Exit program mode (often by pressing "MODE" again or waiting for a few seconds) to save your settings.
The solenoid valve will open and close according to the programmed schedule, providing CO2 during the "ON" periods and stopping during "OFF" periods.
Maintenance
- Regular Cleaning: Periodically inspect the solenoid valve and connections for any signs of wear, leaks, or blockages.
- Solenoid Valve Cleaning: If the solenoid valve fails to control CO2 flow effectively, it may require cleaning. Disconnect power and CO2 lines, then carefully clean any internal components or blockages. Refer to specialized guides for detailed solenoid valve cleaning procedures if necessary.
- Tubing Inspection: Check CO2 tubing for kinks, cracks, or algae buildup that could impede flow. Replace tubing as needed.
- Check Valve Function: Ensure the check valve is functioning correctly to prevent water backflow.
Troubleshooting
| Problem | Possible Cause | Solution |
|---|---|---|
| Solenoid valve not opening/closing. | No power; incorrect timer setting; valve blockage; faulty unit. | Check power connection; verify timer program; clean the valve; contact support if persistent. |
| CO2 leakage. | Loose connections; damaged tubing; faulty seals. | Tighten all connections; replace damaged tubing; inspect and replace seals if necessary. |
| Timer display is off or flickering. | Power adapter issue; loose connection. | Ensure power adapter is securely plugged in; try a different outlet. |
| Difficulty setting timer. | Unclear instructions; user unfamiliarity. | Refer to the "Operating Instructions" section carefully. Search for online tutorials or contact customer support for detailed guidance. |
Specifications
| Model Number | HM30290-3 |
| Input Voltage | AC 100V ~ 240V, 50/60 Hz |
| Output Voltage | DC 12V |
| Working Pressure | ≤ 1.0 MPa |
| Solenoid Valve Dimensions (L x W) | 5.5 cm x 5.2 cm (approx. 2.1 in x 2 in) |
| Material | Aluminum Alloy (main body) |
| Compatibility | 4mm inner / 6mm outer diameter air pipes |
Warranty and Support
For warranty information and technical support, please refer to the product packaging or contact DONGKER customer service directly. Keep your purchase receipt for warranty claims.
For further assistance with setup or troubleshooting, you may also visit the product page on Amazon or consult online aquatic forums for community support.