1. Introduction
This manual provides detailed instructions for the assembly, operation, and maintenance of your ITOTIN 10x9ft Adjustable Photography Backdrop Stand. Designed for versatility, this aluminum alloy support system is suitable for various applications including studio photography, events, parties, and advertising displays. Please read this manual thoroughly before use to ensure proper setup and safe operation.
2. Package Contents
Verify that all components listed below are present in your package:
- 2 × Tripod Stands
- 4 × Crossbar Sections
- 4 × Backdrop Clamps
- 4 × Spring Clips
- 2 × Empty Sandbags (for stability)
- 1 × Carry Bag

Image 2.1: Complete package contents.
3. Safety Information
- Ensure all knobs and locking mechanisms are securely tightened before use.
- Always use the provided sandbags, filled with appropriate material (sand, gravel, etc.), to enhance stability, especially when using large backdrops or in outdoor environments.
- Do not overload the crossbar with excessive weight.
- Keep children and pets away from the stand during setup and use.
- Avoid setting up the stand in high wind conditions without adequate weighting.
4. Setup Instructions
Follow these steps to assemble your backdrop stand:
- Open the Tripod: Extend the legs of each tripod stand outwards until they are fully spread and stable.
- Tighten the Knob: Secure the tripod legs in place by tightening the adjustment knob located on the tripod's central column.
- Connect the Crossbar: The crossbar consists of four detachable sections. Connect the desired number of sections by inserting one end into the other and securing with the spring buttons. For maximum width, use all four sections.
- Attach Crossbar to Tripods: Place each end of the assembled crossbar onto the top pin of each tripod stand. Secure the crossbar by tightening the wing nut on the tripod's top pin.
- Adjust Height: Loosen the locking knobs on the tripod's central column to extend the height to your desired level. Retighten the knobs firmly to secure the height.
- Add Stability: Fill the provided sandbags with sand, gravel, or other heavy material. Attach one sandbag to the base of each tripod stand for enhanced stability.

Image 4.1: Step-by-step assembly guide for the backdrop stand.
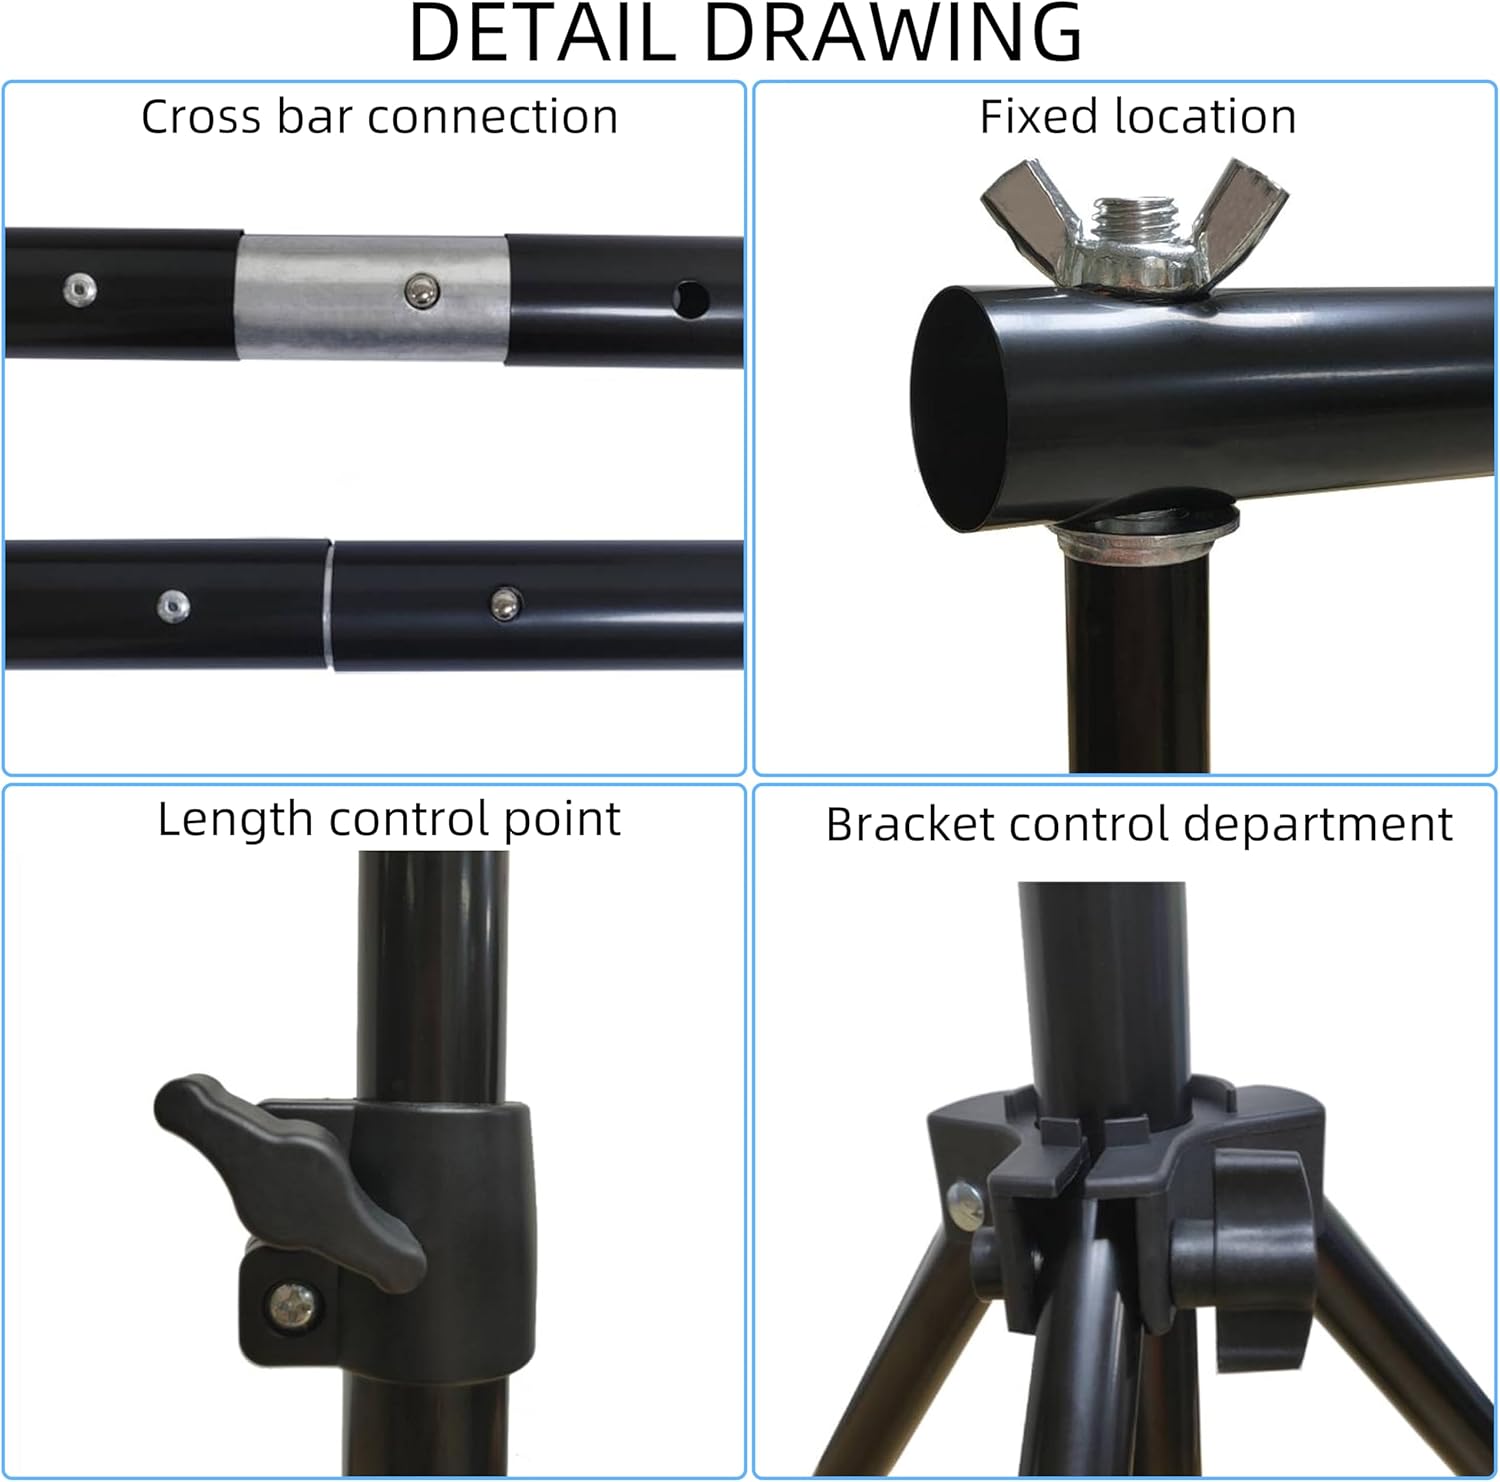
Image 4.2: Detail of crossbar connection.
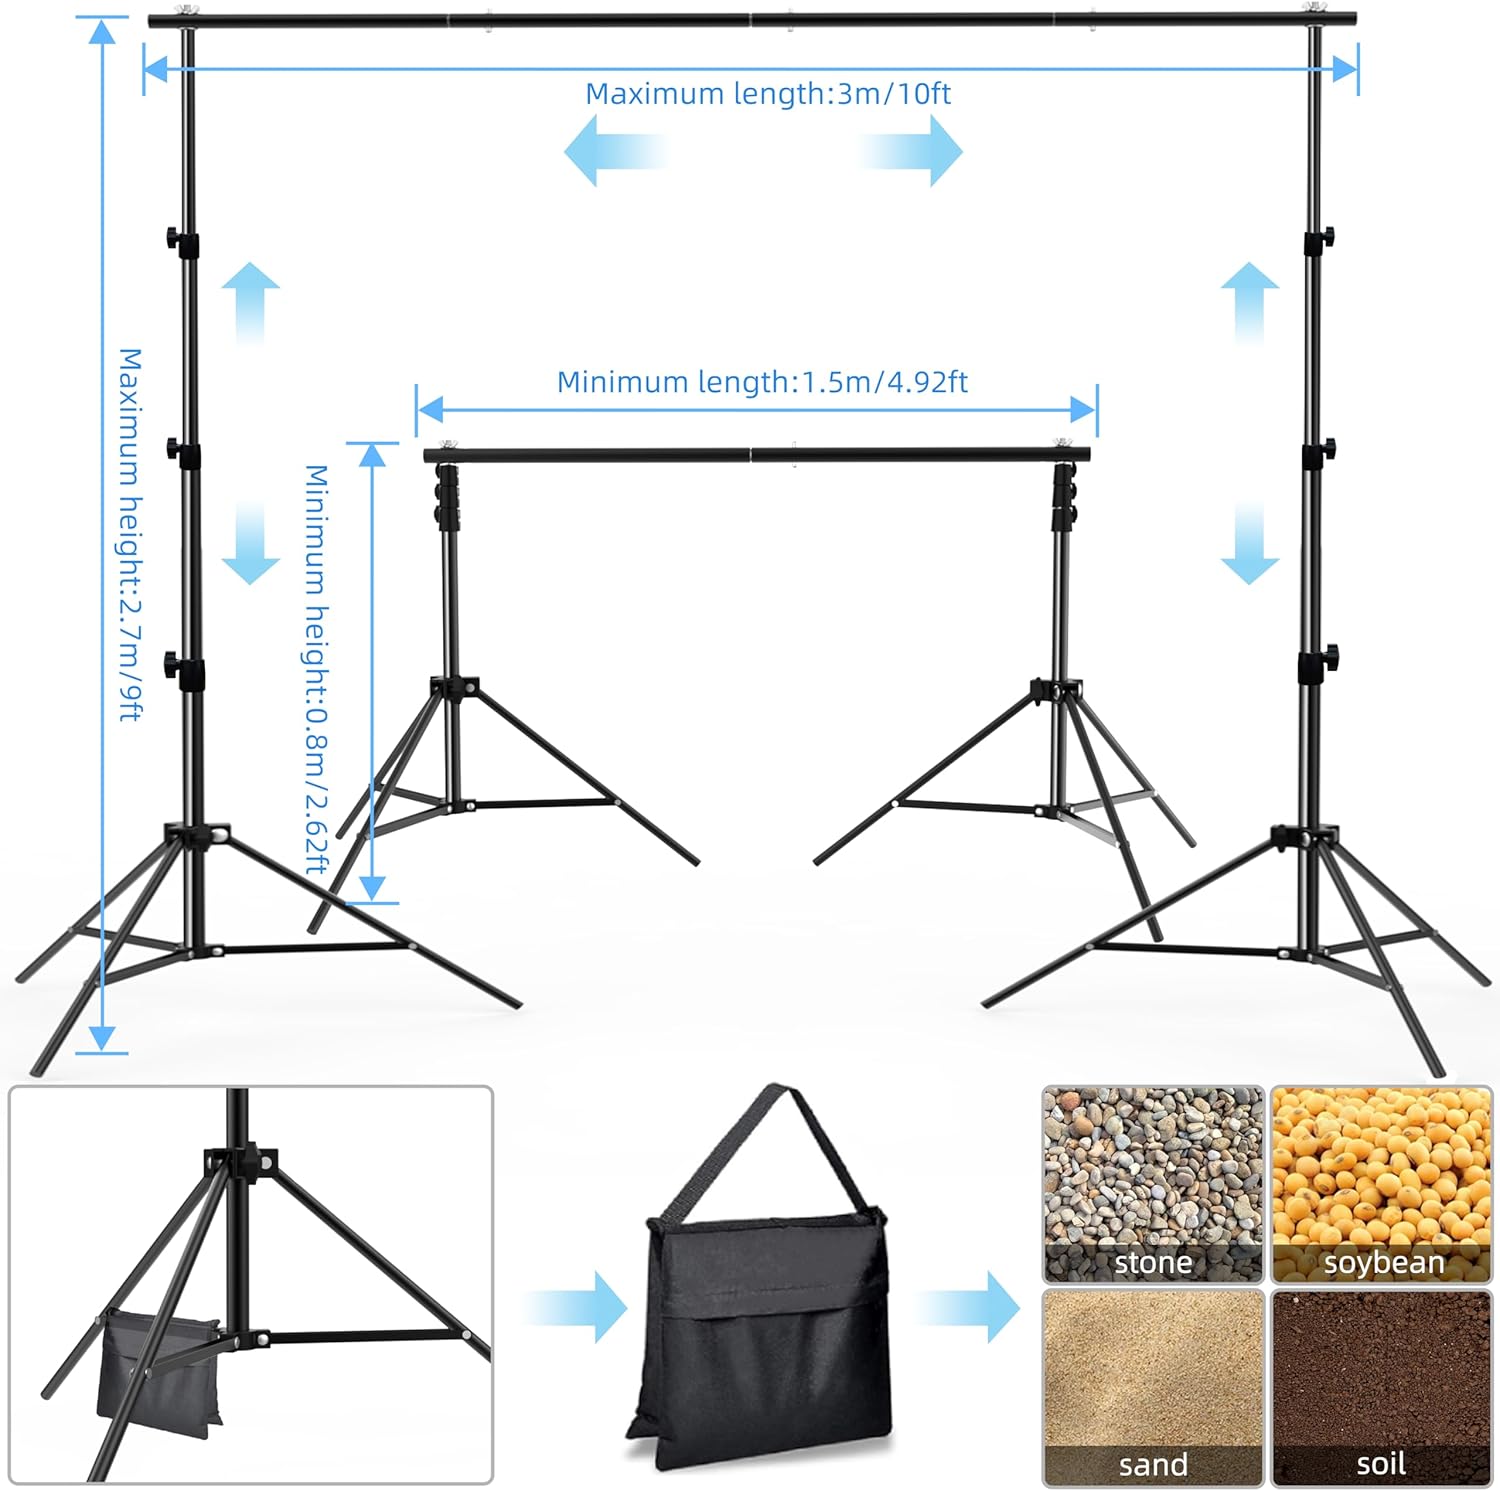
Image 4.3: Detail of crossbar attachment to tripod.
5. Operating Instructions
5.1 Adjusting Height and Width
- Height Adjustment: The tripod stands are adjustable from 2.6 feet (0.8m) to 9 feet (2.7m). Loosen the locking knobs on the central column, extend the pole to the desired height, and then firmly tighten the knobs.
- Width Adjustment: The crossbar can be assembled with 2, 3, or 4 sections to achieve different widths, from a minimum of 4.92 feet (1.5m) up to a maximum of 10 feet (3m). Select the appropriate number of crossbar sections based on your backdrop size.

Image 5.1: Adjustable dimensions of the backdrop stand.
5.2 Attaching a Backdrop
To securely attach your backdrop:
- Drape your backdrop over the assembled crossbar.
- Use the provided backdrop clamps to secure the top edge of the backdrop to the crossbar at regular intervals, ensuring it hangs evenly.
- Utilize the spring clips to further secure the sides of the backdrop to the vertical tripod poles, helping to keep the backdrop wrinkle-free and taut.

Image 5.2: Securing the backdrop with clamps and clips.
6. Maintenance
- Cleaning: Wipe down the aluminum alloy poles with a soft, damp cloth. Avoid abrasive cleaners or solvents that could damage the finish.
- Storage: Disassemble the stand after each use and store all components in the provided carry bag. Store in a dry, cool place away from direct sunlight and moisture.
- Inspection: Periodically check all locking mechanisms, screws, and connections for wear or damage. Replace any damaged parts immediately to ensure safe operation.
7. Troubleshooting
- Stand is unstable: Ensure tripod legs are fully extended and locking knobs are tightened. Fill and attach sandbags to the tripod bases. Avoid uneven surfaces.
- Crossbar sags in the middle: Ensure all crossbar sections are fully connected and secured. If using a very heavy backdrop, consider distributing the weight more evenly or using additional support if available.
- Backdrop is wrinkled: Ensure the backdrop is stretched taut and secured with both backdrop clamps and spring clips at appropriate intervals. Iron or steam the backdrop separately if necessary.
- Difficulty adjusting height: Loosen the locking knobs completely before attempting to adjust the height. Ensure no debris is obstructing the telescopic poles.
8. Specifications
| Feature | Specification |
|---|---|
| Model Number | NN-SJJ-BLM26 |
| Material | Aluminum Alloy |
| Maximum Height | 9 feet (2.7 meters) |
| Minimum Height | 2.6 feet (0.8 meters) |
| Maximum Width | 10 feet (3 meters) |
| Minimum Width | 4.92 feet (1.5 meters) |
| Product Dimensions (assembled) | 120"L x 63"W (approximate, varies with adjustment) |
| Item Weight | 6.6 pounds (3 kg) |
9. Warranty and Support
For warranty information or technical support, please contact ITOTIN customer service through the retailer where the product was purchased or visit the official ITOTIN website. Please have your model number (NN-SJJ-BLM26) and purchase details ready when contacting support.