1. Introduction
This manual provides detailed instructions for the safe and efficient operation, maintenance, and troubleshooting of your RAF R.136 Espresso Coffee Machine. Please read this manual thoroughly before first use and retain it for future reference. Proper use and care will ensure optimal performance and longevity of your appliance.
2. Safety Instructions
To prevent personal injury or damage to the appliance, always observe basic safety precautions when using electrical appliances. This machine is intended for household use only.
- Electrical Safety: Ensure the voltage rating on the appliance matches your local power supply. Do not immerse the machine, power cord, or plug in water or other liquids. Do not operate the appliance with a damaged cord or plug.
- Hot Surfaces: The machine produces hot water and steam. Surfaces may become hot during operation. Avoid contact with hot parts, especially the steam wand and portafilter, to prevent burns. Use handles and knobs.
- Children and Supervision: This appliance is not intended for use by persons (including children) with reduced physical, sensory or mental capabilities, or lack of experience and knowledge, unless they have been given supervision or instruction concerning use of the appliance by a person responsible for their safety. Children should be supervised to ensure that they do not play with the appliance.
- Placement: Place the machine on a stable, level, heat-resistant surface, away from edges and out of reach of children. Do not place near hot gas or electric burners, or in a heated oven.
- Water Tank: Only fill the water tank with fresh, cold water. Do not exceed the maximum fill level.
- Cleaning: Always unplug the machine and allow it to cool completely before cleaning.
3. Product Components
Familiarize yourself with the parts of your RAF R.136 Espresso Coffee Machine:
- Water Tank: Removable tank for fresh water supply.
- Control Panel: Buttons and indicators for power, espresso brewing, and steam function.
- Portafilter: Handle with a filter basket for ground coffee.
- Steam Wand: For frothing milk and dispensing hot water.
- Drip Tray: Collects excess water and coffee drips.
- Cup Warming Plate: Top surface to pre-warm espresso cups.
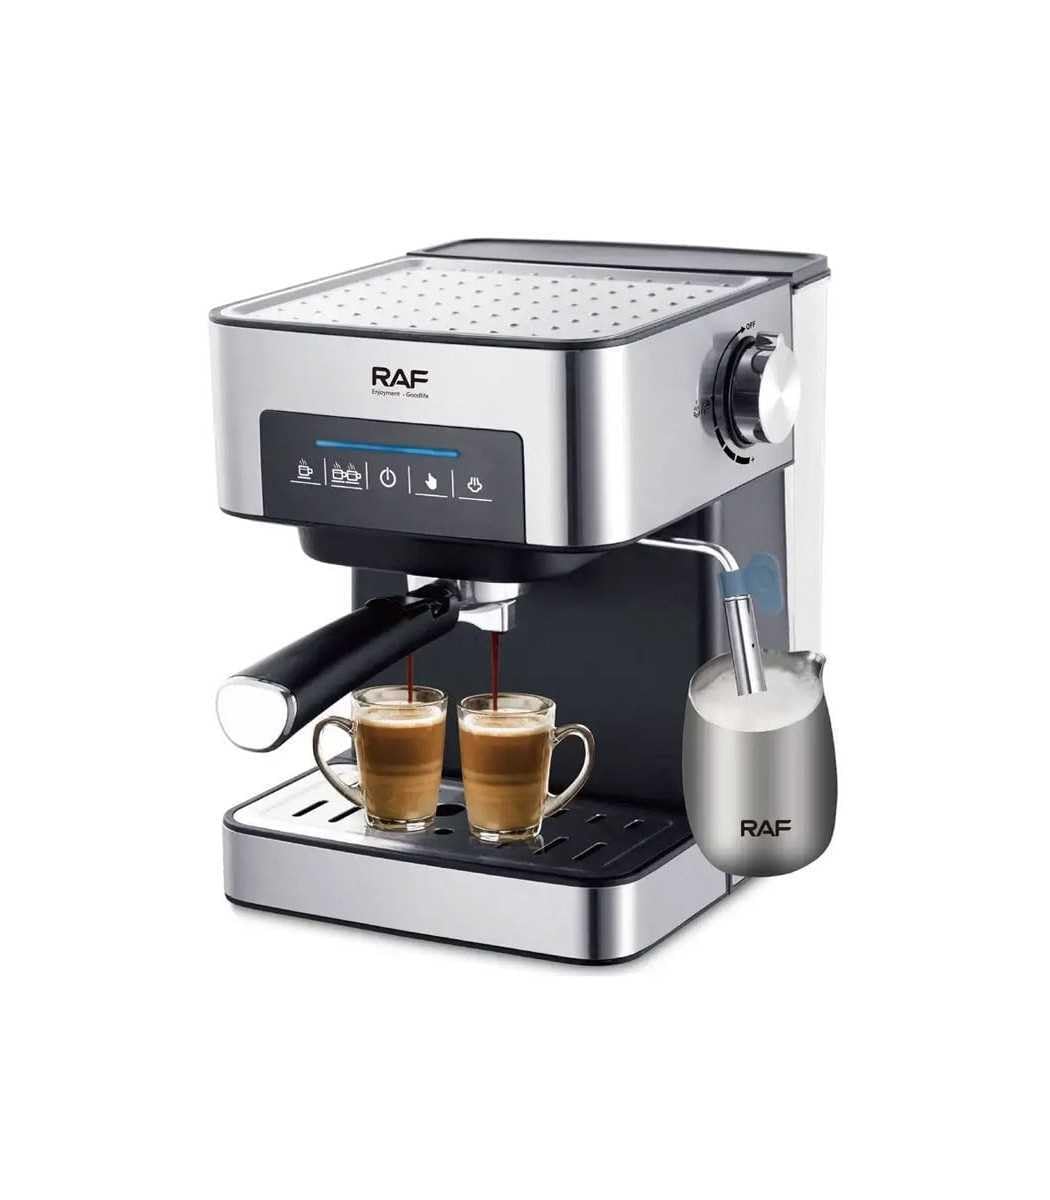
Figure 1: Front view of the RAF R.136 Espresso Coffee Machine, highlighting the control panel, portafilter, and steam wand.
4. Setup
Follow these steps before using your espresso machine for the first time:
- Unpacking: Carefully remove all packaging materials. Check that all components are present and undamaged.
- Initial Cleaning: Wash the water tank, portafilter, and filter basket with warm, soapy water. Rinse thoroughly and dry. Wipe the exterior of the machine with a damp cloth.
- Fill Water Tank: Remove the water tank, fill it with fresh, cold water up to the 'MAX' mark, and place it back securely.
- First Use Cycle (Priming):
- Ensure the portafilter is attached without coffee.
- Place a cup under the portafilter and another under the steam wand.
- Plug in the machine and press the power button. Wait for the indicator lights to show the machine is ready (usually solid green or blue).
- Run a brewing cycle without coffee to flush the system.
- Turn the steam knob to release steam/hot water for a few seconds to prime the steam wand. Close the knob.
- Discard the water. The machine is now ready for use.
5. Operating Instructions
This section guides you through preparing espresso and frothing milk.
5.1 Making Espresso
- Preheat: Ensure the machine is powered on and preheated (indicator light solid). Place your espresso cup on the cup warming plate.
- Prepare Portafilter: Insert the filter basket into the portafilter. Add finely ground espresso coffee to the filter basket. For a single shot, use one level scoop; for a double shot, use two.
- Tamp Coffee: Use the tamper to press the ground coffee firmly and evenly. Wipe any excess coffee from the rim of the portafilter.
- Attach Portafilter: Align the portafilter with the group head and twist it firmly to the right until it is securely locked.
- Brew Espresso: Place one or two preheated cups under the portafilter spouts. Press the espresso brewing button (single or double shot, if available). The machine will dispense espresso. Press the button again to stop brewing if it's not automatic.
- Remove Portafilter: Once brewing is complete, carefully remove the portafilter by twisting it to the left. Discard the used coffee grounds.
5.2 Frothing Milk (Using Steam Wand)
- Prepare Milk: Fill a stainless steel frothing pitcher with cold milk (dairy or non-dairy) to just below the spout.
- Activate Steam: Press the steam button on the control panel. Wait for the steam indicator light to illuminate, indicating the machine has reached steaming temperature.
- Purge Steam Wand: Briefly open the steam knob to release any condensed water from the wand into the drip tray. Close the knob.
- Froth Milk: Immerse the tip of the steam wand just below the surface of the milk. Open the steam knob slowly. Move the pitcher up and down to create foam. Once desired foam and temperature are reached, close the steam knob.
- Clean Steam Wand: Immediately wipe the steam wand with a damp cloth to remove any milk residue. Briefly open the steam knob again to clear any milk from inside the wand.

Figure 2: The RAF R.136 Espresso Coffee Machine in operation, brewing espresso into two cups.
6. Cleaning and Maintenance
Regular cleaning ensures optimal performance and extends the life of your machine.
6.1 Daily Cleaning
- Drip Tray: Empty and clean the drip tray and grid daily. Wash with warm, soapy water and rinse thoroughly.
- Portafilter and Filter Basket: After each use, remove the portafilter, discard coffee grounds, and rinse the portafilter and filter basket under running water.
- Steam Wand: As mentioned in operation, wipe and purge the steam wand immediately after each use.
- Exterior: Wipe the exterior of the machine with a soft, damp cloth. Do not use abrasive cleaners or scouring pads.
6.2 Descaling
Mineral deposits from water can build up over time, affecting machine performance. Descale your machine every 2-3 months, or more frequently if you have hard water.
- Prepare Descaling Solution: Mix a descaling solution (e.g., citric acid or commercial descaler) with water according to the product instructions. Fill the water tank with this solution.
- Run Solution: Place a large container under the portafilter and steam wand. Run several brewing cycles without coffee until half of the solution is dispensed.
- Steam Wand Descale: Open the steam knob and let the remaining solution run through the steam wand until the tank is empty.
- Rinse: Fill the water tank with fresh, clean water. Repeat the brewing and steaming cycles to thoroughly rinse the machine.
7. Troubleshooting
Refer to this section for common issues and their solutions.
| Problem | Possible Cause | Solution |
|---|---|---|
| Machine does not turn on | Not plugged in; Power outlet fault; Power button not pressed | Check power cord connection; Try a different outlet; Press the power button firmly. |
| No coffee dispenses | Water tank empty; Machine not primed; Coffee too finely ground/tamped too hard; Clogged filter basket | Fill water tank; Perform first use priming cycle; Use coarser grind or less pressure; Clean filter basket. |
| Weak or watery coffee | Insufficient coffee grounds; Coffee too coarsely ground; Not enough tamping pressure | Increase coffee amount; Use finer grind; Tamp more firmly. |
| No steam from wand | Steam function not activated; Steam wand clogged; Machine not heated to steam temperature | Press steam button; Clean steam wand; Wait for steam indicator light. |
| Water leaks from machine | Water tank not seated correctly; Drip tray full; Portafilter not attached securely | Ensure water tank is firmly in place; Empty drip tray; Re-attach portafilter securely. |
8. Specifications
Technical details for the RAF R.136 Espresso Coffee Machine:
| Feature | Detail |
|---|---|
| Model Number | R.136 |
| Brand | RAF |
| Power | 850 Watts |
| Voltage | 220 Volts |
| Frequency | 50 Hz |
| Water Tank Capacity | 1.5 Liters |
| Color | Silver |
| Material | Stainless Steel |
| Dimensions (D x W x H) | 40 x 40 x 30 cm |
| Item Weight | 2 Kilograms |
| Special Features | Automatic Shut-off |
9. Warranty and Support
For warranty information, terms, and conditions, please refer to the warranty card included with your product packaging or contact the manufacturer directly. For technical support or service inquiries, please consult the contact details provided in your product documentation or visit the official RAF website.


