Introduction
Thank you for choosing the FrigeluX CCO400BE 395L Chest Freezer. This manual provides essential information for the safe and efficient use of your appliance. Please read these instructions carefully before installation and operation, and keep them for future reference. Proper installation, use, and maintenance will ensure optimal performance and extend the lifespan of your freezer.
Safety Information
Your safety and the safety of others are paramount. Please observe all safety warnings and precautions outlined in this manual.
- Electrical Safety: Ensure the power supply matches the voltage specified on the appliance's rating label. Do not use extension cords or multiple socket adapters. The appliance must be properly grounded.
- Placement: Install the freezer on a firm, level surface in a dry, well-ventilated area, away from direct sunlight and heat sources (e.g., stoves, radiators). Allow adequate space around the appliance for proper air circulation.
- Children: This appliance is not intended for use by persons (including children) with reduced physical, sensory, or mental capabilities, or lack of experience and knowledge, unless they have been given supervision or instruction concerning use of the appliance by a person responsible for their safety. Children should be supervised to ensure they do not play with the appliance.
- Maintenance: Always unplug the freezer before cleaning or performing any maintenance. Do not attempt to repair the appliance yourself. Contact qualified service personnel for repairs.
- Flammable Materials: Do not store explosive substances such as aerosol cans with a flammable propellant in this appliance.
Product Overview
The FrigeluX CCO400BE is a freestanding chest freezer designed for efficient food storage. Below are key visual components of the appliance.

Image: FrigeluX CCO400BE Chest Freezer with its top lid open, revealing the spacious interior and a removable storage basket. The exterior is white.
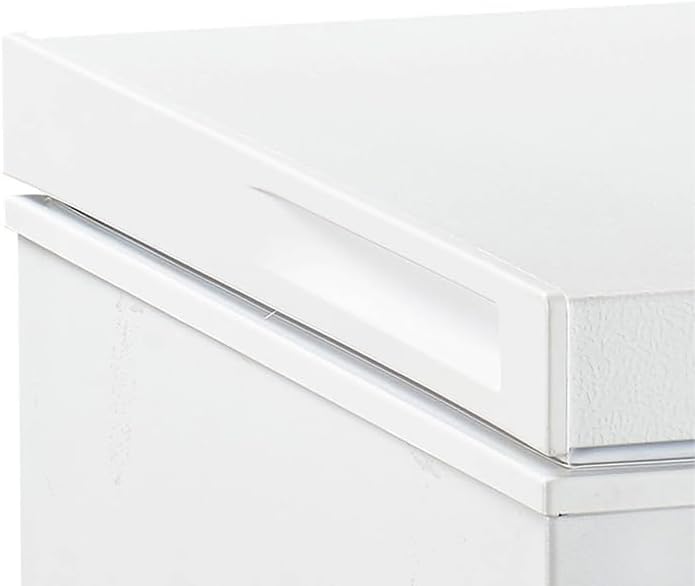
Image: The FrigeluX CCO400BE Chest Freezer in a closed position, displaying its white exterior and the location of the external control panel on the lower right.

Image: A detailed view of the freezer's control panel, featuring a rotary temperature dial with settings from 0 to 7, and a green "RUNNING" indicator light above it.

Image: A close-up shot showing the robust hinge mechanism of the freezer lid and the textured, white interior lining of the lid.
Setup
1. Unpacking
- Remove all packaging materials, including foam and adhesive tape.
- Inspect the freezer for any damage during transit. If damage is found, do not plug in the appliance and contact your retailer.
- Keep packaging materials out of reach of children.
2. Placement
- Place the freezer on a flat, stable surface that can support its weight when fully loaded.
- Ensure there is adequate ventilation around the appliance. Leave at least 10 cm (4 inches) of space at the back and sides, and 30 cm (12 inches) above the lid for proper air circulation and heat dissipation.
- Avoid placing the freezer in direct sunlight or near heat-emitting appliances like ovens, radiators, or stoves.
- The freezer is designed for indoor use. Do not install it in excessively humid or cold environments.
3. Initial Cleaning
- Before first use, clean the interior and exterior of the freezer with a soft cloth and a mild detergent solution. Rinse with clean water and dry thoroughly.
- Do not use abrasive cleaners or solvents.
4. Power Connection
- After placement and cleaning, wait at least 2-4 hours before plugging in the appliance. This allows the refrigerant to settle.
- Plug the freezer into a dedicated, grounded electrical outlet.
Operating Instructions
1. Initial Start-up and Temperature Setting
- After plugging in, the compressor will start. The "RUNNING" indicator light on the control panel will illuminate.
- Turn the temperature control dial (refer to Product Overview image) to your desired setting. Settings typically range from 1 (least cold) to 7 (coldest). A setting of 4 or 5 is usually suitable for general freezing.
- Allow the freezer to operate empty for at least 4-6 hours (or 24 hours for optimal results) to reach the set temperature before loading food.
2. Loading Food
- Do not overload the freezer. Leave some space for air circulation around the items.
- For best results, freeze small quantities of fresh food at a time.
- Ensure all food items are properly packaged in airtight containers or freezer bags to prevent freezer burn and odor transfer.
3. Energy Saving Tips
- Avoid opening the lid too frequently or for extended periods.
- Ensure the lid seal is clean and intact to prevent cold air leakage.
- Defrost the freezer regularly when ice buildup reaches 5-10 mm (0.2-0.4 inches).
- Place the freezer in the coolest part of the room, away from direct sunlight and heat sources.
Maintenance
1. Cleaning the Interior and Exterior
- Always unplug the freezer before cleaning.
- Clean the interior with a solution of mild detergent and warm water. Wipe dry with a soft cloth.
- Clean the exterior with a soft cloth dampened with water and a mild detergent.
- Regularly clean the condenser coils at the back of the freezer (if accessible) with a soft brush or vacuum cleaner to maintain efficiency.
2. Defrosting
The FrigeluX CCO400BE features an easy defrosting design. Defrost the freezer when the ice layer on the walls reaches approximately 5-10 mm (0.2-0.4 inches) thick.
- Unplug the freezer from the power outlet.
- Remove all food items and store them in another freezer or cooler to keep them frozen.
- Open the lid and place towels on the floor around the freezer to catch melting ice.
- Locate the drain plug (if present) at the bottom of the freezer and remove it to allow water to drain.
- Allow the ice to melt naturally. Do not use sharp objects or heating devices to speed up the defrosting process, as this can damage the freezer.
- Once all ice has melted, clean and dry the interior thoroughly.
- Replace the drain plug, plug the freezer back in, and allow it to cool down for a few hours before returning food.
3. Power Outage
- In case of a power outage, keep the freezer lid closed to maintain the internal temperature for as long as possible.
- A full freezer will stay cold longer than a partially filled one.
- Do not refreeze thawed food unless it still contains ice crystals or has been kept at a safe temperature.
Troubleshooting
Before contacting service, please check the following common issues and solutions:
| Problem | Possible Cause | Solution |
|---|---|---|
| Freezer does not operate. | No power supply; power cord loose; circuit breaker tripped. | Check power connection; ensure outlet is functional; reset circuit breaker. |
| Freezer is not cold enough. | Temperature setting too high; lid not closed properly; excessive lid openings; warm food loaded recently; poor ventilation. | Adjust temperature to a colder setting; ensure lid is sealed; minimize lid openings; allow time for new food to freeze; ensure adequate clearance around the freezer. |
| Excessive ice buildup. | Lid not sealed properly; frequent lid openings; high humidity environment. | Check lid seal for damage or obstructions; reduce frequency of lid openings; defrost the freezer. |
| Unusual noises. | Appliance not level; objects vibrating against the freezer; normal operating sounds. | Ensure the freezer is level; move objects away from the freezer; gurgling or humming sounds are normal for refrigerant circulation. |
Specifications
| Feature | Detail |
|---|---|
| Brand | FrigeluX |
| Model Name | CCO400BE |
| Capacity | 395 Liters |
| Product Dimensions (L x W x H) | 71 x 136 x 85 cm |
| Product Dimensions (D x W x H) | 84.5P x 135.5l x 84.5H centimeters |
| Installation Type | Freestanding |
| Door Type | Top-opening |
| Door Material Type | Stainless steel |
| Energy Efficiency Class | E |
| ASIN | B0CZF4WT77 |
| International Article Code | 03541362304353 |
Warranty Information
Specific warranty details for the FrigeluX CCO400BE Chest Freezer are typically provided with your purchase documentation or can be obtained from your retailer. Please retain your proof of purchase for any warranty claims. Information regarding spare parts availability is not provided in the product data.
Support
For technical assistance, service, or questions not covered in this manual, please contact your retailer or the FrigeluX customer support. Refer to your purchase documents for contact information.