
1. Introduction
Thank you for choosing the VOLPAM Bike Phone Mount Holder. This manual provides essential information for the safe and effective installation, operation, and maintenance of your new phone mount. Please read these instructions thoroughly before use and retain them for future reference.
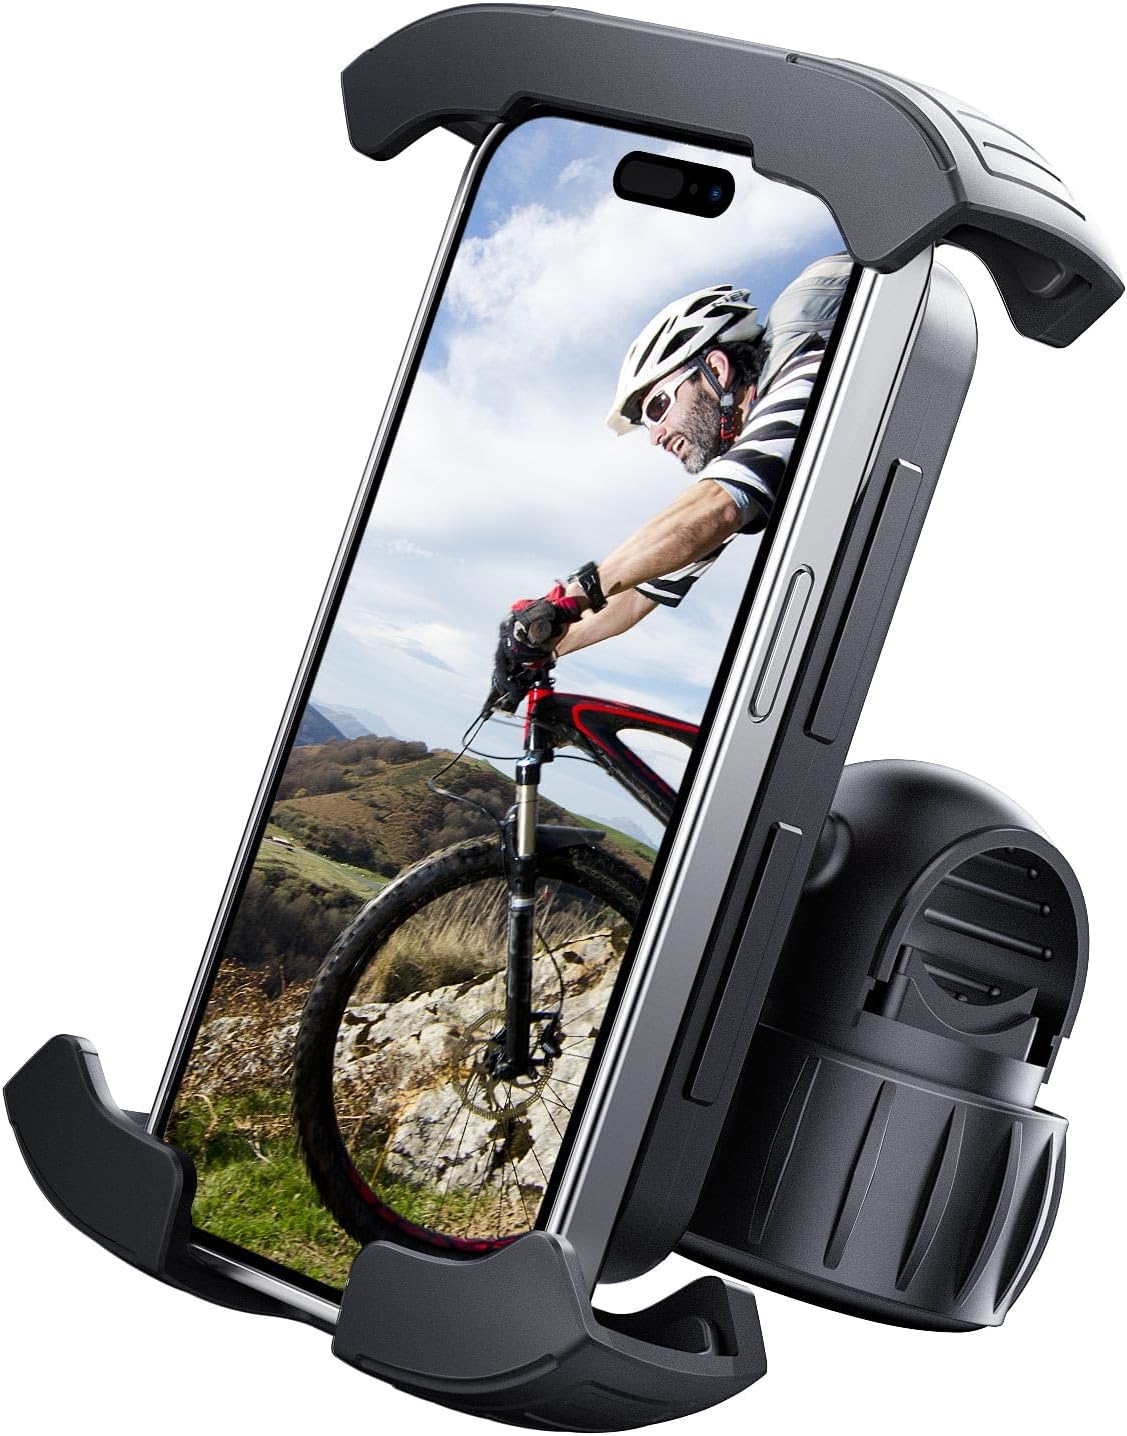
Figure 1: The VOLPAM Bike Phone Mount Holder securely holding a smartphone on a bicycle.
2. Product Overview
2.1 Key Features
- Secure Grip: Designed to hold smartphones firmly during various activities.
- Wide Compatibility: Fits most smartphones from 4.7 to 6.8 inches, including those with thick cases.
- Universal Handlebar Fit: Compatible with handlebars ranging from 0.6 to 1.18 inches in diameter.
- 360° Rotation: Allows for optimal viewing angles in both portrait and landscape orientations.
- One-Hand Operation: Easy insertion and removal of the phone.
- Quick Installation: Simple and fast mounting process.
- Durable Construction: Features anti-slip silicone pads and wide cushioning for phone protection.
2.2 Components
The VOLPAM Bike Phone Mount Holder typically includes the following components:
- Phone Holder Cradle
- Handlebar Clamp with Adjustment Knob
- Ball Joint (connecting cradle and clamp)
- Security Lock Switch

Figure 2: Detailed view of the phone mount's features, including the lock switch and protective silicone pads.
3. Setup and Installation
Follow these steps to properly install your VOLPAM Bike Phone Mount Holder:
- Choose Mounting Location: Select a suitable spot on your handlebar that does not obstruct your view or interfere with vehicle controls. Ensure the handlebar diameter is between 0.6 and 1.18 inches.
- Attach Clamp: Unscrew the large adjustment knob on the handlebar clamp until it opens sufficiently. Place the clamp around the chosen section of your handlebar.
- Secure Clamp: Tighten the adjustment knob firmly until the clamp is securely fastened to the handlebar. Ensure there is no movement or rotation of the clamp. For thinner handlebars, additional rubber shims (not included) may be required for a tighter fit.
- Adjust Angle: The phone holder cradle is connected to the clamp via a ball joint. Loosen the nut on the ball joint, adjust the cradle to your desired viewing angle, and then tighten the nut to lock it in place.
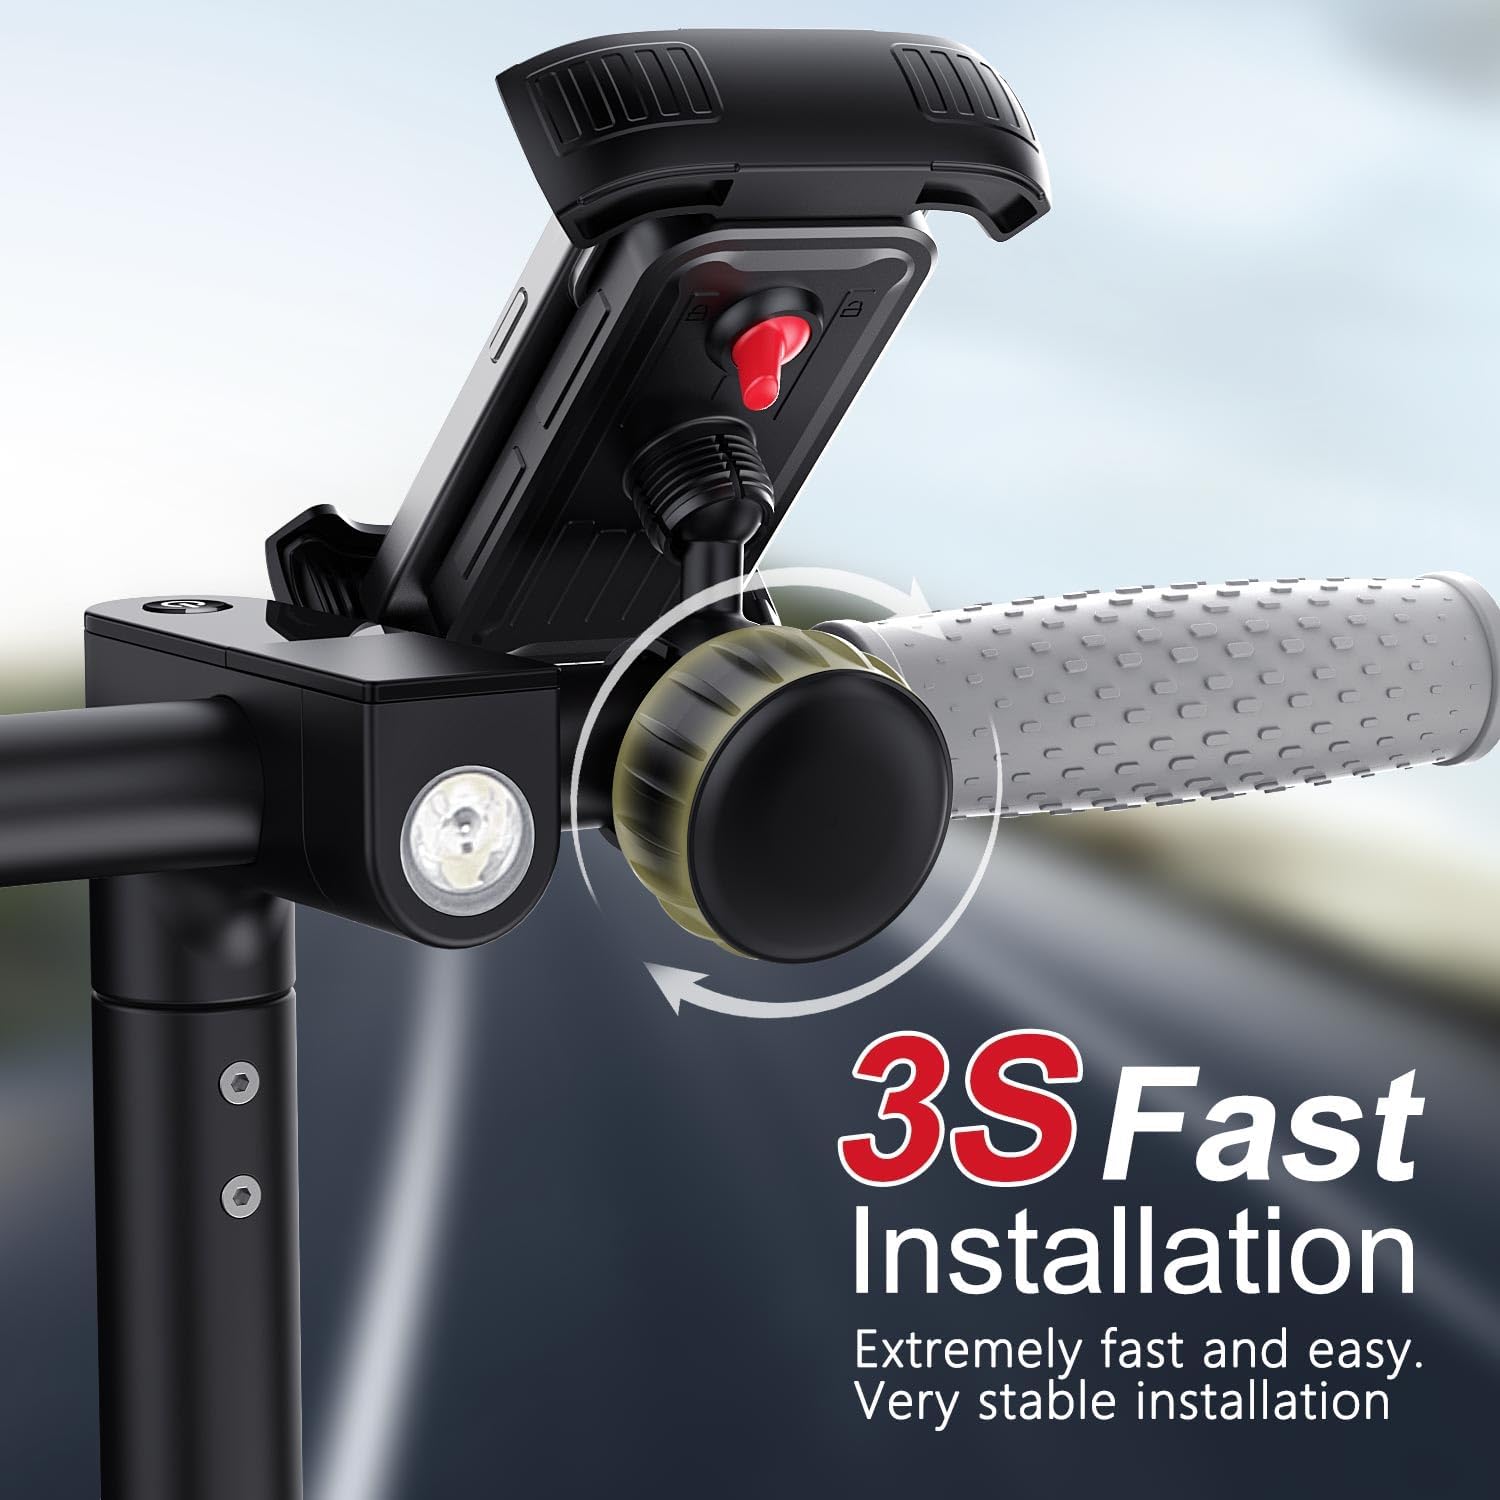
Figure 3: Visual guide for quick installation of the handlebar clamp.

Figure 4: The mount is compatible with handlebars between 0.6 and 1.18 inches in diameter, suitable for various vehicles.
4. Operating Instructions
4.1 Inserting Your Phone
To insert your smartphone into the holder:
- Ensure the security lock switch (red lever on the back) is in the unlocked position (open padlock icon).
- Press the bottom of your phone against the lower arm of the holder. This action will cause the side arms to expand automatically.
- Gently push your phone fully into the cradle until it is securely seated and the side arms grip it firmly.

Figure 5: Demonstrating the one-hand operation for inserting a phone.
4.2 Securing Your Phone
Once your phone is in place, slide the red security lock switch on the back of the holder to the locked position (closed padlock icon). This prevents accidental release of the phone, especially during bumpy rides.
4.3 Removing Your Phone
To remove your smartphone:
- Slide the security lock switch to the unlocked position.
- Gently pull your phone upwards to release it from the cradle.
4.4 Adjusting Viewing Angle
The mount features a 360° rotatable universal joint and a 60° vertical angle adjustment. To adjust the angle:
- Loosen the nut on the ball joint located behind the phone cradle.
- Rotate the phone cradle to achieve your desired horizontal (portrait or landscape) or vertical angle.
- Tighten the nut firmly to secure the chosen angle.

Figure 6: The universal joint allows for 360-degree rotation for optimal viewing.
5. Maintenance
To ensure the longevity and optimal performance of your phone mount:
- Cleaning: Wipe the mount with a soft, damp cloth to remove dust and dirt. Avoid using harsh chemicals or abrasive cleaners.
- Inspection: Periodically check all screws and the adjustment knob to ensure they are tight. Inspect the silicone pads for any signs of wear or damage.
- Storage: When not in use for extended periods, store the mount in a cool, dry place away from direct sunlight.
6. Troubleshooting
| Problem | Possible Cause | Solution |
|---|---|---|
| Mount slides or rotates on handlebar | Clamp not tightened sufficiently; handlebar too thin or irregular shape. | Ensure the adjustment knob is tightened firmly. If the handlebar is too thin, use a rubber shim (not included) to create a tighter fit. |
| Phone feels loose in the cradle | Security lock switch is unlocked; phone not fully seated. | Ensure the security lock switch is in the locked position. Push the phone firmly into the cradle until the side arms grip it securely. |
| Cannot insert phone | Security lock switch is locked; phone too large. | Ensure the security lock switch is in the unlocked position. Verify your phone size is within the 4.7-6.8 inch compatibility range. |
| Viewing angle shifts during ride | Ball joint nut not tightened enough. | Loosen the ball joint nut, readjust the angle, and then tighten the nut very firmly. |
7. Specifications
- Model Number: YYS607
- Compatible Phone Size: 4.7 - 6.8 inches
- Compatible Handlebar Diameter: 0.6 - 1.18 inches
- Item Weight: 7.4 ounces
- Package Dimensions: 8.07 x 3.94 x 2.2 inches
- Special Features: Adjustable, 360° Rotatable, One-Hand Operation, Security Lock
- Manufacturer: VOLPAM

Figure 7: The mount accommodates a wide range of smartphone sizes.
8. Warranty and Support
For warranty information or technical support, please refer to the product packaging or contact VOLPAM customer service directly through their official channels. Keep your purchase receipt for any warranty claims.