1. Important Safety Information
Please read and understand all safety information before using this product. Failure to follow these instructions may result in electric shock, explosion, fire, or serious injury.
- DO NOT jump start a frozen battery.
- DO NOT use the jump starter if the battery clamps or cables are damaged.
- DO NOT connect the positive (+) and negative (-) clamps together.
- DO NOT immerse the product in water or expose it to rain.
- Keep out of reach of children.
- Operate in a well-ventilated area.
- Wear eye protection and gloves when working with batteries.
- If battery acid comes into contact with skin or eyes, flush immediately with clean water and seek medical attention.
2. Product Overview
2.1 Package Contents
- Giatero 4000A Peak Current Jump Starter
- Smart Jumper Cables
- USB-C Charging Cable
- User Manual
- Storage Case

Figure 2.1: All items included in the Giatero Jump Starter package: the jump starter unit, smart jumper cables, a USB-C charging cable, a carrying case, and the user manual.
2.2 Product Features
- High-Performance Jump Starter: 4000A peak current for 12V vehicles (up to 10.0L gasoline, 8.0L diesel engines).
- Advanced Safety System: Protection against over-charge, over-current, short-circuit, reverse-polarity, low-temp, high-temp, over-voltage, over-load, spark-proof, and reverse-charge.
- Versatile LED Light: 400-lumen LED with Flashlight, Strobe Light, and SOS Light modes.
- Portable Power Bank: Two USB outputs (USB 5V 3A, USB 5V 2.1A) and a 15W Type-C input for charging devices.
- Compact and Lightweight Design: Easy to store and transport.

Figure 2.2: The Giatero 4000A Peak Current Jump Starter unit, shown with its smart jumper cables. The device features a robust black and red casing, power indicator lights, and various ports.

Figure 2.3: An illustration showing the Giatero Car Jump Starter's capability to start various vehicles, from motorcycles to trucks, indicating engine displacement limits (up to 10.0L gas and 8.0L diesel) and the 4000A peak current.

Figure 2.4: An infographic detailing the ten safety protections of the Giatero Jump Starter: Reverse Connection, Reverse Polarity, Reverse Charge, Over Charge, Short Circuit, Low Temperature, Over Discharge, Low Voltage, Over Current, and Over Temperature Protection.
2.3 Component Identification

Figure 2.5: A detailed diagram pointing out the key components and ports of the Giatero Jump Starter, including the power button, LED light, power indicator lights, USB outputs (USB1: 5V/3A, 9V/2A, 12V/1.5A; USB2: 5V/2A), and Type-C input.
- Power Button: Turns the unit on/off and cycles LED light modes.
- LED Light: Provides illumination, strobe, and SOS signals.
- Power Indicator Lights: Shows remaining battery charge.
- USB Outputs: For charging mobile devices.
- Type-C Input: For recharging the jump starter unit.
- Jump Start Port: For connecting the smart jumper cables.
3. Setup and Charging
3.1 Initial Charge
Before first use, fully charge the Giatero Jump Starter. Connect the USB-C charging cable to the Type-C input port on the jump starter and to a USB power adapter (not included). The power indicator lights will illuminate to show charging status and turn solid when fully charged.
3.2 Checking Battery Level
Press the power button once to check the battery level. The indicator lights will show the current charge. Ensure the unit is sufficiently charged before attempting to jump start a vehicle.
4. Operating Instructions
4.1 Jump Starting a Vehicle
Follow these steps carefully to jump start your vehicle:
- Prepare the Vehicle: Turn off the vehicle's ignition and all accessories (headlights, radio, air conditioning). Engage the parking brake.
- Connect Jumper Cables to Jump Starter: Insert the smart jumper cable connector firmly into the jump start port on the Giatero unit. Ensure a secure connection.
- Connect Clamps to Battery:
- Connect the RED (+) clamp to the vehicle battery's positive (+) terminal.
- Connect the BLACK (-) clamp to the vehicle battery's negative (-) terminal.
The smart cable indicator light will show the connection status. If there is an error (e.g., reverse polarity), the indicator will alert you. Correct any errors before proceeding.
- Start the Vehicle: Once the smart cable indicator shows a safe connection, start your vehicle's engine.
- Remove Jumper Cables: After the engine starts, immediately remove the BLACK (-) clamp from the vehicle battery, then remove the RED (+) clamp. Finally, disconnect the smart jumper cable from the Giatero unit.

Figure 4.1: A step-by-step visual guide demonstrating the process of jump starting a vehicle using the Giatero Jump Starter. Steps include inserting the cable, connecting clamps, starting the engine, and removing cables.

Figure 4.2: A clear, four-step visual guide on how to properly use the Giatero Jump Starter: 1. Insert the jumper cable into the booster. 2. Connect the red clamp to the positive (+) terminal and the black clamp to the negative (-) terminal of the vehicle battery. 3. Start the car engine. 4. Remove the jumper cable.
4.2 Using as a Portable Power Bank
The Giatero Jump Starter can charge various USB-powered devices.
- Connect your device's USB charging cable to one of the USB output ports on the jump starter.
- The jump starter will automatically begin charging your device.
- Monitor your device's charging status. Disconnect when charging is complete.
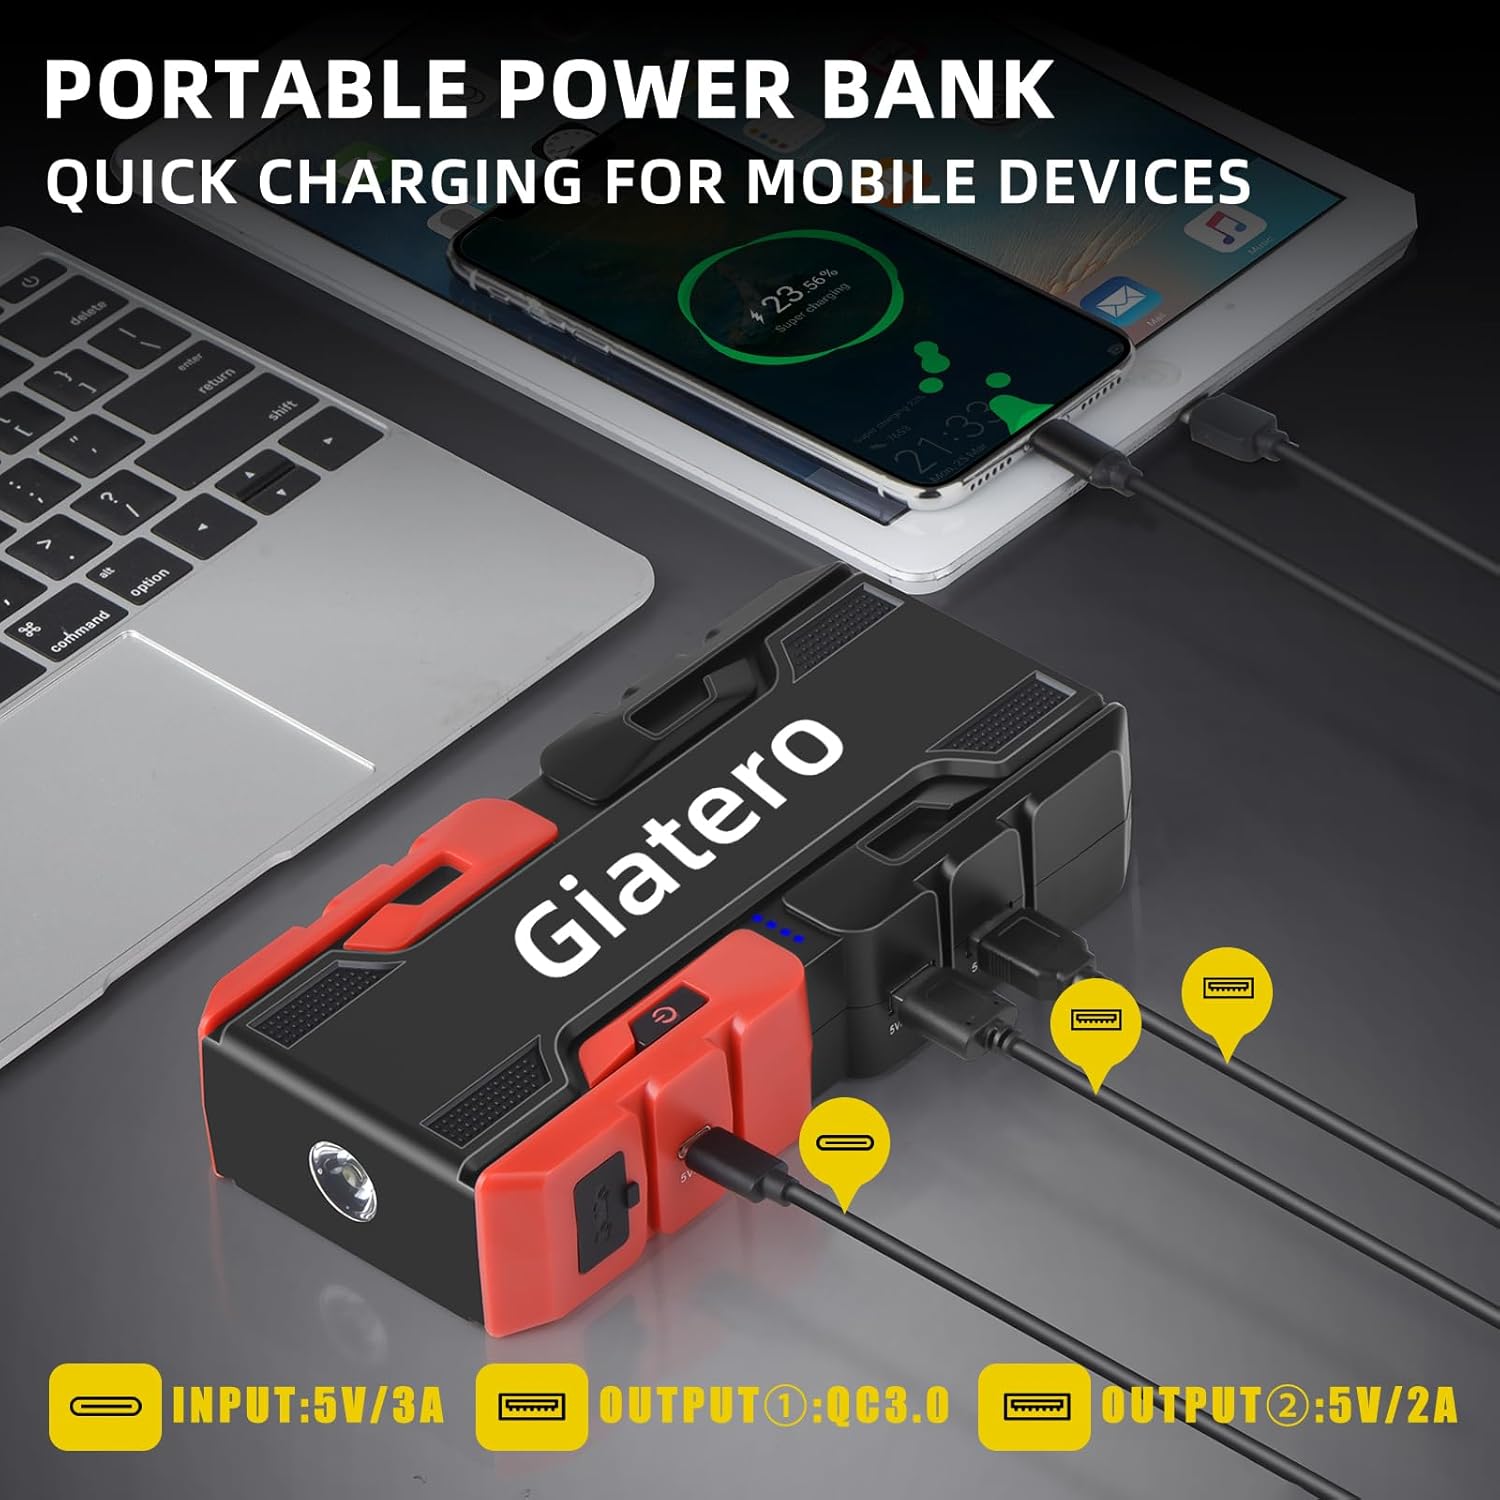
Figure 4.3: The Giatero Jump Starter connected via USB cables to charge a laptop, tablet, and smartphone, demonstrating its portable power bank functionality. Input and output specifications are indicated.
4.3 Using the LED Flashlight
The integrated LED flashlight has three modes:
- Press and hold the power button for 3 seconds to turn on the steady flashlight mode.
- Press the power button again to cycle to Strobe mode.
- Press the power button a third time to cycle to SOS mode.
- Press the power button again to turn off the LED light.

Figure 4.4: The Giatero Jump Starter's integrated LED flashlight in operation, casting light on a car tire. Icons below indicate its three modes: Lighting (steady), SOS, and Strobe.
5. Maintenance
- Cleaning: Wipe the unit with a dry, soft cloth. Do not use harsh chemicals or abrasive materials.
- Storage: Store the jump starter in a cool, dry place away from direct sunlight and extreme temperatures.
- Recharging: For optimal battery life, recharge the unit every 3-6 months, even if not in use.
- Cable Care: Inspect jumper cables and clamps for damage before each use. Replace if any damage is found.
6. Troubleshooting
| Problem | Possible Cause | Solution |
|---|---|---|
| Vehicle does not start. | Jump starter battery is low. | Recharge the jump starter. |
| Poor connection of clamps. | Ensure clamps are securely connected to battery terminals. Clean terminals if corroded. | |
| Vehicle battery is severely damaged. | Consult a professional mechanic. The jump starter may not be able to revive a completely dead or damaged battery. | |
| Smart cable indicator shows error. | Reverse polarity connection. | Disconnect clamps and reconnect correctly (Red to +, Black to -). |
| Short circuit detected. | Ensure clamps are not touching each other or other metal parts of the vehicle. | |
| Jump starter not charging. | Charging cable or adapter issue. | Try a different USB-C cable or power adapter. Ensure connections are secure. |
7. Specifications
| Feature | Specification |
|---|---|
| Model | COCY-001 |
| Peak Current | 4000A |
| Battery Type | Lithium Polymer |
| Vehicle Compatibility | 12V vehicles, up to 10.0L Gasoline / 8.0L Diesel engines |
| USB Output 1 | 5V/3A, 9V/2A, 12V/1.5A |
| USB Output 2 | 5V/2.1A |
| Type-C Input | 15W |
| LED Light Output | 400 Lumens |
| Operating Temperature | -25°C to 65°C (-13°F to 149°F) |
| Dimensions | 2"D x 2"W x 4"H (approximate) |
| Weight | 2 Pounds (approximate) |

Figure 7.1: An image illustrating the Giatero Jump Starter's robust performance in extreme temperatures, showing it functional in both a snowy, cold environment (-25°C) and a hot, desert-like setting (65°C).
8. Warranty and Support
Giatero products are designed and manufactured to high-quality standards. For warranty information or technical support, please refer to the contact details provided with your purchase or visit the official Giatero website. Please have your model number (COCY-001) and purchase details ready when contacting support.


