1. Introduction
Thank you for choosing the Generic Q18 Gimbal Stabilizer. This device is designed to enhance your smartphone photography and videography experience by providing stable footage, versatile shooting modes, and intelligent features. Please read this manual carefully before use to ensure proper operation and to maximize the product's potential.
2. Product Overview and Features
The Q18 Gimbal Stabilizer combines multiple functionalities into one compact device, offering a seamless experience for content creators.
- Extendable Selfie Stick and Tripod: This feature provides versatility in shooting styles. Users can extend the selfie stick for wider shots or use the integrated tripod for stable shots on flat surfaces. This flexibility allows for various shooting scenarios, whether capturing landscapes, group photos, or vlogs.
- 3-Axis Stabilization: The 3-axis stabilization system helps reduce shake and vibrations, resulting in smoother footage. This feature is essential for professional-looking videos, especially when shooting in motion or dynamic environments.
- Face Tracking: Integrated face tracking technology allows the gimbal to automatically follow a person's face, keeping them centered within the frame. This is particularly useful for vlogs, live streaming, or any scenario where the subject moves but needs to remain in focus.
- 360-Degree Rotation: The 360-degree rotation capability enables users to capture shots from various angles, adding dynamism to their content. It empowers creators to explore different perspectives and compose their shots creatively.
- Portable 4-in-1 Tripod Holder: The tripod function adds stability to shots, especially in situations where using the selfie stick alone may not be sufficient. It also enhances convenience by providing multiple functions in one compact device.
- Wide Compatibility: The Q18 Gimbal Stabilizer is compatible with both iPhone and Android smartphones, ensuring broad usability with popular devices.
3. Package Contents
Please check the package for the following items:
- Q18 Gimbal Stabilizer
- USB Charging Cable
- User Manual
Note: Specific contents may vary slightly. If any items are missing or damaged, please contact customer support.
4. Setup Guide
4.1 Charging the Device
Before first use, fully charge the gimbal stabilizer. Connect the provided USB charging cable to the charging port on the device and to a standard USB power adapter (not included).
- The indicator light will show charging status.
- Charging time is approximately [Insert typical charging time, e.g., 2 hours].
4.2 Mounting Your Smartphone
- Gently extend the phone clamp on the gimbal.
- Carefully place your smartphone into the clamp, ensuring it is securely held and balanced.
- Adjust the phone's position to be as centered as possible to optimize stabilization.
4.3 Powering On/Off
- To Power On: Press and hold the power button for 3 seconds until the indicator light illuminates.
- To Power Off: Press and hold the power button for 3 seconds until the indicator light turns off.
4.4 Bluetooth Pairing
- Ensure the gimbal is powered on.
- Activate Bluetooth on your smartphone.
- Search for available devices and select "Q18" (or similar device name) to pair.
- Once paired, the indicator light on the gimbal will typically turn solid blue.
5. Operating Instructions
5.1 Basic Controls
Familiarize yourself with the main buttons and controls on your Q18 gimbal:
- Power Button: Long press to power on/off. Short press for mode switching (if applicable).
- Shutter Button: Press once to take a photo or start/stop video recording after Bluetooth pairing.
- Mode Button: (If present) Short press to cycle through different gimbal modes (e.g., Pan Follow, Lock Mode).
5.2 Using Selfie Stick Mode
To use the Q18 as an extendable selfie stick:
- Ensure your phone is securely mounted.
- Extend the telescopic rod to your desired length.
- Adjust the angle of the phone holder.
- Use the Bluetooth shutter button to capture photos or videos.
5.3 Using Tripod Mode
For stable, hands-free shooting:
- Fold out the tripod legs at the base of the gimbal.
- Place the tripod on a flat, stable surface.
- Adjust the height using the extendable rod and the phone angle as needed.
5.4 Activating Face Tracking
The Q18 features intelligent face tracking for dynamic shots:
- Ensure the gimbal is powered on and your phone is paired via Bluetooth.
- Open the recommended companion app (if available, otherwise some phones may have native tracking).
- Select the face tracking feature within the app.
- Position yourself in front of the camera; the gimbal will automatically rotate to follow your face.

Image: The Q18 Gimbal Stabilizer actively tracking a person and child, keeping them centered in the frame during recording.
5.5 Utilizing 360-Degree Rotation and Inception Mode
The 360-degree rotation allows for creative panoramic shots and dynamic video effects:
- Panoramic Shots: In the companion app, select the panorama mode. The gimbal will rotate automatically to capture a wide-angle image.
- Inception Mode: This mode allows the phone to rotate 360 degrees along its roll axis, creating a spinning effect. Activate this feature through the gimbal's mode button or companion app.
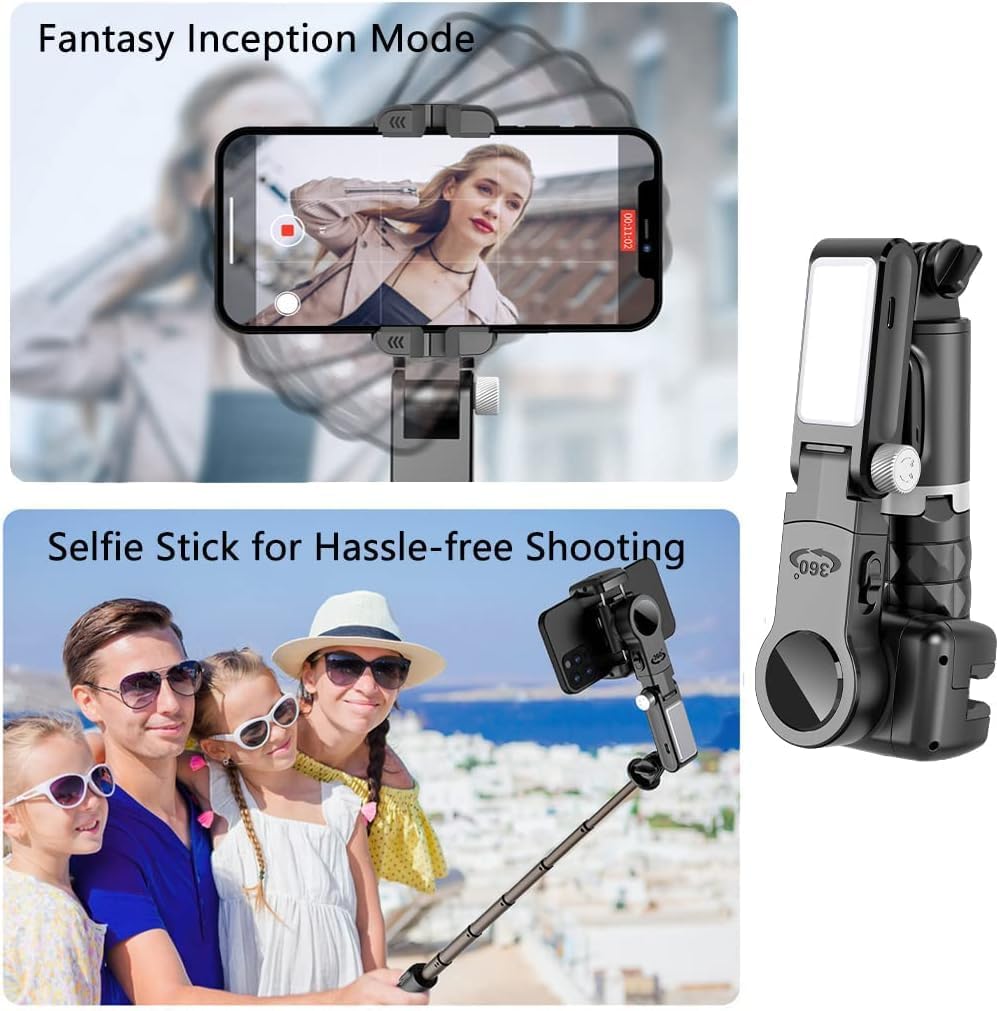
Image: Top shows the 'Fantasy Inception Mode' where the phone rotates for a dynamic video effect. Bottom shows the Q18 in selfie stick mode, used by a family for easy group photos.

Image: Top illustrates the gimbal's capability for panoramic shooting by rotating the phone horizontally. Bottom shows the gimbal in tripod mode, capturing a dynamic action shot, labeled 'Crossing creativity'.
5.6 Switching Between Portrait and Landscape Modes
The Q18 allows for quick switching between shooting orientations:
- Manually rotate the phone clamp to switch between portrait (vertical) and landscape (horizontal) orientations.
- Some models may offer an automatic rotation button; refer to the device's specific controls.
6. Maintenance
To ensure the longevity and optimal performance of your Q18 Gimbal Stabilizer, follow these maintenance guidelines:
- Cleaning: Use a soft, dry cloth to wipe the surface of the gimbal. Do not use liquid cleaners or solvents.
- Storage: Store the gimbal in a cool, dry place away from direct sunlight and extreme temperatures. When not in use for extended periods, ensure it is fully charged before storage and recharge every 3 months to maintain battery health.
- Handling: Avoid dropping or subjecting the gimbal to strong impacts. Do not attempt to disassemble the device, as this will void the warranty.
7. Troubleshooting
If you encounter issues with your Q18 Gimbal Stabilizer, please refer to the following common problems and solutions:
| Problem | Possible Cause | Solution |
|---|---|---|
| Gimbal does not power on. | Low battery. | Charge the gimbal fully. |
| Unable to connect via Bluetooth. | Bluetooth not enabled on phone; gimbal not in pairing mode; interference. | Ensure Bluetooth is on. Restart gimbal and phone. Try pairing in a different location. |
| Phone is not stable or balanced. | Phone not centered in clamp; clamp not tight enough. | Re-position phone to be perfectly centered. Ensure clamp holds phone firmly. |
| Face tracking not working. | App not open or feature not activated; poor lighting; face obscured. | Ensure companion app is running and tracking is enabled. Provide adequate lighting. Ensure face is clearly visible. |
If the problem persists after trying these solutions, please contact customer support for further assistance.
8. Specifications
| Feature | Detail |
|---|---|
| Brand Name | Generic |
| Model Number | Q18 |
| Product Dimensions | 7.5 x 6.6 x 15.5 cm |
| Item Weight | 250 grams |
| Folded Size | 15.5 centimeters |
| Compatible Devices | Smartphones (iPhone, Android) |
| ASIN | B0CZ7MLZJT |
9. Warranty and Support
The Generic Q18 Gimbal Stabilizer comes with a standard manufacturer's warranty. Please refer to the warranty card included in your package for specific terms and conditions. For technical support, troubleshooting assistance, or warranty claims, please contact the retailer or manufacturer's customer service department.
Keep your purchase receipt as proof of purchase for warranty purposes.


