KETOTEK KT100pro
Digital Temperature and Humidity Controller Outlet
Model: KT100pro | Brand: KETOTEK
1. Introduction
The KETOTEK KT100pro is a sophisticated dual-stage digital controller designed to precisely manage both temperature and humidity in various environments. With its dual probes and independent control capabilities, it offers a reliable solution for maintaining optimal conditions in applications such as reptile terrariums, mushroom cultivation, greenhouses, and homebrewing setups. This manual provides comprehensive instructions for setup, operation, and maintenance to ensure safe and effective use of your device.

Figure 1: KETOTEK KT100pro Digital Temperature and Humidity Controller Outlet.
2. Product Features
- Dual Control: Manages both temperature and humidity with independent or simultaneous control via dual probes and dual outlets.
- Wide Control Range: Temperature control from -58°F to 212°F (-50°C to 100°C) and humidity control from 1% to 99% RH.
- Flexible Modes: Supports heating, cooling, humidifying, and dehumidifying modes, allowing for any combination to suit specific environmental needs.
- Easy Setup: Simple programming by setting ON/OFF temperature and humidity points.
- Safety Features: Includes high/low temperature and humidity buzzer alarms, sensor error alarms, and compressor delay protection for cooling devices.
- Data Retention: Saves original setting values in case of accidental power failure.
- Display Options: Supports both Celsius and Fahrenheit degree display.
- Plug-and-Play Design: Pre-wired for easy installation and immediate use.

Figure 2: Overview of KT100pro control modes and functions.

Figure 3: Temperature and Humidity Control capabilities.

Figure 4: Plug-and-play design in a terrarium application.
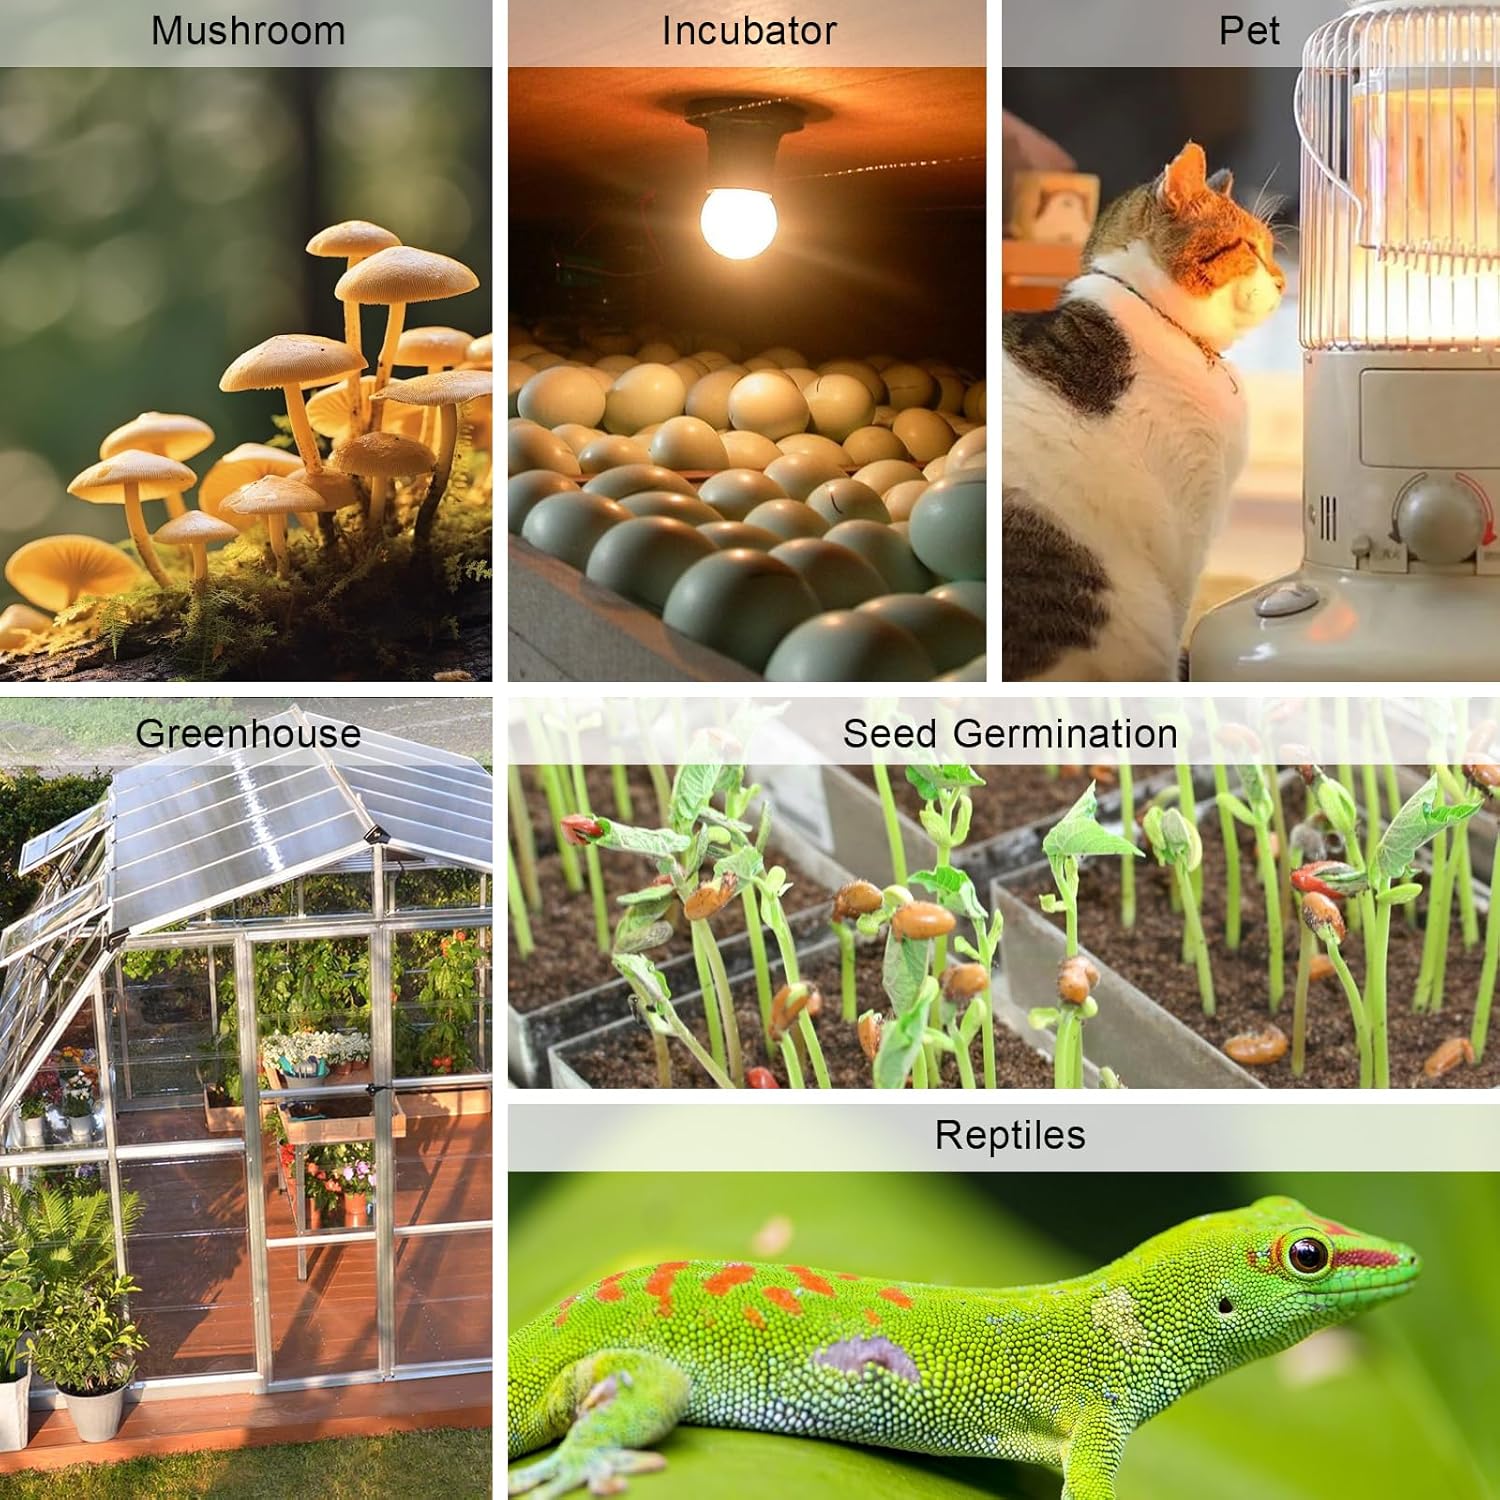
Figure 5: Wall mounting option with keyholes.

Figure 6: Wide range of applications for the controller.
3. Package Contents
- Digital Temperature and Humidity Controller (KT100pro) x 1
- User Manual x 1
4. Safety Information
Please read all safety warnings and instructions carefully before using this product to prevent injury or damage. Keep this manual for future reference.
- Ensure the power supply matches the device's requirements (110V±15% AC).
- Do not expose the main unit or the humidity sensor to water or excessive moisture.
- Only the temperature sensor is waterproof.
- Do not disassemble or modify the device. Refer all servicing to qualified personnel.
- Keep out of reach of children.

Figure 7: Important warning: Humidity sensor is not waterproof.
Figure 8: The temperature sensor is waterproof.
5. Setup
- Unpack: Carefully remove the controller and all accessories from the packaging.
- Connect Sensors: Plug the temperature sensor into the designated port (TC) and the humidity sensor into its port (CH) on the controller.
- Position Sensors: Place the temperature and humidity sensors in the environment you wish to control. Ensure the waterproof temperature sensor is placed where temperature needs to be measured, and the humidity sensor is in a dry location within the controlled area.
- Power On: Plug the controller into a standard 110V AC power outlet. The display will light up, showing current temperature and humidity readings.
- Mounting (Optional): The controller can be placed on a flat surface or mounted on a wall using the keyholes on the back (refer to Figure 5).
No official seller videos demonstrating setup were available for embedding.
6. Operating Instructions
The KT100pro features two main displays: one for temperature (TC) and one for humidity (CH), each with its own set of Up and Down buttons for setting parameters.
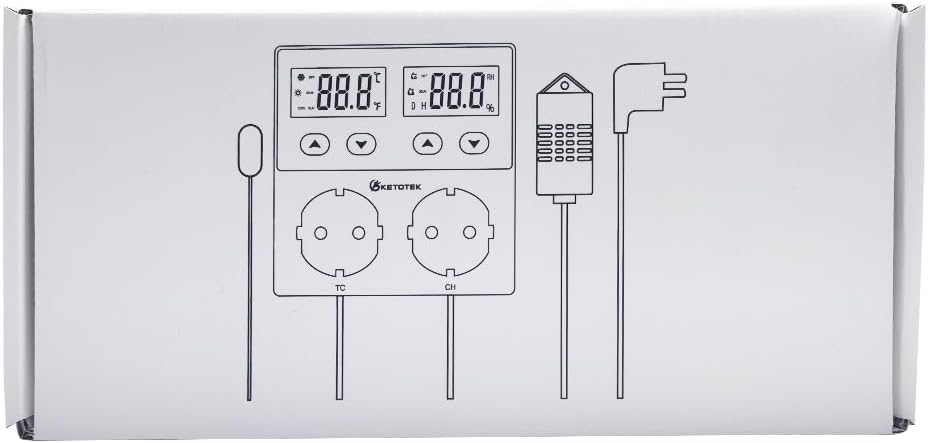
Figure 9: Controller display and output layout.
Setting Temperature Control (TC Outlet)
- Set ON Temperature: Press the Up or Down button under the TC display. The display will flash. Use the Up/Down buttons to set the desired temperature at which the TC outlet should turn ON. Press any other button or wait a few seconds to confirm.
- Set OFF Temperature: Repeat the process to set the desired temperature at which the TC outlet should turn OFF.
- The TC outlet will control temperature within the set ON/OFF range.
Setting Humidity Control (CH Outlet)
- Set ON Humidity: Press the Up or Down button under the CH display. The display will flash. Use the Up/Down buttons to set the desired humidity percentage at which the CH outlet should turn ON. Press any other button or wait a few seconds to confirm.
- Set OFF Humidity: Repeat the process to set the desired humidity percentage at which the CH outlet should turn OFF.
- The CH outlet will control humidity within the set ON/OFF range.
Alarm Settings
The device supports high and low temperature/humidity buzzer alarms. If the measured value exceeds the set alarm threshold, an audible alarm will sound.

Figure 10: Visual representation of alarm thresholds.
Compressor Delay Protection
For cooling devices, the KT100pro includes a compressor delay function to prevent damage from rapid short cycling. This feature ensures the compressor has sufficient time to equalize pressure before restarting.

Figure 11: Compressor Delay Protection for cooling devices.
Calibration and Reset
The device allows for calibration of temperature and humidity readings to ensure accuracy. It also has a reset function to restore factory settings if needed. Consult the detailed instructions in the included user manual for specific steps on calibration and reset procedures.
7. Maintenance
- Cleaning: Wipe the controller and sensors with a soft, dry cloth. Do not use abrasive cleaners or immerse the main unit or humidity sensor in water.
- Sensor Care: Keep the sensors free from dust and debris to ensure accurate readings.
- Storage: When not in use for extended periods, store the device in a cool, dry place away from direct sunlight.
8. Troubleshooting
- No Display/Power: Ensure the controller is securely plugged into a working power outlet. Check for power outages.
- Inaccurate Readings: Verify that sensors are properly connected and positioned. Consider performing a calibration (refer to the Operating Instructions section or the full user manual).
- Output Not Activating: Check your set ON/OFF points for temperature and humidity. Ensure the connected appliance is working correctly and plugged into the correct outlet (TC for temperature, CH for humidity).
- Alarm Sounds Continuously: Check the current temperature/humidity against your set alarm thresholds. Adjust settings if necessary or address the environmental condition causing the alarm.
- Settings Lost After Power Cycle: The KT100pro is designed to save settings after power failure. If settings are lost, ensure the device is not being subjected to extreme power fluctuations.
9. Specifications
| Attribute | Value |
|---|---|
| Brand | KETOTEK |
| Model Name | KT100pro |
| Power Supply | 110V±15% AC |
| Output | 10A relay |
| Temperature Control Range | -58~212°F (-50~100°C) |
| Humidity Control Range | 1~99%RH |
| Temperature Sensor | Waterproof |
| Humidity Sensor | Not waterproof |
| Material | Acrylonitrile Butadiene Styrene (ABS) |
| Product Dimensions | 4.33 x 1.46 x 4.33 inches |
| Item Weight | 0.634 ounces |

Figure 12: Product dimensions and sensor cable lengths.
10. Warranty and Support
KETOTEK products are manufactured to high quality standards. For warranty information, technical support, or any inquiries regarding your KT100pro controller, please refer to the contact details provided in the original product packaging or visit the official KETOTEK website. Please retain your proof of purchase for warranty claims.
Ask a question about this manual
Ask about setup, troubleshooting, compatibility, parts, safety, or missing instructions. Manuals+ will review the question and use this page’s manual context to help answer it.