1. Introduction
This manual provides essential information for the safe and effective operation, maintenance, and troubleshooting of your Topyond Cordless Cyclone Handheld Vacuum Cleaner, Model ATJ 2266. Please read this manual thoroughly before using the product and retain it for future reference.
2. Safety Instructions
- Do not operate the vacuum cleaner near flammable liquids or gases.
- Keep hair, loose clothing, fingers, and all body parts away from openings and moving parts.
- Do not pick up burning or smoking materials, such as cigarettes, matches, or hot ashes.
- Do not use without the dust cup and filter properly installed.
- This appliance is not intended for use by persons (including children) with reduced physical, sensory or mental capabilities, or lack of experience and knowledge, unless they have been given supervision or instruction concerning use of the appliance by a person responsible for their safety.
- Only use the charging cable provided by the manufacturer.
- Store the vacuum cleaner in a dry place when not in use.
3. Package Contents
Verify that all items listed below are included in your package:
- 1 x Topyond Handheld Vacuum Cleaner
- 1 x Flexible Hose
- 1 x Transparent Tube (Crevice Tool)
- 1 x Brush Attachment
- 1 x USB Charging Cable
- 1 x Instruction Manual
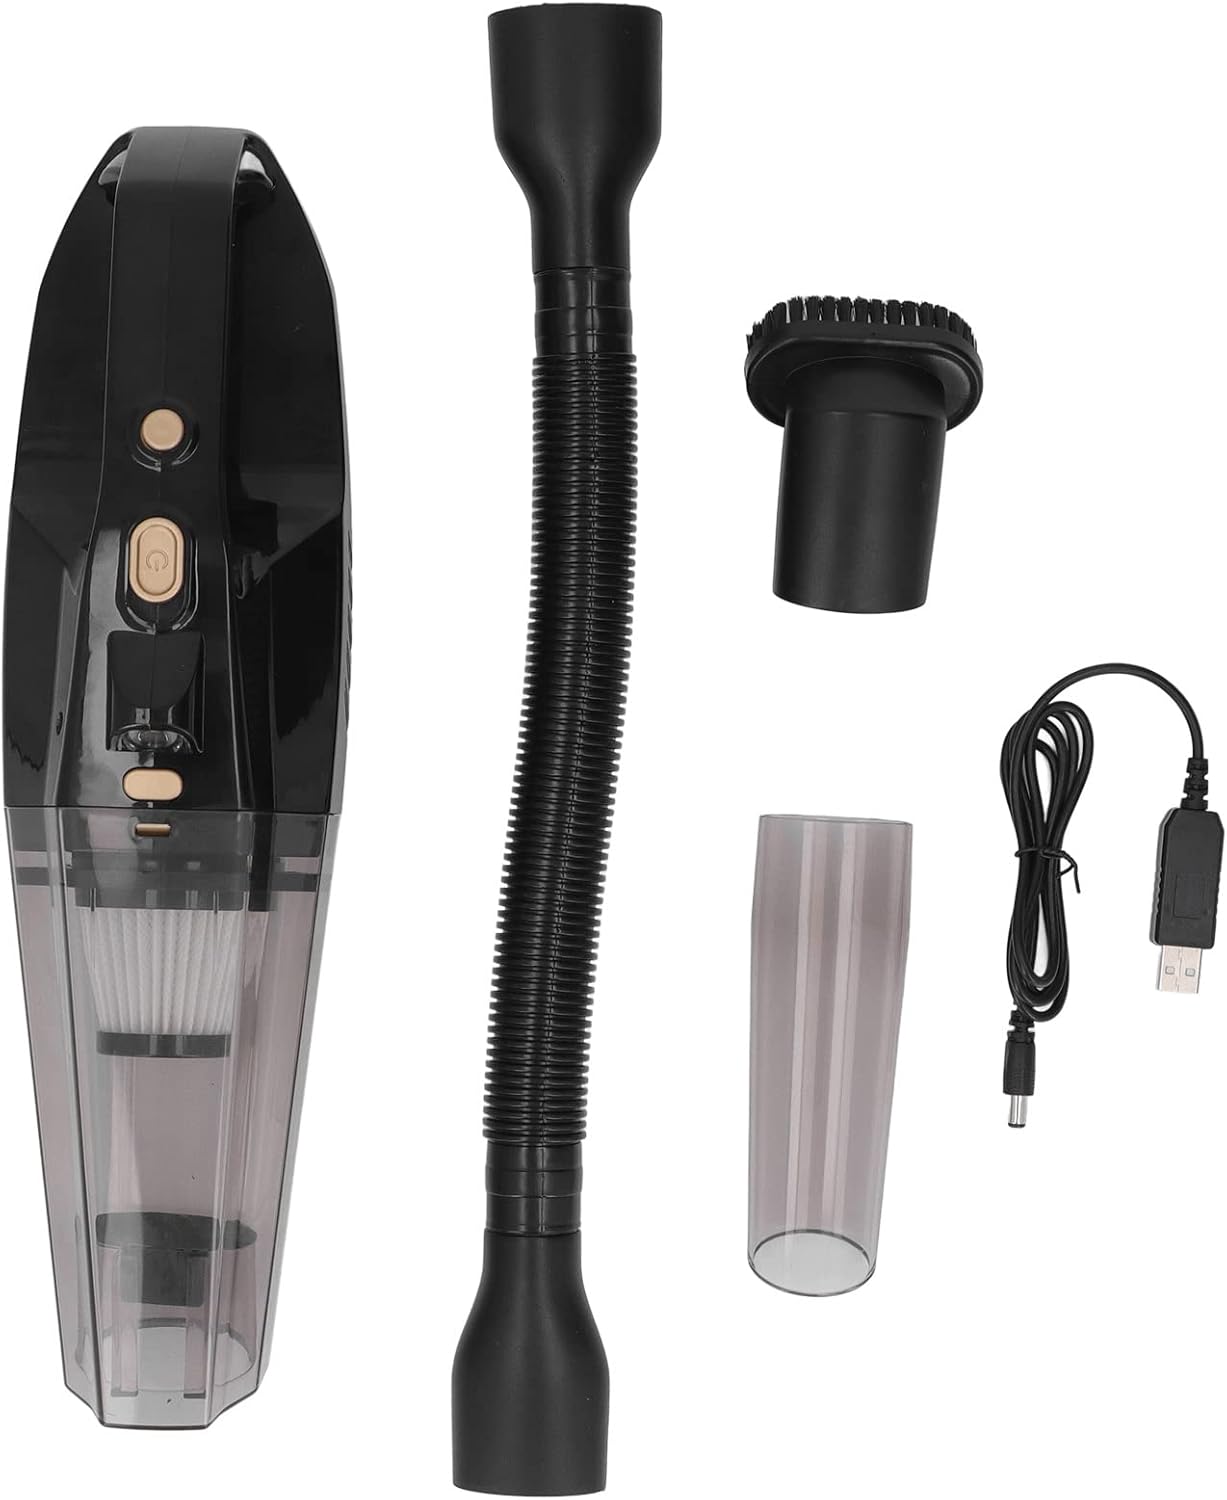
Image: The Topyond handheld vacuum cleaner shown with its included accessories: a flexible hose, transparent tube (crevice tool), brush attachment, and USB charging cable.
4. Product Overview and Components
Familiarize yourself with the main components of your vacuum cleaner.

Image: The Topyond handheld vacuum cleaner with the brush attachment connected, showing its compact design and transparent dustbin.
- Power Button: Turns the vacuum on/off.
- LED Light Button: Activates/deactivates the integrated LED light.
- Dust Cup Release Button: Releases the dust cup for emptying.
- Dust Cup: Collects debris.
- Filter: Traps fine dust particles.
- Charging Port: For connecting the USB charging cable.
- Nozzle/Attachment Port: Where accessories are connected.
5. Setup and Charging
5.1 Initial Charging
- Before first use, ensure the vacuum cleaner is fully charged.
- Connect the USB charging cable to the vacuum cleaner's charging port.
- Plug the other end of the USB cable into a compatible USB power adapter (not included) or a USB port.
- The charging indicator light will illuminate during charging.
- A full charge takes approximately 2.5 hours. The indicator light will change or turn off once charging is complete.
5.2 Attaching Accessories
To attach an accessory, align it with the nozzle port and push firmly until it clicks into place. To remove, pull the accessory straight off.
6. Operating Instructions
6.1 Powering On/Off
Press the power button to turn the vacuum cleaner on. Press it again to turn it off.
6.2 Using the LED Light
Press the LED light button to activate the integrated light for cleaning in dimly lit areas. Press it again to turn the light off.
6.3 General Cleaning
For general cleaning, use the vacuum with or without an attachment. The powerful cyclone suction effectively picks up dust and debris.

Image: A person using the handheld vacuum cleaner with a brush attachment to clean upholstery on a sofa, demonstrating its use for furniture.
6.4 Using Attachments for Specific Tasks
- Transparent Tube (Crevice Tool): Ideal for reaching tight spaces, corners, and between car seats.
- Brush Attachment: Suitable for cleaning upholstery, carpets, and delicate surfaces, helping to dislodge stubborn dirt.
- Flexible Hose: Extends reach and flexibility for cleaning awkward angles or deep crevices, such as car air vents or under seats.

Image: A collage demonstrating the versatile usage of the vacuum cleaner and its attachments, including cleaning flat surfaces, concave areas with the brush, narrow corners with the crevice tool, and extending reach with the hose for comprehensive cleaning.
7. Maintenance
7.1 Emptying the Dust Cup
- Ensure the vacuum cleaner is turned off.
- Press the dust cup release button to detach the dust cup from the main unit.
- Hold the dust cup over a trash receptacle and empty its contents.
7.2 Cleaning the Filter
- After emptying the dust cup, remove the filter.
- Tap the filter gently to remove loose dust.
- If necessary, rinse the filter under running water. Ensure it is completely dry before reinserting it into the dust cup.
- Reassemble the filter and dust cup, then attach them back to the vacuum cleaner.
7.3 General Cleaning of the Unit
Wipe the exterior of the vacuum cleaner with a soft, damp cloth. Do not use harsh chemicals or abrasive cleaners.
8. Troubleshooting
| Problem | Possible Cause | Solution |
|---|---|---|
| Vacuum does not turn on. | Battery is depleted. | Charge the vacuum cleaner fully. |
| Reduced suction power. | Dust cup is full. | Empty the dust cup. |
| Filter is clogged. | Clean or replace the filter. | |
| Nozzle or hose is blocked. | Remove any obstructions from the nozzle or hose. | |
| Charging indicator not working. | Charging cable not properly connected. | Ensure the USB cable is securely connected to both the vacuum and the power source. |
9. Specifications
| Feature | Detail |
|---|---|
| Model | ATJ 2266 |
| Power | 120W |
| Voltage | 12V |
| Vacuum Degree | 6000pa |
| Battery Type | Built-in Lithium Batteries (2x) |
| Battery Capacity | 4000mAh (total) |
| Charging Time | Approximately 2.5 hours |
| Battery Life | More than 25 minutes (continuous) |
| Functions | Vacuuming, Lighting |
| Material | ABS |
| Motor Configuration | 385 motor, ABS fan blade |
10. Warranty and Support
For warranty information or technical support, please refer to the contact details provided with your purchase or visit the official Topyond website. Keep your proof of purchase for warranty claims.