
1. Introduction
This manual provides essential information for the proper installation, operation, and maintenance of your ROEDE Connecting Rod, Model ROEDE321. This connecting rod is designed for use with Loncin LC1P70FA and LC1P70FAD 196cc mower engines. Please read these instructions carefully before proceeding with installation or use to ensure safety and optimal performance.
2. Product Overview
The ROEDE Connecting Rod is a critical component in internal combustion engines, converting the reciprocating motion of the piston into the rotary motion of the crankshaft. This specific model is engineered for durability and precise fit within compatible Loncin 196cc mower engines.
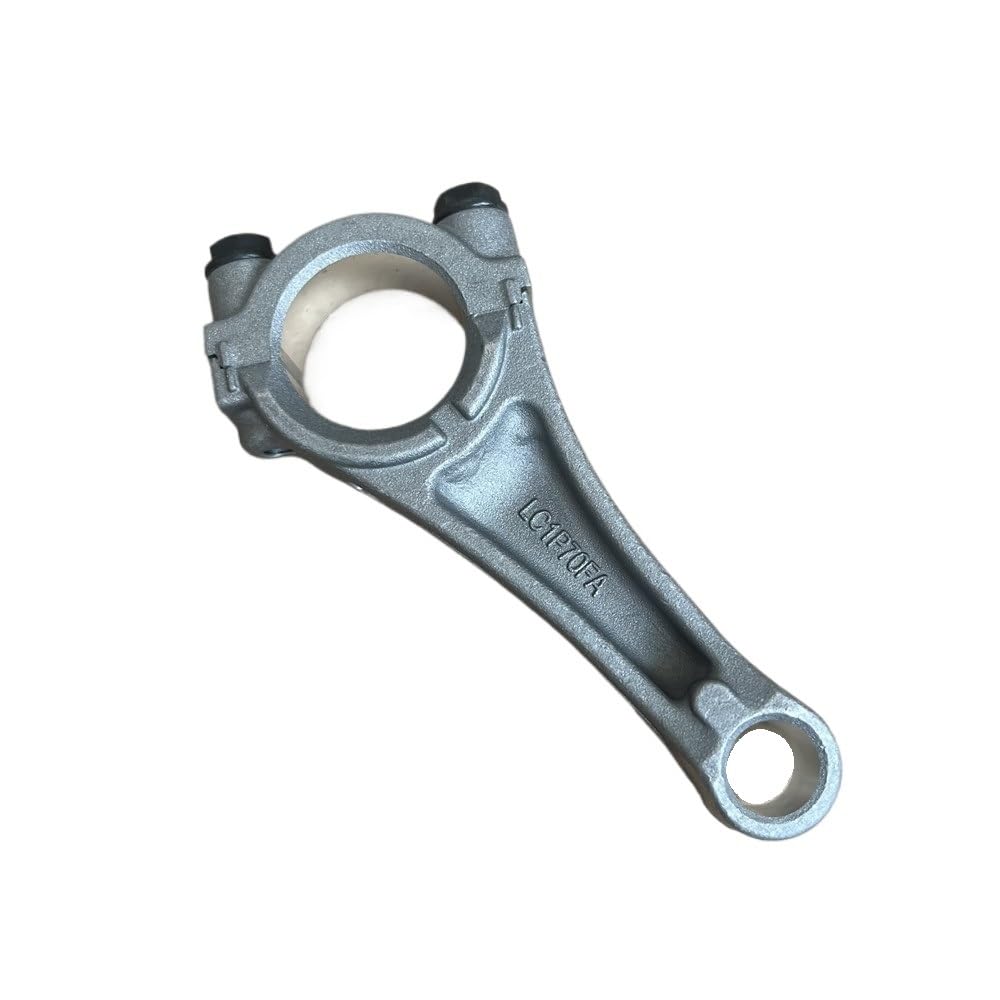
Figure 2.1: ROEDE Connecting Rod with labeled dimensions. Note the 13mm small end bore, 64mm center-to-center length, and 28mm big end bore.

Figure 2.2: Top view of the ROEDE Connecting Rod, highlighting its sturdy design and the location of the connecting rod bolts.

Figure 2.3: Side view of the ROEDE Connecting Rod, showing the stamped part number '2212041B' for identification.

Figure 2.4: Bottom view of the ROEDE Connecting Rod, illustrating the precision-machined bearing surface and internal oil passages for lubrication.
3. Setup and Installation
Installation of a connecting rod requires mechanical expertise and specialized tools. If you are not confident in your ability to perform this procedure, it is recommended to seek assistance from a qualified technician.
3.1 Safety Precautions
- Always wear appropriate personal protective equipment (PPE), including safety glasses and gloves.
- Ensure the engine is cool and disconnected from any power source before beginning work.
- Work in a well-ventilated area.
- Refer to the specific service manual for your Loncin 196cc engine for detailed disassembly and reassembly procedures.
3.2 Installation Steps (General Guide)
- Engine Disassembly: Carefully disassemble the engine according to the manufacturer's service manual to access the crankshaft and piston assembly.
- Old Connecting Rod Removal: Remove the connecting rod cap bolts and separate the old connecting rod from the crankshaft and piston. Inspect the crankshaft journal for wear or damage.
- Bearing Installation: Install new connecting rod bearings into the new ROEDE connecting rod and cap. Ensure they are clean and properly seated.
- Lubrication: Apply a thin layer of clean engine oil to the crankshaft journal, connecting rod bearings, and piston pin bore.
- Assembly: Carefully position the new connecting rod onto the crankshaft journal and connect it to the piston pin. Ensure the connecting rod is oriented correctly (refer to engine manual for specific markings).
- Torqueing: Install the connecting rod cap and tighten the connecting rod bolts to the torque specifications provided in your engine's service manual. Use a torque wrench for accuracy.
- Clearance Check: After torqueing, ensure the crankshaft rotates freely without binding. Check for proper side clearance of the connecting rod.
- Engine Reassembly: Reassemble the engine, ensuring all components are correctly installed and torqued to specifications.
4. Operating Considerations
Once the connecting rod is installed and the engine reassembled, proper operating practices are crucial for longevity.
- Initial Start-up: After major engine work, perform an initial start-up and allow the engine to run at a low RPM for a short period to ensure proper lubrication and break-in.
- Oil Level: Always ensure the engine oil level is correct before operation. Low oil levels can lead to catastrophic connecting rod failure.
- Engine Load: Avoid excessive engine loads or high RPMs immediately after installation. Gradually increase load over time.
5. Maintenance
Regular maintenance is key to extending the life of your engine and its components, including the connecting rod.
- Oil Changes: Follow the engine manufacturer's recommendations for regular oil changes. Use the specified type and grade of engine oil.
- Oil Filter: Replace the oil filter (if applicable) during oil changes.
- Engine Inspection: Periodically inspect the engine for any signs of oil leaks, unusual noises, or vibrations, which could indicate issues with internal components.
6. Troubleshooting
If you experience issues after installing the connecting rod, consider the following common problems and solutions:
| Problem | Possible Cause | Solution |
|---|---|---|
| Engine knocking noise | Incorrect bearing clearance, insufficient lubrication, loose connecting rod bolts. | Disassemble and inspect connecting rod bearings and bolts. Ensure proper torque and lubrication. |
| Engine seizes | Severe lack of lubrication, incorrect bearing installation, overheating. | Immediately stop engine. Disassemble and inspect all internal components for damage. Professional repair likely required. |
| Oil pressure issues | Improper bearing installation, damaged oil pump, incorrect oil level/type. | Check oil level and type. Inspect oil pump and connecting rod bearings for proper installation. |
7. Specifications
- Model: ROEDE321
- Compatibility: Loncin LC1P70FA, LC1P70FAD 196cc Mower Engines
- Material: High-quality alloy (as per product description)
- Small End Bore: Approximately 13mm (refer to Figure 2.1)
- Big End Bore: Approximately 28mm (refer to Figure 2.1)
- Center-to-Center Length: Approximately 64mm (refer to Figure 2.1)
- Item Weight: 1.76 ounces (approx. 50 grams)
- Package Dimensions: 1.18 x 0.79 x 0.39 inches
8. Warranty and Support
For warranty information or technical support regarding your ROEDE Connecting Rod, please contact your original point of purchase or the ROEDE manufacturer directly. Keep your purchase receipt as proof of purchase.
While this product is designed for durability, improper installation or use outside of specified engine parameters may void any applicable warranty.