
Introduction
This manual provides detailed instructions for assembling the Airfix A06023 Boeing Chinook HC.1 1:72 scale plastic model kit. This kit is designed for modelers with a Skill Level 3, offering a moderately challenging and rewarding building experience. Upon completion, you will have a highly detailed replica of the iconic twin-rotor transport helicopter used by the Royal Air Force.
The kit features finely engraved surface details, realistic rotor assemblies, and options for two distinct paint and marking schemes. Please note that paint and glue are required for assembly and are not included in this kit.
Safety Information
WARNING: Model toys, not suitable for children under 14 years of age. This product contains small parts which may present a choking hazard. Adult supervision is recommended during assembly.
- Always use appropriate tools for cutting and sanding plastic parts.
- Ensure adequate ventilation when using model glues and paints.
- Keep all modeling materials out of reach of young children and pets.
- Dispose of waste materials responsibly.
Parts Overview
Your Airfix A06023 Boeing Chinook HC.1 kit contains 171 precision-engineered plastic parts, supplied on sprues, along with clear parts for windows and a decal sheet. Before beginning assembly, carefully inspect all parts against the parts list provided in the kit's printed instructions to ensure all components are present and undamaged.

Image: Unassembled plastic parts (sprues) for the Airfix Boeing Chinook HC.1 model kit. These show the intricate details and various components before removal and assembly.
Familiarize yourself with the different sprues and the general layout of the parts. This will aid in identifying components during the assembly process.
Assembly Instructions
Follow the step-by-step diagrams provided in the kit's printed instruction booklet. The general assembly process involves:
- Preparation: Carefully remove parts from the sprues using a hobby knife or sprue cutters. Clean any excess plastic (flash) with a small file or sandpaper. Test fit parts before applying glue.
- Sub-Assemblies: Begin by assembling smaller sections such as the cockpit, interior components, and rotor heads. Pay close attention to the orientation of parts.
- Fuselage Assembly: Join the main fuselage halves, ensuring proper alignment. Use clamps or tape to hold parts together while the glue dries.
- Rotor Installation: Attach the main rotor assemblies to the fuselage. Ensure they can rotate freely if desired.
- Landing Gear: Assemble and attach the landing gear components.
- Detailing: Add smaller external details such as antennas, lights, and other delicate parts.
Refer to the diagrams for specific part numbers and their correct placement. Allow sufficient drying time for all glued joints before proceeding to the next step.
Finishing and Decals
Once the model is fully assembled and the glue has cured, you can proceed with painting and applying decals. The kit includes two optional paint and marking schemes, typically representing different operational periods or units of the Royal Air Force Chinook HC.1.
- Painting: Apply primer before painting for better adhesion and a smoother finish. Use model-specific paints and follow the recommended color schemes in the instruction booklet. Apply thin coats to preserve detail.
- Decals: Cut out each decal individually. Dip in warm water for a few seconds until it slides freely from the backing paper. Carefully slide the decal onto the model in the desired position. Use a soft brush or cotton swab to gently press out any air bubbles and excess water. Allow decals to dry completely.
- Protective Coat: Consider applying a clear matte or gloss coat over the finished model to protect the paint and decals.

Image: Two completed Airfix Boeing Chinook HC.1 models showcasing different paint and decal schemes. One is in a desert tan livery, and the other in a green and grey camouflage pattern.

Image: A detailed rear view of the finished Airfix Boeing Chinook HC.1 model in desert camouflage, with its rear loading ramp lowered.
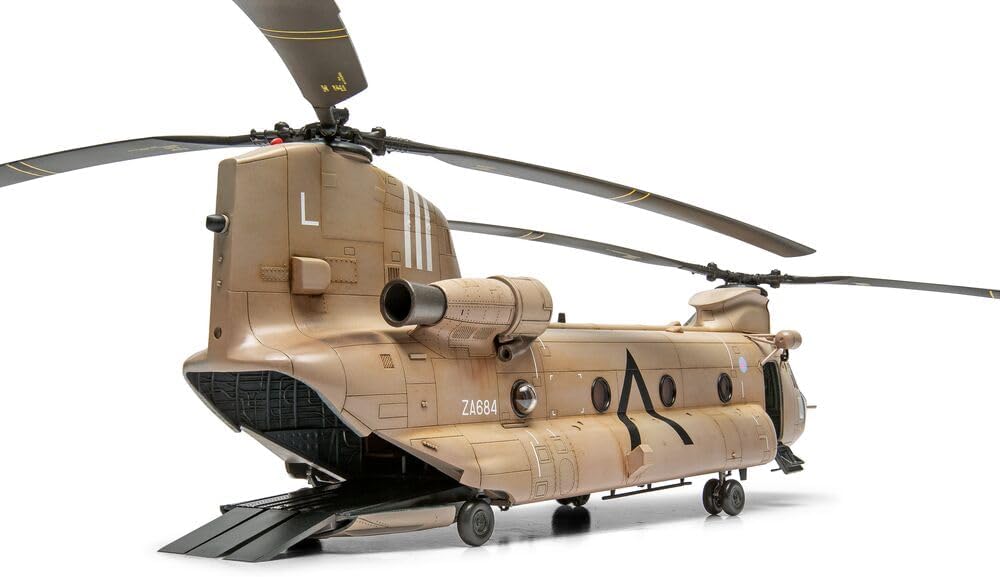
Image: A front view of the finished Airfix Boeing Chinook HC.1 model, displaying its green and grey camouflage scheme and intricate cockpit details.
Care & Maintenance
To ensure the longevity and appearance of your assembled model, follow these care and maintenance guidelines:
- Cleaning: Dust your model regularly with a soft, dry brush or a lint-free cloth. Avoid using water or chemical cleaners, as these can damage paint and decals.
- Handling: Handle the model by its sturdy parts, such as the main fuselage, to avoid damaging delicate components like antennas or rotor blades.
- Storage/Display: Display your model in a stable, dust-free environment away from direct sunlight, extreme temperatures, and high humidity. Direct sunlight can cause paint and decals to fade over time.
- Repairs: In case of accidental damage, use appropriate model glue for repairs. For paint touch-ups, use the original colors if available.
Troubleshooting Common Issues
Here are solutions to common problems encountered during model assembly:
- Parts Not Fitting:
- Ensure all sprue gates and flash are completely removed.
- Check the instruction diagrams carefully for correct part orientation.
- Gently sand or trim mating surfaces if necessary, but avoid removing too much material.
- Gaps Between Parts:
- Use model filler putty to fill any noticeable gaps after gluing. Sand smooth once dry.
- Apply gentle pressure or use clamps while glue is drying to minimize gaps.
- Decals Not Adhering:
- Ensure the surface is clean and smooth. A gloss coat before decals can help.
- Use decal setting solutions to help decals conform to irregular surfaces and improve adhesion.
- Ensure enough water is used to release the decal from its backing.
- Paint Issues (e.g., uneven finish, brush strokes):
- Apply paint in thin, multiple coats rather than one thick coat.
- Ensure paint is properly thinned according to manufacturer instructions.
- Use good quality brushes or an airbrush for a smoother finish.
Product Specifications
| Brand | Airfix |
| Model Name | Airfix Standard Model Set - A06023 Boeing Chinook HC.1 |
| Item Model Number | A06023 |
| Scale | 1:72 |
| Number of Pieces | 171 |
| Skill Level | 3 (out of 4, where 1 is beginner) |
| Material | Plastic |
| Recommended Age | 14 years and up |
| Product Dimensions | 16.54 x 9.84 x 0.04 inches (packaging) |
| Item Weight | 1.06 pounds |
| Included Components | Plastic parts (sprues), clear parts, decal sheet, instructions |
Warranty & Support
Airfix products are manufactured to high standards. If you encounter any issues with missing or defective parts, please contact Airfix customer support directly. Details for contacting support can typically be found on the product packaging or on the official Airfix website.
Please retain your proof of purchase for any warranty claims or support inquiries. Specific warranty terms and conditions may vary by region.