Veken ODHOME123
Veken 55-Inch Electric Standing Desk (Model ODHOME123) User Manual
Brand: Veken | Model: ODHOME123
Introduction
This manual provides detailed instructions for the assembly, operation, maintenance, and troubleshooting of your Veken 55-inch Electric Standing Desk. Please read this manual thoroughly before use to ensure proper function and safety.

Image: The Veken 55-inch Electric Standing Desk in a typical office setup.
Important Safety Information
To prevent injury or damage to the product, observe the following safety guidelines:
- Always use the child safety lock when the desk is not in use to prevent accidental height adjustment.
- Keep the desk away from heat sources.
- Do not place heavy objects on the desk that could cause it to tip over. The maximum weight recommendation is 154 pounds.
- Ensure all cables are properly managed to avoid pinching or entanglement during height adjustments.
- This Veken standing desk is built with joined pieces (not one whole). Ensure the desktop pieces are securely joined during assembly.
Setup and Assembly
The Veken Electric Standing Desk is designed for straightforward assembly. It is recommended that two people assemble the desk.
Included Components:
- Desk Frame Components (legs, crossbar, motor)
- Desktop (two pieces)
- Control Panel
- Power Adapter
- Cable Clip
- Feet Pads (4)
- Headphone Hook
- User Manual (this document)
- Instruction for Using the Control Panel
- Assembly Tools (e.g., Allen wrench, screwdriver)
Assembly Steps:
- Assemble the Desk Legs: Attach the leg components to the crossbar. Ensure all screws are tightened securely.
- Attach Side Plates and Transmission Rod: Install the side plates, ensuring the outer side of the plates is connected to the leg of the table. Insert the transmission rod fully into the left leg and tighten the set screw.
- Assemble and Attach the Desktop: Use the provided dowels to align and join the two desktop pieces. Secure the desktop to the assembled frame using the provided screws.
- Connect Cables: Connect the control panel and motor cables to the power adapter. Use the included cable clips to manage and secure cables neatly under the desk.
Video: Official installation manual for the Veken Electric Standing Desk, demonstrating step-by-step assembly.
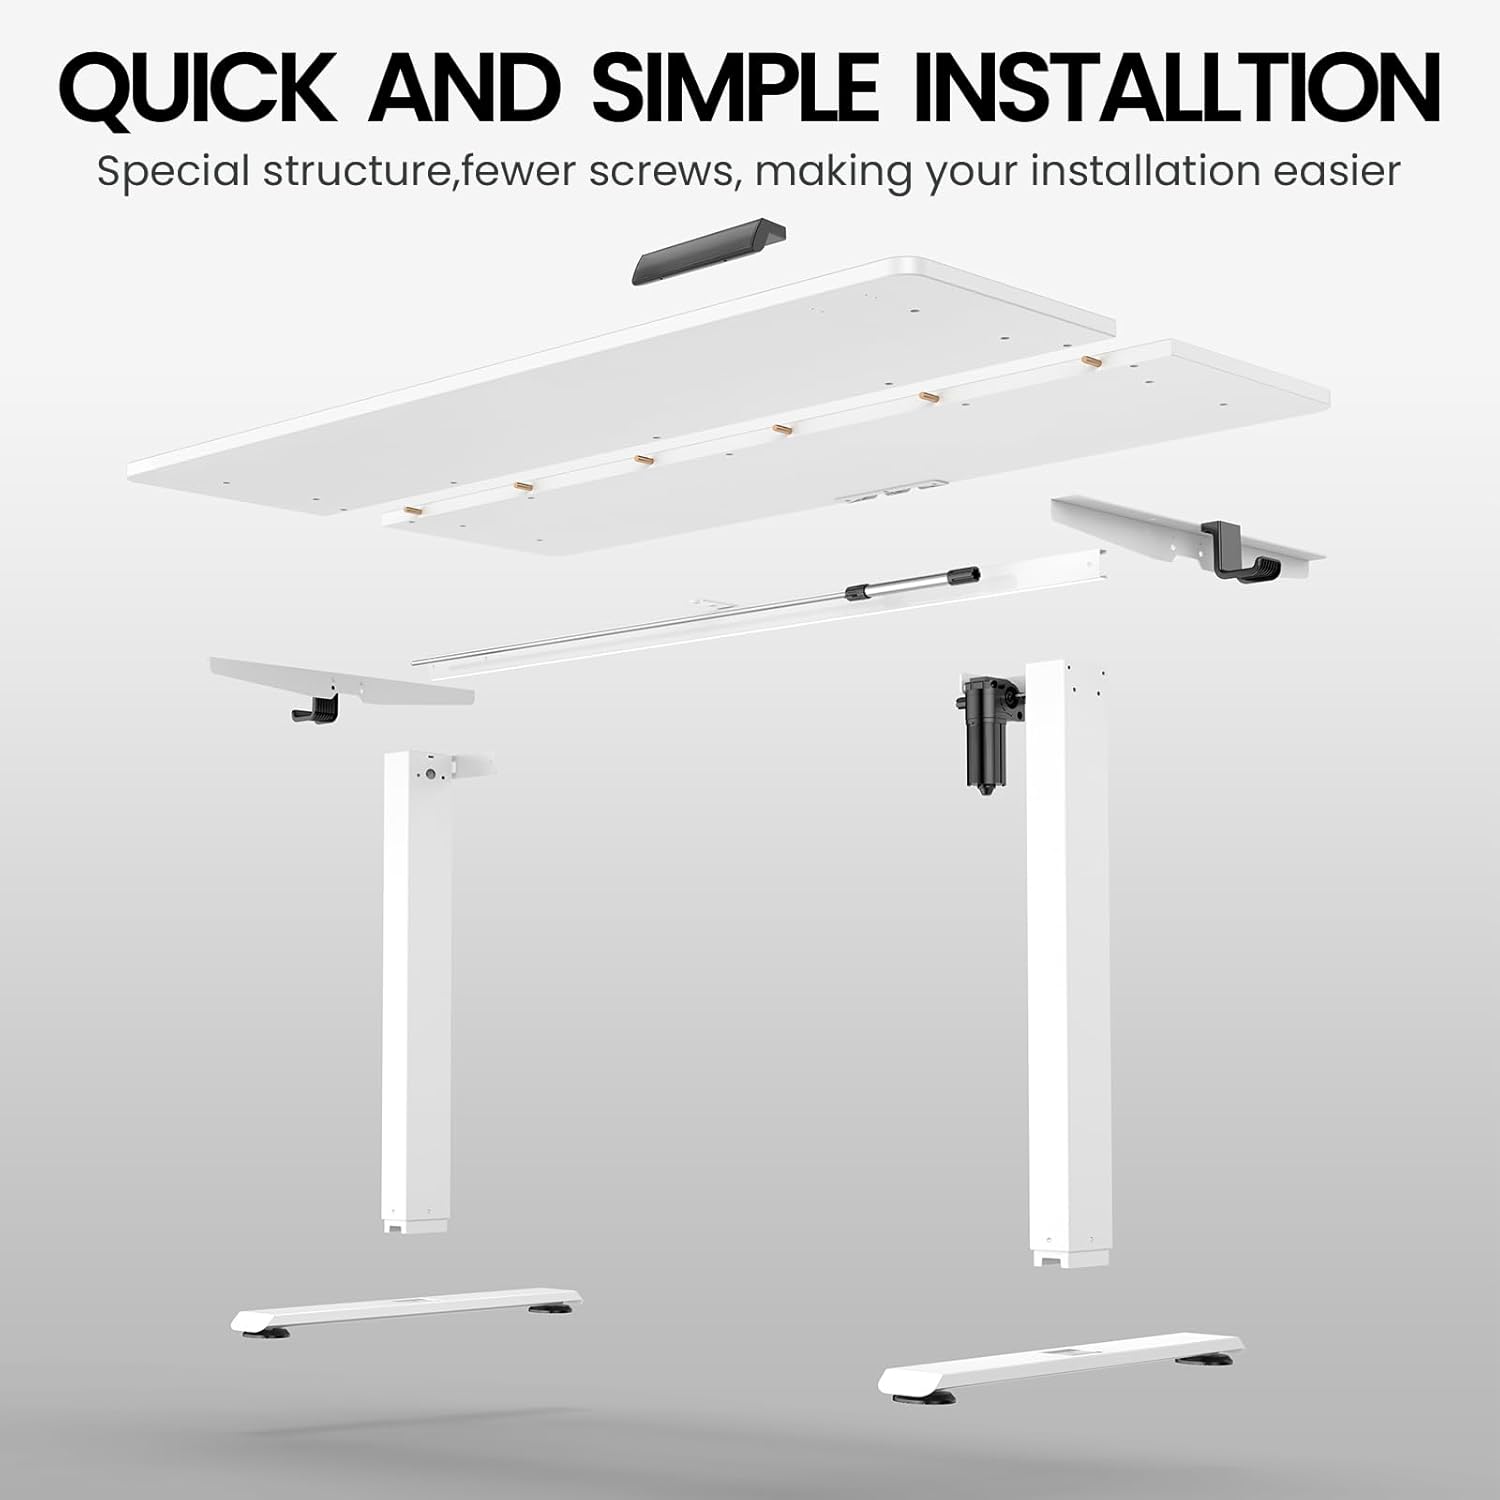
Image: Exploded view showing the simplified installation process with fewer parts.
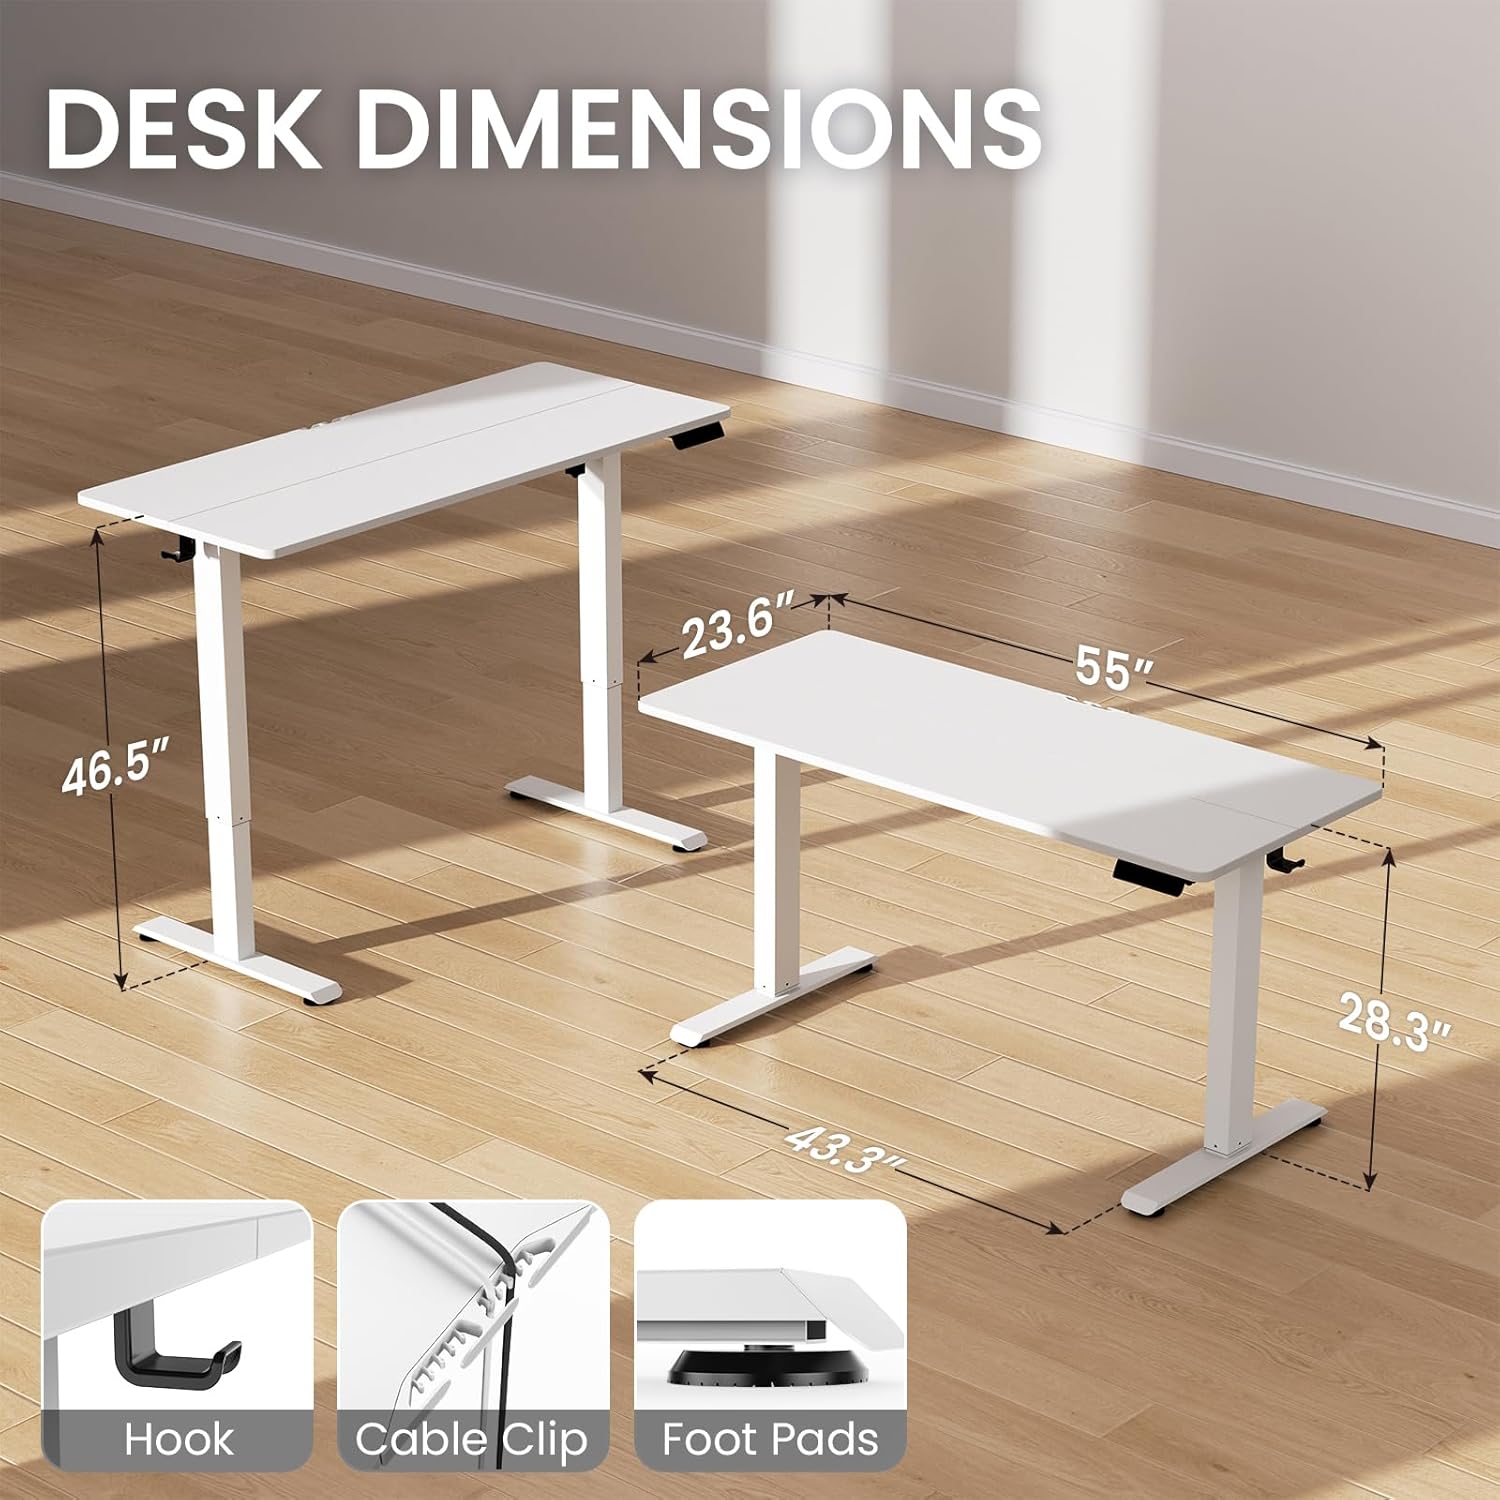
Image: Desk dimensions and included accessories like the headphone hook, cable clip, and foot pads.
Operating Instructions
Height Adjustment:
Use the up (▲) and down (▼) arrow buttons on the control panel to manually adjust the desk height. The desk offers a height range of 28.3 to 46.5 inches.
Memory Presets:
The control panel features memory buttons (1, 2) to save your preferred sitting and standing heights. To set a preset:
- Adjust the desk to your desired height.
- Press the 'M' button, then press the desired number button (1 or 2) to save the current height.
- To recall a saved height, simply press the corresponding number button.
Sedentary Reminder:
Activate the sedentary reminder feature to receive alerts to change your posture. Consult the separate 'Instruction for Using the Control Panel' for detailed setup of this feature.
Safety Lock:
The control panel includes a safety lock feature to prevent accidental adjustments, especially useful in households with children or pets. Press the lock button to activate or deactivate.
Video: Demonstration of the Veken Standing Desk in a home office workstation, highlighting its adjustable height feature.
Maintenance
- Regularly check all screws and connections to ensure they remain tight.
- Clean the desktop surface with a soft, damp cloth. Avoid abrasive cleaners.
- Keep the motor and electrical components free from dust and moisture.
- Ensure cables are not pinched or stressed during movement.
Troubleshooting
Issue: Only one leg is moving up or down.
This typically indicates an incorrect installation of the transmission rod or a loose set screw.
- Loosen the set screw in the transmission rod.
- Unscrew the middle knob and remove the transmission rod.
- Press the left leg (the leg without the motor) to its lowest height.
- Connect the power cord.
- Press the down button until the right leg (the leg without the motor) reaches its lowest height.
- Insert the transmission rod fully into the left leg, ensuring it engages with the hexagonal nut.
- Tighten the middle knob and the set screw at the link.
Video: Troubleshooting guide for when only one desk leg is moving, detailing how to re-align the transmission rod.
Issue: Side plate holes do not align with deskboard.
This is usually due to incorrect installation direction of the side plates.
- Remove the side plates.
- Identify the outer side of the plates (usually indicated in the assembly instructions or by the screw holes).
- Re-install the side plates, ensuring the outer side is connected to the leg of the table.
Video: Troubleshooting guide for misaligned side plate holes, showing the correct orientation for installation.
Specifications
| Feature | Detail |
|---|---|
| Brand | Veken |
| Model Number | ODHOME123 |
| Product Dimensions (D x W x H) | 23.64"D x 55.12"W x 28.3"H |
| Color | White |
| Minimum Height | 28.3 Inches |
| Maximum Height | 46.5 Inches |
| Maximum Weight Recommendation | 154 Pounds |
| Base Material | Carbon Steel |
| Top Material Type | Engineered Wood (Laminated Finish) |
| Lifting Mechanism | Electric |
| Special Features | Adjustable Height, Electric, Ergonomic, Sedentary Reminder, Memory Preset, Safety Lock, Cable Clip |
| Required Assembly | Yes (Recommended 2 people) |
Warranty and Support
This Veken Electric Standing Desk comes with a 2-Year Limited Warranty. For warranty claims or technical support, please contact Veken customer service.