
1. Introduction
The TopDiag JD906 OBD2 Scanner is a versatile diagnostic tool designed for automotive enthusiasts and professionals. It provides comprehensive vehicle diagnostic functions, including reading and clearing fault codes, viewing live data, I/M readiness status, battery testing, and more. This manual provides detailed instructions for the proper setup, operation, maintenance, and troubleshooting of your JD906 scanner.

Figure 1.1: TopDiag JD906 OBD2 Scanner. This image shows the main unit of the JD906 scanner, featuring a color display, navigation buttons, and the attached OBD2 diagnostic cable with its connector.
2. Package Contents
Verify that all items listed below are present in your package:
- 1 x JD906 OBD2 Scanner Unit
- 1 x Tool Box
- 1 x User Manual
3. Product Overview
The JD906 scanner features a robust design with a 3.2-inch true color LCD screen for clear display of diagnostic information. It includes intuitive navigation buttons for easy operation.
3.1 Key Features
- Read and Clear Diagnostic Trouble Codes (DTCs)
- View Live Data Stream and Freeze Frame Data
- I/M Readiness Status Check
- ECU Information Retrieval
- DTC Lookup Function
- Support for Mode 6 (On-Board Monitor Test Results) and Mode 8 (EVAP System Test)
- Real-time Battery Voltage Test and Health Check
- O2 Sensor Test
- Data Review and Print Functionality
- Multi-language Support (English, Spanish, French, German, Chinese, Italian, etc.)
- Software Update via USB Cable
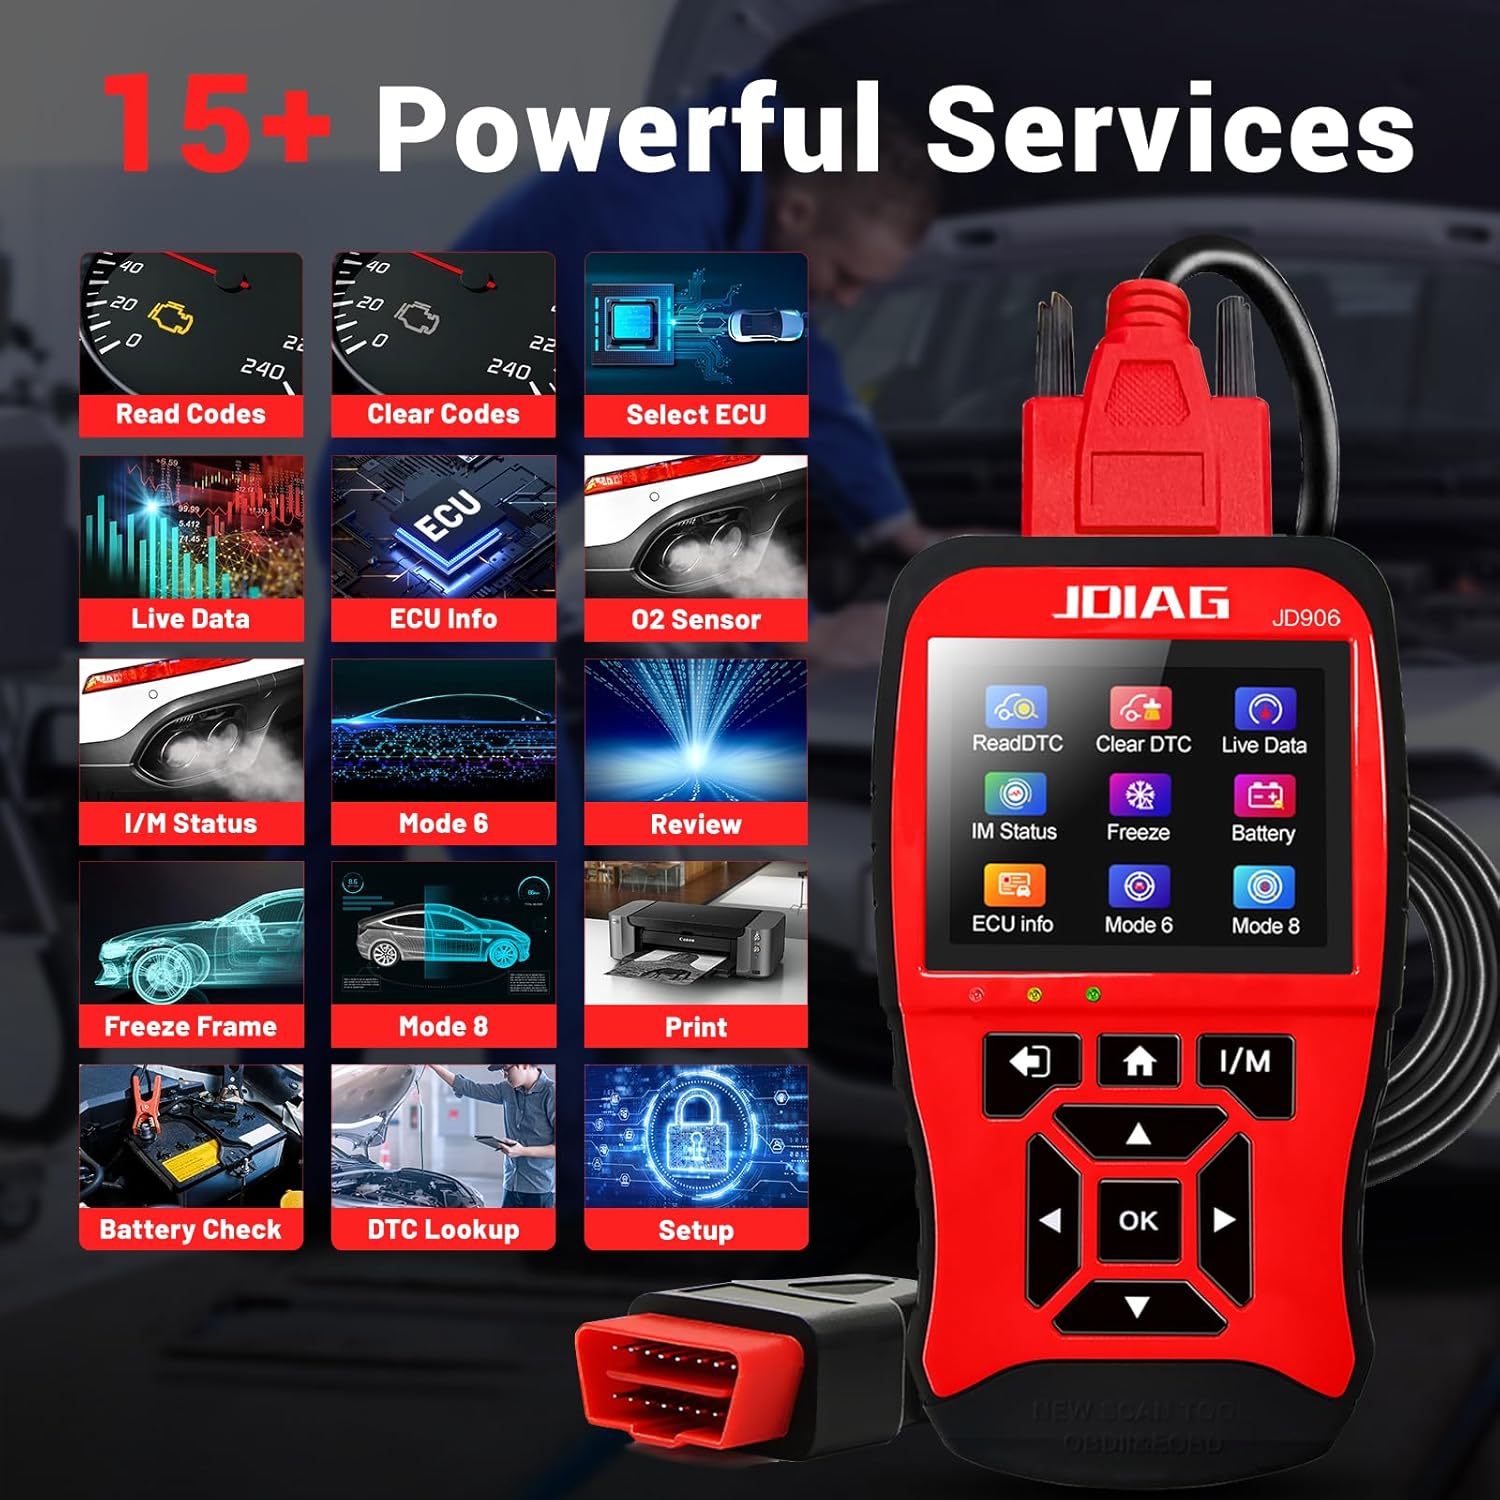
Figure 3.1: Overview of JD906 Scanner's 15+ Functions. This image illustrates the various diagnostic and service functions available on the JD906 scanner, presented as a grid of icons on the device's screen.
4. Setup and Initial Use
4.1 Connecting the Scanner to Your Vehicle
- Locate the vehicle's 16-pin Data Link Connector (DLC). This is typically found under the dashboard on the driver's side.
- Ensure the vehicle's ignition is in the OFF position.
- Firmly plug the JD906 scanner's OBD2 connector into the vehicle's DLC.
- Turn the vehicle's ignition to the ON position (engine can be off or running, depending on the test). The scanner will automatically power on.
4.2 Language Settings
Upon first use or after a reset, you may need to select your preferred language. Navigate to the 'Setup' or 'Settings' menu on the device, then select 'Language' to choose from available options such as English, Spanish, French, German, Chinese, and Italian.
4.3 Software Update
The JD906 scanner supports software updates via a USB cable to ensure optimal performance and compatibility with newer vehicle models. Connect the scanner to a computer using the provided USB cable. Visit the official TopDiag website for update instructions and software downloads. Regular updates are recommended.
5. Operating the JD906 Scanner
5.1 General Navigation
The JD906 scanner features a user-friendly interface with dedicated buttons for navigation:
- OK Button: Confirms a selection or enters a menu.
- Arrow Buttons (Up/Down/Left/Right): Navigate through menus and options.
- Back Button: Returns to the previous screen or menu.
- Home Button: Returns to the main menu.
- I/M Button: Directly accesses the I/M Readiness status.
5.2 Read and Clear Diagnostic Trouble Codes (DTCs)
This function allows you to read generic (P0, P2, P3, U0) and manufacturer-specific (P1, P3, U1) codes, and then clear them to turn off the Check Engine Light.
- From the main menu, select 'Read DTC' to view current, pending, and permanent codes.
- To clear codes, select 'Clear DTC'. Confirm the action when prompted. Note: Clearing codes will also clear freeze frame data. Ensure you have recorded any necessary information before clearing.
5.3 View Live Data and Freeze Frame Data
Live Data displays real-time sensor readings from the vehicle's ECU. Freeze Frame Data captures a snapshot of vehicle conditions at the moment a DTC was set.
- Select 'Live Data' from the main menu. You can view data in text or graph format.
- Select 'Freeze Frame' to view the stored data related to a specific DTC.
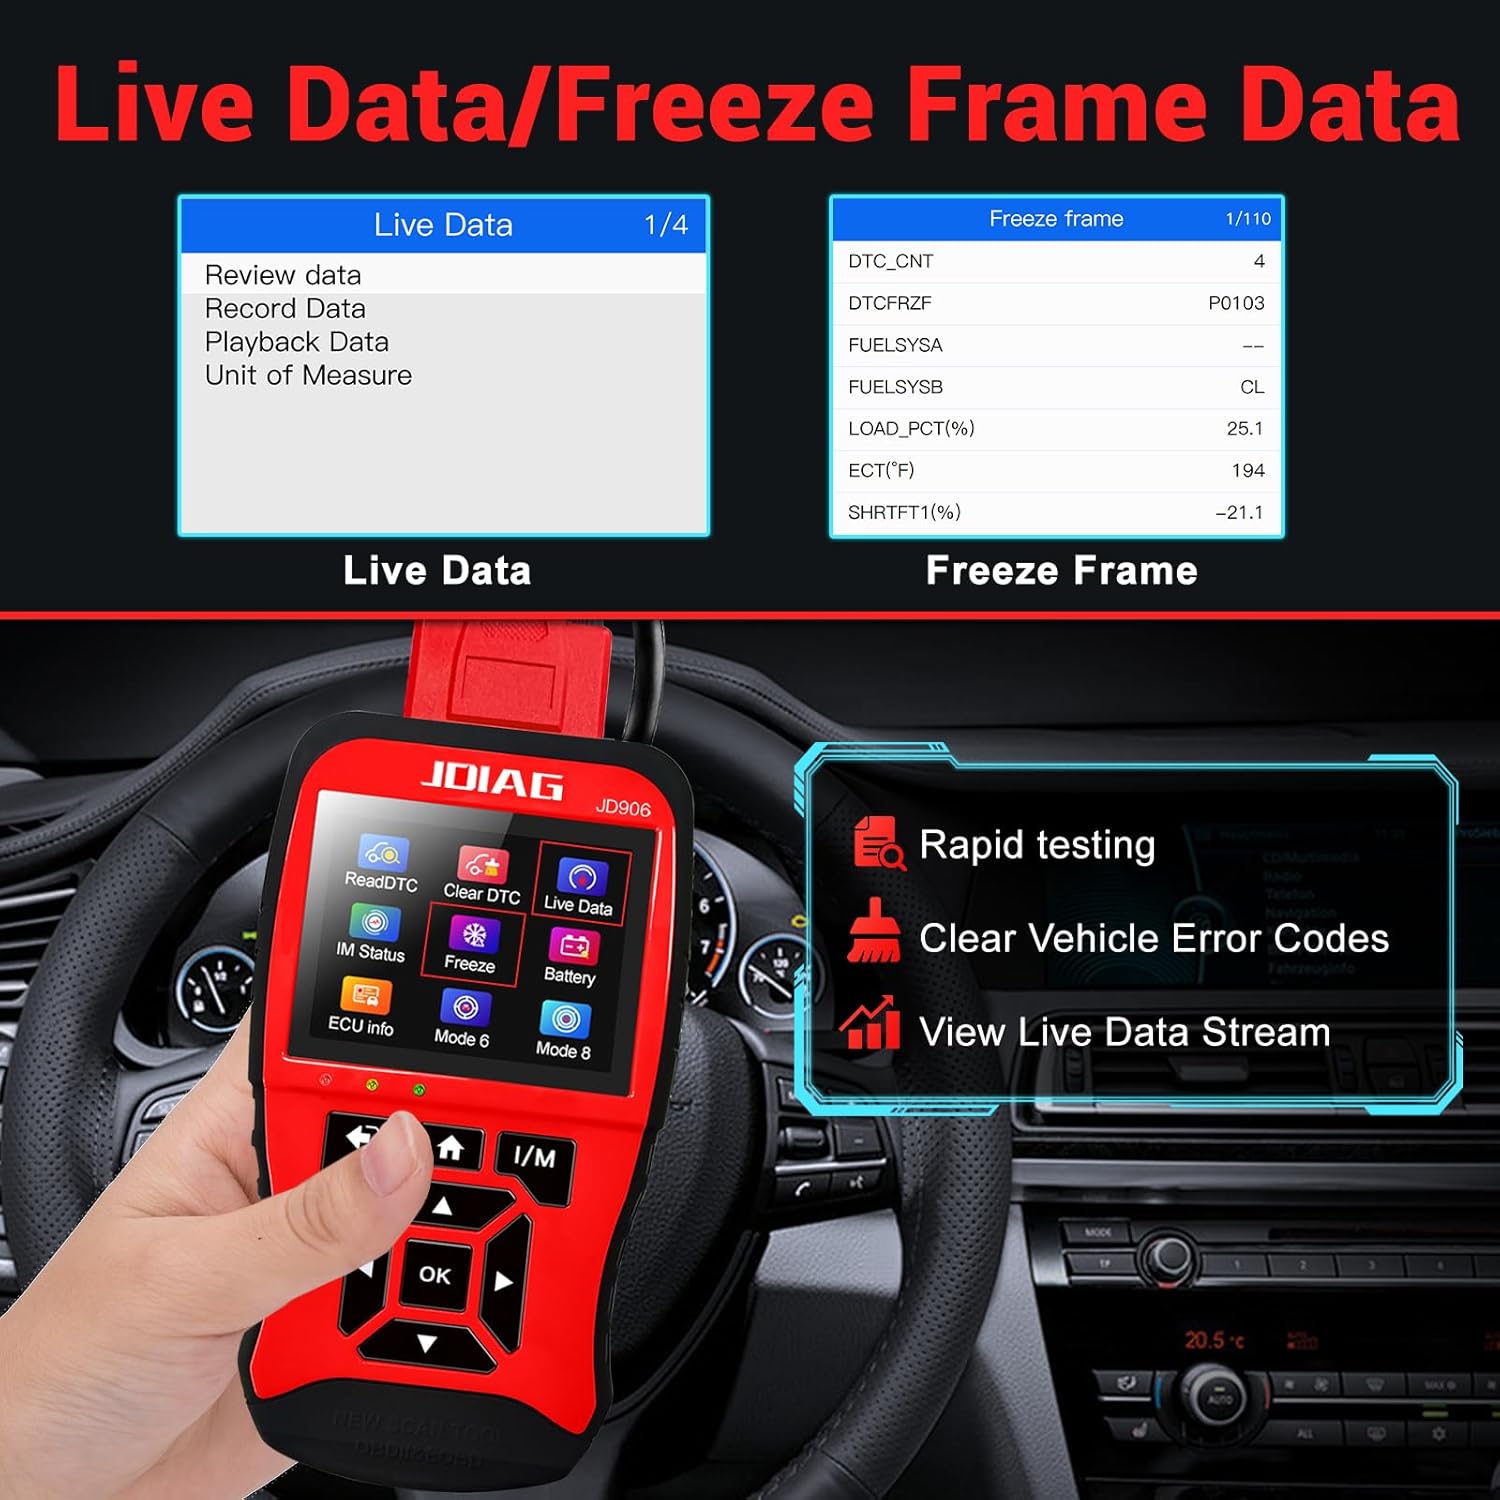
Figure 5.1: Live Data and Freeze Frame Data Display. This image illustrates the JD906 scanner's screen displaying both real-time live data parameters and a freeze frame snapshot of vehicle conditions when a fault code occurred.
5.4 I/M Readiness Status
This function checks if the various emissions-related systems on the vehicle are operating correctly and are ready for inspection and maintenance testing.
- Press the dedicated 'I/M' button or select 'I/M Status' from the main menu.
- The scanner will display the status of various monitors (e.g., MIL, MIS, Fuel System, O2 Sensor). 'OK' indicates the monitor has completed its test, while 'INC' (Incomplete) means it has not.

Figure 5.2: I/M Readiness Status Screen. This image illustrates the I/M Readiness display on the JD906 scanner, showing the status of various vehicle monitors (e.g., MIL, Fuel, CAT, EVAP) as either complete (OK) or incomplete (INC).
5.5 ECU Information
Retrieve important vehicle information such as Vehicle Identification Number (VIN), Calibration ID (CID), and Calibration Verification Number (CVN).
- Select 'ECU Info' from the main menu.
- The scanner will display the available vehicle information.
5.6 DTC Lookup Function
This feature allows you to look up the definition of a Diagnostic Trouble Code directly on the device, saving time from external searches.
- Select 'DTC Lookup' from the main menu.
- Enter the DTC code using the navigation buttons.
- The scanner will display the definition of the code.

Figure 5.3: DTC Lookup Function. This image shows the JD906 scanner's DTC Lookup interface, allowing users to input a code and view its definition, with a background diagram of a car highlighting potential fault locations.
5.7 Mode 6 (On-Board Monitor Test Results) and Mode 8 (EVAP System Test)
Mode 6 allows access to the results of on-board diagnostic monitoring tests for specific components/systems that are not continuously monitored. Mode 8 initiates a leak test for the vehicle's Evaporative Emission Control (EVAP) system.
- Select 'Mode 6' or 'Mode 8' from the main menu.
- Follow the on-screen prompts to perform the respective tests and view results.

Figure 5.4: Mode 6 and Mode 8 Support. This image displays the JD906 scanner's interface for accessing Mode 6 (On-Board Monitor Test Results) and Mode 8 (EVAP System Leak Test), with explanatory text for each mode.
5.8 Battery Test
The JD906 can monitor the vehicle's battery in real-time and perform a health check, displaying voltage and identifying potential issues.
- Select 'Battery Test' from the main menu.
- The scanner will display the current battery voltage and a graph of voltage over time.

Figure 5.5: Battery Health Test. This image shows the JD906 scanner performing a battery health test, displaying the current voltage and a graphical representation of voltage fluctuations.
5.9 O2 Sensor Test
This function allows retrieval and viewing of O2 sensor monitor test results for the most recently completed tests from the vehicle's on-board computer.
- Select 'O2 Sensor' from the main menu.
- Review the O2 sensor test results.
5.10 Review and Print Data
The scanner allows you to review previously recorded diagnostic data and print reports for analysis or record-keeping.
- Select 'Review' from the main menu to access saved data.
- To print data, connect the scanner to a computer via USB and use the dedicated PC software (if available from TopDiag) to print reports.
6. Maintenance
6.1 Cleaning the Scanner
Use a soft, damp cloth to clean the exterior of the scanner. Do not use abrasive cleaners or solvents. Keep the screen clean and free of dust and smudges for optimal visibility.
6.2 Storage
When not in use, store the JD906 scanner in its protective tool box in a cool, dry place, away from direct sunlight and extreme temperatures. Avoid dropping the device or exposing it to excessive moisture.
6.3 Software Updates
Periodically check the official TopDiag website for available software updates. Keeping your scanner's software up-to-date ensures compatibility with the latest vehicle models and diagnostic protocols, and may introduce new features or performance improvements.
7. Troubleshooting
7.1 Common Issues and Solutions
| Issue | Possible Cause | Solution |
|---|---|---|
| Scanner does not power on. | Loose connection; vehicle's ignition not on; vehicle's battery low. | Ensure the OBD2 connector is firmly plugged in. Turn the vehicle's ignition to the ON position. Check vehicle battery voltage. |
| Communication error with vehicle. | Incorrect protocol; faulty connection; vehicle's ECU issue. | Verify the connection. Try on another OBD2 compliant vehicle. Ensure vehicle's ignition is ON. |
| Screen freezes or device is unresponsive. | Software glitch; temporary error. | Disconnect the scanner from the vehicle, wait a few seconds, then reconnect. If persistent, check for software updates. |
| Unexpected dash lights after use. | Rare vehicle incompatibility; specific vehicle system sensitivity. | While rare, some vehicles may react unexpectedly to diagnostic tools. Try clearing codes again. If lights persist, consult a professional mechanic or use another diagnostic tool. |
If you encounter issues not listed here or if the suggested solutions do not resolve the problem, please refer to the support section for further assistance.
8. Specifications
| Attribute | Detail |
|---|---|
| Model | JD906 |
| Brand | TopDiag |
| Item Weight | 1.39 pounds |
| Package Dimensions | 8.66 x 7.4 x 1.97 inches |
| Manufacturer Part Number | JD906 |
| UPC | 794969059147 |
| First Available Date | March 22, 2024 |
9. Warranty and Support
9.1 Return Policy
The JD906 scanner is typically covered by a 30-day return policy for refund or replacement. Please refer to your purchase platform's specific return guidelines for detailed terms and conditions.
9.2 Customer Support
For technical assistance, product inquiries, or warranty claims, please visit the official TopDiag store or contact their customer service through the platform where the product was purchased. You can find more information and contact details on the TopDiag Amazon Store.