
1. Introduction
This manual provides detailed instructions for the installation, operation, and maintenance of your CAMECHO 6.86 Inch Dual DIN Car Radio. Please read this manual thoroughly before using the product to ensure proper function and safety. Keep this manual for future reference.
2. Safety Information
- Ensure proper installation by a qualified professional to prevent damage to the vehicle or the device.
- Do not operate the device in a manner that distracts you from driving. Always prioritize road safety.
- Avoid exposing the device to extreme temperatures, direct sunlight for prolonged periods, or excessive moisture.
- Use only specified power cables and accessories.
- Do not attempt to disassemble or modify the unit. This may void the warranty and cause damage.
3. Package Contents
Verify that all items are present in the package before installation.

Image 3.1: Illustration of the CAMECHO Car Radio's packing list and dimensions. This image displays the main unit, a 12 LED rear camera, power cable, speaker cable, steering wheel control remote, microphone, antenna, user manual, and mounting bracket. Dimensions for the unit (180mm x 105mm x 93mm) and the rear panel connections are also shown.
- CAMECHO 6.86 Inch Dual DIN Car Radio Unit
- 12 LED Rear View Camera
- Power Cable
- Speaker Cable
- Steering Wheel Control Remote
- External Microphone
- Antenna
- User Manual (this document)
- Mounting Bracket
4. Setup and Installation
4.1 Wiring Diagram
Refer to the wiring diagram provided in Image 3.1 (Packing List & Size) for correct connections. Ensure all connections are secure before powering on the unit.
- Power Connection: Connect the yellow wire to the constant 12V power supply, the red wire to the accessory (ACC) 12V power supply, and the black wire to ground.
- Speaker Connection: Connect the speaker wires according to their polarity (positive and negative) to the corresponding vehicle speakers.
- Rear View Camera: Connect the camera's video output to the 'VIN' input on the radio and the camera's power to the vehicle's reverse light circuit.
- Antenna: Connect the radio antenna to the designated antenna input.
- Steering Wheel Control (SWC): Connect the SWC wires to your vehicle's steering wheel control interface, if applicable.
- External Microphone: Plug the external microphone into the 'MIC' input for improved call quality.
4.2 Mounting
Install the unit into your vehicle's double DIN slot using the provided mounting bracket. Secure the unit firmly to prevent movement during driving.
5. Operating Instructions
5.1 Basic Controls
The unit features a 6.86-inch touch screen and physical buttons/knobs for common functions. Refer to the main product image for button layout.
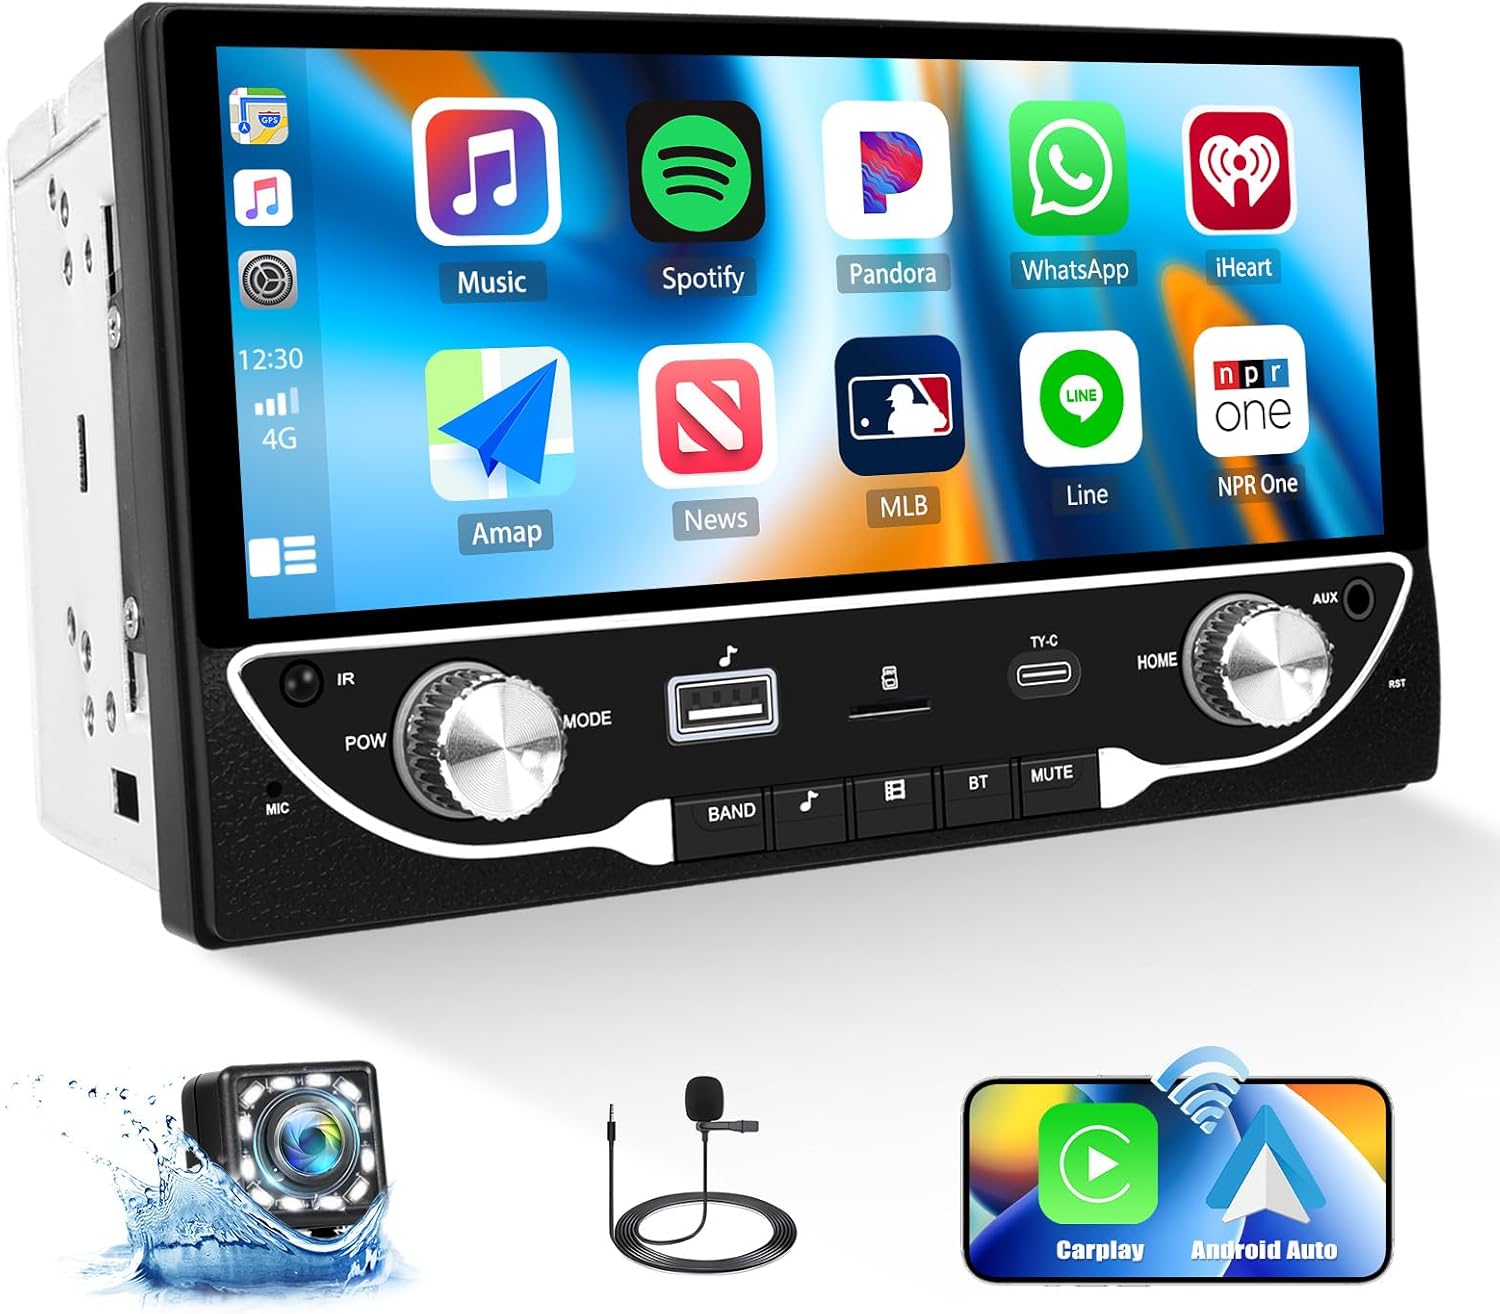
Image 5.1: Front view of the CAMECHO 6.86 Inch Dual DIN Car Radio, showing the touch screen interface with various app icons, two rotary knobs (POWER/VOL and MODE/BAND), and several buttons (IR, MIC, TY-C, HOME, AUX, RST, BT, MUTE).
- Power/Volume Knob: Press to power on/off, rotate to adjust volume.
- Mode/Band Knob: Press to cycle through audio sources (FM, USB, BT, AUX), rotate to change radio stations or tracks.
- Touch Screen: Navigate menus and control functions by touching the screen.
- HOME Button: Returns to the main menu.
- MUTE Button: Mutes/unmutes audio.
- RST (Reset) Button: A small pinhole button to reset the unit to factory settings. Use a thin object to press.
5.2 Wireless Carplay & Android Auto
Connect your smartphone wirelessly to access navigation, music, calls, and messages directly on the car radio display.
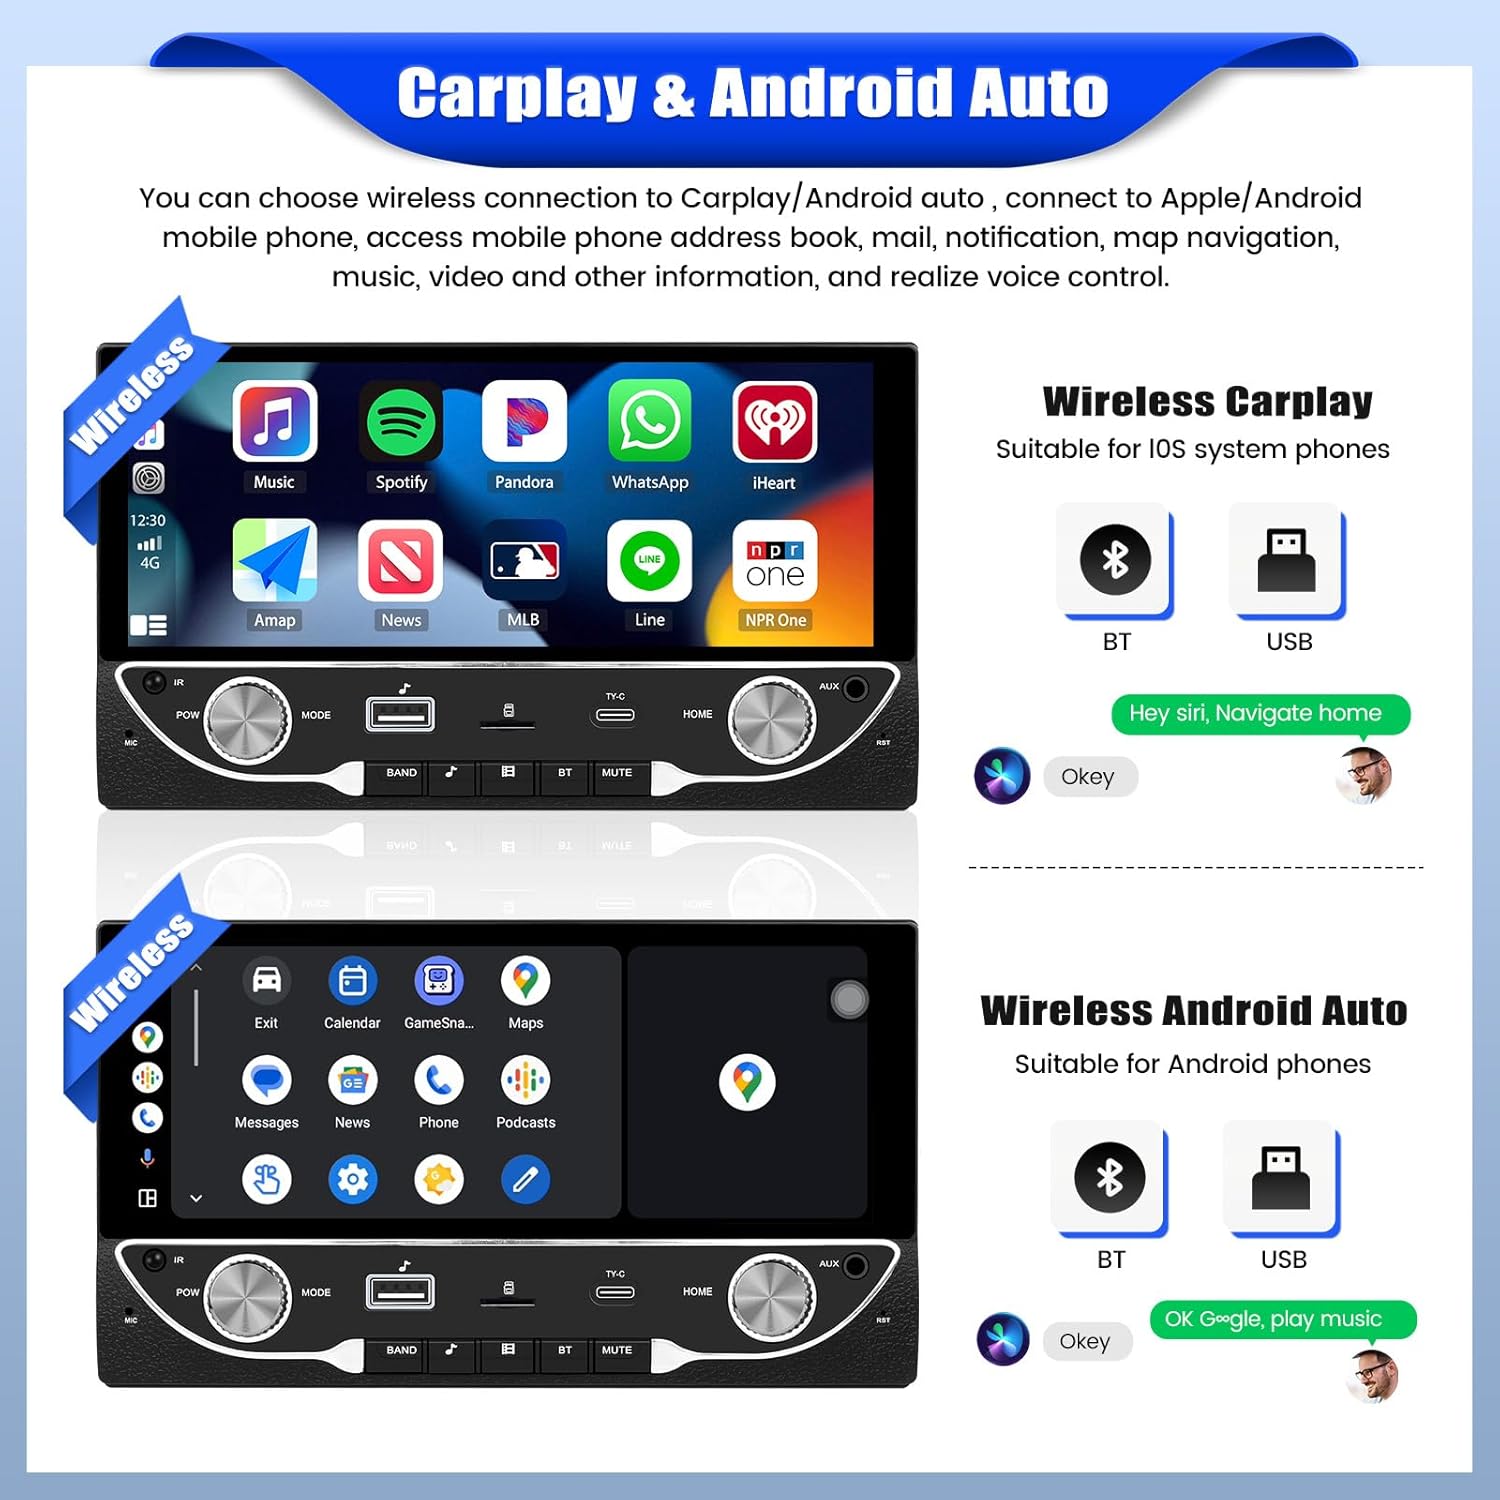
Image 5.2: This image illustrates the wireless Carplay and Android Auto functionalities. It shows the car radio display with iOS-like app icons for Carplay and Android-like app icons for Android Auto, indicating compatibility with both systems via Bluetooth and USB connections. Voice control examples are also provided.
- For Wireless Carplay (iOS): Enable Bluetooth on your iPhone and pair with the car radio. Follow the on-screen prompts to activate Carplay.
- For Wireless Android Auto (Android): Enable Bluetooth on your Android phone and pair with the car radio. Ensure Android Auto is installed on your phone and follow the on-screen prompts.
- Voice control is supported for both Carplay and Android Auto.
5.3 iOS/Android Mirror Link (Wired)
Mirror your smartphone screen onto the car radio display via a wired USB connection.

Image 5.3: This image demonstrates the wired Mirror Link feature for iOS and Android phones. It shows a smartphone screen displaying a navigation app, which is then mirrored onto the car radio's larger display via a USB cable connection.
- Connect your smartphone to the unit's USB port using a high-quality USB cable.
- Select the 'Mirror Link' option on the car radio.
- Follow any prompts on your phone to allow screen mirroring.
5.4 Bluetooth 5.0 & FM Radio
Utilize Bluetooth for hands-free calling and audio streaming, and enjoy FM radio broadcasts.
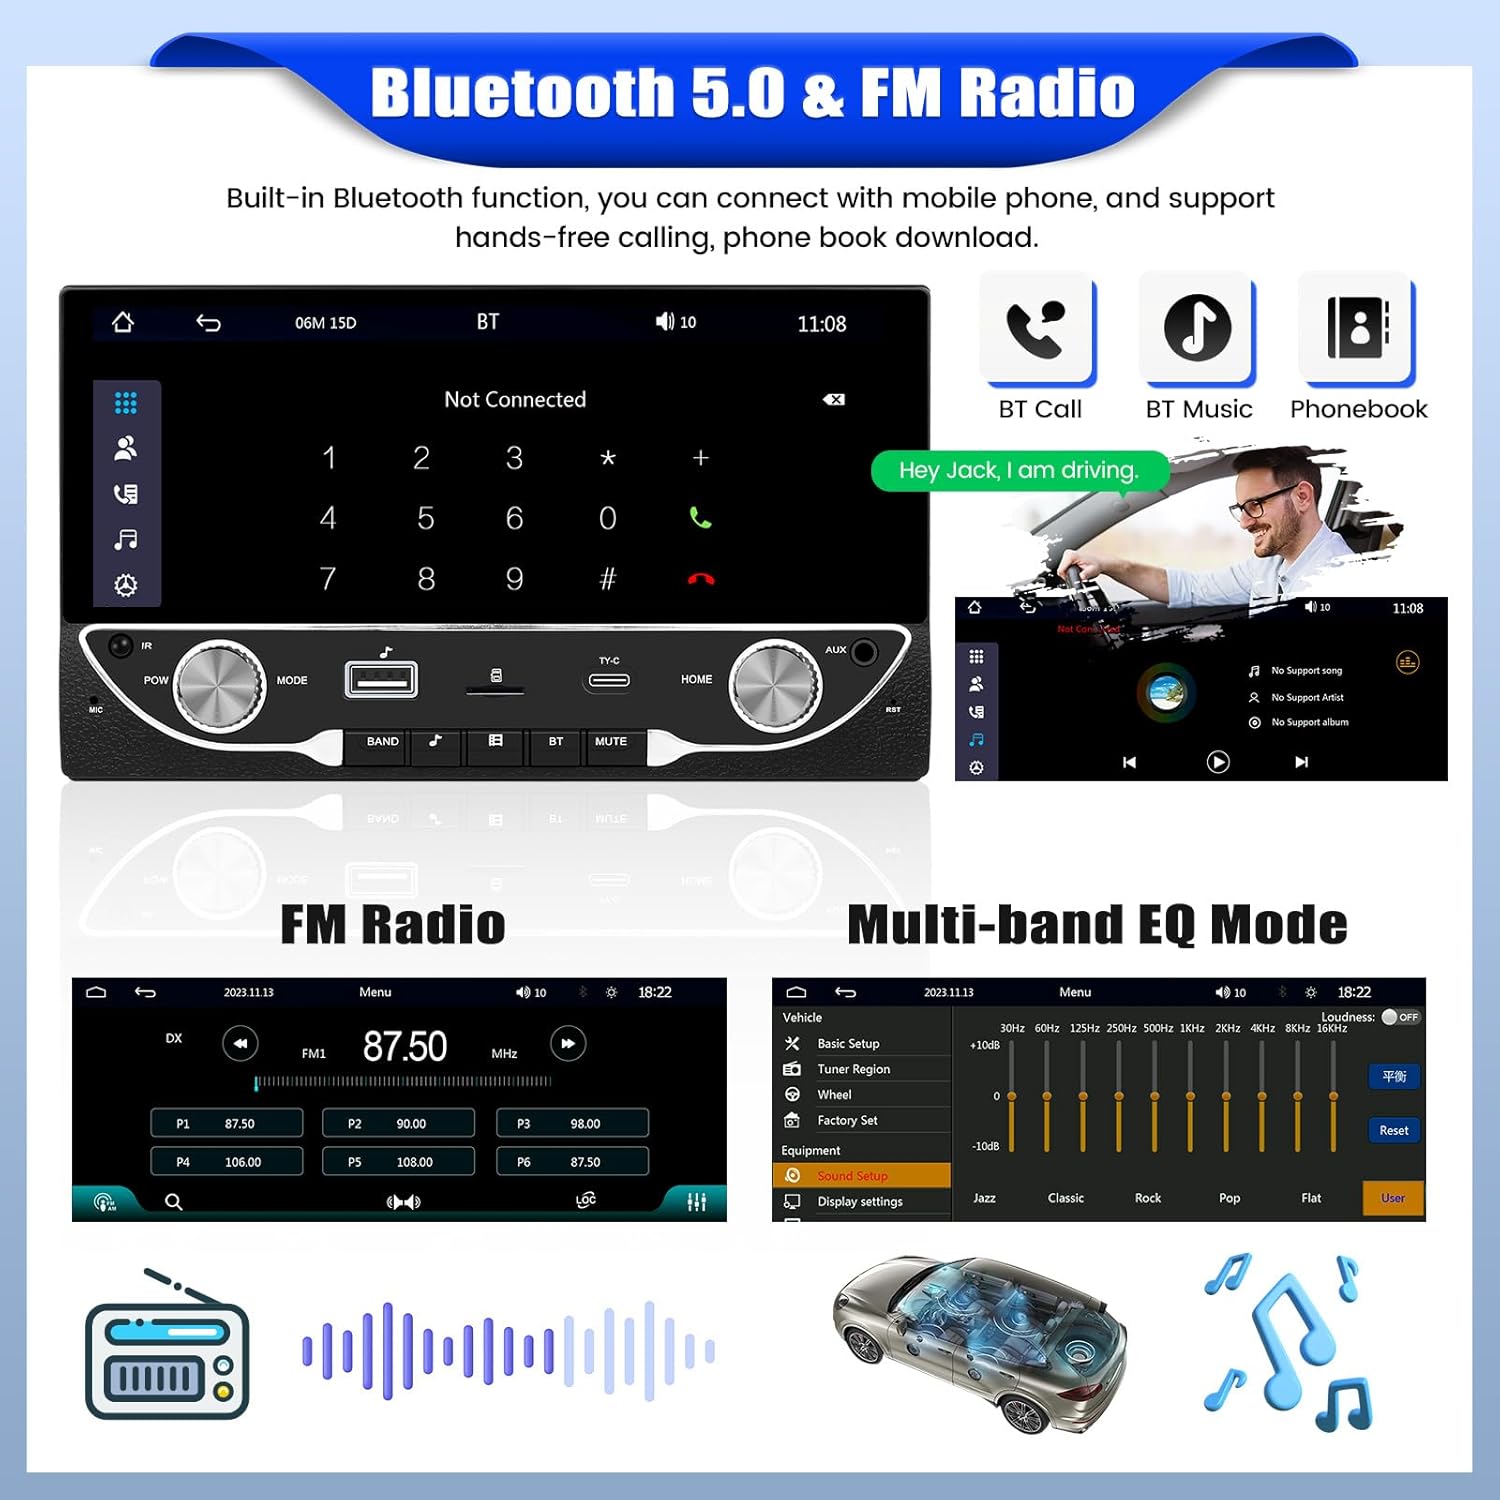
Image 5.4: This image highlights the Bluetooth 5.0 and FM Radio capabilities. It shows the Bluetooth interface for calls and music playback, including phone book download. The FM radio interface with station presets and a multi-band EQ mode for sound customization are also depicted.
- Bluetooth Pairing: Go to the Bluetooth menu, enable Bluetooth on your phone, search for the car radio (e.g., "CAMECHO Car Radio"), and pair.
- Hands-Free Calling: Once paired, you can make and receive calls directly through the car radio.
- Bluetooth Music: Stream audio from your phone to the car radio.
- FM Radio: Select the FM radio source. Use the touch screen or physical controls to scan for stations (87.5-108 MHz) and save presets.
5.5 Media Playback (Type-C/USB/AUX/TF)
The unit supports various media inputs for audio and video playback.

Image 5.5: This image details the supported input types: USB, Type-C, and AUX-IN. It shows the physical ports on the unit and an example of a smartphone charging via the Type-C port. Additionally, it illustrates the 7-color backlight feature, allowing users to customize the button illumination.
- USB/Type-C: Insert a USB drive or Type-C device containing media files. The unit will automatically detect and allow playback.
- TF Card: Insert a TF (MicroSD) card into the designated slot for media playback.
- AUX-IN: Connect external audio devices using a 3.5mm audio cable to the AUX-IN port.
5.6 Steering Wheel Control (SWC)
Control basic functions of the radio directly from your vehicle's steering wheel buttons.

Image 5.6: This image demonstrates the Steering Wheel Control (SWC) setup interface, showing options to program buttons for functions like volume, track change, and call handling. It also highlights the features of the included reversing camera, such as HD clear image, waterproof design, 170° wide angle, and night vision, with an example of the camera's view on the car radio screen.
- Access the SWC settings menu on the radio.
- Follow the on-screen instructions to program your steering wheel buttons to control functions like volume, track skip, and call answer/reject.
5.7 Rear View Camera
The included rear view camera provides a clear image of the area behind your vehicle when reversing.
- When the vehicle is shifted into reverse gear, the radio display will automatically switch to the camera view.
- The camera features HD clear image, waterproof design, 170° wide angle, and night vision capabilities.
5.8 Sound Settings
Adjust audio output to your preference using the built-in equalizer.
- Navigate to the 'Sound Setup' or 'EQ' menu.
- Choose from preset equalizer modes (e.g., Jazz, Classic, Pop, Rock) or customize your own settings.
5.9 Display Settings
Customize the backlight color of the unit's buttons.
- Access the 'Display Settings' menu.
- Select from 7 available backlight colors to match your vehicle's interior or personal preference.
6. Maintenance
- Cleaning: Use a soft, dry cloth to clean the unit's screen and exterior. For stubborn marks, slightly dampen the cloth with water. Avoid harsh chemicals or abrasive cleaners.
- Software Updates: Periodically check the manufacturer's website for any available software updates to ensure optimal performance and new features.
- Temperature: Do not leave the unit in direct sunlight or in an environment with extremely high or low temperatures for extended periods.
7. Troubleshooting
If you encounter issues, refer to the following common problems and solutions:
- No Power:
- Check all power connections (constant 12V, ACC 12V, ground).
- Verify vehicle fuses are intact.
- No Sound:
- Check speaker wiring connections.
- Ensure volume is not muted or set to minimum.
- Verify correct audio source is selected.
- Bluetooth Connection Issues:
- Ensure Bluetooth is enabled on both the radio and your phone.
- Delete previous pairings and re-pair the devices.
- Restart both the radio and your phone.
- Rear Camera Not Displaying:
- Check the camera's video input connection to the radio.
- Ensure the camera's power supply is correctly connected to the reverse light circuit.
- Touch Screen Unresponsive:
- Perform a soft reset using the RST button.
- If the issue persists, contact customer support.
8. Specifications
| Feature | Specification |
|---|---|
| Brand | CAMECHO |
| Model Number | 6.86 Inch Touch Screen Car Radio |
| Display Size | 6.86 Inches |
| Form Factor | Dual DIN |
| Connectivity | Wireless Carplay, Android Auto, Bluetooth 5.0, Mirror Link (Wired), USB, Type-C, AUX-IN, TF Card |
| Radio Tuner | FM (87.5-108 MHz) |
| Rear Camera | 12 LED, HD, Waterproof, 170° Wide Angle, Night Vision |
| Steering Wheel Control | Supported (via included remote) |
| Package Dimensions | 20 x 13 x 13 cm |
| Item Weight | 900 g |
9. Warranty and Support
For warranty information and technical support, please refer to the contact details provided on the CAMECHO official website or your purchase documentation. Keep your proof of purchase for warranty claims.