1. Introduction
This manual provides detailed instructions for the safe and efficient operation of your heetipuk Y2 Mini Karaoke Machine. Please read this manual thoroughly before using the product and retain it for future reference.

Figure 1.1: heetipuk Y2 Mini Karaoke Machine and two wireless microphones.
2. Package Contents
Verify that all items listed below are present and in good condition upon unpacking:
- 1 x Karaoke Speaker
- 2 x Wireless Microphones
- 1 x USB Type-C Charging Cable
3. Setup and Initial Use
3.1 Charging the Device
Before first use, fully charge the karaoke speaker and both microphones. Use the provided USB Type-C charging cable.
- Connect the USB Type-C cable to the charging port on the speaker and microphones.
- Connect the other end of the cable to a compatible USB power adapter (not included), computer, or laptop.
- The charging indicator light will illuminate during charging and turn off when fully charged.
- A full charge provides up to 4 hours of playtime for the microphone with the speaker.
3.2 Powering On/Off
- To power on the speaker: Press and hold the power button on the speaker until the indicator light turns on.
- To power on the microphones: Press and hold the power button on each microphone until the indicator light turns on.
- To power off: Press and hold the power button on the respective device until the indicator light turns off.
3.3 Bluetooth Pairing
The Y2 Mini Karaoke Machine supports Bluetooth 5.3 for wireless audio streaming.
- Ensure the karaoke speaker is powered on. It will automatically enter Bluetooth pairing mode, indicated by a flashing light.
- On your mobile device (smartphone, tablet, etc.), enable Bluetooth and search for available devices.
- Select "Y2 Karaoke" from the list of devices.
- Once paired, the speaker will emit a confirmation sound, and the indicator light will become solid.
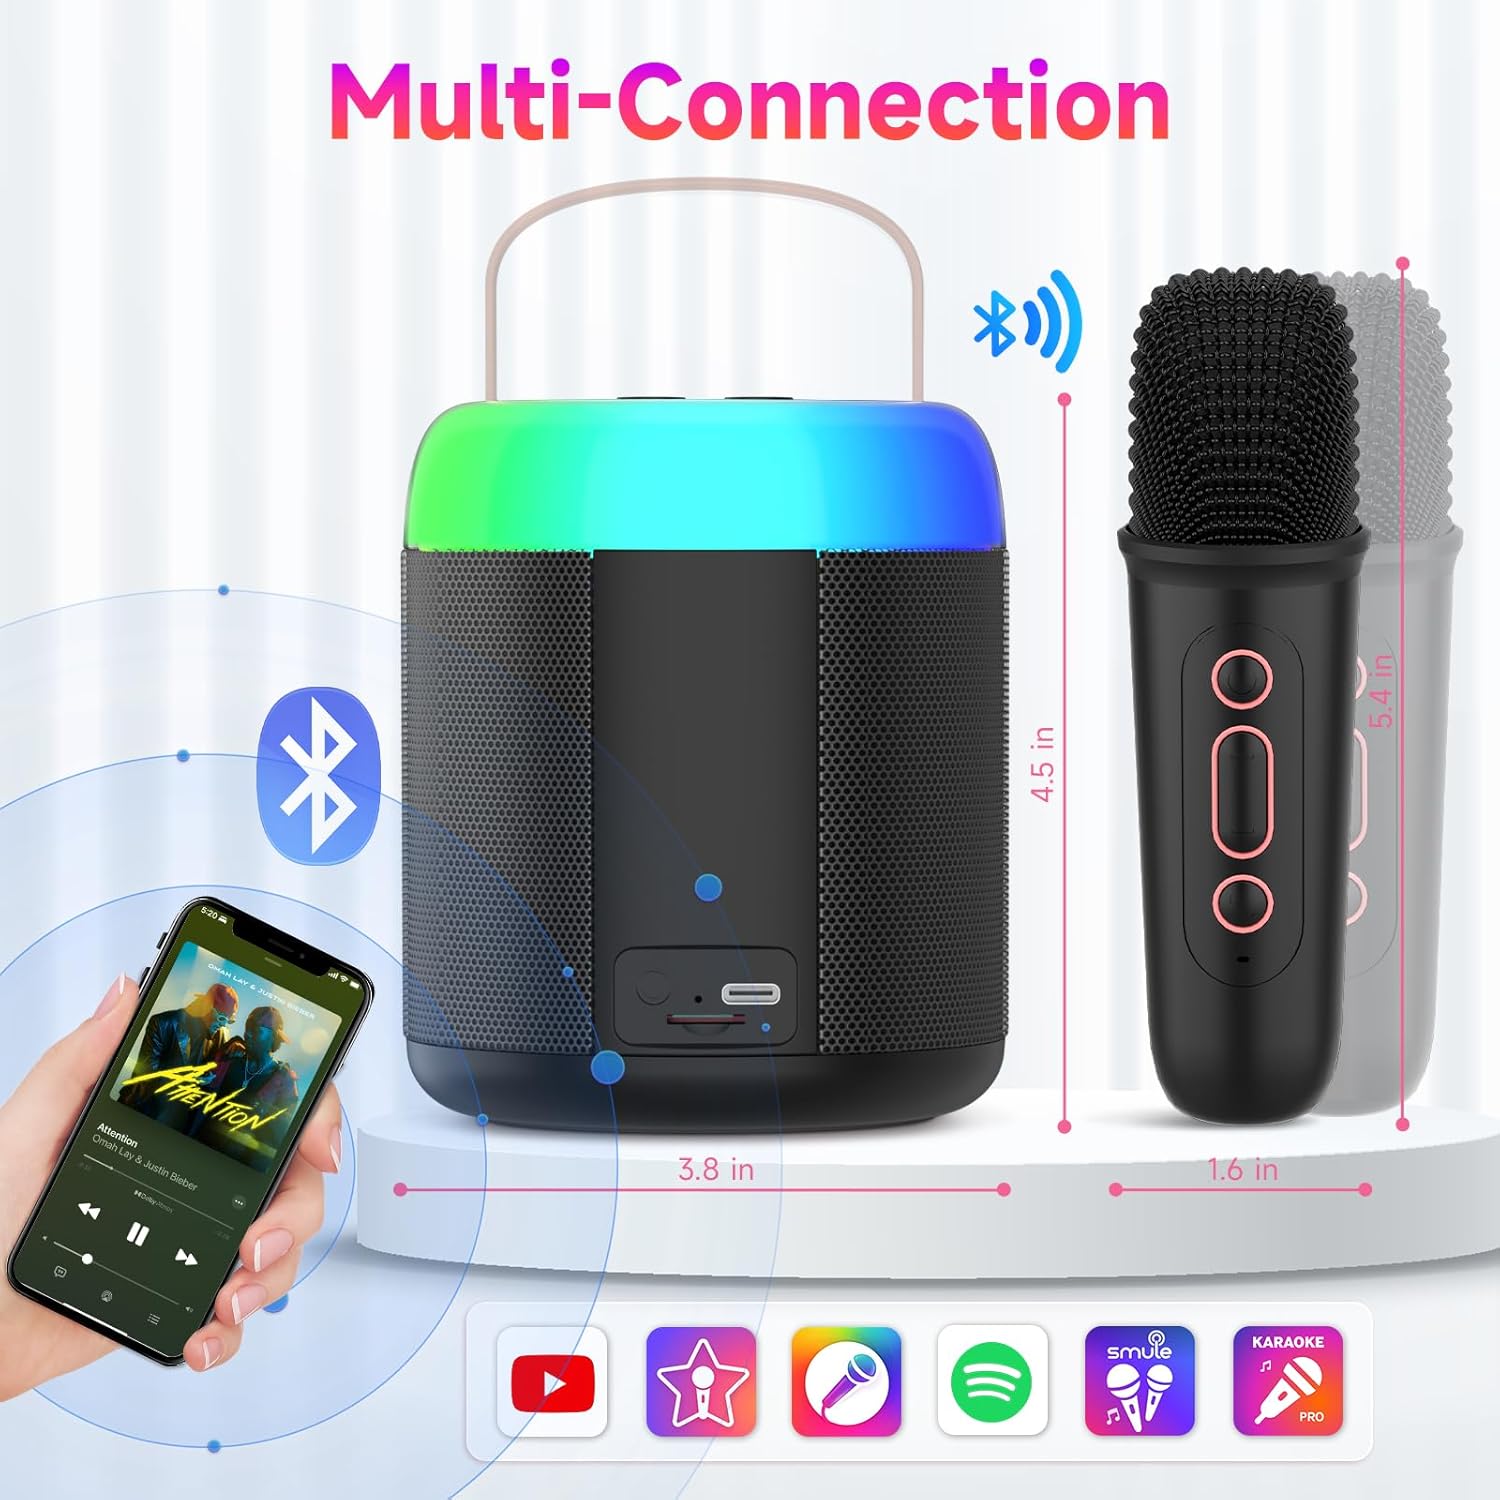
Figure 3.1: Multi-connection options including Bluetooth, TF card slot, and headphone jack.
4. Operating Instructions
4.1 Microphone Usage
The two wireless microphones automatically connect to the speaker when powered on.
- Speak or sing into the microphone.
- Adjust microphone volume using the dedicated buttons on the microphone or speaker.
- Important: To prevent a screeching sound (feedback), avoid placing the microphone too close to the speaker, especially when the speaker volume is high.
4.2 Voice Effects
The Y2 Mini Karaoke Machine offers five distinct voice effects to enhance your performance:
- Original Voice: Standard vocal output.
- Male to Female: Transforms your voice to a higher pitch.
- Female to Male: Transforms your voice to a lower pitch.
- Quirky Monster Sounds: Adds a monstrous effect to your voice.
- Adorable Childlike Tones: Creates a high-pitched, childlike voice effect.
Use the dedicated button on the microphone to cycle through these effects. The device also includes echo and reverb adjustments.

Figure 4.1: Available voice effects for the microphones.
4.3 Dynamic Lighting Effects
The speaker features colorful dance lights with 5 modes to create an engaging atmosphere.
- Press the light mode button on the speaker to cycle through the 5 dynamic RGB lighting effects.
- Press and hold the button to turn the lights off.
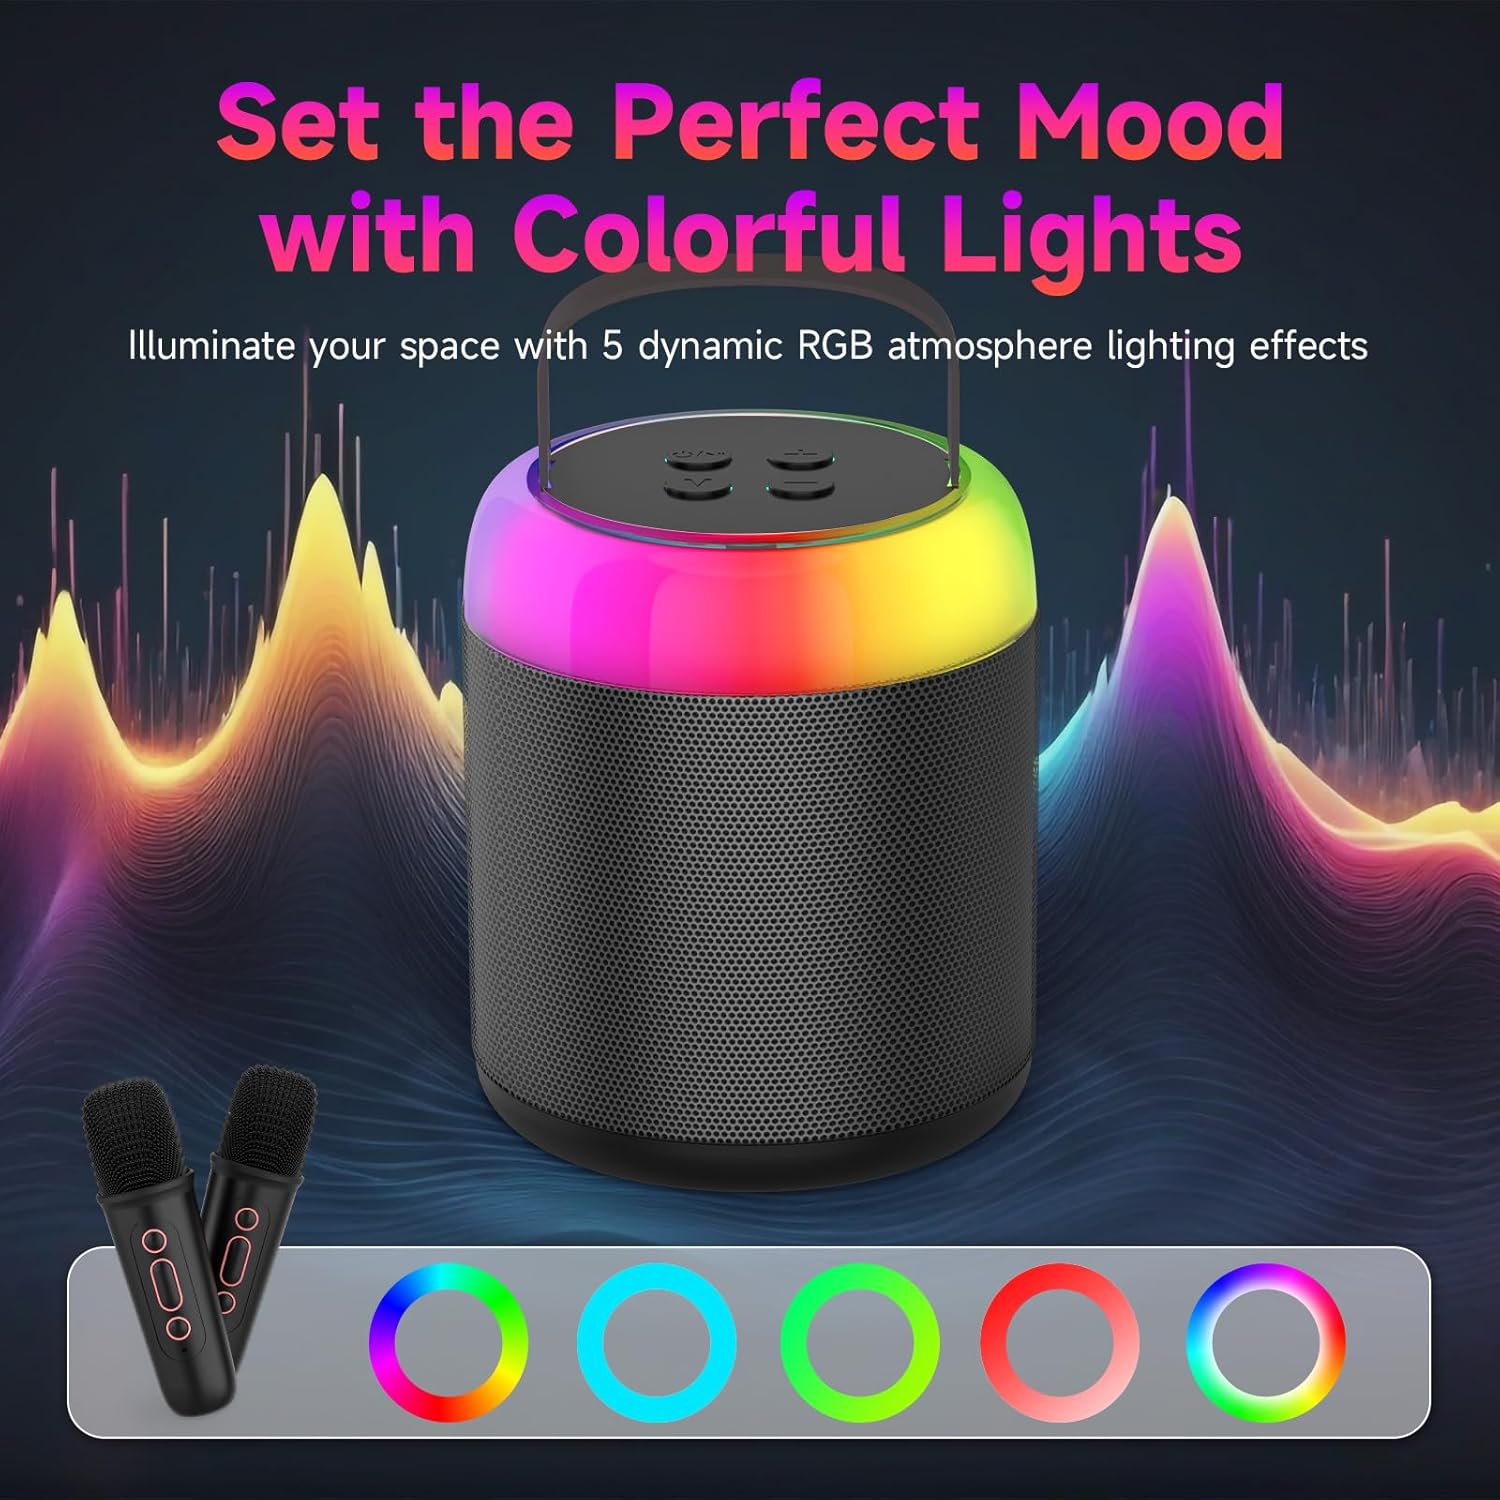
Figure 4.2: Speaker with dynamic RGB lighting effects.
4.4 Playback Options
In addition to Bluetooth, the Y2 Mini Karaoke Machine supports other playback methods:
- TF Card: Insert a TF (microSD) card with audio files into the designated slot on the speaker. The speaker will automatically play the content.
- Headphone Jack: Connect headphones to the 3.5mm audio jack for private listening.

Figure 4.3: Internal components highlighting DSP technology for clear sound.
5. Maintenance and Care
- Cleaning: Use a soft, dry cloth to clean the surface of the speaker and microphones. Do not use abrasive cleaners or solvents.
- Storage: Store the device in a cool, dry place away from direct sunlight and extreme temperatures.
- Water Exposure: This device is not waterproof. Avoid exposure to water or excessive moisture.
- Battery Care: To prolong battery life, avoid fully discharging the battery frequently. Charge the device regularly, even if not in use for extended periods.
6. Troubleshooting
| Problem | Possible Cause | Solution |
|---|---|---|
| No power | Battery is depleted. | Charge the speaker and microphones using the provided USB Type-C cable. |
| No sound from speaker | Volume is too low; Device not paired; Incorrect input source. | Increase volume; Ensure Bluetooth is paired or TF card is inserted correctly; Check selected input mode. |
| Microphone not working | Microphone is off; Battery is depleted; Not paired with speaker. | Power on microphone; Charge microphone; Ensure microphone is within range and automatically paired. |
| Screeching sound (feedback) | Microphone too close to speaker; Volume too high. | Increase distance between microphone and speaker; Reduce speaker or microphone volume. |
| Bluetooth connection unstable | Distance too far; Interference; Low battery. | Move devices closer; Avoid obstacles; Charge devices. |
7. Specifications
| Feature | Detail |
|---|---|
| Brand | heetipuk |
| Model | Y2 |
| Product Dimensions | 17.5 x 15.49 x 11.51 cm (Speaker) |
| Weight | 621 g |
| Connectivity Technology | Bluetooth 5.3, TF Card, Auxiliary (Headphone Jack) |
| Power Source | Battery Powered (Lithium Polymer) |
| Battery Capacity (Speaker) | 1200mAh (Rechargeable) |
| Playtime (Microphone with Speaker) | Up to 4 hours |
| Charging Port | USB Type-C |
| Voice Effects | 5 modes (Original, Male to Female, Female to Male, Monster, Childlike) |
| Lighting Effects | 5 dynamic RGB atmosphere lighting modes |
8. Safety Information
- Do not disassemble, repair, or modify the device. This may cause damage, electric shock, or fire.
- Keep the device away from heat sources, direct sunlight, and flammable materials.
- Do not expose the device to rain, moisture, or immerse it in water.
- Use only the provided charging cable or a certified equivalent.
- Dispose of batteries and electronic components responsibly according to local regulations.
- This product contains small parts and is not suitable for children under 3 years old without adult supervision.
9. Warranty and Support
For warranty information or technical support, please refer to the purchase documentation or contact the retailer where the product was purchased. Keep your proof of purchase for warranty claims.