SPEDWHEL 125/60-7
Instruction Manual: 13 Inch 125/60-7 Tubeless Tire
For Teverun Fighter 7260R Electric Scooter
Brand: SPEDWHEL | Model: 125/60-7
1. Introduction
This manual provides essential information for the installation, operation, and maintenance of your new SPEDWHEL 13 Inch 125/60-7 Tubeless Tire, designed specifically for the Teverun Fighter 7260R Electric Scooter. This tire is a direct replacement accessory, ensuring optimal performance and safety for your scooter.

Figure 1: Overview of the 13 Inch 125/60-7 Tubeless Tire. This image shows the full profile of the tire, highlighting its tread pattern and overall design.
2. Setup and Installation
Proper installation is crucial for the safety and performance of your electric scooter. If you are unsure about any step, it is recommended to seek professional assistance.
2.1 Safety Precautions
- Ensure the scooter is powered off and stable before beginning any work.
- Wear appropriate safety gear, including gloves and eye protection.
- Work in a well-lit and clear area.
- Refer to your scooter's original manual for specific wheel removal instructions.
2.2 Tools Required
- Wrenches (appropriate sizes for axle nuts)
- Tire levers (for tubeless tires)
- Valve core tool
- Air compressor or pump with pressure gauge
- Soapy water solution (for bead seating)
2.3 Installation Steps
- Remove the Old Tire:
- Carefully remove the wheel from the scooter by loosening the axle nuts.
- Deflate the old tire completely by removing the valve core.
- Use tire levers to carefully pry the old tire off the rim, working around the circumference.
- Prepare the New Tire:
- Inspect the rim for any damage or debris. Clean thoroughly.
- Apply a thin layer of soapy water solution to the beads of the new tire. This aids in seating.
- Mount the New Tire:
- Place one bead of the new tire onto the rim.
- Carefully work the second bead onto the rim using tire levers, being cautious not to pinch the tire or damage the rim.
- Inflate and Seat the Bead:
- Reinstall the valve core.
- Begin inflating the tire. You should hear a distinct "pop" as the tire beads seat firmly against the rim. If the beads do not seat, deflate, reapply soapy water, and try again.
- Inflate to the recommended pressure (refer to the tire sidewall or scooter manual).
- Reinstall Wheel:
- Reattach the wheel to the scooter, ensuring all nuts and bolts are tightened to the manufacturer's specifications.
- Check for proper alignment and rotation.

Figure 2: Key dimensions of the tire. This image illustrates the approximate width (13cm), inner diameter (18cm), and outer diameter (29cm) of the tire, along with its weight (1.6kg), which are important for compatibility and installation.
3. Operating Guidelines
Once installed, proper operation of your scooter with the new tire involves maintaining correct tire pressure and being aware of riding conditions.
3.1 Recommended Tire Pressure
Always maintain the tire pressure within the recommended range. The optimal pressure for this tire is typically indicated on the tire's sidewall (e.g., 32 PSI / 225 kPa). Incorrect pressure can lead to:
- Under-inflation: Increased rolling resistance, reduced range, excessive heat buildup, and premature wear.
- Over-inflation: Reduced traction, harsher ride, and increased susceptibility to punctures from road debris.
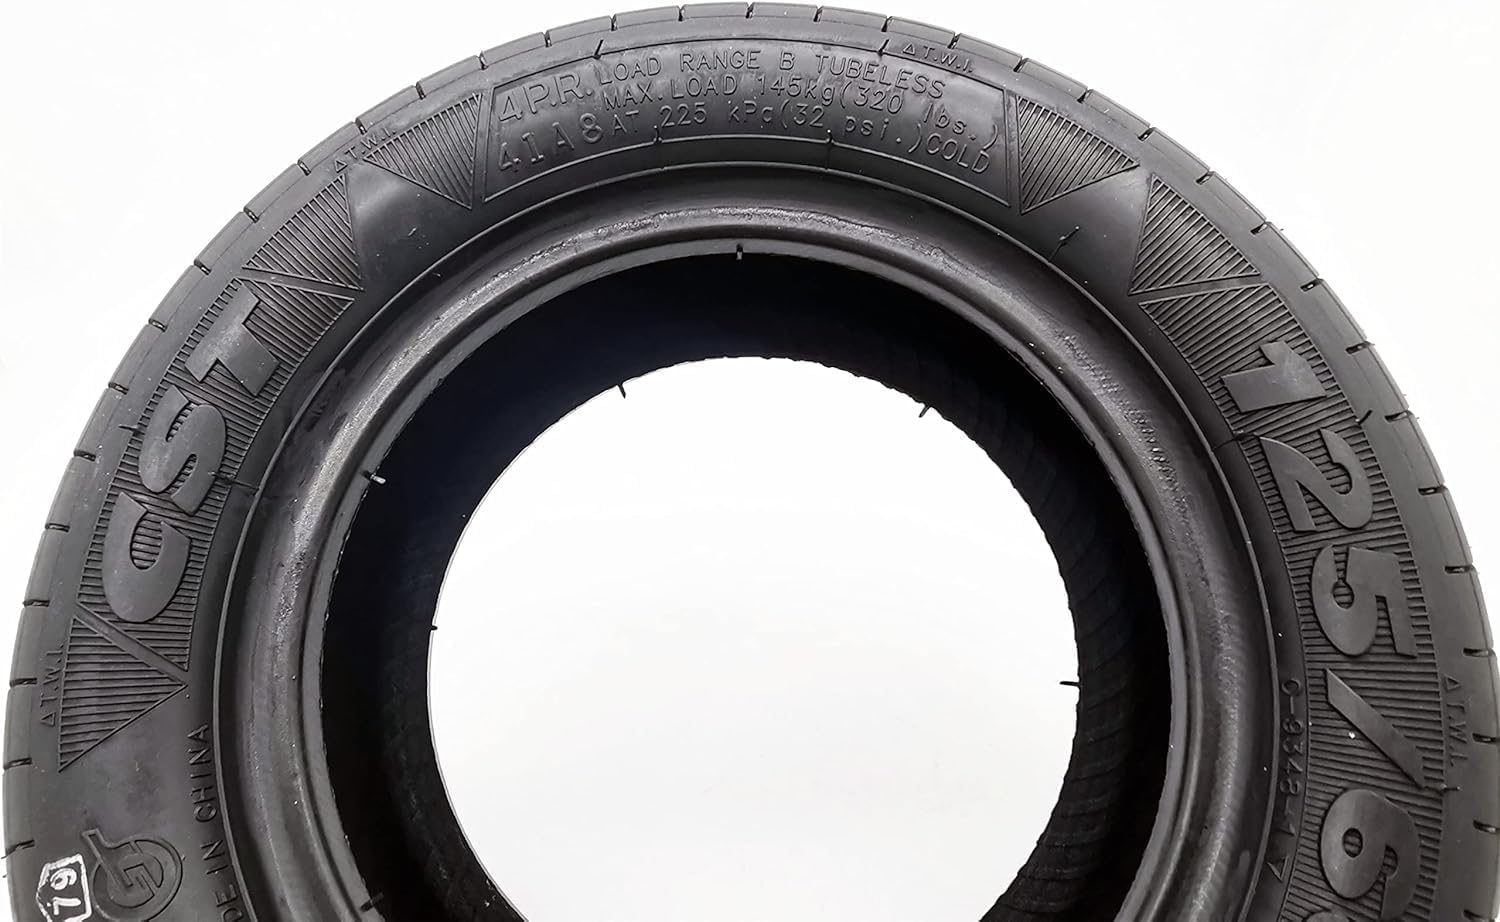
Figure 3: Tire sidewall markings. This image displays important information such as the maximum load (145kg / 320 lbs) and recommended cold inflation pressure (225 kPa / 32 PSI), crucial for safe operation.
3.2 Riding Conditions
While this tire is designed for general use, be mindful of extreme riding conditions:
- Avoid sharp objects and potholes that can damage the tire or rim.
- Reduce speed on wet or slippery surfaces as traction may be reduced.
- Do not exceed the maximum load capacity indicated on the tire sidewall.
4. Maintenance
Regular maintenance extends the life of your tire and ensures continued safe operation.
4.1 Regular Inspection
- Tire Pressure: Check tire pressure weekly, or before every long ride, using a reliable pressure gauge.
- Tread Wear: Inspect the tire tread for signs of excessive or uneven wear. Replace the tire when the tread depth is significantly reduced.
- Damage: Look for cuts, cracks, bulges, or embedded objects (like glass or nails) in the tire. Remove any foreign objects carefully.
- Sidewall: Check the sidewalls for any signs of cracking or deterioration.
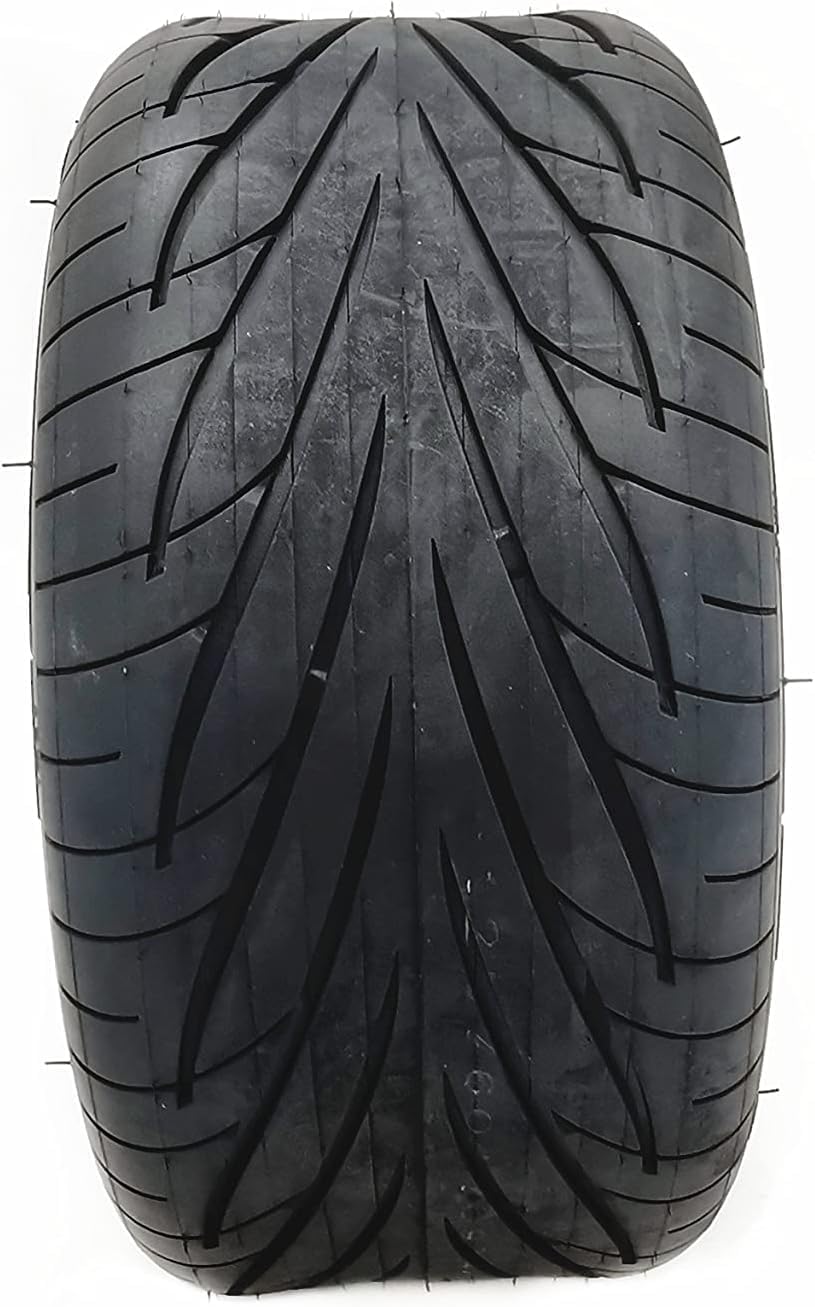
Figure 4: Detailed view of the tire tread. Regular inspection of the tread pattern helps identify wear and potential damage, ensuring optimal grip and safety.
4.2 Cleaning and Storage
- Clean the tire with mild soap and water. Avoid harsh chemicals that can degrade rubber.
- Store the scooter in a cool, dry place away from direct sunlight and extreme temperatures when not in use.
5. Troubleshooting
This section addresses common issues you might encounter with your tire.
| Problem | Possible Cause | Solution |
|---|---|---|
| Rapid Air Loss / Flat Tire | Puncture, valve stem leak, improper bead seating. | Inspect for punctures. If small, a tubeless repair kit may be used. Check valve stem for tightness. Re-seat tire bead if necessary. If damage is significant, replace the tire. |
| Uneven Tread Wear | Incorrect tire pressure, misaligned wheel, aggressive riding style. | Ensure correct tire pressure is maintained. Check wheel alignment. Adjust riding habits. |
| Vibration or Wobble | Improperly seated tire, damaged rim, unbalanced wheel. | Check tire bead seating. Inspect rim for damage. If issues persist, professional inspection is recommended. |
6. Product Specifications
Detailed specifications for the SPEDWHEL 13 Inch 125/60-7 Tubeless Tire.
- Brand: SPEDWHEL
- Model: 125/60-7
- Tire Type: Tubeless
- Construction Type: Tubeless
- Tread Type: Asymmetrical
- Item Dimensions (L x W x H): 11.5 x 5.1 x 5.1 inches (approx. 29 x 13 x 13 cm)
- Weight: Approximately 1.6 kg (3.5 lbs)
- Max Load: 145 kg (320 lbs)
- Recommended Cold Pressure: 225 kPa (32 PSI)
- Compatibility: Teverun Fighter 7260R Electric Scooter
- UPC: 744612581396

Figure 5: Top view of the tire. This image provides a clear perspective of the tire's width and the full extent of its asymmetrical tread pattern, along with side markings.

Figure 6: Side view of the tire. This image highlights the "125/60-7" size designation and other manufacturing details embossed on the tire's sidewall.
7. Warranty and Support
Information regarding product warranty and customer support.
7.1 Warranty Information
Specific warranty details for this product are not provided in this manual. Please refer to the product packaging or the official SPEDWHEL website for the most current warranty policy. Typically, warranties cover manufacturing defects but do not cover damage due to improper installation, misuse, or normal wear and tear.
7.2 Customer Support
For technical assistance, installation queries, or warranty claims, please contact SPEDWHEL customer support through their official channels. Contact information can usually be found on the product packaging or their official website.
Related Documents - 125/60-7
 |
Xantrex XKW 1000 Watt Series Programmable DC Power Supply Operating Manual This operating manual details the Xantrex XKW 1000 Watt Series Programmable DC Power Supplies. It covers features, specifications, installation, operation, and calibration for models XKW 8-125 through XKW 600-1.7, emphasizing high power density and remote control capabilities. |
 |
DES3 Series Gas-Fired Infrared Tube Heaters - Submittal Data & Specifications Detailed submittal data, specifications, clearances, and accessories for the Re-Verber-Ray DES3 Series single-stage low-intensity gas-fired infrared tube heaters. Includes model numbers, performance data, and installation requirements. |
 |
Ashly FX and FXD Power Amplifiers Operating Manual Comprehensive operating manual for Ashly FX and FXD series power amplifiers, covering installation, network configuration, software menus, GPIO setup, and technical specifications. |
 |
Detroit Radiant Products DES Series 4" Tube Heater Installation, Operation, Maintenance, and Parts Manual Comprehensive manual for Detroit Radiant Products DES Series 4-inch tube heaters, covering installation, operation, maintenance, safety warnings, technical specifications, wiring diagrams, troubleshooting, and parts lists. Includes model details from DES 20-50 to DES 60-175. |
 |
Hilti Tool Spares List for Central Warehouse Purchase Comprehensive list of Hilti tool spare parts available for purchase from the central warehouse, including part numbers, descriptions, and ordering information for self-maintenance. |
 |
Хомути для вентиляційних систем Vents: Серії X, ХБ, ХБР Технічний опис, розміри та інструкції з монтажу хомутів Vents серій X, ХБ та ХБР для вентиляційних систем. |
Ask a question about this manual
Ask about setup, troubleshooting, compatibility, parts, safety, or missing instructions. Manuals+ will review the question and use this page’s manual context to help answer it.