KCO C1079-G
KCO Lighting 16" Vintage Green Flush Mount Ceiling Light (Model C1079-G) Instruction Manual
Brand: KCO | Model: C1079-G
1. Introduction
Thank you for purchasing the KCO Lighting 16" Vintage Green Flush Mount Ceiling Light. This manual provides detailed instructions for safe installation, operation, and maintenance of your new lighting fixture. Please read this manual thoroughly before installation and retain it for future reference.
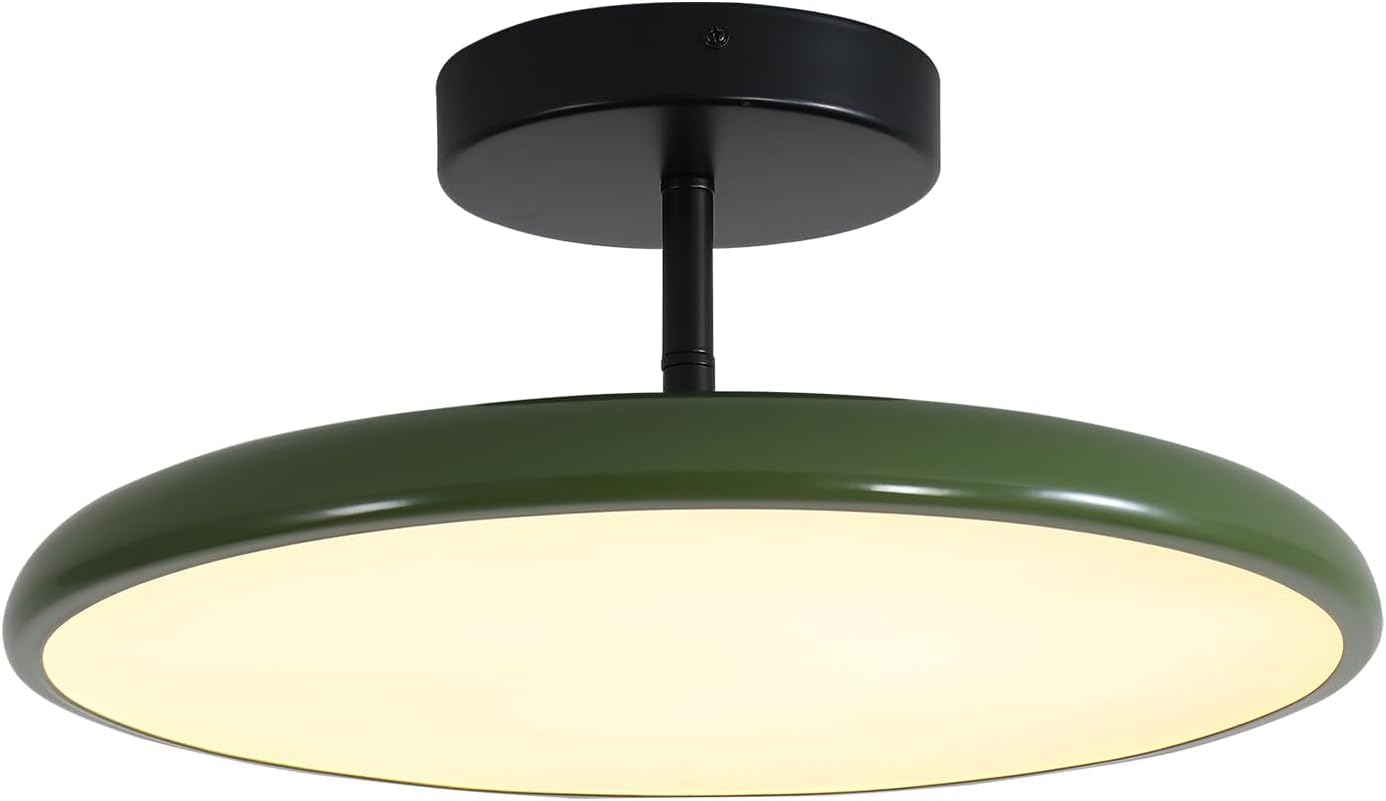
Image: KCO Lighting 16" Vintage Green Flush Mount Ceiling Light.
2. Important Safety Information
- Always turn off the power at the main circuit breaker before beginning installation.
- Consult a qualified electrician if you are unsure about the installation process.
- Ensure all electrical connections are secure and comply with local codes.
- Do not exceed the specified voltage (110-220V) for this fixture.
- This product is designed for indoor use only.
- Handle glass components with care to prevent breakage.
3. Package Contents
Verify that all components are present and undamaged before proceeding with installation.
- Flush Mount Ceiling Light Fixture (Green Metal Shade)
- Mounting Hardware (screws, wire nuts, mounting plate)
- Remote Control
- Instruction Manual
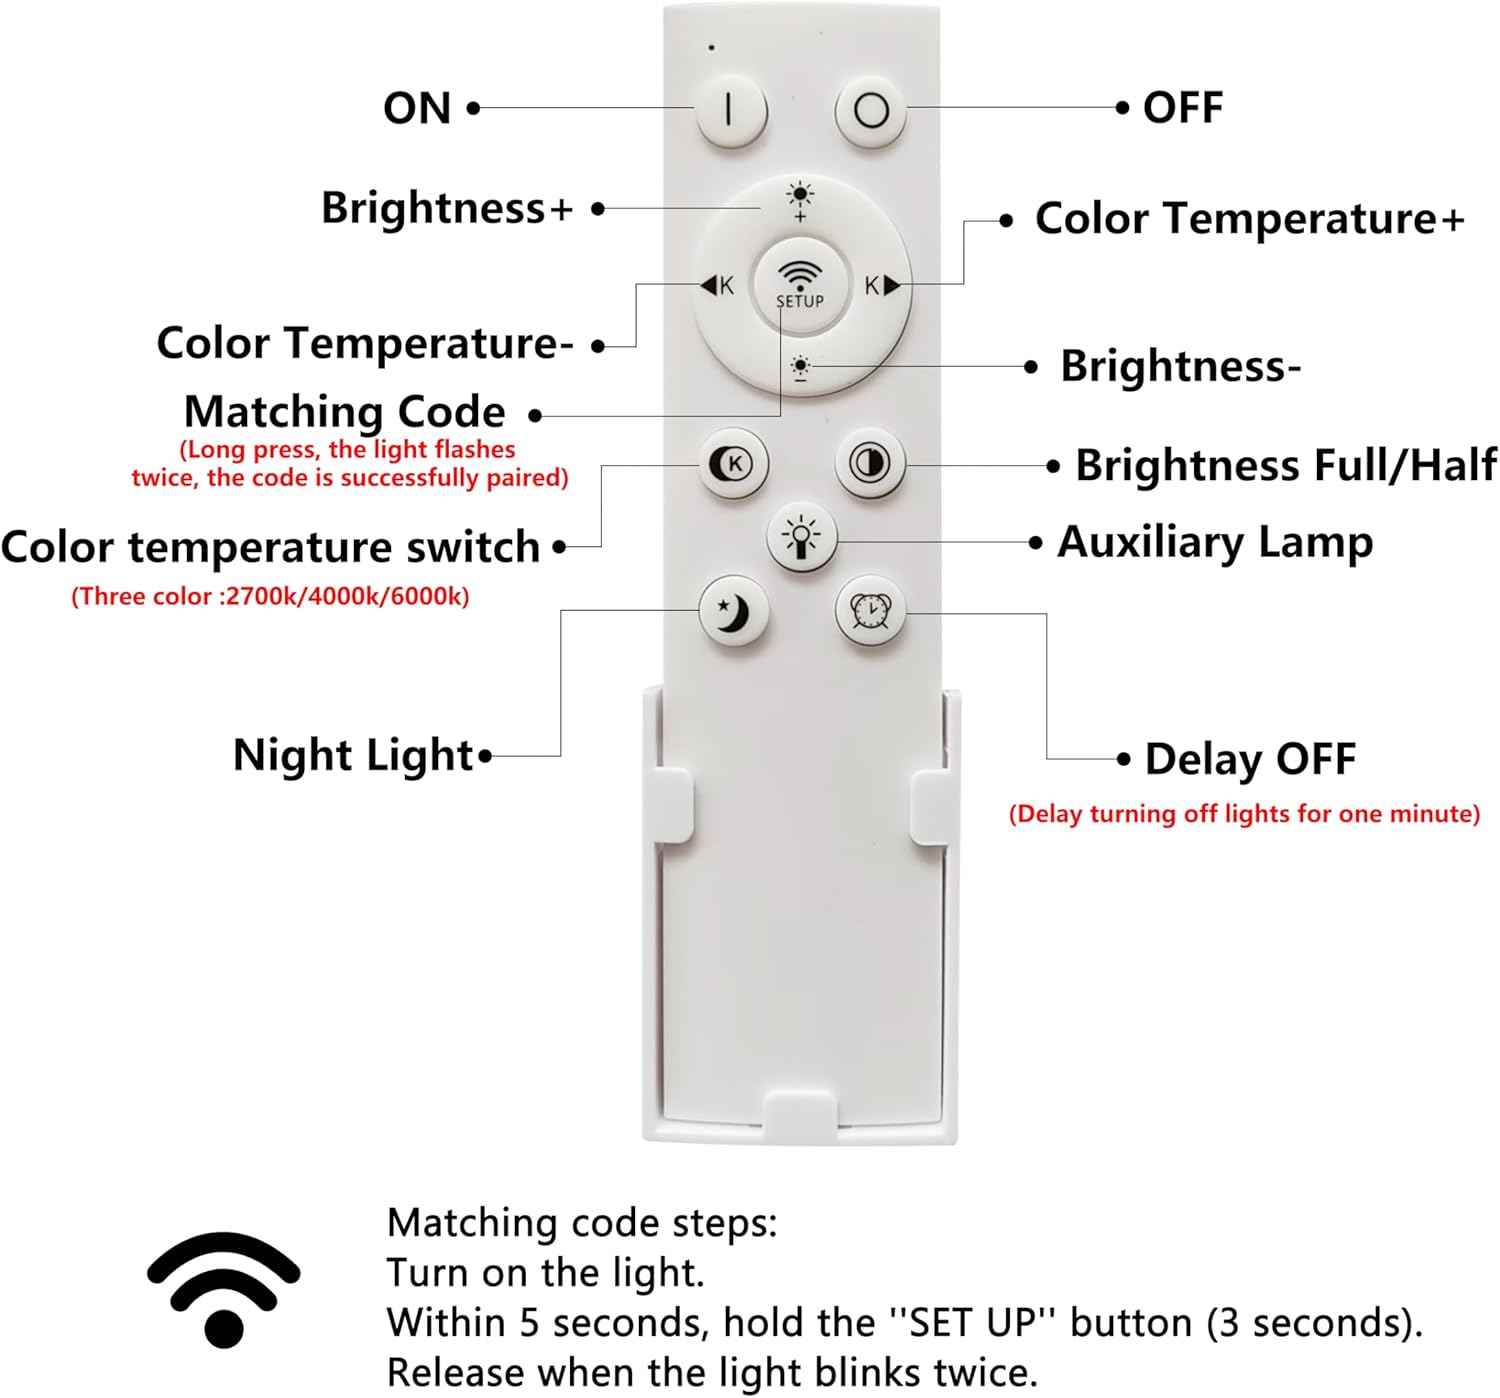
Image: Included remote control with button functions labeled.
4. Product Specifications
| Feature | Detail |
|---|---|
| Brand | KCO |
| Model Number | C1079-G |
| Product Dimensions | 39.9L x 39.9W x 18H Centimetres (15.7" W x 7.1" H) |
| Material | Metal |
| Color | Green |
| Light Source | LED |
| Voltage | 110-220V |
| Wattage | 40 watts |
| Brightness | 800 Lumens (Max) |
| Color Temperature | 3000K-5000K (Adjustable) |
| Control Method | Remote Control (Infrared) |
| Mounting Type | Ceiling Mount (Flush Mount) |
| Special Features | Adjustable Head (Tilt 15° Up/Down, Rotate 270° Left/Right) |
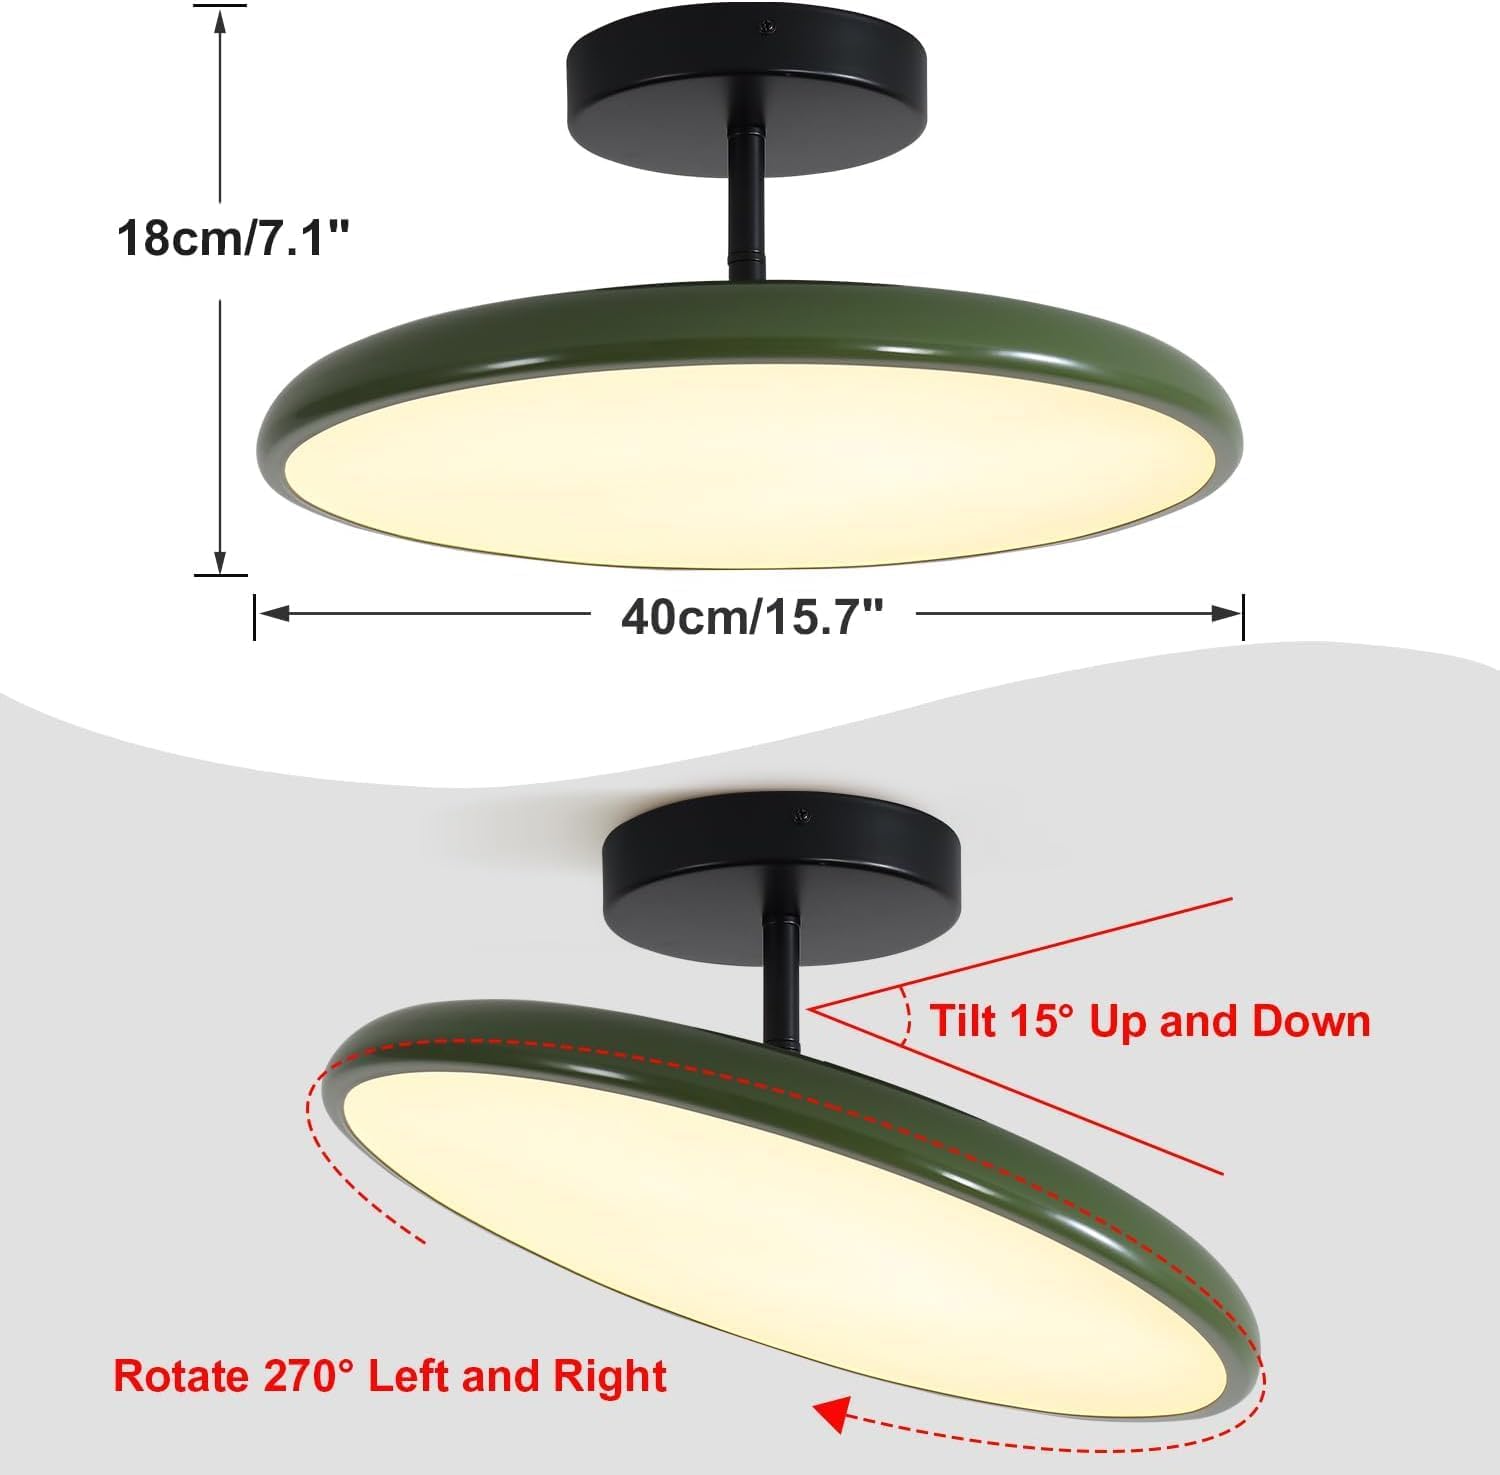
Image: Product dimensions and adjustable lighting direction features.
5. Installation Instructions
5.1 Before You Begin
- Turn off power at the circuit breaker.
- Ensure you have all necessary tools (screwdriver, wire strippers, ladder, etc.).
5.2 Step-by-Step Installation
- Prepare Mounting Plate: Attach the mounting plate to the junction box in the ceiling using the provided screws. Ensure it is securely fastened.
- Connect Wiring: Connect the fixture's wires to the household electrical wires. Typically, black to black (live), white to white (neutral), and green/bare copper to green/bare copper (ground). Use wire nuts to secure connections.
- Secure Fixture: Carefully push the wired fixture up to the ceiling, aligning the mounting holes. Secure the fixture to the mounting plate with the provided screws.
- Install Shade: Attach the metal shade to the fixture body. Ensure it is properly seated and secured.
- Restore Power: Once installation is complete, turn the power back on at the circuit breaker.
Video: Step-by-step guide on how to install the KCO Lighting ceiling light fixture.

Image: Close-up of the light's metal canopy and classic round lampshade.
6. Operating Instructions
6.1 Remote Control Pairing
- Turn on the ceiling light using the wall switch.
- Within 5 seconds, point the remote towards the ceiling light and press the middle "SETUP" button for 3-5 seconds.
- Release the button when the ceiling light flashes twice. This indicates successful pairing.
Note: To maintain your light settings, always use the remote control to turn the light on/off, rather than the wall switch.
6.2 Light Adjustment
- Brightness: Use the "Brightness +" and "Brightness -" buttons on the remote to adjust light intensity.
- Color Temperature: Use the "Color Temperature +" and "Color Temperature -" buttons to change the light color from 3000K (warm white) to 5000K (cool white).
- Adjustable Lighting Direction: The light fixture features a sloped ceiling adapter and swiveling heads. The light beam can be tilted 15° up and down, and rotated 270° left and right to direct light as needed.
7. Maintenance
- Ensure power is off before cleaning.
- Wipe the fixture with a soft, dry cloth. Do not use abrasive cleaners or solvents.
- Regularly check all connections for tightness.
8. Troubleshooting
| Problem | Possible Cause | Solution |
|---|---|---|
| Light does not turn on. | No power, loose wiring, faulty remote. | Check circuit breaker. Verify wiring connections. Re-pair remote control. |
| Remote control not working. | Batteries dead, not paired. | Replace remote batteries. Follow remote pairing instructions. |
| Light flickers. | Loose connection, incompatible dimmer. | Check wiring connections. Ensure dimmer (if used) is compatible with LED fixtures. |
9. Warranty and Support
KCO Lighting offers a 3-year after-sale service for this flush mount ceiling light. If you receive a damaged or cracked lampshade, or if any parts are missing, please contact the seller "KCO Lighting" directly via your order number for replacement parts or support.
For any other inquiries or technical assistance, please refer to your purchase documentation for contact information.
Ask a question about this manual
Ask about setup, troubleshooting, compatibility, parts, safety, or missing instructions. Manuals+ will review the question and use this page’s manual context to help answer it.