Introduction
Thank you for choosing the KCO Lighting Vintage Smoke Glass Pendant Light. This manual provides detailed instructions for the safe installation, operation, and maintenance of your new lighting fixture. Please read all instructions carefully before beginning installation and retain this manual for future reference.
Safety Information
To reduce the risk of electric shock, fire, or injury, always follow these basic safety precautions:
- WARNING: To avoid possible electric shock, turn off the electricity at the circuit breaker or fuse box before installation.
- All electrical connections must be in accordance with local and National Electrical Code (NEC) standards. If you are unfamiliar with proper electrical wiring connections, consult a qualified electrician.
- Do not install this fixture in wet or damp locations.
- Ensure the mounting surface can support the weight of the fixture.
- Use only the specified bulb type and wattage. Do not exceed the maximum wattage indicated on the fixture.
- Never connect the fixture to a power source while it is still in the packaging.
Package Contents
Carefully unpack your fixture and check that all parts are included. If any parts are missing or damaged, contact customer support before proceeding.
- Pendant Light Fixture (including ceiling plate, adjustable cord, lamp holder)
- Smoke Gray Glass Shade
- Mounting Hardware (screws, wire nuts, etc.)
- Instruction Manual
Product Specifications
- Brand: KCO
- Model: B0CYL5P8B9
- Color: Smoke Gray
- Material: Glass, Metal
- Style: Modern
- Light Fixture Form: Pendant
- Fixture Height: 9.8 inches (25 cm)
- Globe Diameter: 9.8 inches (25 cm)
- Canopy Diameter: 4.7 inches (12 cm)
- Hanging Cord Length: Adjustable from 1 inch to 59.1 inches (150 cm)
- Light Source: E26 Base (bulb not included)
- Voltage: 110-240V (for worldwide use)

This diagram illustrates the key dimensions and components of the pendant light. It highlights the sturdy black ceiling plate (12cm/4.7 inches diameter), the adjustable hanging cord (up to 150cm/59.1 inches), the smoke gray glass shade with a 25cm/9.8 inches diameter, and the E26 bulb base. Various compatible E26 bulb types are also shown.
Installation Guide
IMPORTANT: Ensure power is turned OFF at the circuit breaker before starting installation.
- Prepare for Installation: Turn off the main power supply at the circuit breaker. Clear the work area and gather necessary tools (screwdriver, wire strippers, ladder).
- Mount the Ceiling Plate: Attach the mounting bracket to the junction box in the ceiling using the provided screws. Ensure it is securely fastened.
- Adjust Hanging Height: The hanging cord is adjustable. Loosen the screw on the ceiling plate or lamp holder to adjust the cord length to your desired height. Tighten the screw firmly once the desired length is achieved.
- Wire Connections: Connect the fixture's wires to the corresponding wires from the junction box. Typically, connect the black wire (live) from the fixture to the black wire from the junction box, the white wire (neutral) from the fixture to the white wire from the junction box, and the ground wire (bare copper or green) from the fixture to the ground wire from the junction box. Secure connections with wire nuts.
- Secure the Ceiling Canopy: Carefully push the ceiling canopy up to the ceiling, covering the junction box and wiring. Secure it to the mounting bracket with the provided screws.
- Install the Glass Shade: Gently attach the smoke gray glass shade to the lamp holder. Ensure it is seated correctly and securely.
- Install the Bulb: Screw an E26 base bulb (not included) into the lamp holder. Do not exceed the maximum wattage.
- Restore Power: Turn the main power supply back on at the circuit breaker. Test the light fixture.
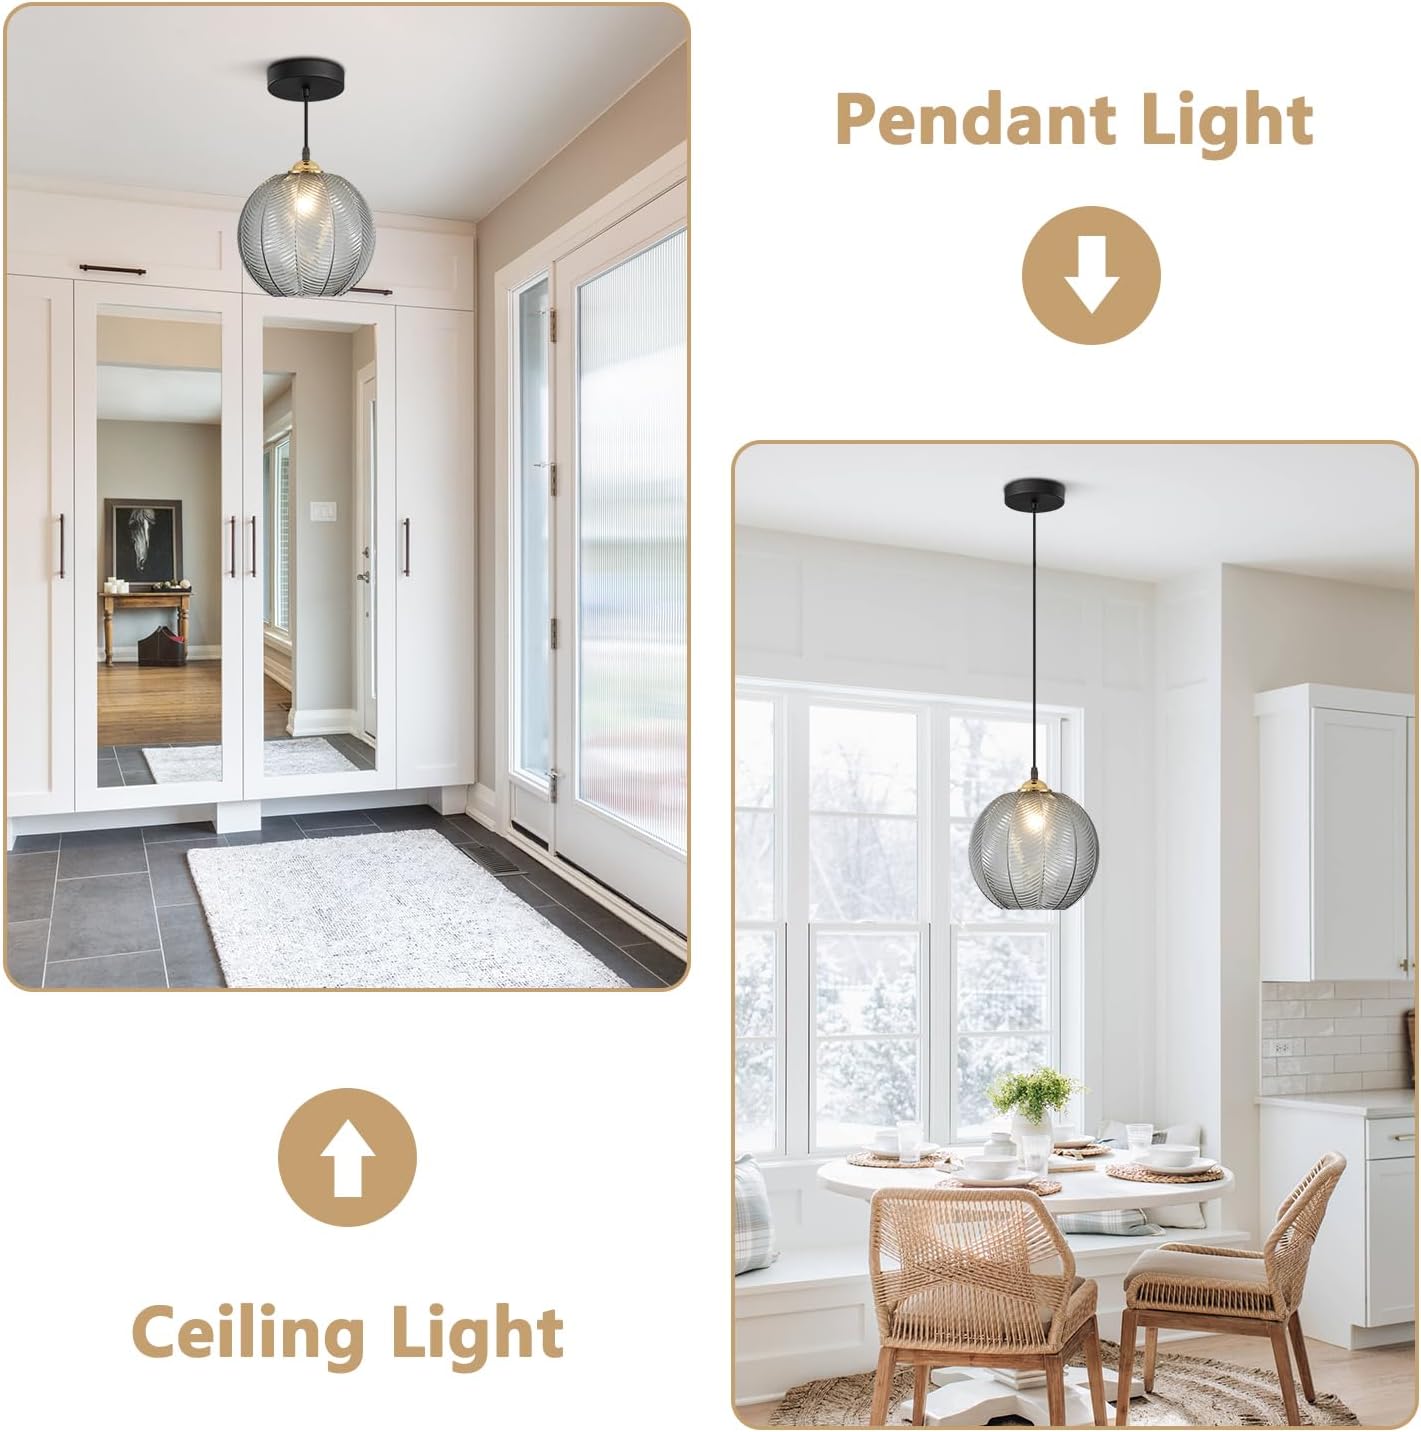
This image displays the versatility of the light fixture, showing it installed both as a traditional pendant light, hanging from the ceiling, and as a semi-flush mount, closer to the ceiling. This illustrates how the adjustable cord can be used to achieve different aesthetic and functional placements.

This photograph shows two KCO Lighting pendant lights elegantly installed above a dining table, demonstrating their aesthetic appeal in a dining room environment. The lights provide ambient illumination and complement the room's decor.

This image features three KCO Lighting pendant lights arranged above a kitchen island, illustrating their suitability for task lighting and decorative purposes in a kitchen setting. The lights enhance the modern design of the space.
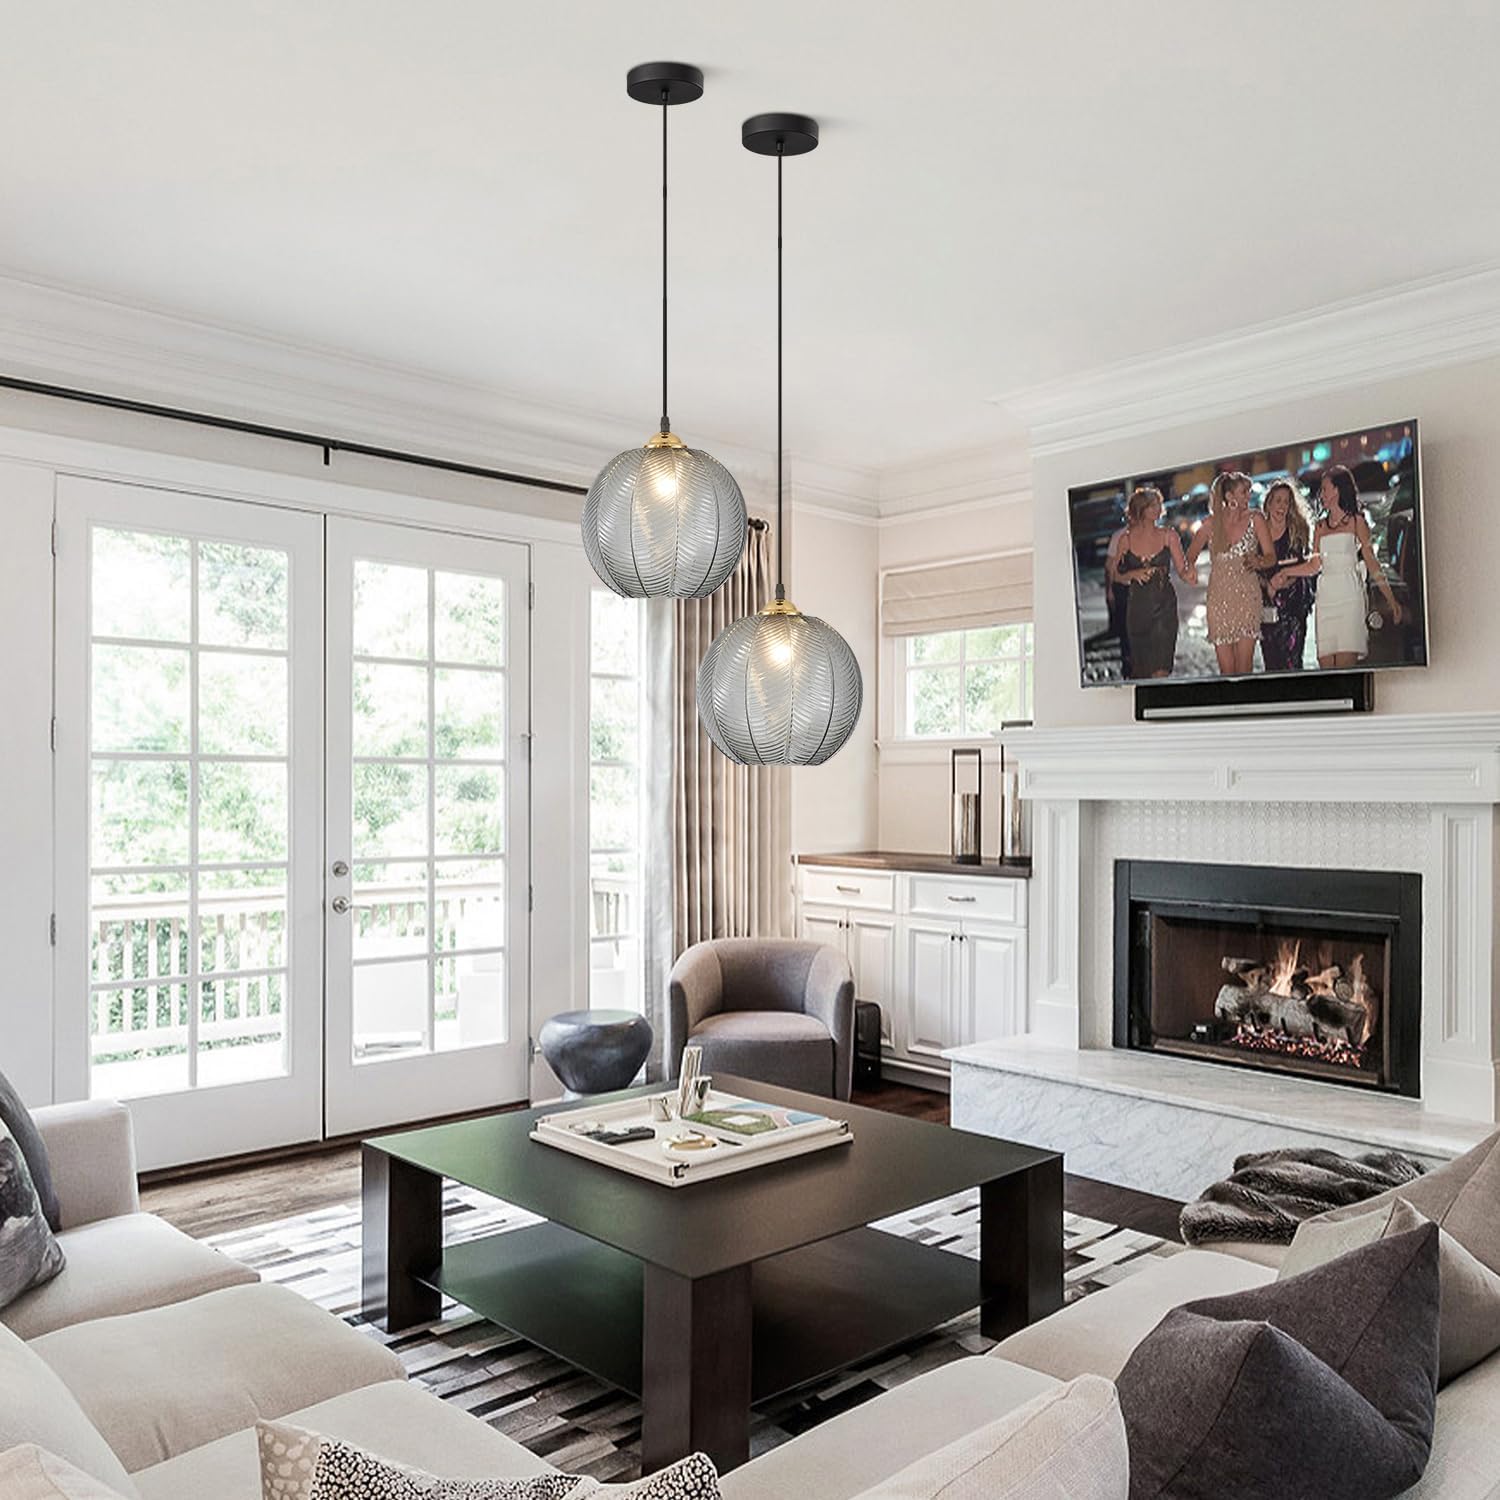
This photograph displays two KCO Lighting pendant lights integrated into a living room design, providing soft lighting and contributing to the room's overall ambiance. The lights are positioned to complement the seating area.

This image shows two KCO Lighting pendant lights installed in a bedroom, one on each side of the bed, serving as stylish and functional bedside lighting. Their placement adds a modern touch to the minimalist bedroom decor.
Operation
Once installed and powered, the pendant light operates via a standard wall switch. The fixture itself is not dimmable. However, it can be fully dimmable when used with a compatible dimmable E26 bulb and a separate dimmable wall switch (bulb and switch not included).
Care and Maintenance
To maintain the appearance and functionality of your pendant light:
- Always turn off the power supply before cleaning.
- Wipe the fixture with a soft, dry cloth.
- Do not use abrasive cleaners, solvents, or polishes as they may damage the finish or glass.
- Regularly check for any loose connections or signs of wear.
Troubleshooting
If you encounter issues with your pendant light, refer to the following common problems and solutions:
- Light does not turn on:
- Check if the power supply is on at the circuit breaker.
- Ensure the bulb is correctly installed and not faulty.
- Verify all wire connections are secure.
- Light flickers:
- Ensure the bulb is fully screwed in.
- Check for loose wire connections.
- If using a dimmable bulb, ensure it is compatible with your dimmer switch (if applicable).
- Glass shade is damaged:
- Contact customer support for a replacement.
Warranty and Customer Support
KCO Lighting offers a 3-year after-sales service for this product. If you receive broken, damaged, or cracked globe glass lampshades, or if you require extra hanging cord or are missing any parts, please communicate directly with the seller "KCO Lighting" via your order number. We are committed to providing replacements as soon as possible to ensure your satisfaction.