1. Introduction
This manual provides detailed instructions for the installation, operation, and maintenance of your JK Vision 5MP CCTV IP Camera Full Set. This comprehensive security solution is designed to protect your property with high-definition video surveillance, offering clear footage day and night. Please read this manual thoroughly before installation and operation to ensure proper setup and optimal performance.
2. What's in the Box
The JK Vision 5MP CCTV IP Camera Full Set includes the following components:
- 4 x JK Vision 5MP IP Bullet Cameras with Color Night Vision and Built-in Audio
- 1 x 5 Channel Network Video Recorder (NVR)
- 1 x JK Vision 4 Channel/Port Power over Ethernet (PoE) Switch
- 1 x 1TB Hard Disk Drive
- 1 x Cat6 Ethernet Cable (Roll)
- 8 x RJ45 Connectors
3. Product Overview
Familiarize yourself with the main components of your JK Vision CCTV system.
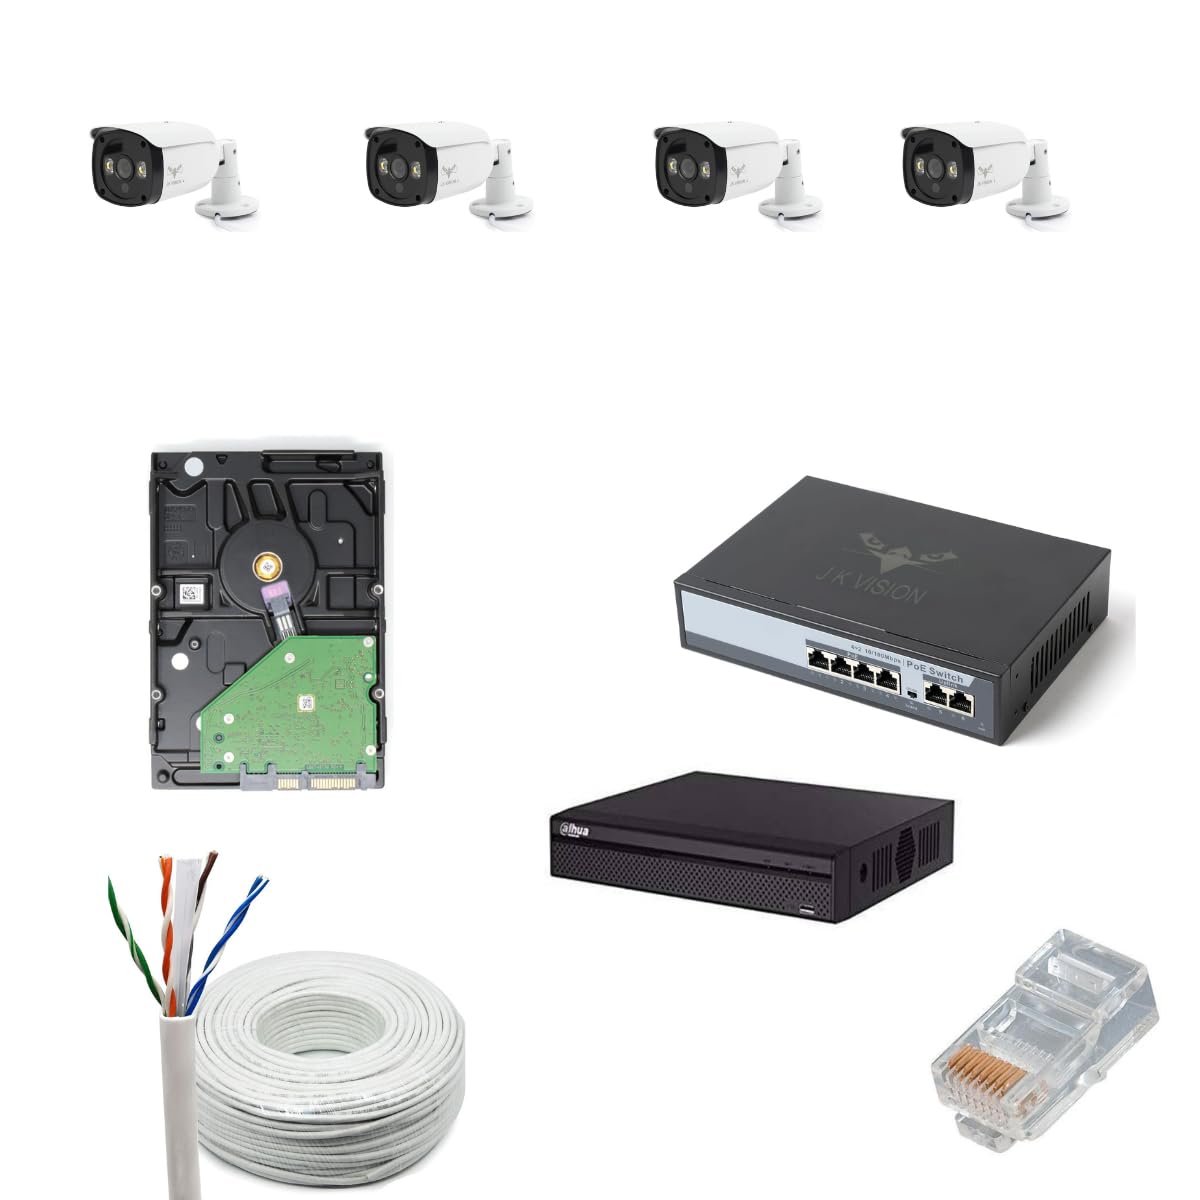
Figure 3.1: Overview of all components included in the JK Vision 5MP CCTV IP Camera Full Set.
3.1. 5MP IP Bullet Camera
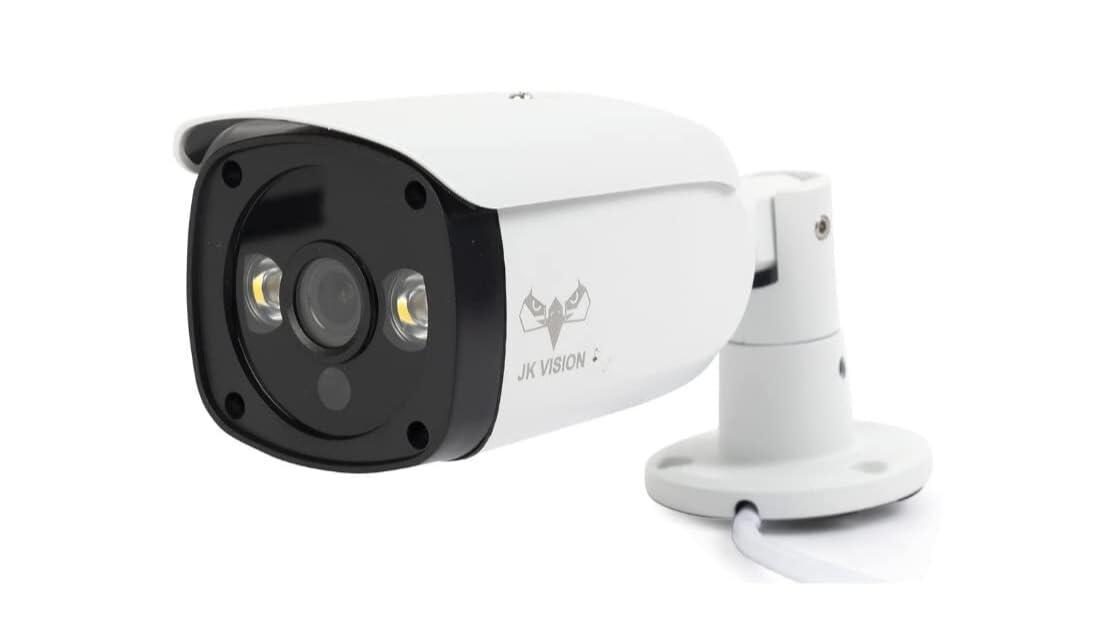
Figure 3.2: A single JK Vision 5MP IP Bullet Camera, featuring a robust housing and integrated lens.
These cameras capture crisp, high-resolution 5-megapixel footage. They are designed for both indoor and outdoor use, featuring color night vision and built-in audio capabilities for comprehensive surveillance.
3.2. 5 Channel Network Video Recorder (NVR)

Figure 3.3: The 5 Channel Network Video Recorder (NVR) unit, responsible for recording and managing video feeds.
The NVR is the central recording unit for your IP cameras. It supports up to 5 camera channels and includes a bay for the 1TB hard disk drive for video storage.
3.3. 4 Port Power over Ethernet (PoE) Switch

Figure 3.4: The JK Vision 4 Port PoE Switch, providing both data and power to the IP cameras via Ethernet cables.
This PoE switch simplifies installation by delivering both power and data to your IP cameras through a single Cat6 Ethernet cable, eliminating the need for separate power adapters for each camera.
3.4. 1TB Hard Disk Drive
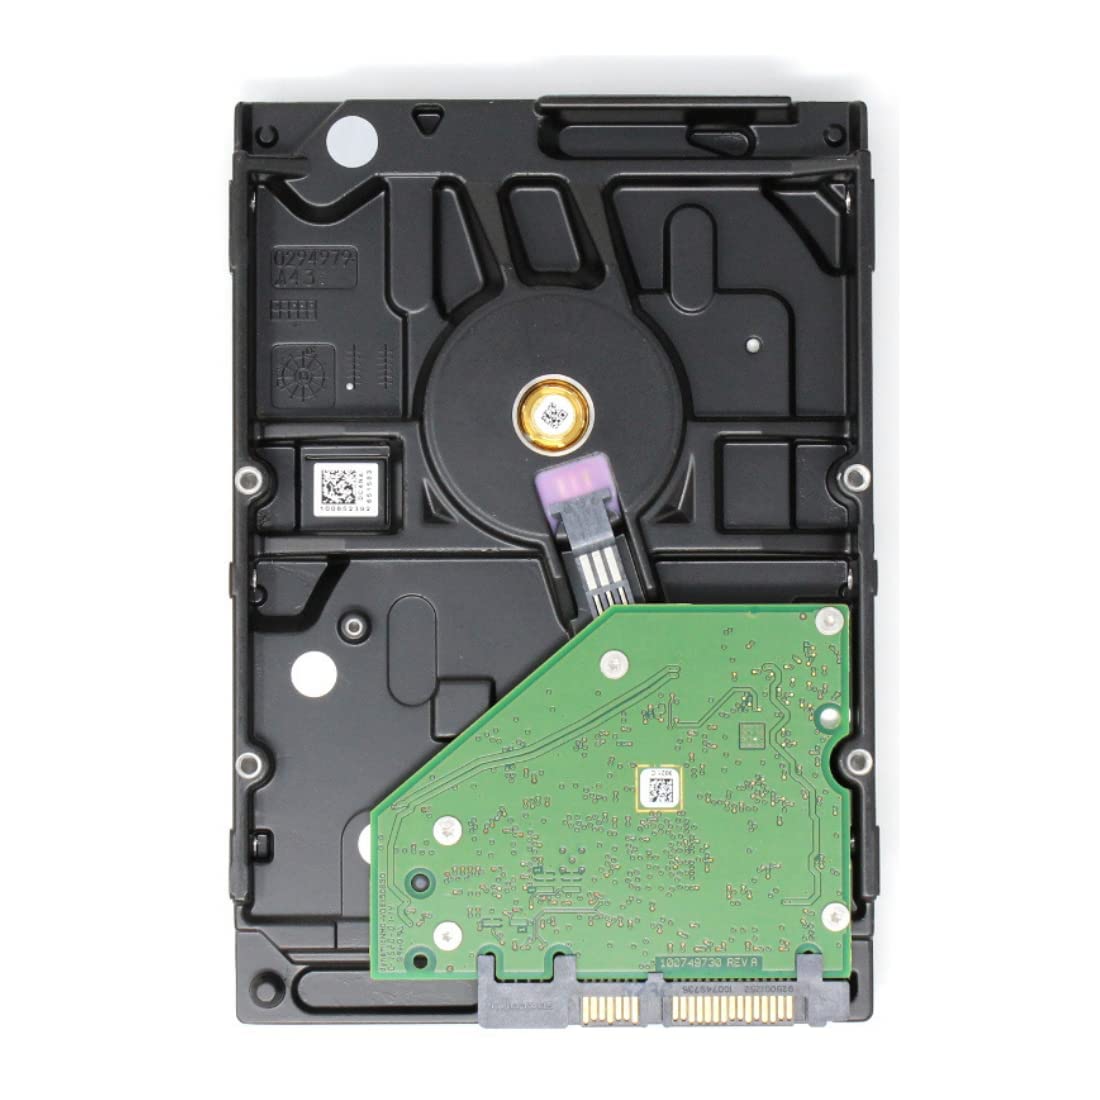
Figure 3.5: The 1TB Hard Disk Drive, used for storing recorded video footage from the NVR.
The included 1TB hard disk drive provides ample storage capacity for continuous recording from your 5MP cameras.
3.5. Cat6 Ethernet Cable & RJ45 Connectors

Figure 3.6: A roll of Cat6 Ethernet Cable, used for connecting cameras to the PoE switch and the switch to the NVR.
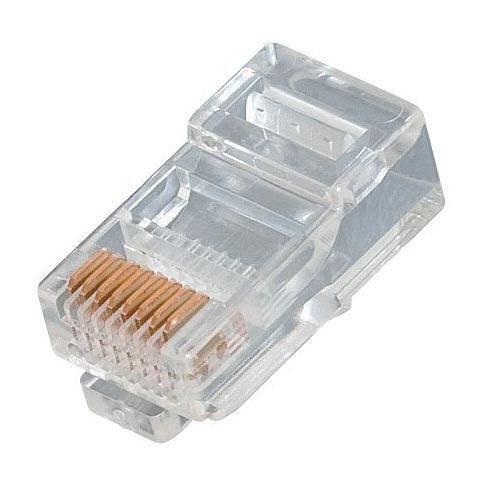
Figure 3.7: RJ45 Connectors, used to terminate the Cat6 Ethernet cable for network connections.
The Cat6 cable and RJ45 connectors are provided for reliable high-speed data and power transmission within your surveillance network.
4. Setup Guide
Follow these steps to set up your JK Vision 5MP CCTV IP Camera Full Set:
- Install Hard Disk Drive (HDD) into NVR:
- Unscrew the NVR casing and carefully open it.
- Connect the SATA data and power cables from the NVR to the 1TB HDD.
- Secure the HDD inside the NVR using the provided screws.
- Close and secure the NVR casing.
- Mount Cameras:
- Choose suitable locations for your 4 bullet cameras, ensuring optimal viewing angles and coverage.
- Mount the cameras securely using appropriate hardware.
- Prepare Ethernet Cables:
- Measure and cut the Cat6 cable to the required lengths for each camera connection and for connecting the PoE switch to the NVR.
- Terminate both ends of each cable with RJ45 connectors using a crimping tool (not included). Ensure proper wiring standards (T568A or T568B) are followed.
- Connect Cameras to PoE Switch:
- Connect one end of each prepared Ethernet cable to the RJ45 port on each camera.
- Connect the other end of these cables to the PoE ports (ports 1-4) on the JK Vision 4 Port PoE Switch.
- Connect PoE Switch to NVR:
- Connect an Ethernet cable from the "Uplink" or "LAN" port of the PoE Switch to the LAN port on the NVR.
- Connect NVR to Display and Network:
- Connect the NVR to a monitor or TV using an HDMI or VGA cable.
- (Optional but recommended) Connect the NVR's LAN port to your router/modem using an Ethernet cable for remote access and network features.
- Connect a USB mouse to the NVR for navigation.
- Power On:
- Connect the power adapter to the NVR and plug it into a power outlet.
- Connect the power adapter to the PoE Switch and plug it into a power outlet.
- The system will power on. Follow the on-screen instructions on your monitor to complete the initial NVR setup, including password creation, time zone, and hard disk formatting.
5. Operating Instructions
Once your system is set up, you can begin operating your surveillance system.
5.1. NVR Interface Navigation
- Use the connected USB mouse to navigate the NVR's graphical user interface (GUI) on your monitor.
- Right-click to access the main menu, which typically includes options for Live View, Playback, Record Settings, Network Settings, System Settings, and Shutdown.
5.2. Live View
- Upon startup, the NVR usually defaults to Live View, displaying feeds from all connected cameras.
- You can switch between single-camera view, multi-camera grid view, and sequence view using the icons on the screen or through the main menu.
5.3. Recording
- The NVR is typically configured for continuous recording by default.
- To adjust recording settings (e.g., motion detection recording, scheduled recording), navigate to "Record Settings" in the main menu.
- Ensure the hard disk is formatted and recognized by the NVR for recording to function.
5.4. Playback
- Access "Playback" from the main menu.
- Select the desired camera(s) and date/time range to review recorded footage.
- Use the timeline and playback controls (play, pause, fast forward, rewind) to navigate through recordings.
5.5. Remote Access (Optional)
- If the NVR is connected to your network, you can typically access it remotely via a web browser or a dedicated mobile application.
- Refer to the NVR's specific software manual for detailed instructions on setting up remote viewing, port forwarding, or cloud services.
6. Maintenance
Regular maintenance ensures the longevity and optimal performance of your JK Vision CCTV system.
- Clean Camera Lenses: Periodically clean camera lenses with a soft, damp cloth to remove dust, dirt, or water spots that may obscure the view. Avoid abrasive cleaners.
- Check Cable Connections: Ensure all Ethernet cables are securely connected to the cameras, PoE switch, and NVR. Loose connections can lead to signal loss.
- NVR Firmware Updates: Check the manufacturer's website for NVR firmware updates. Keeping the firmware updated can improve performance, add features, and enhance security.
- Hard Disk Health: Monitor the health of your 1TB hard disk drive through the NVR's system settings. Replace the HDD if it shows signs of failure to prevent data loss.
- Power Supply Check: Ensure all power adapters are functioning correctly and are securely plugged into stable power sources.
- Environmental Considerations: For outdoor cameras, ensure they are free from obstructions like overgrown foliage and that their mounting remains secure against weather conditions.
7. Troubleshooting
Here are solutions to common issues you might encounter:
| Problem | Possible Cause | Solution |
|---|---|---|
| No video display on monitor | NVR not powered on, monitor not connected, incorrect input source on monitor. | Check NVR power, ensure HDMI/VGA cable is secure, select correct input on monitor. |
| No camera feed (individual camera) | Loose Ethernet cable, PoE switch issue, camera power issue, camera fault. | Check Ethernet cable connection at both ends, verify PoE switch is powered and port LED is active, try connecting camera to a different PoE port. |
| No recording | Hard disk not installed/formatted, recording schedule not set, hard disk full/faulty. | Ensure HDD is installed and formatted via NVR settings, check recording schedule, verify HDD health. |
| Remote access not working | NVR not connected to network, incorrect network settings, firewall/router issues. | Verify NVR network connection, check NVR IP address and gateway, consult NVR manual for remote access setup (e.g., P2P, port forwarding). |
| Poor image quality | Dirty lens, low light conditions, camera focus issue. | Clean camera lens, ensure adequate lighting or verify night vision is active, adjust camera focus if applicable. |
If you continue to experience issues, please refer to the "Warranty and Support" section for assistance.
8. Specifications
Key technical specifications for the JK Vision 5MP CCTV IP Camera Full Set:
| Feature | Detail |
|---|---|
| Product Model Number | HE-JK-TIANDY-IP-COMBO-4B-4CH-1TB-KIT-X1 |
| Camera Type | 5MP IP Bullet Camera (4 units) |
| Video Capture Resolution | 5 Megapixels |
| Night Vision | Color Night Vision, 30 Meter Range |
| Audio | Built-in Audio (on cameras) |
| NVR Channels | 5 Channels |
| PoE Switch | 4 Port JK Vision PoE Switch |
| Storage | 1TB Hard Disk Drive |
| Connectivity | Ethernet (Cat6 Cable, RJ45 Connectors included) |
| Power Source | Corded Electric |
| Mounting Type | Embedded (for NVR), Wall/Ceiling (for cameras) |
| Product Dimensions (LxWxH) | 30 x 30 x 30 Centimeters (overall package) |
| Item Weight | 6 kg 790 g |
| Manufacturer | HOTSPOT ELECTRONICS |
| Country of Origin | India |
9. Warranty and Support
For warranty information and technical support, please contact the manufacturer or your point of purchase.
- Manufacturer: HOTSPOT ELECTRONICS, MUMBAI 400004
- Product Model: HE-JK-TIANDY-IP-COMBO-4B-4CH-1TB-KIT-X1
- Please retain your proof of purchase for warranty claims.
- Extended warranty plans may be available from third-party providers. Refer to your purchase details for more information.


