1. Introduction
Welcome to the user manual for your ISWARD G10 Automatic Robot Lawn Mower. This guide provides essential information for setting up, operating, and maintaining your robotic lawnmower to ensure optimal performance and a beautifully manicured lawn. The ISWARD G10 is designed for efficiency and convenience, featuring advanced navigation and smart control capabilities.
2. Safety Information
Please read all safety warnings and instructions carefully before operating the ISWARD G10. Failure to follow these instructions may result in electric shock, fire, and/or serious injury.
- Always keep hands and feet away from the cutting blades.
- Ensure children and pets are clear of the mowing area when the robot is operating.
- Do not operate the mower in wet conditions or during rain.
- Turn off the mower and remove the safety key before performing any maintenance or cleaning.
- Only use the original charging station and power supply provided with the product.
- Avoid placing the charging station in low-lying areas where water may accumulate.
3. Box Contents
Upon opening the package, please verify that all the following items are included:
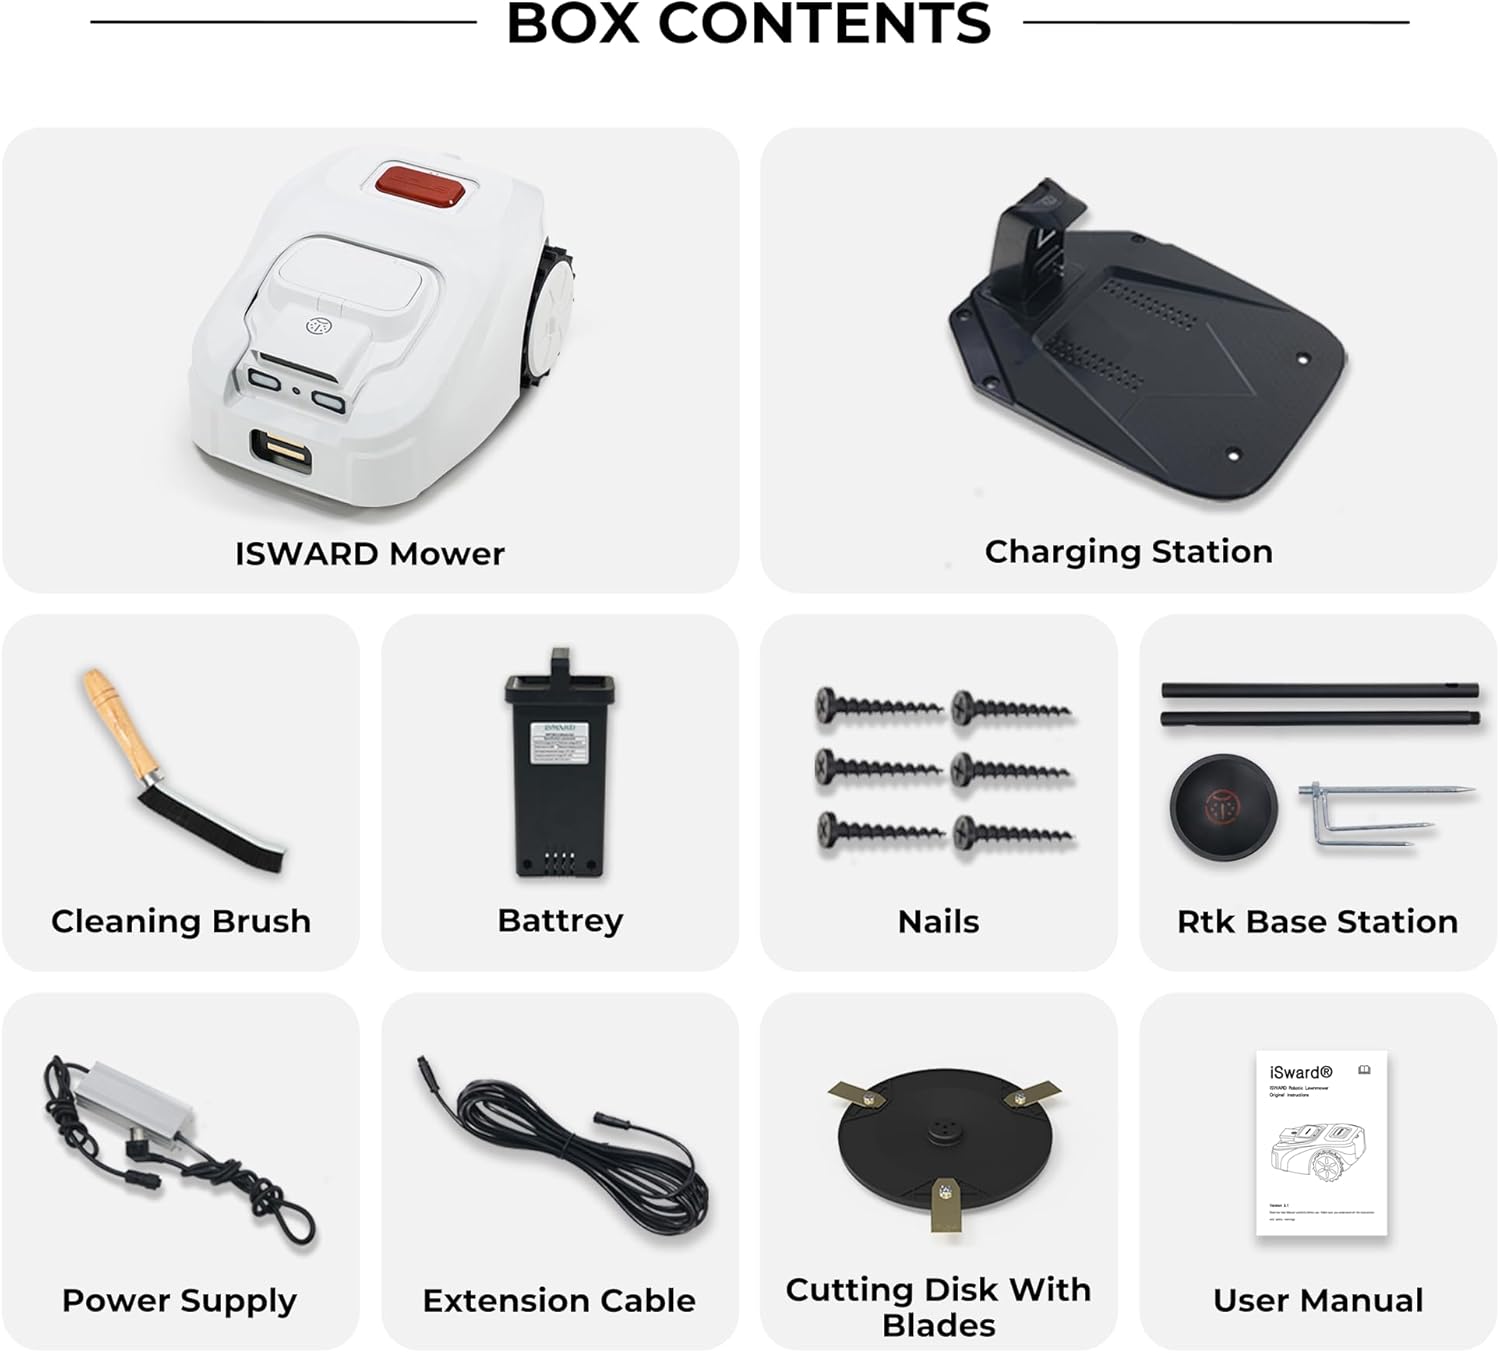
Image: All components included in the ISWARD G10 Robot Lawn Mower package.
- ISWARD Mower
- Charging Station
- Cleaning Brush
- Battery
- Nails (for securing charging station)
- RTK Base Station
- Power Supply
- Extension Cable
- Cutting Disk With Blades
- User Manual (this document)
4. Setup Guide
4.1. Charging Station Installation
Proper installation of the charging station is crucial for the robot mower's operation and charging cycles.
- Place the charging stand on the board: Align the charging stand with the designated area on the base board.
- Secure it with screws: Use a drill to firmly attach the charging stand to the base board using the provided screws.
- Place charging station on a flat ground: Choose a level, open area for the charging station, away from low-lying spots where water might accumulate. Ensure it's near an electrical outlet.
- Insert 6 screws into mounting holes: Secure the entire charging station base to the ground using the six provided screws.
- Insert the power cord into the charging stand: Connect the power supply cable to the charging stand.
4.2. RTK Pole Installation
The RTK (Real-Time Kinematic) base station provides precise positioning for the mower, enabling accurate navigation without perimeter wires.

Image: Diagram illustrating the RTK technology with satellites and the base station for precise lawn mower positioning.
- Install the mounting pole: Assemble the sections of the mounting pole by twisting them together until secure.
- Joint the mounting pole with the RTK trident ground stake: Attach the trident ground stake to the bottom of the mounting pole.
- Insert the mounting pole into the ground: Drive the trident stake firmly into the ground in an open area with a clear view of the sky, ensuring the pole is vertical.
- Install the RTK station onto the mounting pole: Place the RTK base station unit onto the top of the mounting pole.
- Screw tight the power cord: Securely connect the power cord to the RTK station.
- Connect the power cord between RTK station and charging stand: Route the power cable from the RTK station to the charging station and connect it.
Video: A detailed installation guide for the ISWARD G10 Robot Lawn Mower, covering the setup of the charging station and the RTK pole.
5. Operating Instructions
5.1. Manual Activation
To manually start your ISWARD G10 Robot Lawn Mower:
- Press any key to light up the screen: This will activate the control panel.
- Input password, press OK: Enter your security password to unlock the mower.
- Click on "Mow" (to mow grass): Select the mowing function from the menu.
- Select start or resume, press OK: Choose to start a new mowing session or resume a paused one, then confirm.
5.2. App Control
The ISWARD G10 can be easily operated and managed through the dedicated iSward mobile application.

Image: A smartphone displaying the iSward app interface, showing options for controlling the robot lawn mower.
The iSward app provides comprehensive functionalities, including:
- Map Management: Create and manage multiple mowing zones for different areas of your lawn.
- Mowing Schedule: Set up automated mowing times and days.
- Cutting Height Adjustment: Easily adjust the grass cutting height from your device.
- Obstacle Avoidance Setting: Designate fixed obstacle avoidance areas for quick setup.
- Anti-theft Function: Track the mower's location and secure it remotely if it is moved from its designated area.
6. Maintenance
Regular maintenance ensures the longevity and optimal performance of your ISWARD G10.
- Cleaning: Use the provided cleaning brush to remove grass clippings and debris from the mower's chassis, wheels, and cutting deck after each use.
- Blade Inspection and Replacement: Regularly check the cutting blades for wear or damage. Replace dull or damaged blades with new ones from the cutting disk with blades kit to maintain cutting efficiency.
- Battery Care: Store the mower in a cool, dry place when not in use for extended periods. Ensure the battery is fully charged before long-term storage.
- Weather Protection: While the mower is weatherproof, it is recommended to store it indoors during extreme weather conditions or winter months.
7. Troubleshooting
If you encounter issues with your ISWARD G10, refer to the following common problems and solutions:
| Problem | Possible Cause | Solution |
|---|---|---|
| Mower not starting | Low battery, safety key not inserted, error message on screen. | Charge the battery, ensure safety key is fully inserted, check app for error codes. |
| Poor cutting performance | Dull or damaged blades, grass too high, debris on cutting deck. | Replace blades, adjust cutting height, clean cutting deck. |
| Navigation issues / Mower gets stuck | RTK signal obstruction, unmapped obstacles, uneven terrain. | Ensure clear view for RTK station, update app map, clear obstacles, adjust mowing area. |
| Mower not charging | Charging contacts dirty, power cord disconnected, charging station not powered. | Clean charging contacts, check all cable connections, verify power to outlet. |
For more complex issues, please refer to the detailed troubleshooting section in the full user manual or contact customer support.
8. Specifications
- Brand: ISWARD
- Model Number: ISWARD G10
- Product Dimensions: 55.88 x 44.96 x 24.89 cm; 23.16 kg
- Power Source: Battery Powered
- Material: Metal
- Color: White
- Operation Mode: Automatic
- Max Mowing Area: 1000㎡
- Max Slope: 57%/30-degree
- Cutting Width: 19.6 cm
- Noise Level: 65 dB
9. Warranty and Support
Your ISWARD G10 Automatic Robot Lawn Mower comes with a manufacturer's warranty. Please refer to the warranty card included in your package for specific terms and conditions. For technical support, spare parts, or warranty claims, please contact ISWARD customer service through their official website or the contact information provided in your purchase documentation.


