
Kaskiwaly 2 gallon
Kaskiwaly 2 Gallon Electric Garden Sprayer User Manual
Brand: Kaskiwaly | Model: 2 Gallon Electric Sprayer
1. Important Safety Information
Please read and understand all safety information before operating this product. Failure to follow these instructions may result in injury or property damage.
CAUTION: Pressurized container. Do not puncture or incinerate. Protect from sunlight and store in a cool, well-ventilated area. Keep out of reach of children. Use only clean water or approved chemicals. Do not use with flammable or corrosive liquids. Avoid contact with eyes, skin, and clothing. If ingested, seek medical advice. Unplug USB cord when not in use. Battery-powered components should be kept dry and not submerged in water.
2. Product Overview
The Kaskiwaly 2 Gallon Electric Garden Sprayer is a battery-powered solution designed for effortless gardening tasks. It eliminates the need for manual pumping, offering a convenient one-button start for automatic spraying. Featuring a 2200mAh built-in battery, it provides up to 3 hours of continuous spraying per charge. The sprayer includes a retractable wand that extends up to 23.62 inches and comes with three mist nozzles (sector, brass, and six-hole) to accommodate various spraying needs, from fine mist to powerful streams. Its 2-gallon capacity reduces the need for frequent refills, and an adjustable shoulder strap ensures portability during extended use. The water tank includes scale markers for easy monitoring of solution levels.
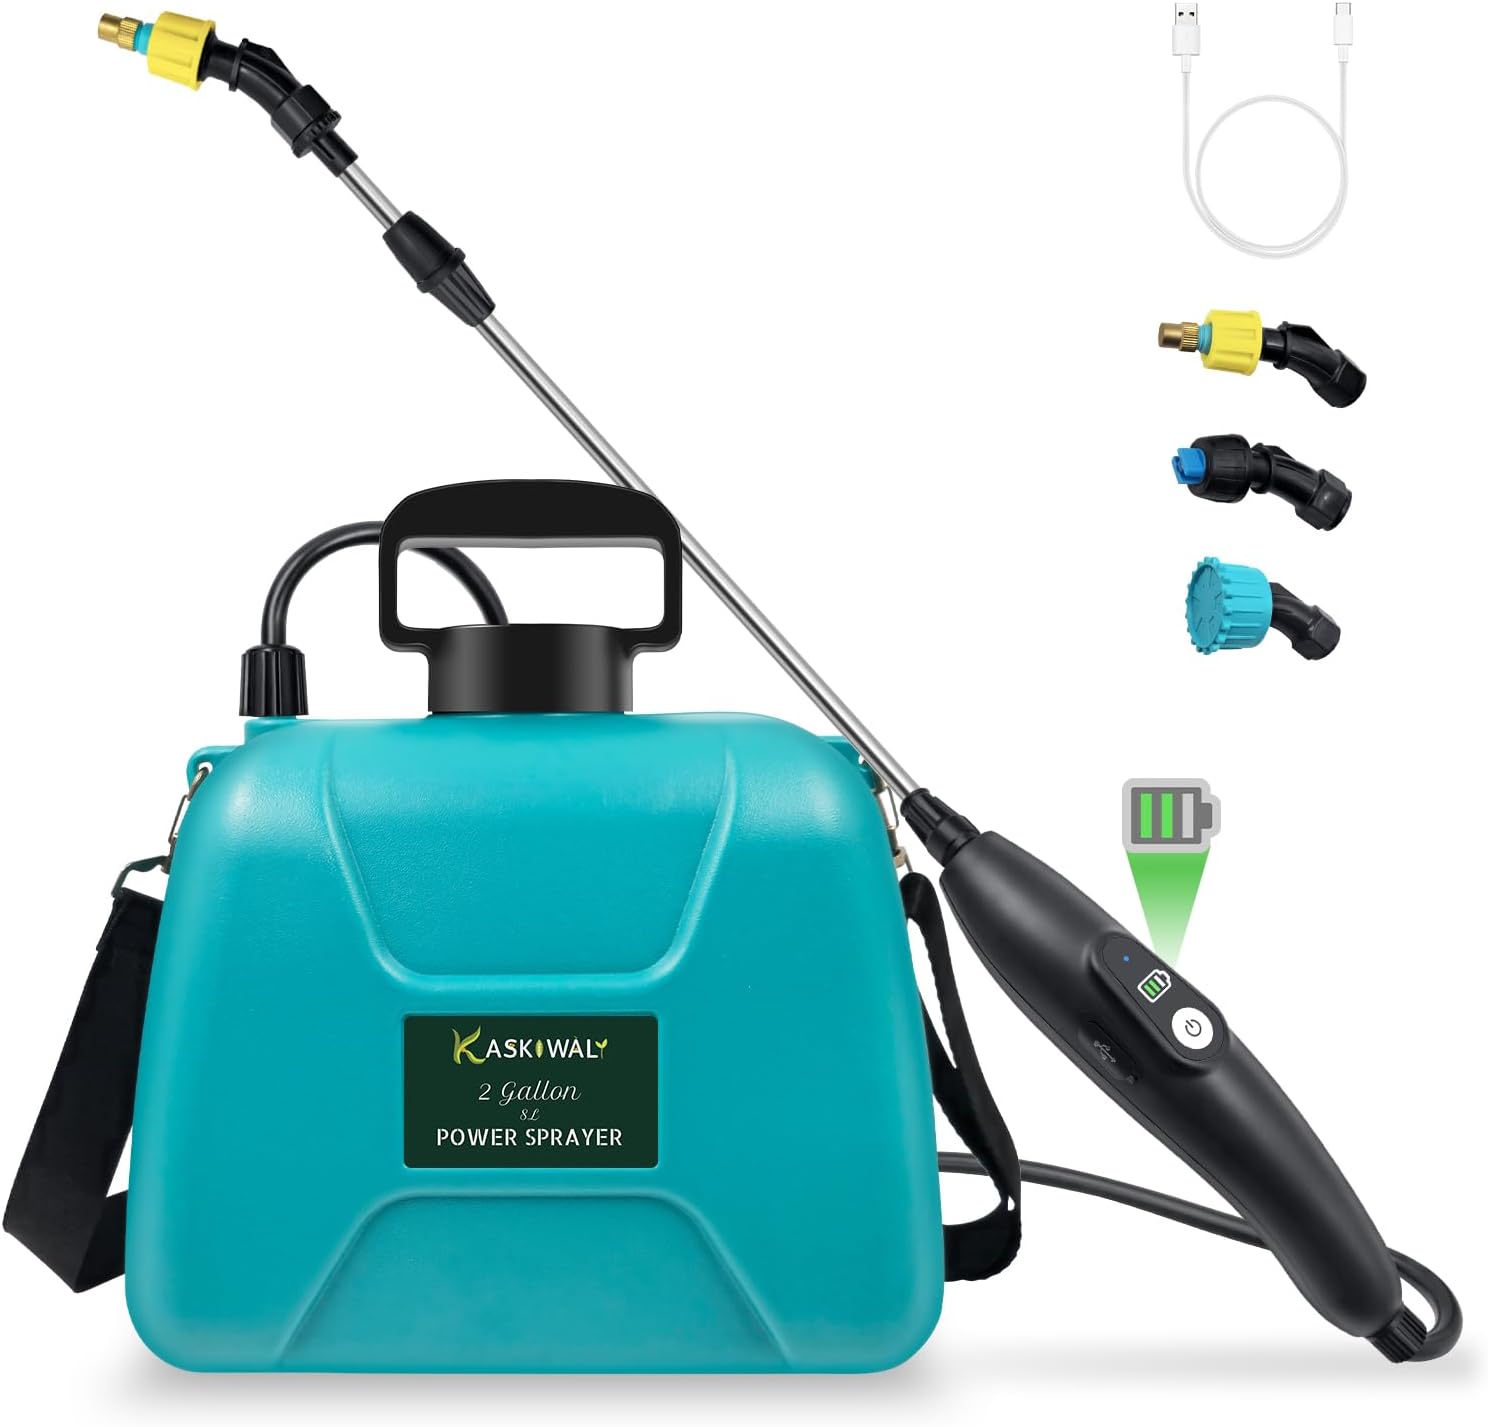
Figure 2.1: Kaskiwaly 2 Gallon Electric Garden Sprayer and its included accessories.
3. Components
The Kaskiwaly 2 Gallon Electric Garden Sprayer package includes the following components:
- 1 x Electric Handle
- 1 x Telescopic Wand
- 1 x Water Hose
- 1 x Water Tank (2 Gallon)
- 3 x Spray Nozzles (Sector, Brass, Six-hole)
- 1 x USB Charge Cord
- 1 x Adjustable Shoulder Strap
4. Setup and Assembly
Follow these steps to assemble your Kaskiwaly Electric Garden Sprayer:
- Install Nozzle: Install the desired nozzle onto the telescopic wand.
- Connect Wand to Handle: Connect the telescopic wand to the electric handle.
- Attach Water Pipe to Handle: Attach the water pipe to the electric handle.
- Insert Pipe into Tank: Insert the other end of the water pipe into the water tank, ensuring a secure fit.
- Tighten Lid: Tighten the lid of the water tank firmly.
- Attach Shoulder Strap: Attach the adjustable shoulder strap to the designated points on the water tank for comfortable carrying.

Figure 4.1: Step-by-step assembly instructions for the sprayer.
5. Operating Instructions
To operate your Kaskiwaly Electric Garden Sprayer:
- Charge Battery: Ensure the battery is sufficiently charged. The handle features an indicator to track remaining power.
- Fill Tank: Fill the 2-gallon water tank with your desired solution (clean water or approved chemicals). Do not overfill.
- Start Spraying: Press the power button on the electric handle to start spraying automatically. There is no need for manual pumping.
- Direct Spray: Direct the telescopic wand towards the area you wish to spray.
- Stop Spraying: To stop spraying, press the power button again.

Figure 5.1: User demonstrating the one-button automatic spraying feature.
6. Nozzle Adjustment
The sprayer comes with three types of nozzles to suit different spraying requirements:
- Sector Nozzle: Provides a wide, flat spray pattern, ideal for covering larger areas or broad leaf plants.
- Brass Nozzle: Offers a fine mist, perfect for delicate plants or when a gentle application is needed.
- Six-Hole Nozzle: Delivers a more powerful, multi-stream spray for targeted applications or tougher tasks.
Adjust the intensity and pattern of the spray by twisting the tightness of the nozzle.

Figure 6.1: Visual representation of the three included nozzle types.

Figure 6.2: How to adjust the nozzle for different spray patterns.
7. Charging and Battery Care
The electric handle has a built-in 2200mAh battery, providing approximately 3 hours of spraying time per charge. A full charge takes about 4 hours.
Charging Instructions:
Use the included USB charge cord to connect the handle to a USB power source (e.g., wall adapter, power bank, computer USB port). The indicator lights on the handle will show the charging status.
Battery Care Tips:
- Fully charge the battery before first use.
- Avoid using fast charging methods.
- If the battery is completely exhausted, activate it with a small current.
- Charge the battery every two months when the product is not in use to maintain battery health and prevent deep discharge.

Figure 7.1: USB charging port and battery indicator on the sprayer handle.

Figure 7.2: Battery specifications and charging recommendations.
8. Carrying Options
The Kaskiwaly Electric Garden Sprayer offers two convenient ways to carry, ensuring portability during long-term outdoor work:
- Hand-held Lid: The sturdy lid features a comfortable handle for easy carrying over short distances.
- Adjustable Shoulder Strap: For extended use or when hands-free operation is preferred, attach the adjustable shoulder strap to distribute the weight evenly across your shoulder.

Figure 8.1: Two methods for carrying the sprayer.
9. Maintenance
Proper maintenance ensures the longevity and optimal performance of your sprayer:
- Cleaning: After each use, especially when spraying chemicals, wash the tank and hose thoroughly with clean water. Ensure there is no liquid residue left inside.
- Filter: The hose includes a filter head to prevent impurities from clogging the system. Regularly check and clean this filter if necessary.
- Storage: Always empty the tank and clean the sprayer before storage. Keep the battery-powered components dry. Do not store the sprayer with liquid residue inside. Store in a cool, well-ventilated area, away from direct sunlight and extreme heat.
- Battery Storage: Charge the battery every two months if not in regular use to prevent deep discharge.
- Usage Tip: Never operate the sprayer without water or liquid in the tank, as this can damage the pump.

Figure 9.1: Key design details contributing to ease of maintenance and use.
10. Troubleshooting
If you encounter issues with your Kaskiwaly Electric Garden Sprayer, refer to the following common problems and solutions:
Problem: Sprayer Not Working / No Spray
- Check Battery: Ensure the battery is fully charged. Recharge if necessary.
- Check for Clogs: Inspect the nozzle and the filter at the end of the hose inside the tank for any blockages. Clean thoroughly.
- Check Connections: Ensure all hose and wand connections are tight and secure.
- Liquid Level: Verify there is sufficient liquid in the tank. The pump requires liquid to operate.
Problem: Weak Spray / Inconsistent Spray
- Nozzle Adjustment: Twist the nozzle to ensure it's set to the desired spray pattern and not partially blocked.
- Clogs: Check for partial clogs in the nozzle or filter.
- Air Leak: Ensure the tank lid is tightly sealed to prevent air leaks that can affect pressure.
- Battery Level: A low battery can result in reduced pump performance. Recharge the battery.
Problem: Leaking
- Connections: Tighten all connections, including the nozzle, wand, hose, and tank lid.
- Damage: Inspect hoses and seals for any visible damage or cracks. If damaged, contact customer support for replacement parts.
11. Specifications
Detailed specifications for the Kaskiwaly 2 Gallon Electric Garden Sprayer:
| Feature | Detail |
|---|---|
| Brand | Kaskiwaly |
| Model Name | 2 gallon |
| Tank Volume | 2 Gallons |
| Color | Green |
| Recommended Uses | Garden sprayer |
| Material | Acrylonitrile Butadiene Styrene (ABS) |
| Item Weight | 1.21 Pounds |
| Product Dimensions | 5.7"W x 11.4"H |
| Style | Knapsack |
| Power Source | Battery Powered |
| Hose Length | 23.62 Inches |
| UPC | 780748670887 |
| Manufacturer | Kaskiwaly |
| ASIN | B0CYH47NT9 |

Figure 11.1: Product dimensions for reference.
12. Warranty and Support
For warranty information or technical support regarding your Kaskiwaly 2 Gallon Electric Garden Sprayer, please contact Kaskiwaly customer service directly. Keep your purchase receipt as proof of purchase for any warranty claims.
Ask a question about this manual
Ask about setup, troubleshooting, compatibility, parts, safety, or missing instructions. Manuals+ will review the question and use this page’s manual context to help answer it.