1. Introduction
Thank you for purchasing the VCHICS A22 Portable Mini Body Camera. This manual provides essential information for the proper setup, operation, and maintenance of your device. Please read it thoroughly before use to ensure optimal performance and longevity of the product.
Package Contents
- 1 x VCHICS A22 Mini Camera
- 1 x USB Data Cable
- 1 x English User Manual

Image 1.1: The VCHICS A22 Mini Body Camera package contents, including the camera, USB cable, and user manual.
2. Product Overview
The VCHICS A22 is a compact and versatile mini body camera designed for various recording needs. It features a durable plastic shell, simple operation, and advanced recording capabilities.
Key Features
- Durable Construction: Robust plastic shell designed to withstand accidental drops.
- Simple One-Key Operation: Start recording instantly with a single button press.
- Enhanced Night Vision: Equipped with 4 x 940 IR night vision lights for clear recording in low-light conditions.
- Simultaneous Recording & Charging: Allows continuous operation without battery concerns.
- Loop Recording: Ensures no critical moments are missed by overwriting the oldest files when storage is full.
- Motion Detection: Automatically starts recording when movement is detected.
- High-Definition Video: Supports 1080P and 720P video recording.
- Versatile Use: Functions as a car DVR, sports DV, or web camera.
- Expandable Storage: Supports TF memory cards from 8GB to 256GB (FAT32 format).
- Rotatable Camera Head: 180-degree rotating camera head with a 160-degree ultra-wide angle lens.
- Magnetic Back Clip: Strong magnetic clip for secure attachment.
- Long Battery Life: Approximately 10 hours of continuous video recording at 720P 30fps on a full charge.
- Invisible Silent Recording: Records discreetly without visible indicators.
- Photo Capture: Supports taking photos during video recording.
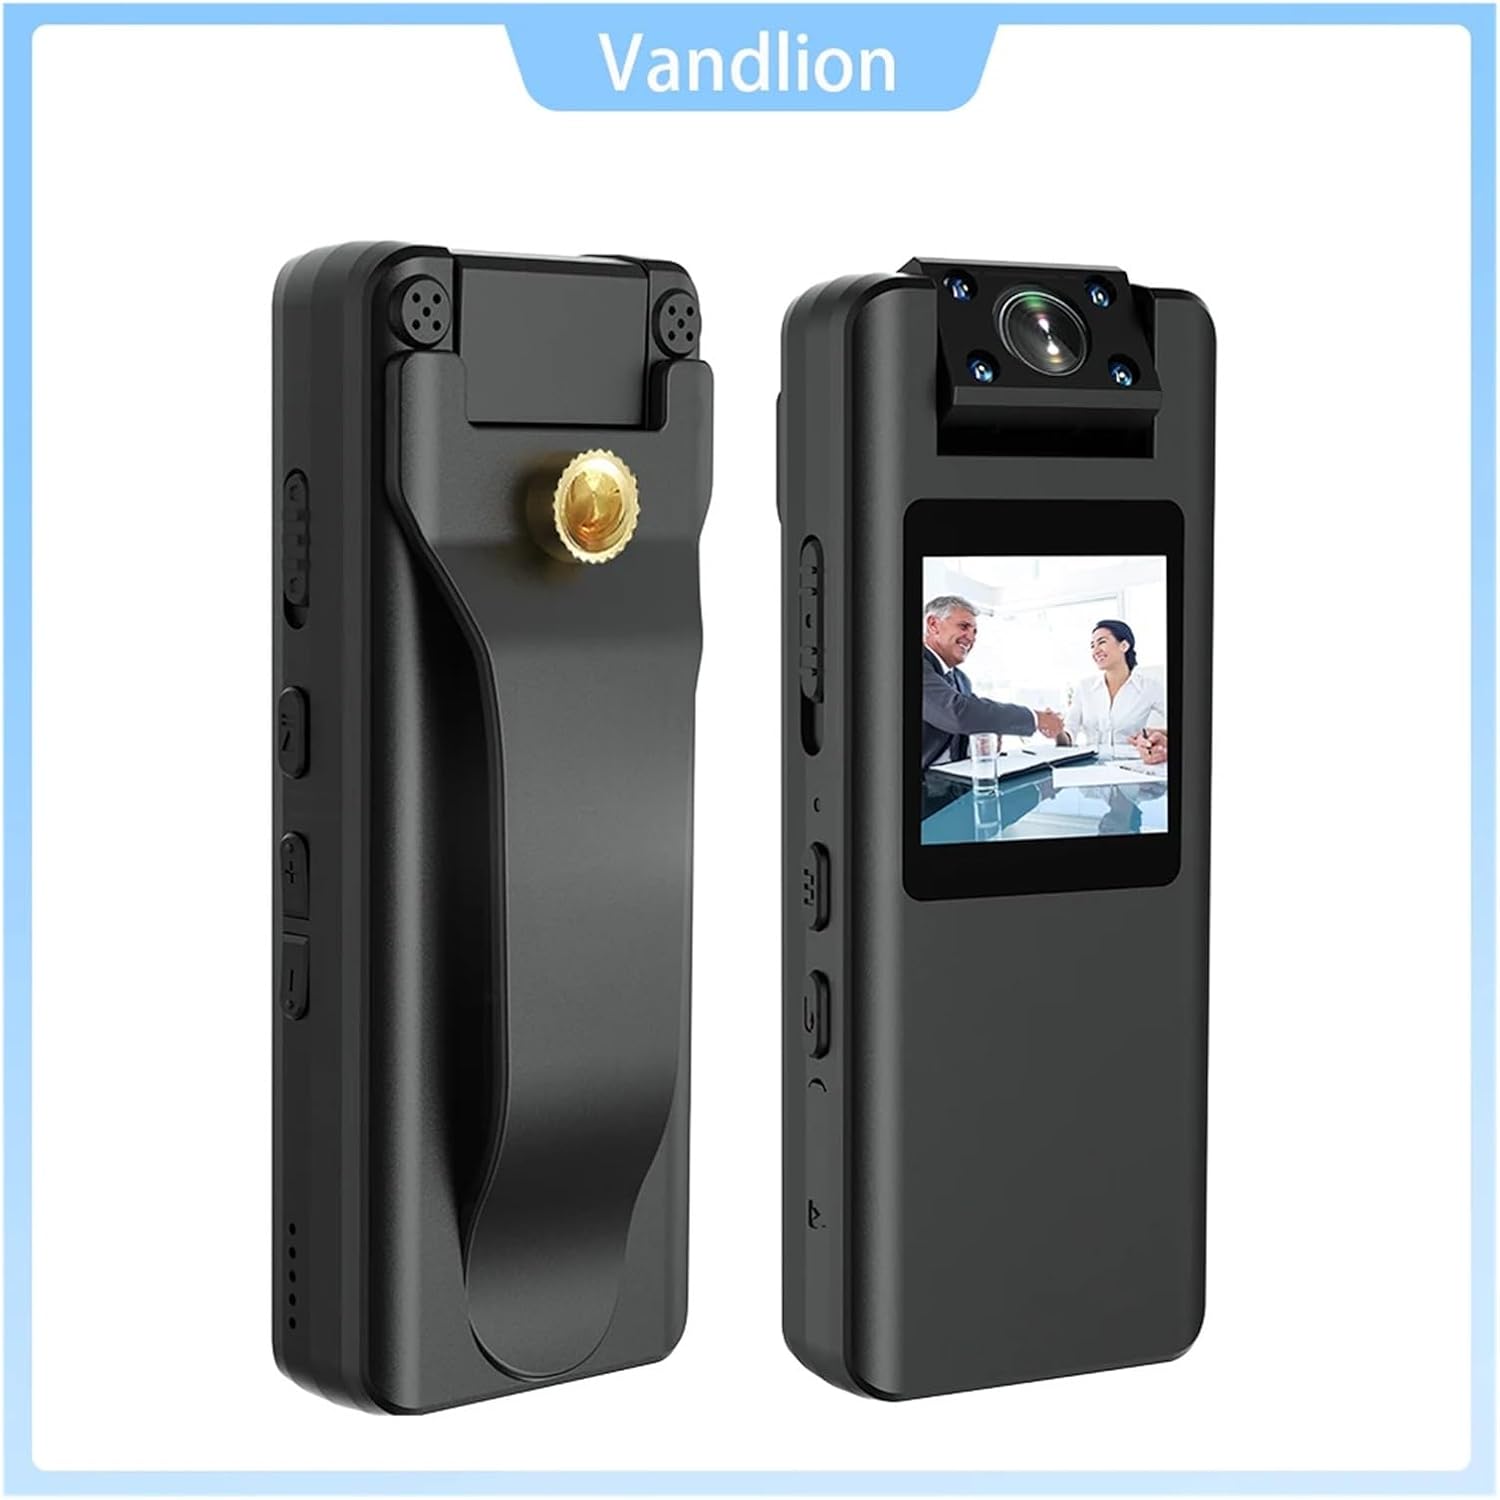
Image 2.1: Front and side views of the VCHICS A22 Mini Body Camera, highlighting its compact design and controls.
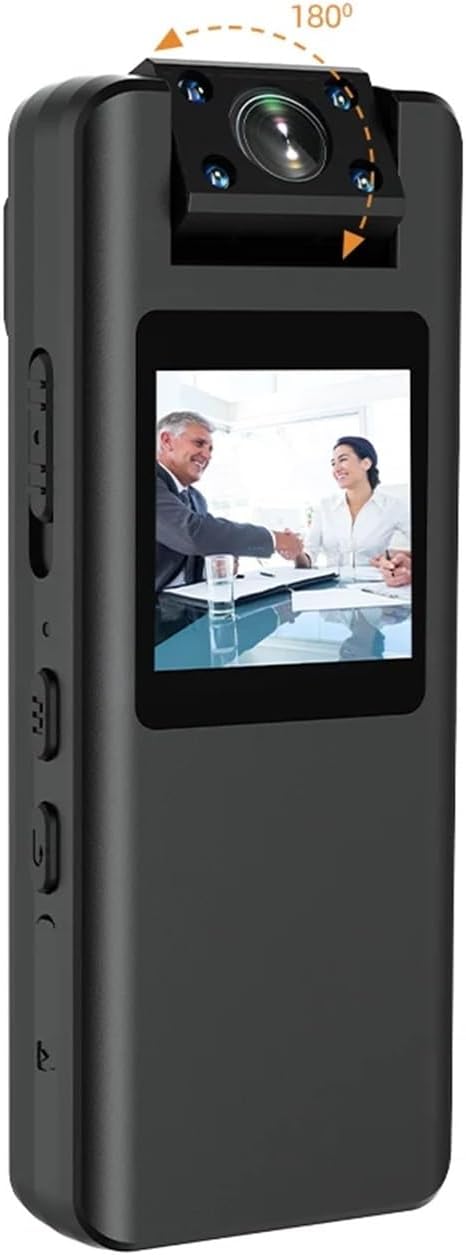
Image 2.2: The VCHICS A22 Mini Body Camera demonstrating its 180-degree rotatable camera head for flexible recording angles.
3. Setup
3.1 Charging the Device
Before first use, fully charge the camera. Connect the camera to a USB power adapter (not included) or a computer's USB port using the provided USB data cable. The LED indicator will show charging status and turn off when fully charged.
3.2 Inserting the TF Card
The camera supports TF (microSD) cards from 8GB to 256GB. Ensure the card is formatted to FAT32. Gently insert the TF card into the designated slot until it clicks into place. To remove, push the card in again until it springs out.
3.3 Setting System Time
To synchronize the system time, connect the camera to a computer. Create a text file named `time.txt` in the root directory of the TF card. Open the file and enter the current date and time in the format `YYYYMMDDHHMMSS` (e.g., `20240302103000` for March 2, 2024, 10:30:00). Save the file and safely eject the camera. The time will be updated upon the next power-on.
4. Operating Instructions
4.1 Power On/Off
- Power On: Press and hold the Power button for a few seconds until the indicator light turns on.
- Power Off: Press and hold the Power button for a few seconds until the indicator light turns off.
4.2 Video Recording (1080P/720P)
Once powered on, press the Video Record button to start recording. The indicator light will flash to indicate recording is in progress. Press the button again to stop recording and save the file.
4.3 Photo Taking
In standby mode, press the Photo button to take a still image. The indicator light will flash once to confirm the photo has been taken and saved.
4.4 Audio Recording
In standby mode, press the Audio Record button to start audio-only recording. The indicator light will flash differently (refer to device specific light patterns) to indicate audio recording. Press again to stop and save.
4.5 Motion Detection
To activate motion detection, refer to the specific button sequence or menu option on your device. Once enabled, the camera will automatically begin recording when movement is detected within its 5-meter range and stop when motion ceases.
4.6 Night Vision
The camera features 4 x 940 IR night vision lights. These lights activate automatically in low-light conditions or can be manually toggled via a dedicated button or menu setting (refer to device specific controls). This allows for clear video capture even in dark environments.

Image 4.1: Visual comparison of video quality captured by the VCHICS A22 camera during daytime and nighttime, demonstrating its night vision capability.
4.7 Loop Recording
The camera supports loop recording. When the TF card is full, the oldest video files will be automatically overwritten by new recordings. This ensures continuous recording without manual deletion of old files.
4.8 Connecting to PC (Webcam/File Transfer)
Connect the camera to your computer using the USB data cable. The camera can function as a removable disk for file transfer or as a webcam. Select the desired mode on the camera's screen or through your computer's settings.
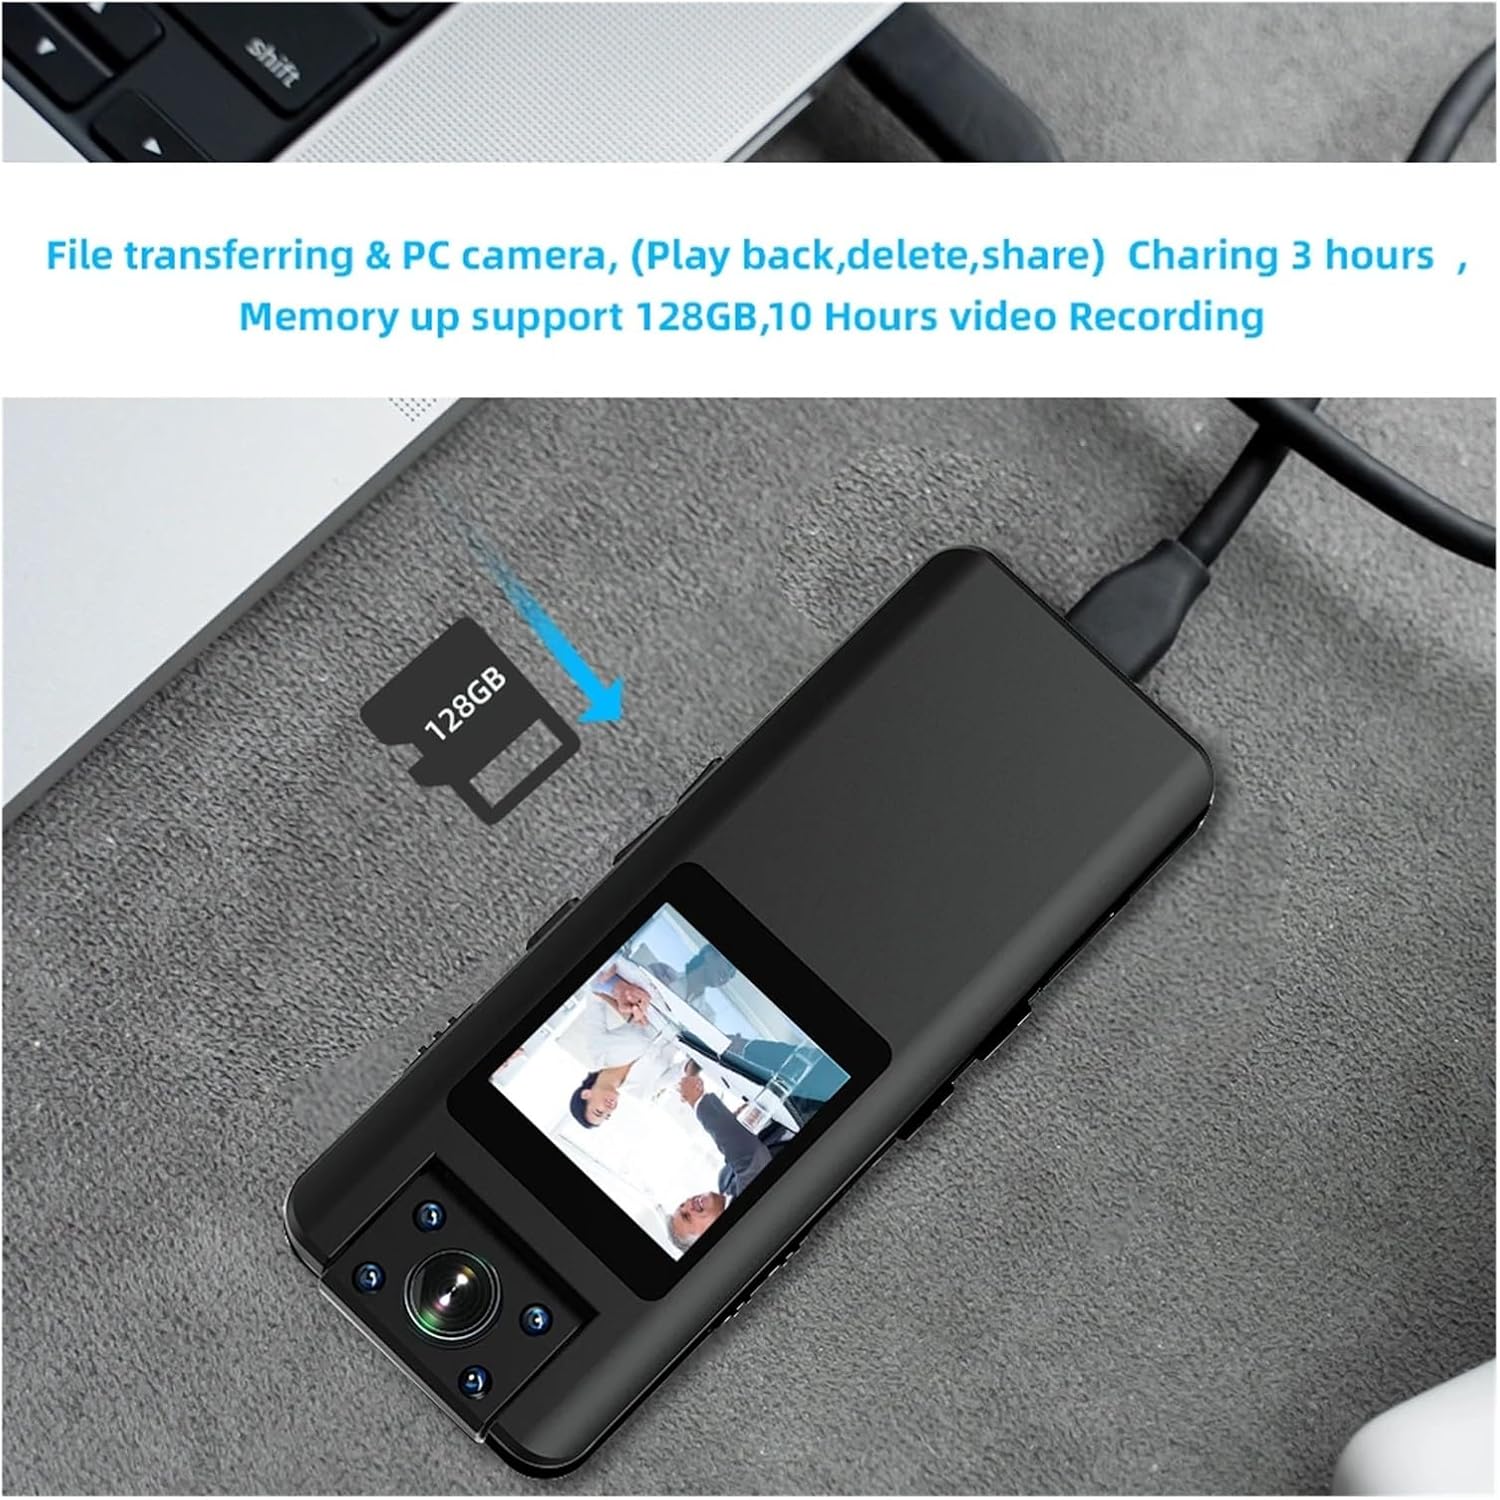
Image 4.2: The VCHICS A22 Mini Body Camera connected to a laptop, illustrating its capability for file transfer and use as a PC camera.
5. Maintenance
5.1 Cleaning
Wipe the camera body with a soft, dry cloth. Do not use liquid cleaners or solvents. For the lens, use a specialized lens cleaning cloth to avoid scratches.
5.2 Storage
Store the camera in a cool, dry place away from direct sunlight, extreme temperatures, and high humidity. Remove the TF card if storing for extended periods.
5.3 Battery Care
To prolong battery life, avoid fully discharging the battery frequently. Charge the camera regularly, even if not in use, to maintain battery health. Do not expose the battery to high temperatures.
6. Troubleshooting
6.1 Camera Not Turning On
- Ensure the battery is charged. Connect to a power source and try again.
- If the camera is unresponsive, try resetting it using a small pin in the reset hole (if available).
6.2 Recording Issues (No Recording/Corrupted Files)
- Check if a TF card is properly inserted and has sufficient free space.
- Ensure the TF card is formatted to FAT32. Reformat if necessary (this will erase all data on the card).
- Try using a different TF card to rule out card issues.
6.3 Poor Video Quality
- Ensure the camera lens is clean and free from smudges or dust.
- Check lighting conditions. For low light, ensure night vision is active.
- Verify that the correct video resolution (1080P or 720P) is selected.
6.4 Camera Not Recognized by PC
- Try a different USB port or USB cable.
- Ensure the camera is powered on when connected to the PC.
- Check your computer's device manager for any driver issues.
7. Specifications
| Feature | Specification |
|---|---|
| Video Codec | H.264 |
| Video Format | MOV (1920x1080P) |
| Photo Format | JPG |
| Audio Format | WAV |
| Dimensions (L x W x H) | 96mm x 38mm x 16mm |
| USB Connector | Micro USB 2.0 |
| TF Memory Card Support | 8GB - 256GB (FAT32) |
| Battery Capacity | 3.8V/2200MA Lithium Battery |
| Frame Rate | 30FPS |
| Motion Detection Distance | 5 meters (straight line) |
| Photo Resolution Options | 40M/21M/12M/10M/8M/5M/2MHD/1.3M/VGA |
| Video Resolution Options | 1080P/720P |
| Operating Temperature | -5°C to 45°C |
8. Warranty and Support
For warranty information and technical support, please refer to the contact details provided with your purchase or visit the official VCHICS website. Keep your purchase receipt as proof of purchase for warranty claims.
If you encounter any issues not covered in this manual, please contact our customer support team for assistance.