1. Safety Instructions
Please read all safety instructions carefully before using the VIFIGEN 3-in-1 Cordless Car Vacuum, Air Duster, and Hand Pump. Retain this manual for future reference.
- Do not immerse the device in water or other liquids.
- Keep the device away from heat sources, direct sunlight, and flammable materials.
- Ensure the filter is properly installed before operation to prevent damage to the motor.
- Do not use the device to vacuum liquids, hot ashes, sharp objects, or hazardous materials.
- Keep hair, loose clothing, fingers, and all body parts away from openings and moving parts.
- This appliance is not intended for use by persons (including children) with reduced physical, sensory or mental capabilities, or lack of experience and knowledge, unless they have been given supervision or instruction concerning use of the appliance by a person responsible for their safety.
- Children should be supervised to ensure that they do not play with the appliance.
- Use only the provided USB-C cable for charging. A 5V/2A adapter is suggested (not included).
- If the battery is low, the suction power will weaken. Fully charge the device for optimal performance.
2. Product Overview
The VIFIGEN 3-in-1 Cordless Car Vacuum is a versatile cleaning tool designed for convenience and efficiency. It combines the functions of a handheld vacuum cleaner, an air duster, and a portable hand pump, making it suitable for various cleaning and inflation tasks in your car, home, or office.
Key features include a 120W super power motor providing up to 9000Pa suction, a 4000mAh rechargeable battery, and an integrated LED light for improved visibility in dark areas.
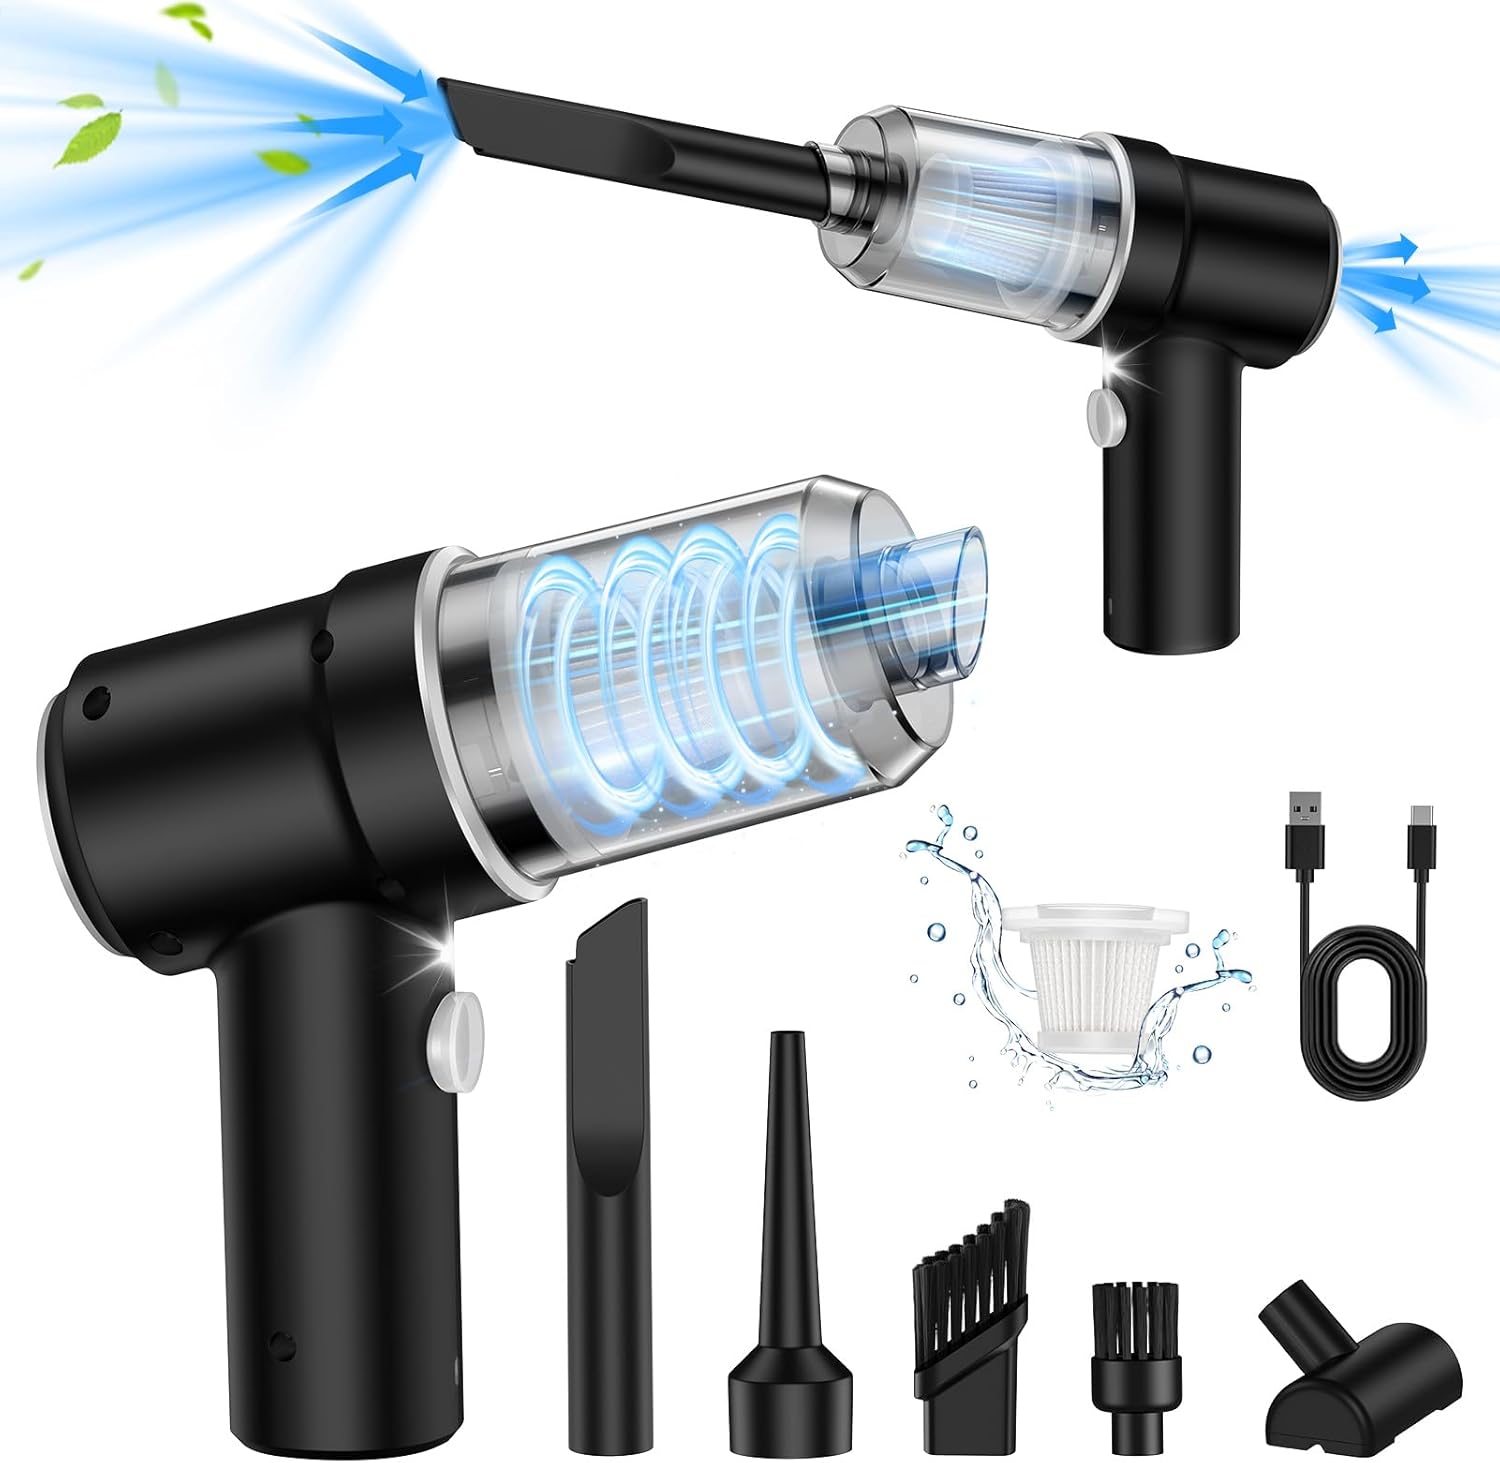
Figure 2.1: The VIFIGEN 3-in-1 Cordless Car Vacuum with its various attachments, showcasing its vacuum and blowing capabilities.
3. Package Contents
Verify that all items are present in the package:
- 1 x Handheld Vacuum Cleaner (Main Body)
- 1 x USB-C Cable
- 1 x Filter
- 3 x Accessory Heads
- 2 x Brush Nozzles
- 1 x User Manual (this document)

Figure 3.1: Components including the HEPA filter, waste bin, and various nozzles for different applications.
4. Setup
4.1 Charging the Device
- Connect the provided USB-C cable to the charging port on the device.
- Connect the other end of the USB-C cable to a 5V/2A USB power adapter (not included), car charger, power bank, or computer USB port.
- The indicator light will be red during charging and turn green when fully charged.
- Charging typically takes approximately 1.5 to 2.5 hours.
Important: If the device has been used continuously, the battery temperature may be high. Allow it to cool down for 15 minutes before charging to ensure battery protection.

Figure 4.1: The device can be charged using the included USB-C cable from multiple power sources.
4.2 Attaching Accessories
Select the appropriate nozzle for your task and firmly attach it to the device's intake or exhaust port. The nozzles are designed for specific functions:
- Suction Nozzle: For vacuuming in tight spaces like window frames, car seats, and cupboard corners.
- Brush Nozzles: Two types are included. One for general dusting and cleaning surfaces like keyboards, and another for more delicate areas.
- Blow Nozzle: For air dusting keyboards, camera lenses, or inflating small items.
- Floor Brush: For larger surfaces such as car floors, trunks, mattresses, and sofas.
5. Operating Instructions
5.1 Powering On/Off
Press the power button located on the handle to turn the device on. Press it again to turn the device off.
5.2 Vacuum Mode
- Attach the desired suction nozzle or brush nozzle to the intake port of the device.
- Turn on the device.
- Move the nozzle over the surface to be cleaned, allowing the device to suction dust and debris.
- The integrated LED light can be used to illuminate dark areas during cleaning.
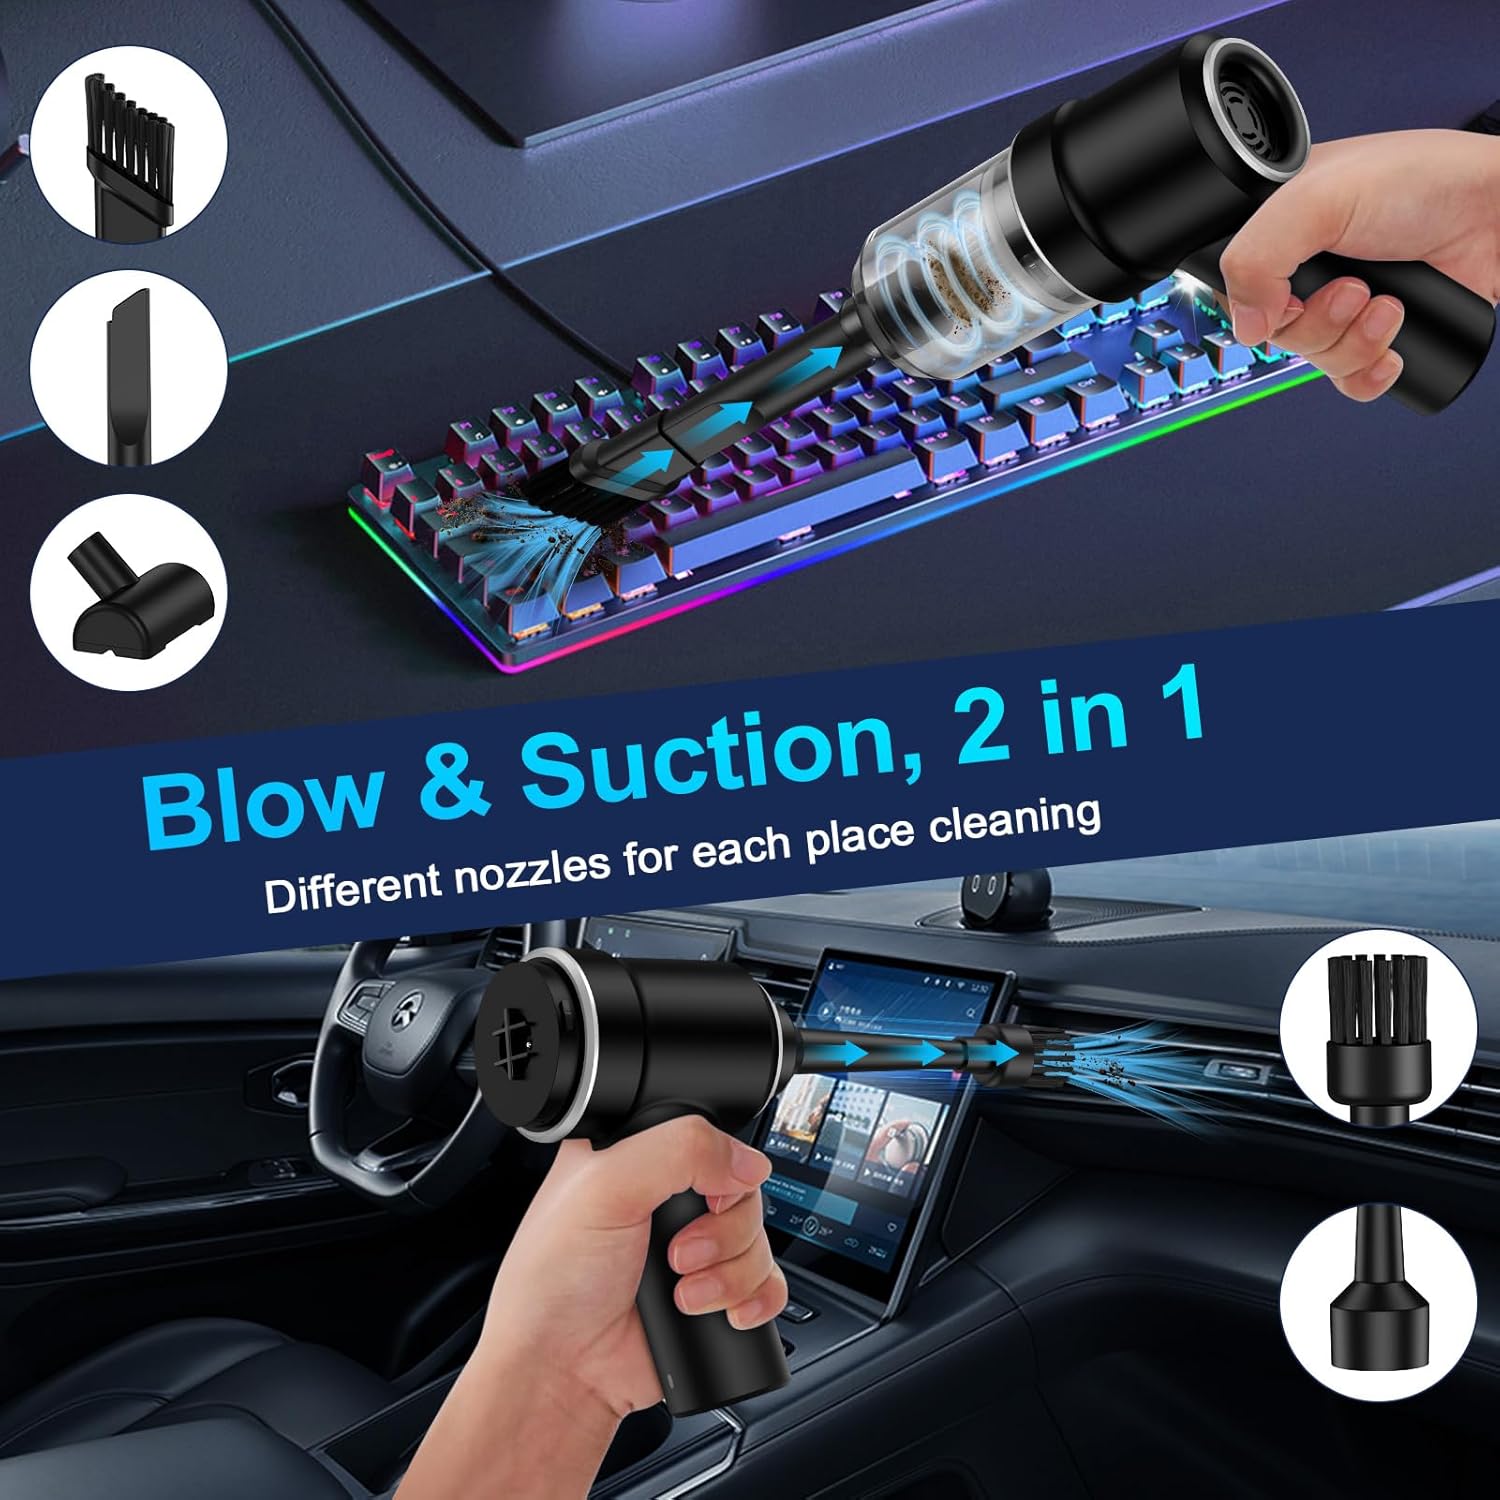
Figure 5.1: The device in use for vacuuming a keyboard and blowing air in a car.
5.3 Air Duster Mode
- Attach the desired blow nozzle to the exhaust port of the device.
- Turn on the device.
- Direct the airflow towards dust and debris on surfaces such as keyboards, camera lenses, or intricate car vents to dislodge them.
5.4 Hand Pump Mode
The device can also function as a hand pump for inflating small items or vacuum-sealing storage bags.
- Attach the appropriate nozzle to the exhaust port for inflation (e.g., for balloons, swimming rings).
- For vacuum sealing, attach the appropriate nozzle to the intake port and connect it to the vacuum seal bag valve.
- Turn on the device to begin inflation or vacuum sealing.

Figure 5.2: Examples of the device's versatility, including cleaning pet hair and blowing air for various tasks.
5.5 LED Light Usage
The built-in LED light automatically activates when the device is turned on, providing illumination for cleaning in dimly lit areas such as under car seats, dashboards, or dark corners of your home.

Figure 5.3: The LED light assists in cleaning hard-to-see areas in a car interior.
6. Maintenance
6.1 Emptying the Dust Cup
The transparent dust cup allows you to monitor the fill level. Empty the dust cup when it appears full or after each use to maintain optimal suction power.
- Ensure the device is turned off.
- Twist the dust cup counter-clockwise to detach it from the main body.
- Carefully empty the contents into a waste bin.
6.2 Cleaning the Filter
The device is equipped with a washable and reusable filter. Regular cleaning of the filter is crucial for maintaining suction efficiency.
- After emptying the dust cup, remove the filter from inside the cup.
- Rinse the filter under running water until it is clean.
- Allow the filter to air dry completely before reinserting it into the dust cup. Do not use the device with a wet filter.
- Reassemble the filter into the dust cup, then twist the dust cup clockwise onto the main body until secure.
6.3 Storage
Store the device and its accessories in a cool, dry place, away from direct sunlight and out of reach of children.
7. Troubleshooting
| Problem | Possible Cause | Solution |
|---|---|---|
| Low suction power | Battery is low Dust cup is full Filter is clogged Nozzle is blocked | Fully charge the device Empty the dust cup Clean or replace the filter Check and clear any blockages in the nozzle or intake port |
| Device does not turn on | Battery is completely drained Device is faulty | Charge the device for at least 2 hours Contact customer support if charging does not resolve the issue |
| Device not charging | USB-C cable is not properly connected Power adapter is faulty Battery temperature is too high | Ensure cable is securely connected Try a different USB power adapter Allow device to cool down for 15 minutes before attempting to charge |
8. Specifications
| Feature | Specification |
|---|---|
| Brand | VIFIGEN |
| Model Name | LT-113C, LT-101C, LT-102C, LT-103C |
| Special Feature | Compact, 3-in-1 (Vacuum, Blower, Pump) |
| Filter Type | Cartridge (Washable) |
| Is Cordless? | Yes |
| Capacity | 0.1 Liters (Dust Cup) |
| Wattage | 120 watts |
| Charging Time | 1.5 - 2.5 Hours |
| Maximum Suction | 9000 Pa |
| Battery Capacity | 4000 mAh |
| Runtime | Approximately 20 minutes |
| Noise Level | <70 dB |
| Product Dimensions | 2.1"L x 0.12"W x 5.1"H |
| Connectivity Technology | USB-C |
| Color | Black |
9. Warranty and Support
VIFIGEN provides an 18-month refund or replacement warranty for this product. For any inquiries, technical assistance, or warranty claims, please contact VIFIGEN customer service.
Please refer to the contact information provided with your purchase or visit the official VIFIGEN store for support details.
We are committed to providing 24/7 care-free service and are ready to assist you.