1. Introduction
This manual provides essential information for the A-Premium Front CV Axle Shaft Assembly, Model APCVA2574C. It covers product specifications, vehicle compatibility, installation guidelines, maintenance recommendations, and troubleshooting tips to ensure proper function and longevity of the component. The A-Premium CV Axle Shaft is designed as a direct replacement part, manufactured to meet or exceed original equipment standards.

Image: Two A-Premium Front CV Axle Shaft Assemblies next to their product box, illustrating the product packaging and the two axle shafts included.
2. Vehicle Compatibility
The A-Premium Front CV Axle Shaft Assembly (Model APCVA2574C) is compatible with a range of Chevrolet, Buick, Pontiac, and Oldsmobile models. Please verify your vehicle's make, model, and year against the list below to ensure proper fitment. Always cross-reference with your vehicle's specific requirements.

Image: A detailed compatibility chart for various Chevrolet, Buick, Pontiac, and Oldsmobile models, including specific years and engine configurations.
Compatible Models:
- Buick: Allure (2005-2009), Century (2000-2005), LaCrosse (2005-2009), Regal (1998-2004)
- Chevrolet: Impala (2000-2011), Monte Carlo (2000-2007), Venture (1999-2005)
- Oldsmobile: Intrigue (1998-2002), Silhouette (1999-2004)
- Pontiac: Grand Prix (1998-2008), Montana (1999-2005)
Note: Supplied with Standard Neoprene Outboard Boot.
3. Product Components and Design
The CV Axle Shaft Assembly is a critical component of your vehicle's drivetrain, transmitting power from the transmission to the wheels. This A-Premium assembly is engineered for durability and performance.

Image: An exploded diagram illustrating the various internal and external components of the CV axle shaft assembly, including the axle nut, splines, cage, inner race, steel balls, CV boots, center shaft, stainless-steel clamps, tripod, and housing.
Key Design Features:
- Outer and Inner CV Joints: Designed with precision-ground seal surfaces to prevent grease leakage and ensure flexible rotation.
- Spline and Screw Thread: Engineered to reduce positional error and guarantee quality fitment.
- Durable Construction: Utilizes a precise forging process, heat treatment, and robust internal structure for enhanced strength and longevity.
- Protective Boots: Equipped with high-quality CV boots and stainless-steel clamps for full protection against contaminants and to prevent grease leakage.

Image: Comparison of A-Premium's CV joint design with a generic alternative, emphasizing precision and leak prevention.

Image: Illustration of the precise forging process, indicating heat treatment for improved performance and stronger internal structure.
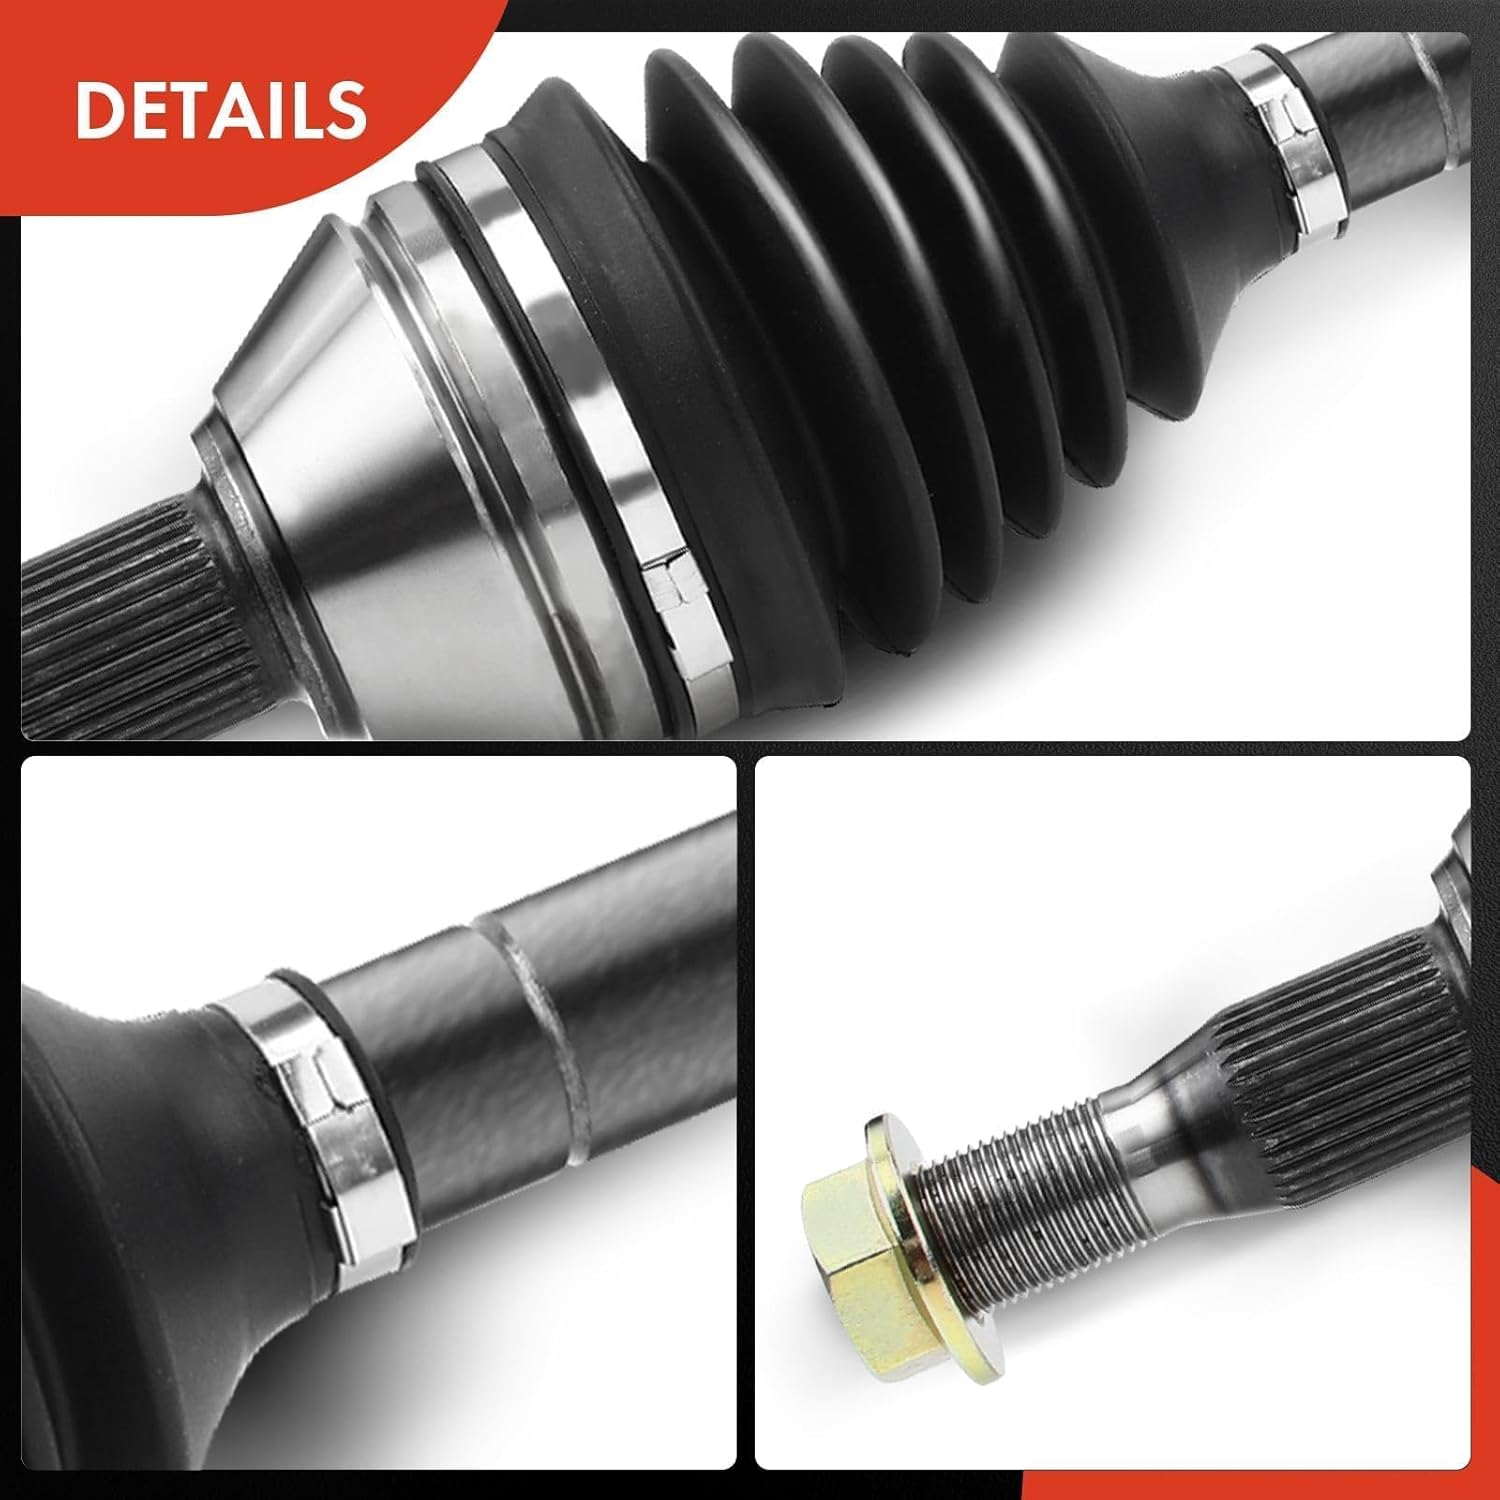
Image: Close-up details of the CV boot, stainless steel clamp, and axle nut, showcasing component quality.
4. Specifications
Detailed technical specifications for the A-Premium Front CV Axle Shaft Assembly:
| Feature | Description |
|---|---|
| Location | Front Left and Right (Driver and Passenger Side) |
| ABS Ring Included | No |
| Axle Nut Included | Yes |
| Compressed Length (Left) | 21.81 inches |
| Compressed Length (Right) | 24.88 inches |
| Input Shaft Spline Count | 34 |
| Output Shaft Spline Count | 33 |
| Item Weight | 34.9 pounds (pair) |
| Manufacturer Part Number | APCVA2574C |
| OEM Part Numbers | 20859643, 26045924, 26047914, 26073385, 26073396, 20859642, 26054579, 26054707, 26073386, 26073399, 88965659, NCV10232, NCV10235, 661250, 66-1250, 661255, 66-1255 |

Image: A diagram detailing the spline counts and compressed lengths for both left and right CV axle shafts.

Image: Results from rigorous testing, including cycle life, temperature resistance, and fatigue tests, demonstrating product reliability.
5. Installation Guidelines
Installing a CV axle shaft requires specific tools and technical knowledge. Incorrect installation can lead to component failure, vehicle damage, or personal injury. It is highly recommended that installation be performed by a qualified mechanic or automotive professional.
General Steps (Consult a Professional Manual for Details):
- Safety First: Ensure the vehicle is safely lifted and supported on jack stands. Disconnect the battery.
- Remove Wheel and Brake Components: Remove the wheel, brake caliper, and rotor to access the hub assembly.
- Disconnect Suspension Components: Loosen and remove necessary suspension components (e.g., tie rod end, lower ball joint) to allow the steering knuckle to move freely.
- Remove Axle Nut: Loosen and remove the large axle nut securing the CV axle to the hub.
- Separate Axle from Hub: Carefully push the CV axle shaft out of the hub assembly.
- Remove Axle from Transmission/Transaxle: Depending on the vehicle, the inner CV joint may be bolted to the transmission or simply pull out. Use appropriate tools to remove it without damaging seals.
- Install New Axle: Carefully insert the new A-Premium CV axle shaft into the transmission/transaxle, ensuring the splines align correctly.
- Insert into Hub: Guide the outer end of the new CV axle into the hub assembly.
- Reassemble: Reattach all suspension components, brake components, and the wheel. Torque all fasteners to manufacturer specifications.
- Final Checks: Lower the vehicle, check for proper operation, and inspect for any leaks or unusual noises.
Attention: Please use an appropriate shop manual for your specific vehicle to obtain detailed instructions and torque specifications. If you do not have an installation manual or possess sufficient skill to install this part, it is strongly recommended to seek assistance from a qualified mechanic.

Image: A warning graphic emphasizing the importance of professional installation or consulting a vehicle-specific shop manual.
6. Maintenance
Regular inspection of your CV axle shafts can help prevent premature failure and ensure safe vehicle operation. Pay attention to the following:
- Inspect CV Boots: Periodically check the rubber boots on both ends of the CV axle for cracks, tears, or signs of grease leakage. Damaged boots allow dirt and moisture in, leading to joint failure.
- Listen for Noises: Pay attention to any clicking, popping, or clunking noises, especially when turning or accelerating. These can indicate a failing CV joint.
- Check for Vibrations: Excessive vibration during driving, particularly at certain speeds, might suggest an issue with the axle shaft.
- Professional Inspection: Include CV axle inspection as part of your routine vehicle maintenance checks performed by a qualified technician.
7. Troubleshooting Common Issues
If you experience any of the following symptoms, your CV axle shaft may require inspection or replacement:
- Clicking or Popping Noise: Often heard when turning, this is a common sign of a worn outer CV joint.
- Clunking Noise: Typically heard when shifting from drive to reverse, or during acceleration/deceleration, indicating excessive play in the inner CV joint.
- Vibration: Excessive vibration during acceleration, especially noticeable at higher speeds, can point to a failing inner CV joint or an unbalanced axle shaft.
- Grease on Tire or Undercarriage: A torn CV boot will leak grease, which can be seen on the inside of the wheel, tire, or undercarriage. This indicates the joint is exposed to contaminants and will eventually fail.
- Deformation of CV Axle Shaft: Visible bending or damage to the shaft itself.

Image: Visual guide to common indicators that suggest a CV axle shaft replacement is needed.
If you observe any of these symptoms, it is advisable to have your vehicle inspected by a qualified technician promptly.
8. Warranty and Customer Support
A-Premium stands behind the quality of its products. The A-Premium CV Axle Shaft Assembly comes with a 1-Year Unlimited-Mileage Warranty. This warranty covers defects in materials and workmanship under normal use and service.
For Warranty Claims or Technical Assistance:
Please contact A-Premium customer support through the retailer where the product was purchased or visit the official A-Premium website for contact information. When contacting support, please have your purchase details and product model number (APCVA2574C) available.
We value your satisfaction and are committed to providing a positive experience with our products.