
Introduction
This manual provides detailed instructions for the assembly, use, and maintenance of your Convenience Concepts Newport Criss-Cross Chairside End Table. Please read all instructions carefully before beginning assembly and retain this manual for future reference.
The Newport Criss-Cross Chairside End Table features a unique criss-cross base design and a spacious tabletop, crafted from manufactured wood with an espresso woodgrain finish. Its versatile design allows for different positioning to suit your space.
Safety Information
- Ensure all parts are present and undamaged before assembly.
- Assemble on a soft, clean surface to prevent scratching.
- Do not overtighten screws during assembly.
- Keep small parts away from children during assembly.
- Do not stand or sit on the table.
- Place the table on a level surface to prevent tipping.
- Maximum weight capacity for the tabletop is 20 lbs (9 kg).
Parts List
Please verify that all components are included before proceeding with assembly.
- Top Panel (1)
- Base Panel (1)
- Criss-Cross Support Legs (2)
- Connecting Brackets (2)
- Hardware Pack (Screws, Dowels, Allen Wrench)
Note: Actual part names may vary slightly. Refer to the included hardware diagram for precise identification.
Setup and Assembly
Follow these steps to assemble your Newport Criss-Cross Chairside End Table.
- Step 1: Attach Criss-Cross Support Legs to Base Panel.
Carefully align the pre-drilled holes on the bottom of the Criss-Cross Support Legs with the holes on the Base Panel. Insert the provided screws and tighten them using the Allen wrench. Ensure the legs are securely fastened but do not overtighten.

Image: Close-up view of the criss-cross base structure, indicating where components connect. This illustrates the unique design of the table's support legs.
- Step 2: Attach Connecting Brackets.
Secure the Connecting Brackets between the two Criss-Cross Support Legs using the shorter screws. These brackets provide additional stability to the base structure.
- Step 3: Attach Top Panel.
Place the Top Panel upside down on a soft surface. Align the assembled base (Criss-Cross Support Legs and Base Panel) with the pre-drilled holes on the underside of the Top Panel. Insert the remaining screws and tighten them until the Top Panel is firmly attached to the base.

Image: An angled view of the fully assembled end table, showcasing the top panel connected to the criss-cross base.
- Step 4: Final Placement.
Carefully turn the assembled table upright and place it in your desired location. Ensure it is on a stable, level surface.
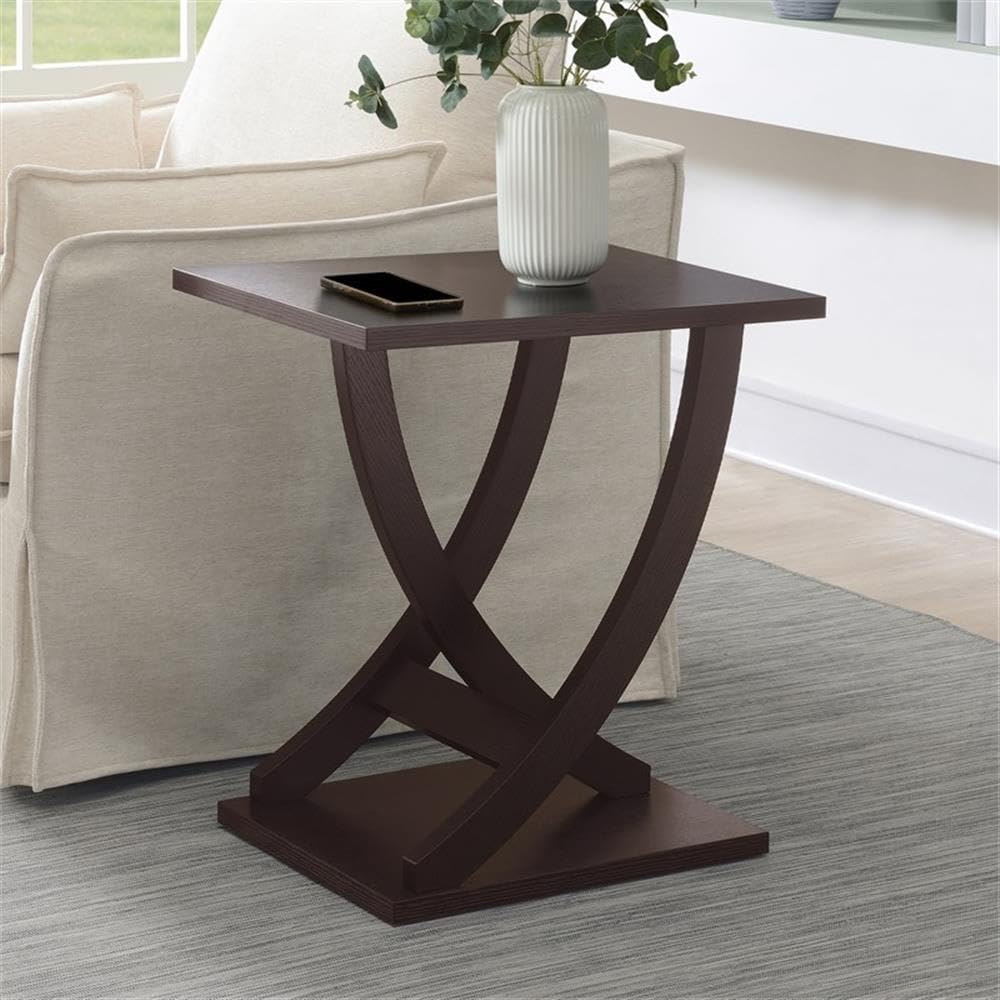
Image: The end table displayed with its overall dimensions (15.5"D x 22"W x 24"H), illustrating its size and form.
Operating and Usage
The Newport Criss-Cross Chairside End Table is designed for versatile use in various living spaces.
- Positioning: The unique criss-cross base can be positioned facing forwards or sideways, allowing you to customize its appearance to best suit your room's layout and aesthetic.

Image: Two views of the end table, one with the criss-cross base facing forward and another with it facing sideways, demonstrating its versatile styling options.
- Tabletop Use: The spacious tabletop is suitable for displaying decorative items, holding beverages, books, or other small personal items.

Image: A close-up of the tabletop with a potted plant and a glass of water, highlighting its spaciousness and utility for everyday items.
- Weight Capacity: Do not exceed the recommended weight capacity of 20 lbs (9 kg) on the tabletop to ensure stability and prevent damage.
Maintenance and Care
Proper care will help maintain the appearance and longevity of your end table.
- Cleaning: Wipe the surface with a soft, damp cloth. Avoid using harsh chemicals, abrasive cleaners, or polishes that may damage the espresso woodgrain finish.

Image: A visual representation of the espresso woodgrain finish, emphasizing the material and texture for care instructions.
- Spills: Immediately wipe up any spills to prevent water damage or staining.
- Heat and Moisture: Avoid placing hot items directly on the tabletop. Use coasters under beverages to protect the surface from moisture rings.
- Sunlight Exposure: Prolonged exposure to direct sunlight may cause fading or discoloration of the finish.
- Tighten Hardware: Periodically check and retighten all screws to ensure the table remains stable.
Troubleshooting
If you encounter any issues with your end table, refer to the following common solutions:
- Wobbling Table:
Ensure the table is placed on a level surface. Check all assembly screws and tighten them if loose. If the floor is uneven, use furniture pads under the legs to stabilize.
- Scratches or Dents:
Minor scratches can sometimes be touched up with a furniture repair marker matching the espresso finish. For deeper damage, professional repair may be required.
- Missing Parts:
If any parts were missing upon delivery, please contact customer support immediately with your purchase details.
Specifications
| Feature | Detail |
|---|---|
| Model Number | 121645ES |
| Brand | Convenience Concepts |
| Product Dimensions (D x W x H) | 15.5" x 22" x 24" (39.37 cm x 55.88 cm x 60.96 cm) |
| Item Weight | 14 Pounds (6.35 kg) |
| Frame Material | Manufactured Wood |
| Finish | Espresso Woodgrain Texture |
| Design | Criss-Cross Base, Modern Style |
| Maximum Weight Capacity | 20 lbs (9 kg) |
Warranty Information
For warranty details, please refer to the product description on the store page where you purchased this item, or contact Convenience Concepts customer service directly. Manufacturer warranty descriptions typically cover defects in materials and workmanship for a specified period from the date of purchase.
Customer Support
If you have any questions, require assistance with assembly, or need to report missing/damaged parts, please contact Convenience Concepts customer support. You can typically find contact information on the brand's official website or through the retailer where the product was purchased.
Online Resources: Visit the Convenience Concepts Store on Amazon