1. Introduction
This manual provides comprehensive instructions for the installation, operation, and maintenance of your ProTuning KOMPLEMENT Sliding Tray with Divider. Please read this manual carefully before using the product to ensure proper function and longevity. Keep this manual for future reference.
2. Product Overview
The KOMPLEMENT Sliding Tray with Divider is designed to enhance organization within your wardrobe system. It features a smooth sliding mechanism and adjustable dividers to neatly store various items such as accessories, jewelry, or small garments.

Figure 1: The KOMPLEMENT Sliding Tray with its integrated dividers, designed for organized storage.
3. Specifications
| Brand | ProTuning |
| Model Number | IK.193.320.09 |
| Product Width | 71.1 cm |
| Frame Width | 75 cm |
| Product Depth | 56.3 cm |
| Frame Depth | 58 cm |
| Height | 6.3 cm |
| Maximum Load | 10 kg |
4. Setup and Installation
This sliding tray is designed for integration into compatible wardrobe systems. Ensure your wardrobe frame dimensions match the product specifications (Frame Width 75 cm, Frame Depth 58 cm) for proper fit.
- Unpack Components: Carefully remove all parts from the packaging. Verify that all components are present according to the product's assembly instructions (not included in this manual, refer to the original product packaging for detailed assembly steps if required).
- Prepare Wardrobe Frame: Identify the desired location within your wardrobe. Ensure the mounting points for the sliding rails are clear and accessible.
- Install Sliding Rails: Attach the provided sliding rails to the interior sides of your wardrobe frame. Follow the specific instructions provided with your wardrobe system or the tray's original assembly guide for correct alignment and secure fastening.
- Insert Tray: Once the rails are securely installed, carefully slide the KOMPLEMENT tray onto the rails until it clicks into place. Test the sliding mechanism to ensure smooth operation.
- Position Dividers: The felt dividers can be adjusted or removed to create compartments of various sizes. Place them as needed to organize your items.
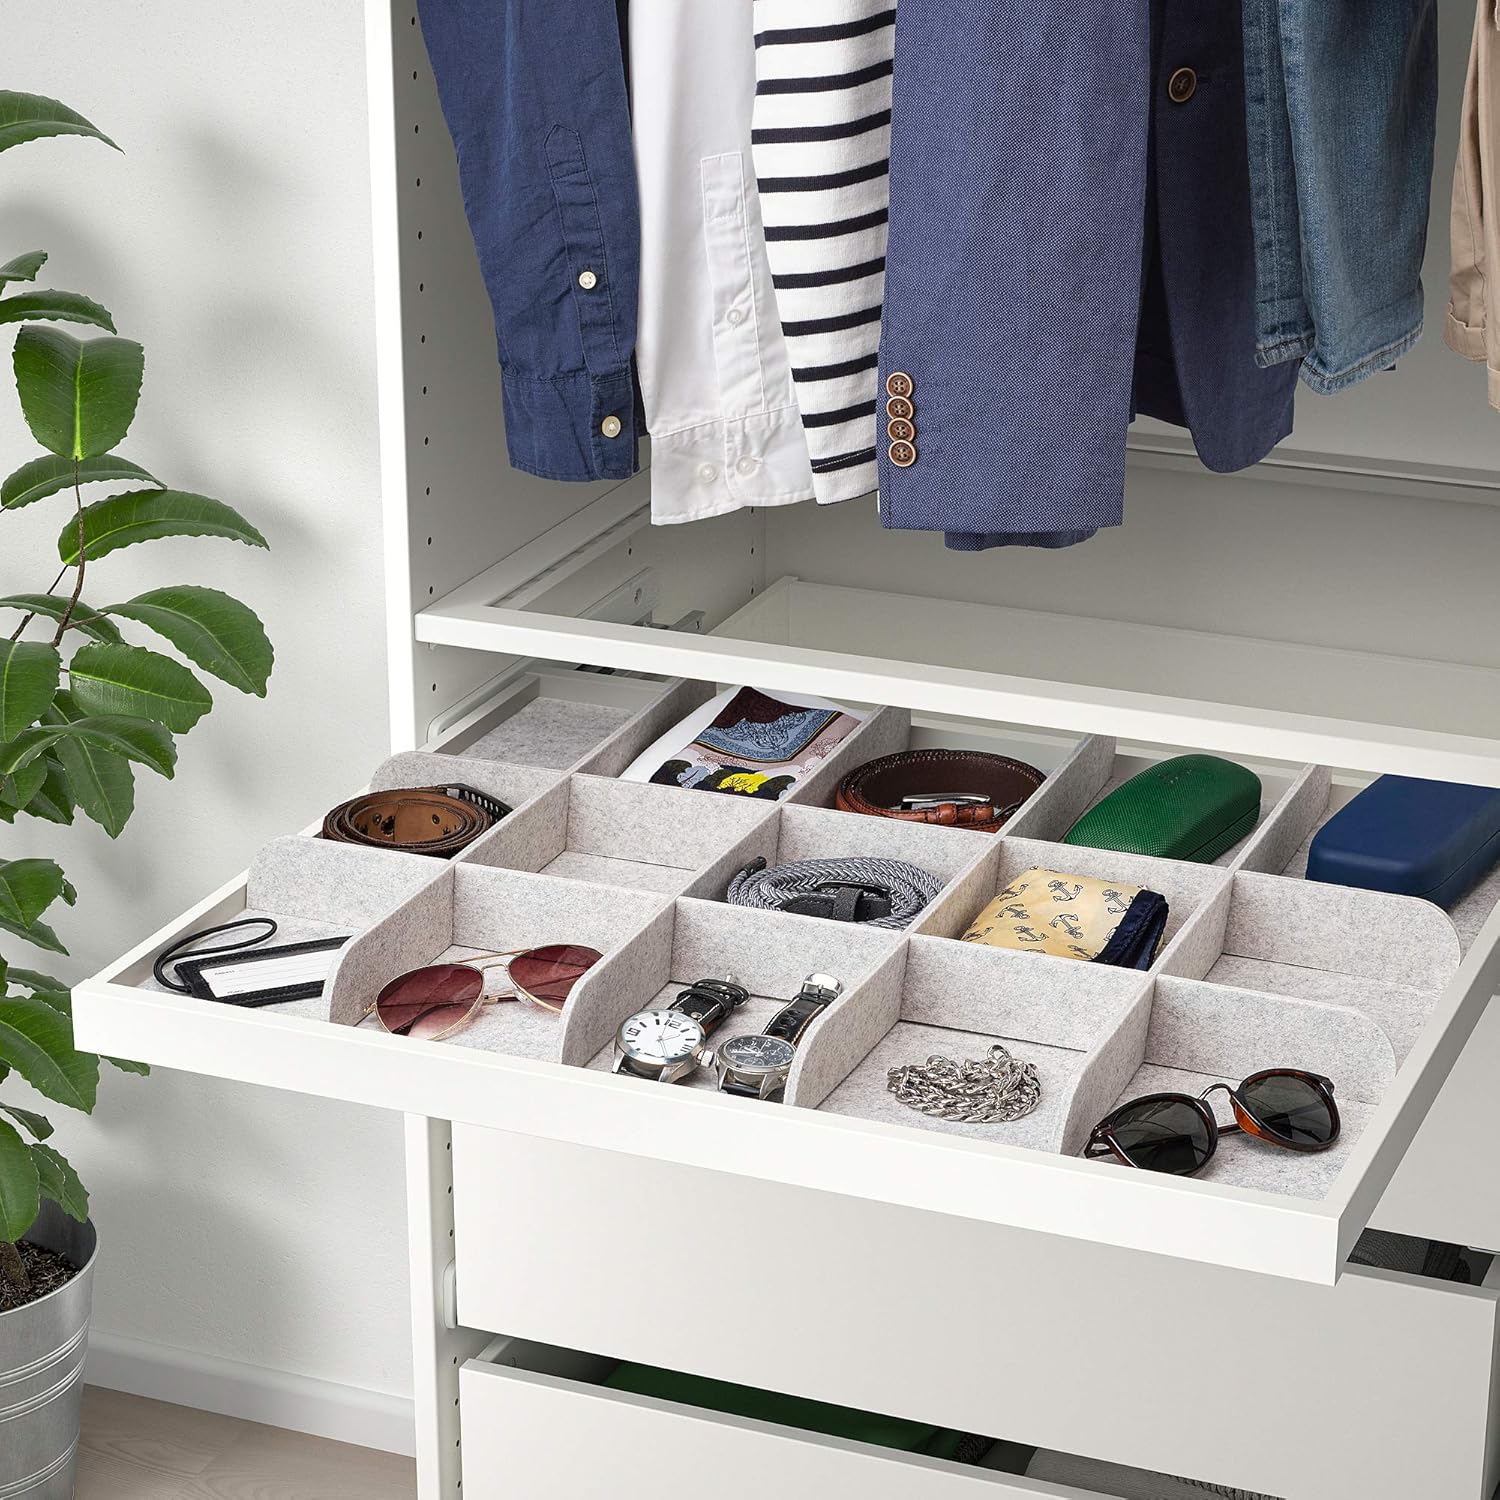
Figure 2: The sliding tray integrated into a wardrobe system, showcasing its organizational capacity for various accessories.

Figure 3: A detailed view of the sliding mechanism, ensuring smooth and effortless access to the tray's contents.
5. Operating Instructions
- Sliding the Tray: Gently pull the front edge of the tray to slide it out. Push it back in until it is fully recessed within the wardrobe frame.
- Using Dividers: The felt dividers can be repositioned by lifting them slightly and placing them into the desired slots. This allows for customization of compartment sizes to suit different items.
- Loading Capacity: Do not exceed the maximum load capacity of 10 kg (22 lbs) to prevent damage to the tray or its sliding mechanism. Distribute weight evenly.

Figure 4: Close-up view of the felt dividers, illustrating their texture and how they create organized compartments within the tray.
6. Maintenance
- Cleaning the Tray: Wipe the tray surfaces with a soft, damp cloth. Use a mild detergent if necessary, then wipe dry. Avoid abrasive cleaners or solvents.
- Cleaning Dividers: The felt dividers can be gently vacuumed or spot cleaned with a damp cloth and mild soap. Allow them to air dry completely before placing them back in the tray.
- Sliding Mechanism: Periodically check the sliding rails for any debris. Clean with a dry cloth. Lubrication is generally not required for these types of mechanisms.
7. Troubleshooting
- Tray not sliding smoothly:
- Check for obstructions on the sliding rails.
- Ensure the tray is correctly seated on both rails.
- Verify that the maximum load capacity has not been exceeded.
- Dividers do not fit securely:
- Ensure the dividers are inserted correctly into the designated slots.
- Check for any damage to the dividers or the tray slots.
8. Warranty and Support
This ProTuning KOMPLEMENT Sliding Tray with Divider comes with a 10-year warranty. For detailed terms and conditions, please refer to the warranty brochure included with your original product packaging or contact ProTuning customer support.
For further assistance, technical support, or to report any issues, please contact ProTuning customer service through their official website or the contact information provided with your purchase documentation.