1. Product Overview
The sixcow R0550700 PCB Subassembly is a replacement part designed for the Zodiac Jandy Aqualink RS OneTouch control system. This subassembly includes an updated board with a white button and LCD, intended to restore or enhance the functionality of your pool and spa control panel.

Figure 1: Front view of the R0550700 PCB Subassembly.
This component is manufactured to meet or exceed original equipment specifications for part number R0550700, ensuring compatibility and reliable operation within the Aqualink RS OneTouch system.

Figure 2: R0550700 PCB Subassembly in context with an Aqualink RS OneTouch control panel.
2. Key Features and Functionality
- System Compatibility: Designed as a direct replacement for the Zodiac Jandy Aqualink RS OneTouch control system (part # R0550700).
- Enhanced Control: The updated board with a white button and LCD supports efficient operation of the OneTouch Control Panel Heater.
- Comprehensive Management: Capable of commanding up to 32 auxiliaries, filtration systems, chemical automation, precision temperature settings, pump speeds, diagnostics, and multiple mood settings.
- User Interface: Features a simple, menu-driven system for one-touch convenience.
- Durable Construction: Crafted from PCB materials designed to resist moisture, high temperatures, and corrosion.

Figure 3: Control Board Upgrade features and applications.
3. Installation Instructions
This subassembly is designed for straightforward installation and is compatible with both original and updated wiring systems. A detailed installation manual is included with the product.
3.1 Mounting the PCB
- Wire the 4-conductor cable to the red, 4-pin terminal bar.
- Attach the 4-pin terminal bar to the back of the OneTouch PCB.
- Place the PCB with LCD and buttons into the control box.
- Insert and hand-tighten the screws. Avoid overtightening to prevent damage.
- Snap the faceplate into position.
3.2 Jumper Settings (Important Note)
Adjust jumper settings only when installing multiple control panels within a single system. These jumpers assign a unique system address to each panel. When replacing an existing panel, ensure the new subassembly's jumper settings match those of the original panel for seamless integration and proper system function.
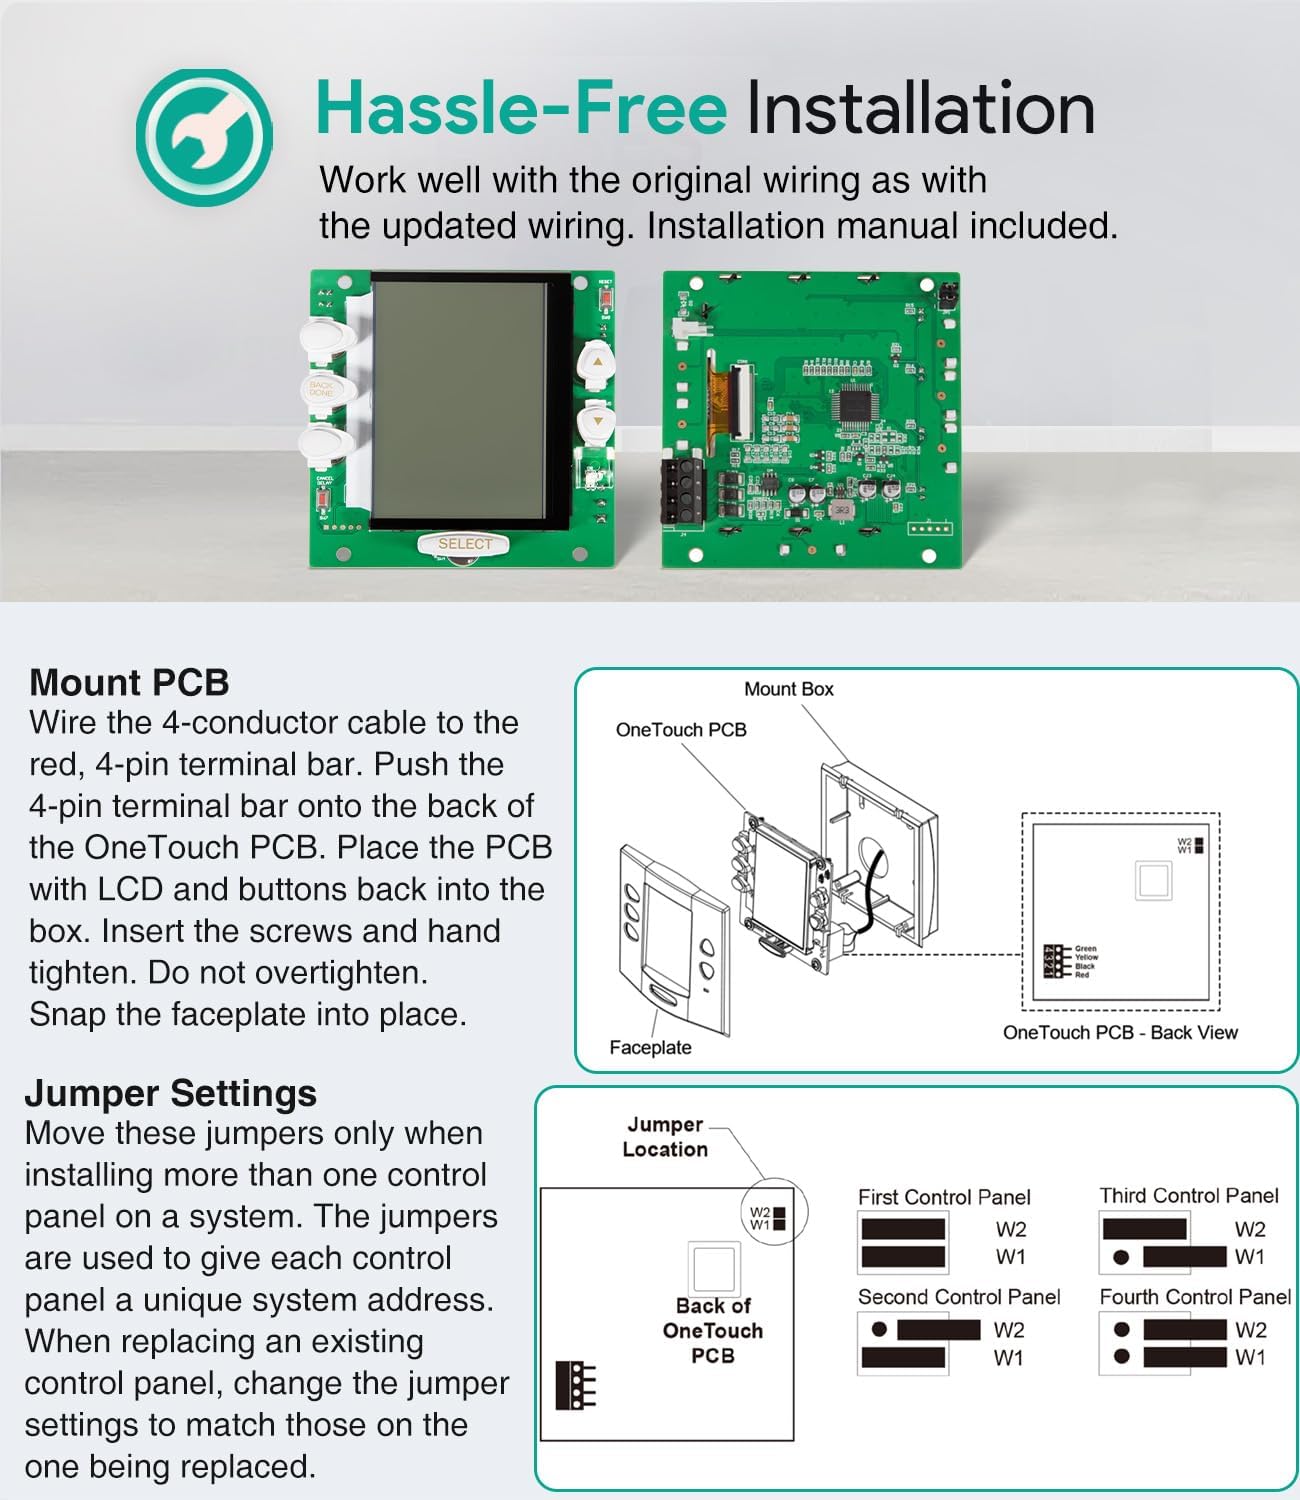
Figure 4: Mounting and Jumper Settings for the R0550700 PCB Subassembly.
4. Operating Instructions
The OneTouch control panel provides a user-friendly interface for managing your pool and spa equipment.
4.1 Button Functions
- OneTouch Buttons: Used to navigate screens or activate OneTouch features displayed on the screen.
- Arrow Buttons: Adjust highlighted items or values on the display.
- Select Button: Activates the currently highlighted item.
- Heater LED: Indicates the operational status of the heater. A green light signifies the heater is enabled or at optimal temperature. A red light indicates active heating.

Figure 5: Overview of Button Functions and Screen Examples.
4.2 Navigating Screens
- Equipment Screen: Manually activate equipment. Use Arrow buttons to highlight an item, then press SELECT. OneTouch buttons can navigate pages (e.g., Page Up, Back a Screen, Page Down).
- OneTouch Screen: Activate multiple pre-programmed equipment settings with a single touch.
- Menu/Help Screen: Program equipment start/stop times, set temperatures, and access other powerful features of your OneTouch Control System.
5. Maintenance
The R0550700 PCB Subassembly is designed for durability. Regular maintenance typically involves ensuring the control panel area remains clean and dry. Avoid exposing the unit to excessive moisture or harsh chemicals. Periodically inspect the wiring connections for security. No specific user-serviceable parts or routine internal maintenance are required for the PCB itself.
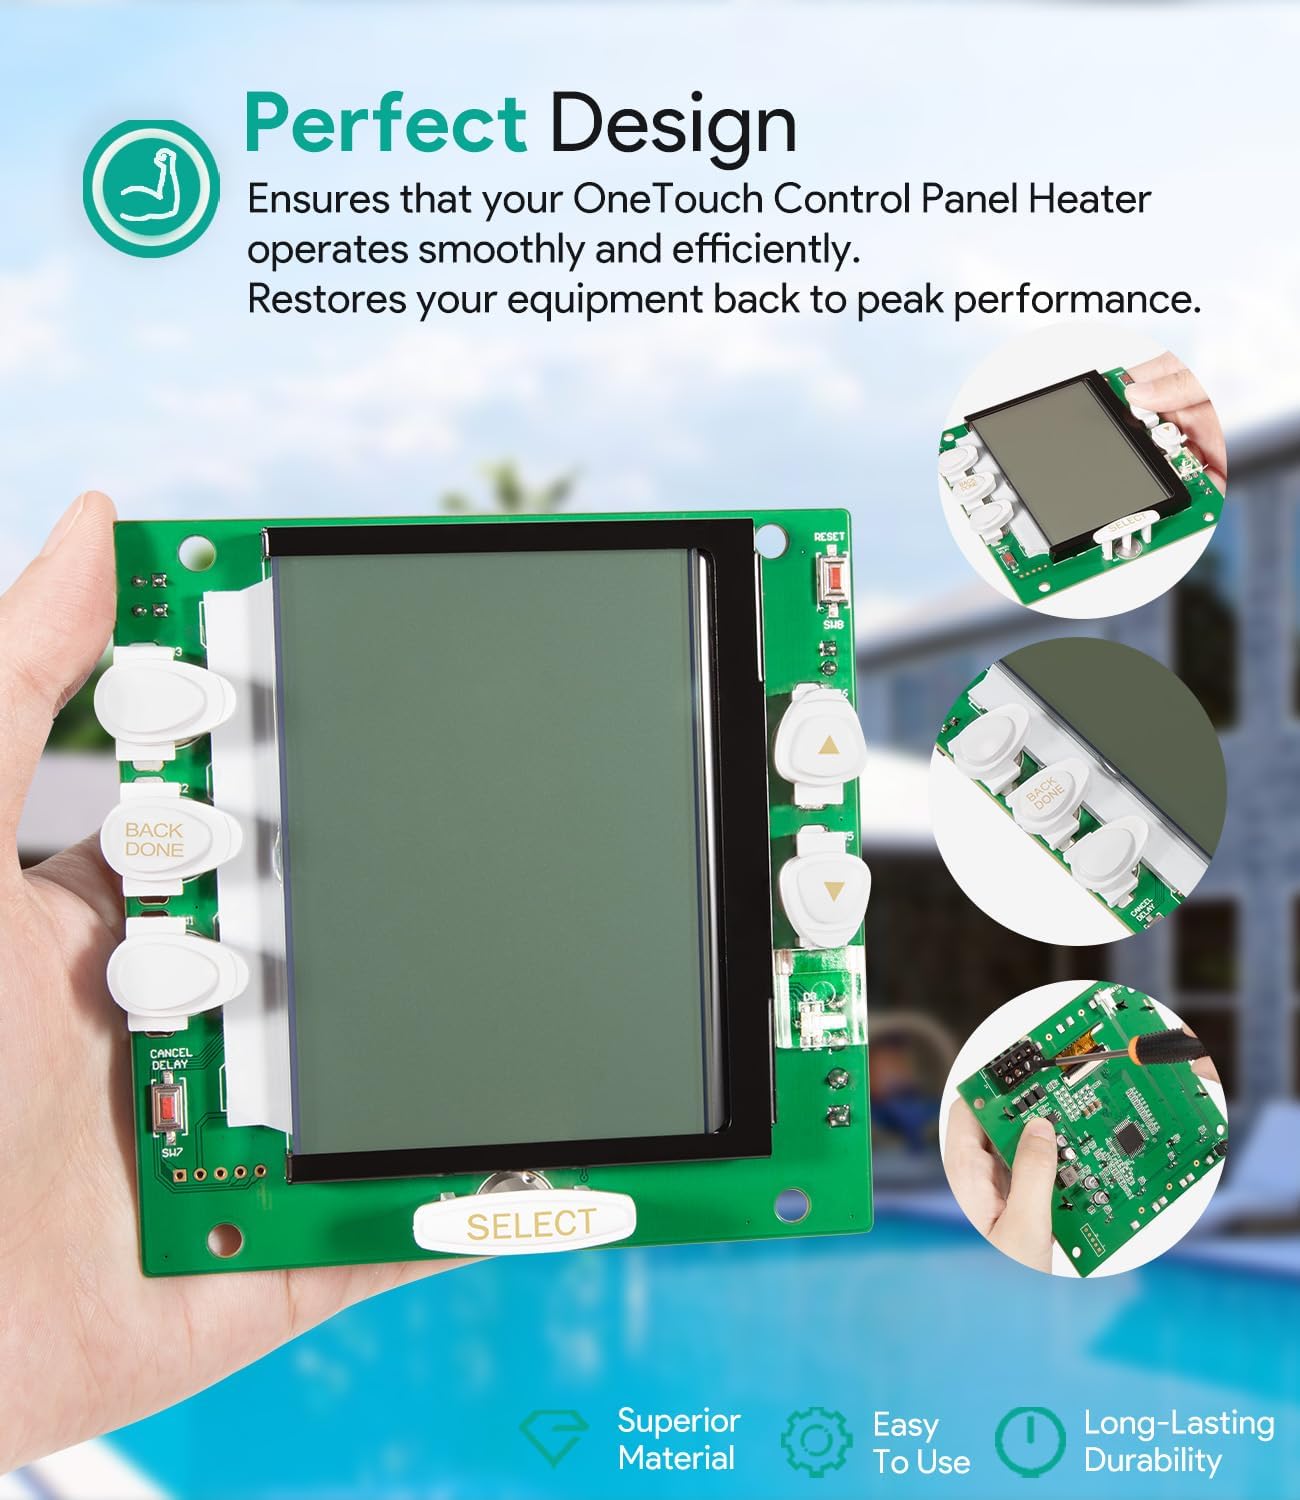
Figure 6: Design aspects contributing to product durability.
6. Troubleshooting
If you encounter issues with your control system after installing the R0550700 PCB Subassembly, consider the following:
- No Power/Display: Verify all wiring connections are secure and correctly seated. Check the main power supply to the control system.
- Incorrect Functionality: Ensure jumper settings on the new PCB match the original panel, especially if multiple control panels are part of your system. Refer to Section 3.2.
- Unresponsive Buttons: Confirm the faceplate is correctly snapped into position and not obstructing button movement.
- Heater LED Issues: If the Heater LED does not indicate expected status, check temperature settings and heater operation within the Aqualink system.
For persistent issues, consult the complete Jandy Aqualink RS OneTouch Control System manual or contact a qualified pool and spa technician.
7. Specifications
| Specification | Detail |
|---|---|
| Product Dimensions | 5 x 3.9 x 1.5 inches |
| Item Weight | 5.3 ounces |
| Model Number | R0550700 |
| Manufacturer | sixcow |
| Compatibility | Zodiac Jandy Aqualink RS OneTouch Control System |

Figure 7: Product Dimensions.
8. Warranty and Support
All sixcow products include a 30-Day money-back guarantee and a 12-Month warranty for quality-related issues. For warranty claims or support, please contact sixcow customer service. Further details regarding the warranty and return process can be found on the official sixcow product page or by contacting the seller directly.