1. Important Safety Instructions
Please read all instructions carefully before using this appliance. Failure to follow these instructions may result in electric shock, fire, or serious injury.
- Always ensure the appliance is unplugged from the power outlet before cleaning or when not in use.
- Do not immerse the appliance, power cord, or plug in water or any other liquid.
- Keep the appliance out of reach of children.
- Do not operate the appliance with a damaged cord or plug, or after the appliance malfunctions or has been damaged in any manner.
- Use only accessories recommended by the manufacturer.
- Do not place the appliance on or near a hot gas or electric burner, or in a heated oven.
- Avoid contact with moving parts.
- Always ensure the water tank is filled to the appropriate level before operation.
- Exercise extreme caution when using hot steam for frothing milk.
2. Product Overview
The Oster OCAF900 Digital Espresso Coffee Machine is designed to deliver a rich and creamy espresso experience. It features a 20-bar pump system, a touch control panel, and compatibility with both ground coffee and Nespresso® capsules.
Key Features:
- 20 Bar Pressure Pump: Ensures optimal flavor extraction and rich crema.
- Dual Compatibility: Brews with ground coffee or Nespresso® capsules.
- Milk Frother: Integrated steam wand for creating cappuccinos and lattes.
- Touch Control Panel: Intuitive interface with pre-programmed functions for short espresso, long espresso, milk frother, and power on/off.
- Large Water Tank: 1.6-liter capacity for multiple servings.
- Cup Warmer: Top surface designed to keep cups warm.
Components:
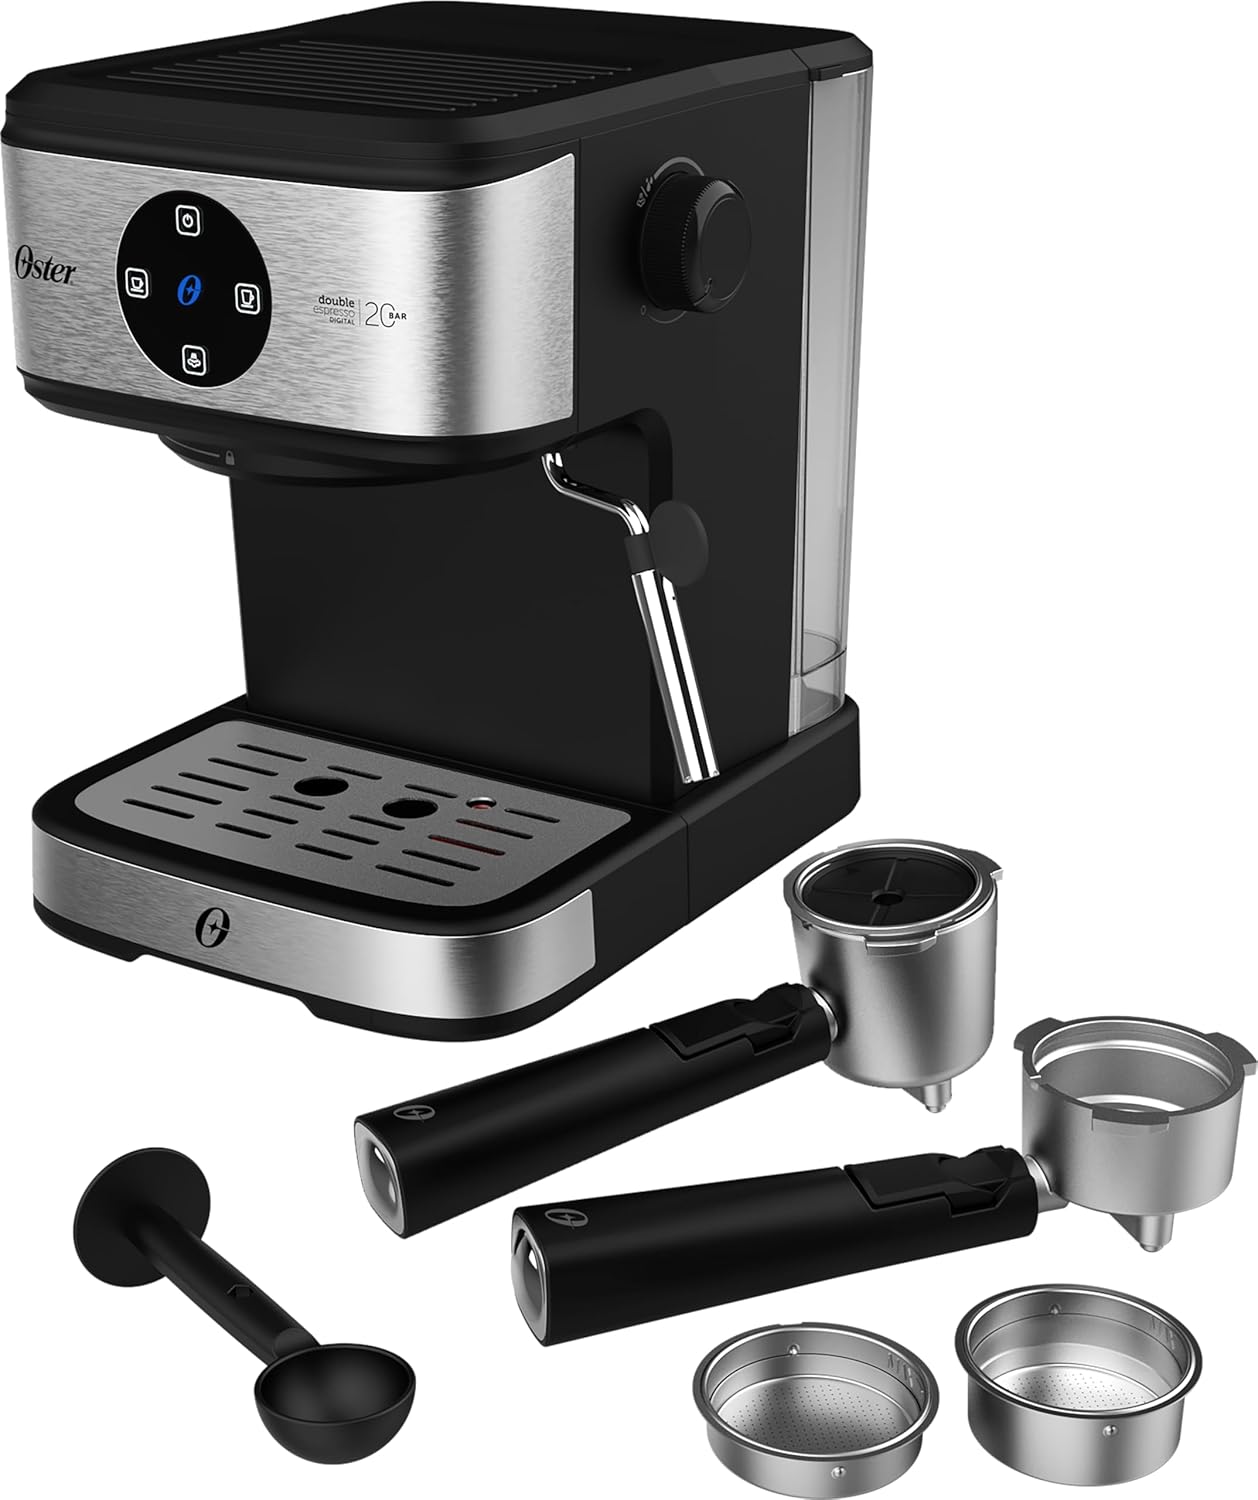
Figure 2.1: Front view of the Oster OCAF900 Espresso Machine with its accessories, including portafilters, filters, and a coffee scoop.

Figure 2.2: Detailed view of the included accessories: two portafilters (one for ground coffee, one for capsules), various filter baskets, and a coffee measuring scoop.
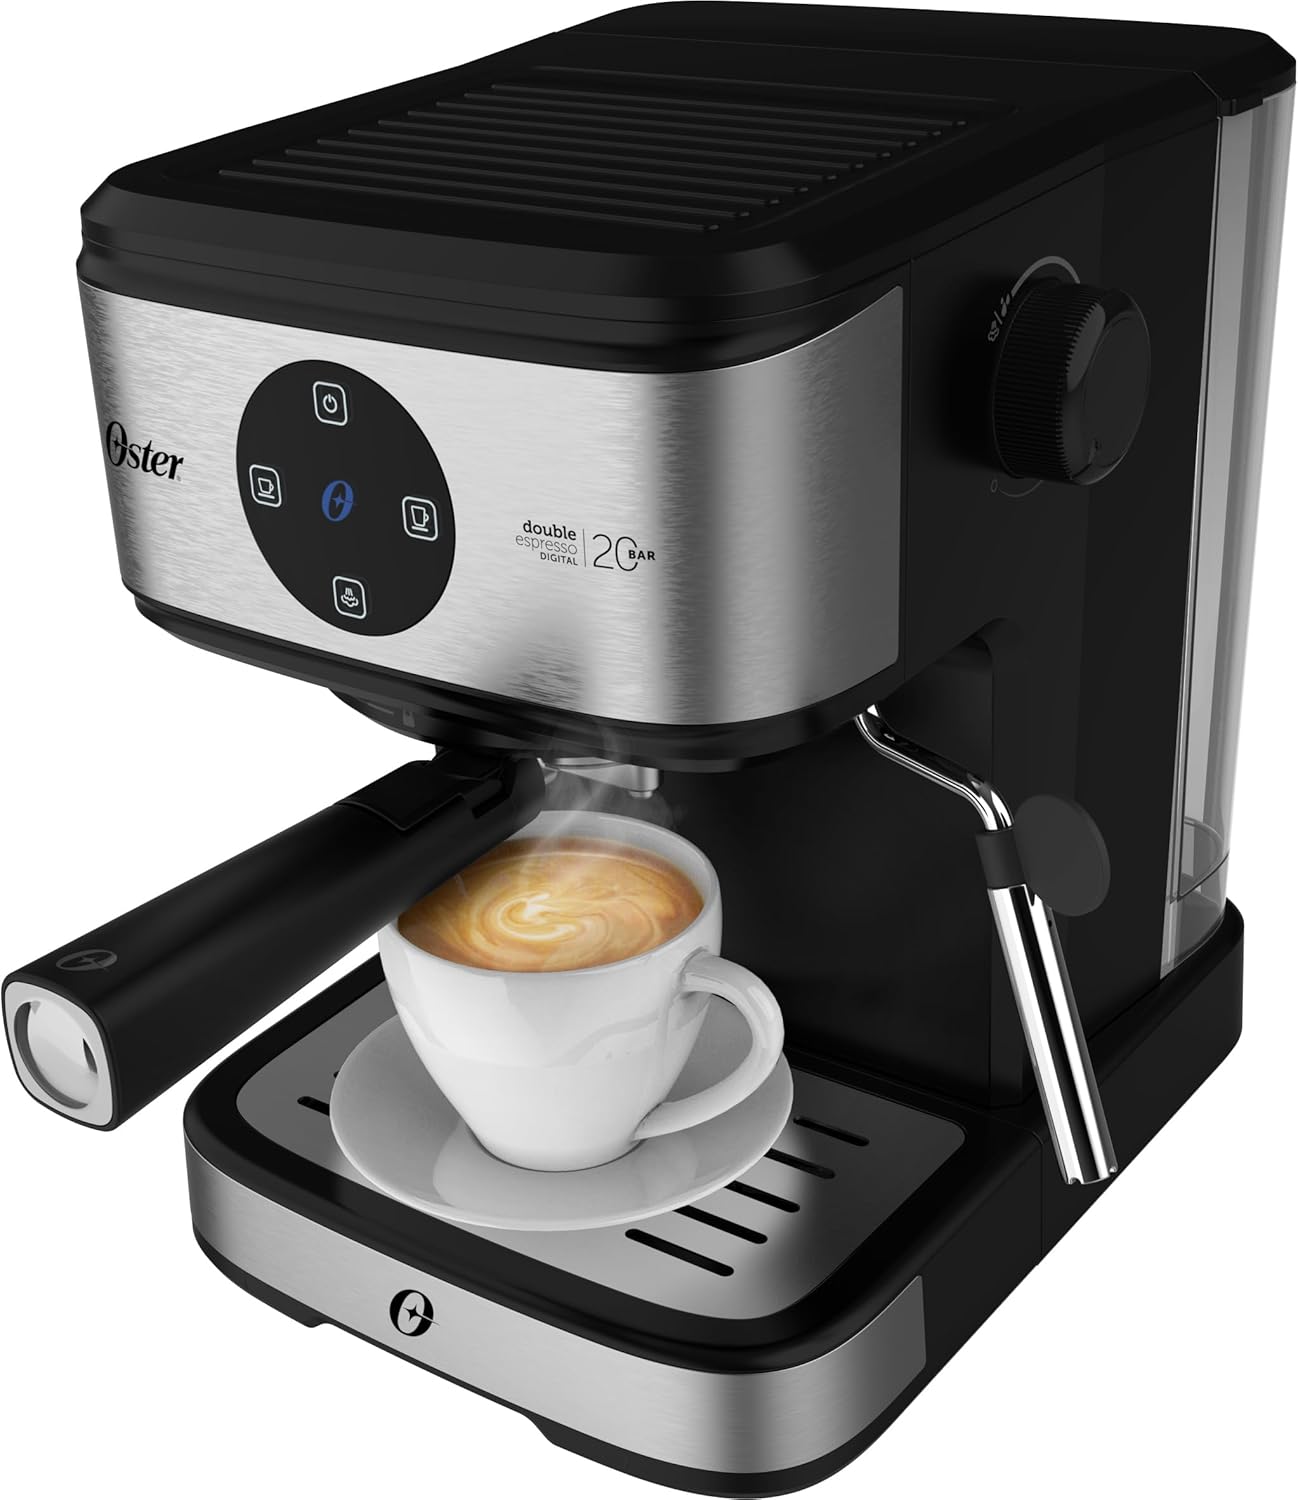
Figure 2.3: Rear view of the espresso machine, showing the water tank and power cord connection.
3. Setup
- Unpacking: Carefully remove all packaging materials and ensure all components are present.
- Placement: Place the machine on a stable, flat, heat-resistant surface, away from water sources and heat.
- Clean Components: Wash the water tank, portafilters, and filter baskets with warm soapy water, then rinse thoroughly.
- Fill Water Tank: Fill the removable water tank with fresh, cold water up to the MAX line. Ensure the tank is properly seated.
- First Use Cycle (Priming):
- Plug the machine into a 110V power outlet.
- Press the power button on the touch panel. The machine will heat up.
- Place a large cup under the portafilter spout (without coffee).
- Press the Long Espresso button to run a cycle of hot water through the system. Repeat this process 2-3 times to clean and prime the machine.
4. Operation
4.1 Brewing Espresso with Ground Coffee
- Ensure the water tank is filled.
- Insert the appropriate filter basket for ground coffee into the portafilter.
- Add finely ground espresso coffee to the filter basket. Do not overfill. Use the included scoop for measurement.
- Lightly tamp the coffee grounds.
- Attach the portafilter to the brewing head by aligning it and twisting firmly to the right until secure.
- Place one or two espresso cups on the drip tray under the portafilter spouts.
- Press either the Short Espresso or Long Espresso button on the touch panel. The machine will begin brewing.
- Once brewing is complete, the machine will stop automatically. Carefully remove the portafilter and discard the used coffee grounds.

Figure 4.1: The espresso machine in operation, dispensing freshly brewed coffee into a cup.
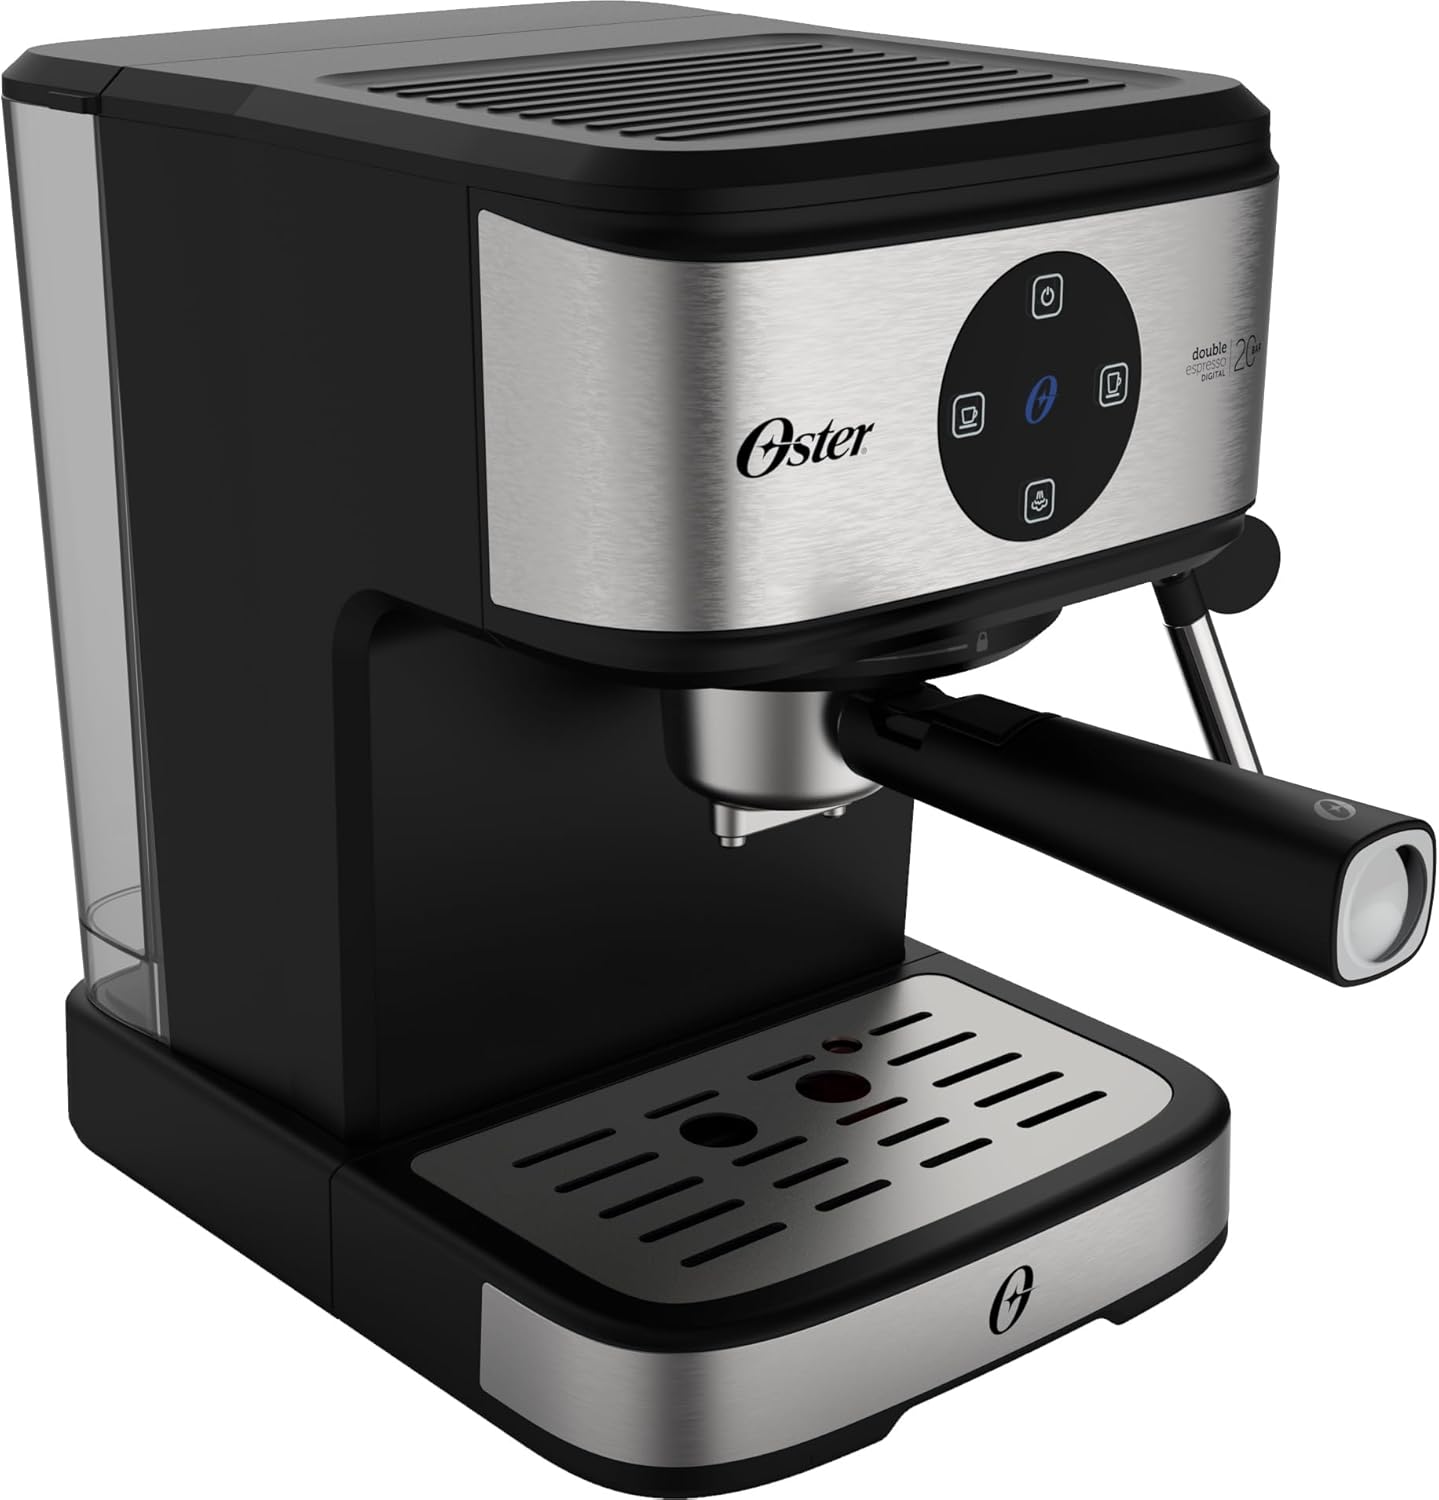
Figure 4.2: A close-up view of the espresso extraction process, showing the rich crema forming in the cup.
4.2 Brewing with Nespresso® Capsules
- Ensure the water tank is filled.
- Insert the specific filter basket designed for Nespresso® capsules into the portafilter.
- Place a Nespresso® compatible capsule into the capsule adapter.
- Attach the portafilter to the brewing head by aligning it and twisting firmly to the right until secure.
- Place your cup(s) on the drip tray.
- Press either the Short Espresso or Long Espresso button.
- After brewing, carefully remove the portafilter and discard the used capsule.
4.3 Frothing Milk
- Fill a pitcher with cold milk (dairy or non-dairy) to about one-third full.
- Press the Milk Frother button on the touch panel. The indicator light will blink as it heats up, then remain solid when ready.
- Position the steam wand just below the surface of the milk in the pitcher.
- Turn the steam control knob on the side of the machine counter-clockwise to release steam.
- Move the pitcher up and down gently to create foam. Once desired foam is achieved, turn the steam control knob clockwise to stop the steam.
- Immediately wipe the steam wand with a damp cloth to prevent milk residue from drying.

Figure 4.3: The espresso machine's steam wand being used to froth milk in a pitcher for lattes or cappuccinos.
4.4 Official Product Video
Video 4.1: An official product video demonstrating the features and operation of the Oster OCAF900 Espresso Machine, including brewing espresso and frothing milk.
5. Cleaning and Maintenance
Regular cleaning ensures optimal performance and extends the lifespan of your espresso machine.
5.1 Daily Cleaning
- Portafilter and Filter Baskets: After each use, remove the portafilter, discard coffee grounds, and rinse thoroughly under warm water.
- Steam Wand: Immediately after frothing milk, wipe the steam wand with a damp cloth to remove any milk residue. Run a short burst of steam to clear any internal blockages.
- Drip Tray: Empty and rinse the drip tray daily.
- Water Tank: Empty any remaining water from the tank and rinse it. Refill with fresh water for the next use.
- Exterior: Wipe the exterior of the machine with a soft, damp cloth. Do not use abrasive cleaners.
5.2 Descaling
Descaling should be performed every 2-3 months, or more frequently if you have hard water, to prevent mineral buildup.
- Prepare a descaling solution according to the descaler manufacturer's instructions, or use a mixture of white vinegar and water (1:1 ratio).
- Fill the water tank with the descaling solution.
- Place a large container under the portafilter and steam wand.
- Run several cycles of hot water through the brewing head and steam wand until the water tank is empty.
- Rinse the water tank thoroughly and refill with fresh water.
- Run several cycles of fresh water through the machine to flush out any remaining descaling solution.
6. Troubleshooting
| Problem | Possible Cause | Solution |
|---|---|---|
| No coffee dispenses. | Water tank empty; machine not primed; coffee too finely ground/over-tamped; blockage. | Fill water tank; perform priming cycle; use coarser grind or less coffee; clean portafilter/filter. |
| Coffee is too weak. | Coffee too coarse; insufficient coffee; brewing too fast. | Use finer grind; add more coffee; ensure proper tamping. |
| Coffee is too strong/bitter. | Coffee too fine; too much coffee; brewing too slow. | Use coarser grind; use less coffee; reduce tamping pressure. |
| Steam wand not producing steam. | Not heated sufficiently; blockage; water tank empty. | Wait for steam indicator light to be solid; clean steam wand; fill water tank. |
| Machine leaks water. | Water tank not seated correctly; portafilter not secured; drip tray full. | Re-seat water tank; secure portafilter firmly; empty drip tray. |
If the problem persists after attempting these solutions, please contact Oster customer support.
7. Specifications
| Model Number | OCAF900 |
| Brand | Oster |
| Voltage | 110 Volts |
| Power | 1100 Watts |
| Pressure Pump | 20 Bar |
| Water Tank Capacity | 1.6 Liters |
| Material | Stainless Steel |
| Dimensions (D x W x H) | 28.9 x 21.8 x 27.3 cm |
| Weight | 3 kg |
| Special Features | Cup warmer, Milk frother, Permanent filter, Automatic cleaning function, Programmable |
8. Warranty and Support
This Oster OCAF900 Digital Espresso Coffee Machine comes with a standard manufacturer's warranty. For specific warranty terms and conditions, please refer to the warranty card included with your product or visit the official Oster website.
For technical support, service, or to purchase replacement parts, please contact Oster customer service through their official channels. Keep your proof of purchase for warranty claims.
- Online Support: www.oster.com
- Customer Service: Refer to your local Oster contact information.