1. Introduction and Overview
The Trailer Life Pathway 7" Wireless Backup Camera System (Model CW7941) is designed to provide enhanced visibility and safety for your vehicle, particularly when maneuvering trailers or RVs. This system features a 7-inch Ultra-bright IPS screen for clear viewing, a wireless camera with full HD recording capabilities, and full-color night vision. The lag-free transmission ensures real-time visual feedback, and the built-in microphone captures audio from the rear of your vehicle.
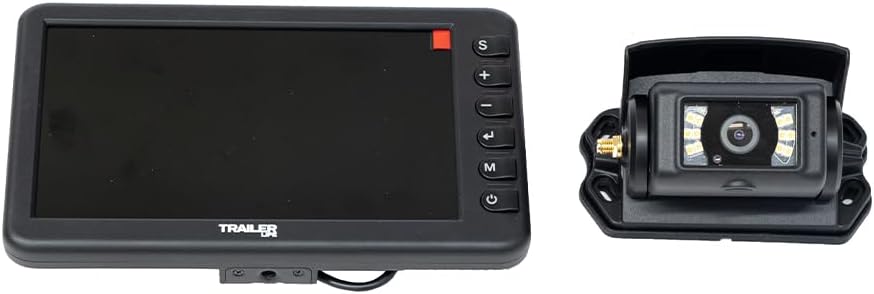
Image 1.1: The Trailer Life Pathway 7-inch Wireless Backup Camera System, displaying both the monitor and the camera unit.
2. Package Contents
Please verify that all components are present in the package before proceeding with installation. The standard package for the Trailer Life Pathway 7" Wireless Backup Camera System includes:
- 7-inch Wireless Monitor
- Wireless Backup Camera
- Suction Cup Mount for Monitor
- U-Bracket Mount for Monitor
- Camera Mounting Bracket
- Power Cables for Monitor and Camera
- User Manual

Image 2.1: The retail packaging for the Trailer Life Pathway Wireless Backup Camera System, indicating the included components.
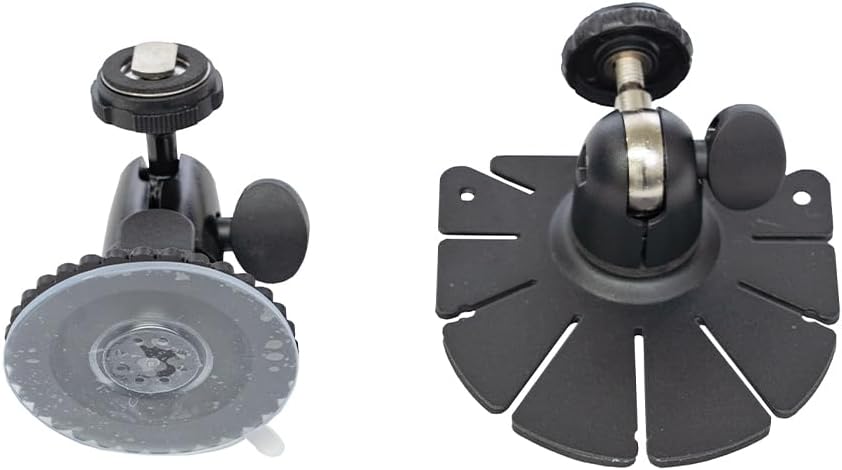
Image 2.2: A view of the included mounting accessories, including a suction cup mount and a surface mount for the monitor.
3. Setup and Installation
Proper installation is crucial for optimal performance. Follow these steps carefully:
3.1 Camera Installation
- Choose Location: Select a suitable location at the rear of your vehicle or trailer, typically above the license plate or near the top center, ensuring a clear view.
- Mount Camera: Secure the camera using the provided mounting bracket and screws. Ensure the camera is angled correctly for the desired field of view.
- Power Connection: Connect the camera's power cable to a 12V-24V power source. This is typically connected to the vehicle's reverse lights for automatic activation when backing up, or to a constant power source for continuous monitoring. Ensure a secure and weather-sealed connection.

Image 3.1: The wireless backup camera unit, showing its rear view and the detachable mounting plate for installation.
3.2 Monitor Installation
- Choose Location: Select a position on your dashboard or windshield that provides a clear view without obstructing your driving view.
- Attach Mount: Use either the suction cup mount or the U-bracket mount to secure the monitor. Ensure the mount is firmly attached.
- Mount Monitor: Attach the monitor to the chosen mount. Adjust the angle for optimal viewing.
- Power Connection: Connect the monitor's power cable to a 12V power outlet (cigarette lighter socket) in your vehicle.
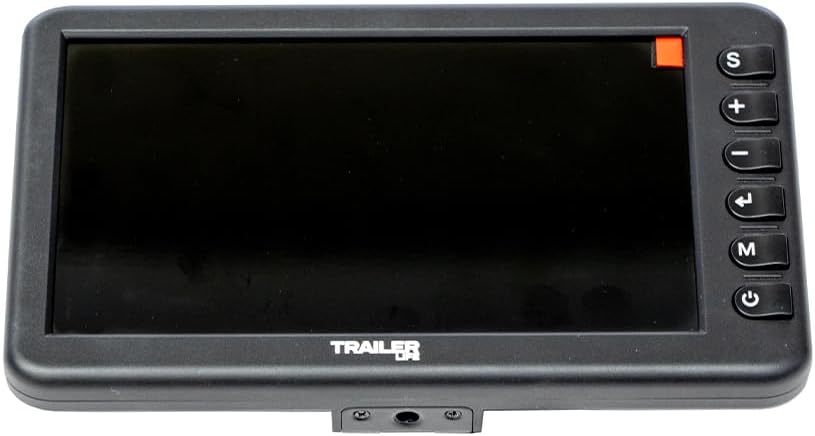
Image 3.2: The front view of the 7-inch wireless monitor, highlighting the screen and control buttons on the right side.
3.3 Initial Pairing (if necessary)
The camera and monitor are typically pre-paired at the factory. If no image appears after powering on, manual pairing may be required:
- Ensure both the camera and monitor are powered on.
- On the monitor, press the 'M' button to enter the menu.
- Navigate to the 'Pairing' option using the '+' or '-' buttons.
- Select 'Pairing' and follow the on-screen prompts. The monitor will search for the camera.
- Once paired, the camera's video feed will appear on the monitor.
Video 3.1: An official product video demonstrating the Trailer Life Pathway Wireless Backup Camera System, including aspects of its setup and functionality.
4. Operating Instructions
Familiarize yourself with the monitor's controls for effective use of the system.
4.1 Monitor Controls
- Power Button (⑂): Press and hold to turn the monitor on or off. A short press may toggle the display.
- 'S' Button: Typically used for selecting channels or switching views if multiple cameras are connected.
- '+' Button: Increases values in menu settings or adjusts brightness/volume.
- '-' Button: Decreases values in menu settings or adjusts brightness/volume.
- Left Arrow Button (←): Used for navigation within menus or to exit a sub-menu.
- 'M' Button: Accesses the main menu for settings adjustments.
4.2 Key Features and Functions
- Lag-free Transmission: The system provides real-time video feed, minimizing delay for immediate visual feedback.
- 1080p Full HD Recording: The camera records video at 1080p resolution at 30 frames per second. Ensure a compatible SD card (not included) is inserted into the monitor for recording functionality.
- Full-color Night Vision: The camera automatically adjusts to low-light conditions, providing a full-color image for improved visibility at night.
- Built-in Microphone: The camera includes a microphone to capture audio from the rear of the vehicle, enhancing situational awareness. Audio can be monitored via the monitor's built-in speaker.
5. Maintenance
Regular maintenance helps ensure the longevity and optimal performance of your backup camera system.
- Cleaning the Lens and Screen: Use a soft, lint-free cloth to gently wipe the camera lens and monitor screen. For stubborn dirt, dampen the cloth slightly with water or a mild, non-abrasive cleaner. Avoid harsh chemicals.
- Checking Connections: Periodically inspect all power and mounting connections for security and signs of wear or corrosion. Ensure all cables are properly routed and secured to prevent damage.
- Weather Protection: While the camera is designed for outdoor use, extreme weather conditions can affect performance. Ensure the camera is free from excessive ice, snow, or mud.
- Software Updates: Check the manufacturer's website periodically for any available firmware updates for your system.
6. Troubleshooting
If you encounter issues with your Trailer Life Pathway system, refer to the following common problems and solutions:
| Problem | Possible Cause | Solution |
|---|---|---|
| No image on monitor | No power to camera or monitor; Camera and monitor not paired; Signal interference. | Check power connections for both units. Ensure both are powered on. Attempt manual pairing (refer to Section 3.3). Relocate the monitor or camera to reduce interference. |
| Image is blurry or distorted | Dirty camera lens; Condensation on lens; Incorrect camera angle. | Clean the camera lens with a soft cloth. Allow time for condensation to dissipate. Adjust the camera angle. |
| Intermittent signal or freezing image | Weak wireless signal; Obstructions between camera and monitor; Electrical interference. | Ensure no large metal objects are blocking the signal path. Move the monitor closer to the camera if possible. Check for other wireless devices causing interference. |
| Recording not working | No SD card inserted; SD card full or corrupted; Incorrect recording settings. | Insert a compatible SD card. Format or replace the SD card. Check recording settings in the monitor menu. |
| No audio from microphone | Microphone muted; Volume too low; Microphone malfunction. | Check monitor settings to ensure microphone is enabled and volume is adjusted. |
7. Specifications
Detailed technical specifications for the Trailer Life Pathway 7" Wireless Backup Camera System (Model CW7941):
| Feature | Specification |
|---|---|
| Model Number | CW7941 |
| Screen Size | 7 Inches |
| Display Technology | LCD, IPS |
| Video Capture Resolution | 1080p |
| Video Capture Format | AVI |
| Optical Sensor Technology | CMOS |
| Optical Sensor Size | 1/2.9 inch |
| Lens Type | Fixed, Wide Angle |
| Field Of View | 120 Degrees |
| Real Angle of View | 85 Degrees |
| Connector Type | Wireless |
| Installation Type | Bracket Mount, Surface Mount |
| Product Dimensions (L x W x H) | 11.25" x 9" x 4.25" |
| Item Weight | 3.1 Pounds |
| UPC | 810150475043 |
8. Warranty and Support
Trailer Life products are manufactured to high-quality standards. For specific warranty information, including coverage duration and terms, please refer to the warranty card included with your product or visit the official Trailer Life website. For technical support, troubleshooting assistance beyond this manual, or to inquire about replacement parts, please contact Trailer Life customer service through their official channels.


