1. Introduction
This manual provides detailed instructions for the installation, operation, and maintenance of your Yunseity Video Doorbell Intercom System. This system offers enhanced home security and communication, featuring a 1080P camera with night vision, a 170-degree wide-angle lens, and a dual-way intercom function for clear communication with visitors.

Image 1.1: The Yunseity Video Doorbell Intercom System, showing the outdoor doorbell unit and the indoor monitor displaying a visitor.
2. Safety Information
- Read all instructions carefully before installation and operation.
- Do not expose the device to extreme temperatures, humidity, or direct sunlight.
- Ensure the power supply used is compatible with the device's specifications.
- Keep the device away from water and other liquids.
- Do not attempt to disassemble or repair the device yourself. Contact qualified personnel for service.
- Dispose of electronic components and batteries according to local regulations.
3. Package Contents
Please check the package contents upon unboxing. If any items are missing or damaged, contact customer support.
- Outdoor Doorbell Unit (with integrated camera)
- Indoor Monitor Unit (with 4.3-inch screen)
- Mounting Bracket for Outdoor Unit
- Mounting Bracket for Indoor Monitor
- USB Type-C Charging Cable
- Screws and Wall Plugs for Installation
- User Manual (this document)
- (Optional: Small memory card, depending on package variant)
4. Product Overview
4.1 Outdoor Doorbell Unit

Image 4.1: Diagram of the outdoor doorbell unit highlighting its components.
- 170-degree Wide Angle Camera: Captures a broad view of your doorstep.
- Environmental Sensors: Detects ambient conditions for optimal performance.
- LED Fill Light: Automatically illuminates in low-light conditions for clear night vision.
- Doorbell Button: Activates the intercom system and alerts the indoor monitor.
4.2 Indoor Monitor Unit

Image 4.2: Diagram of the indoor monitor unit highlighting its components.
- Power Button: Turns the monitor on/off.
- Type-C Charging Port: For charging the indoor monitor.
- Small Memory Card Slot: For inserting a memory card to enable automatic recording and photo capture.
- Control Buttons: Typically include volume adjustment (+/-) and menu/answer buttons.
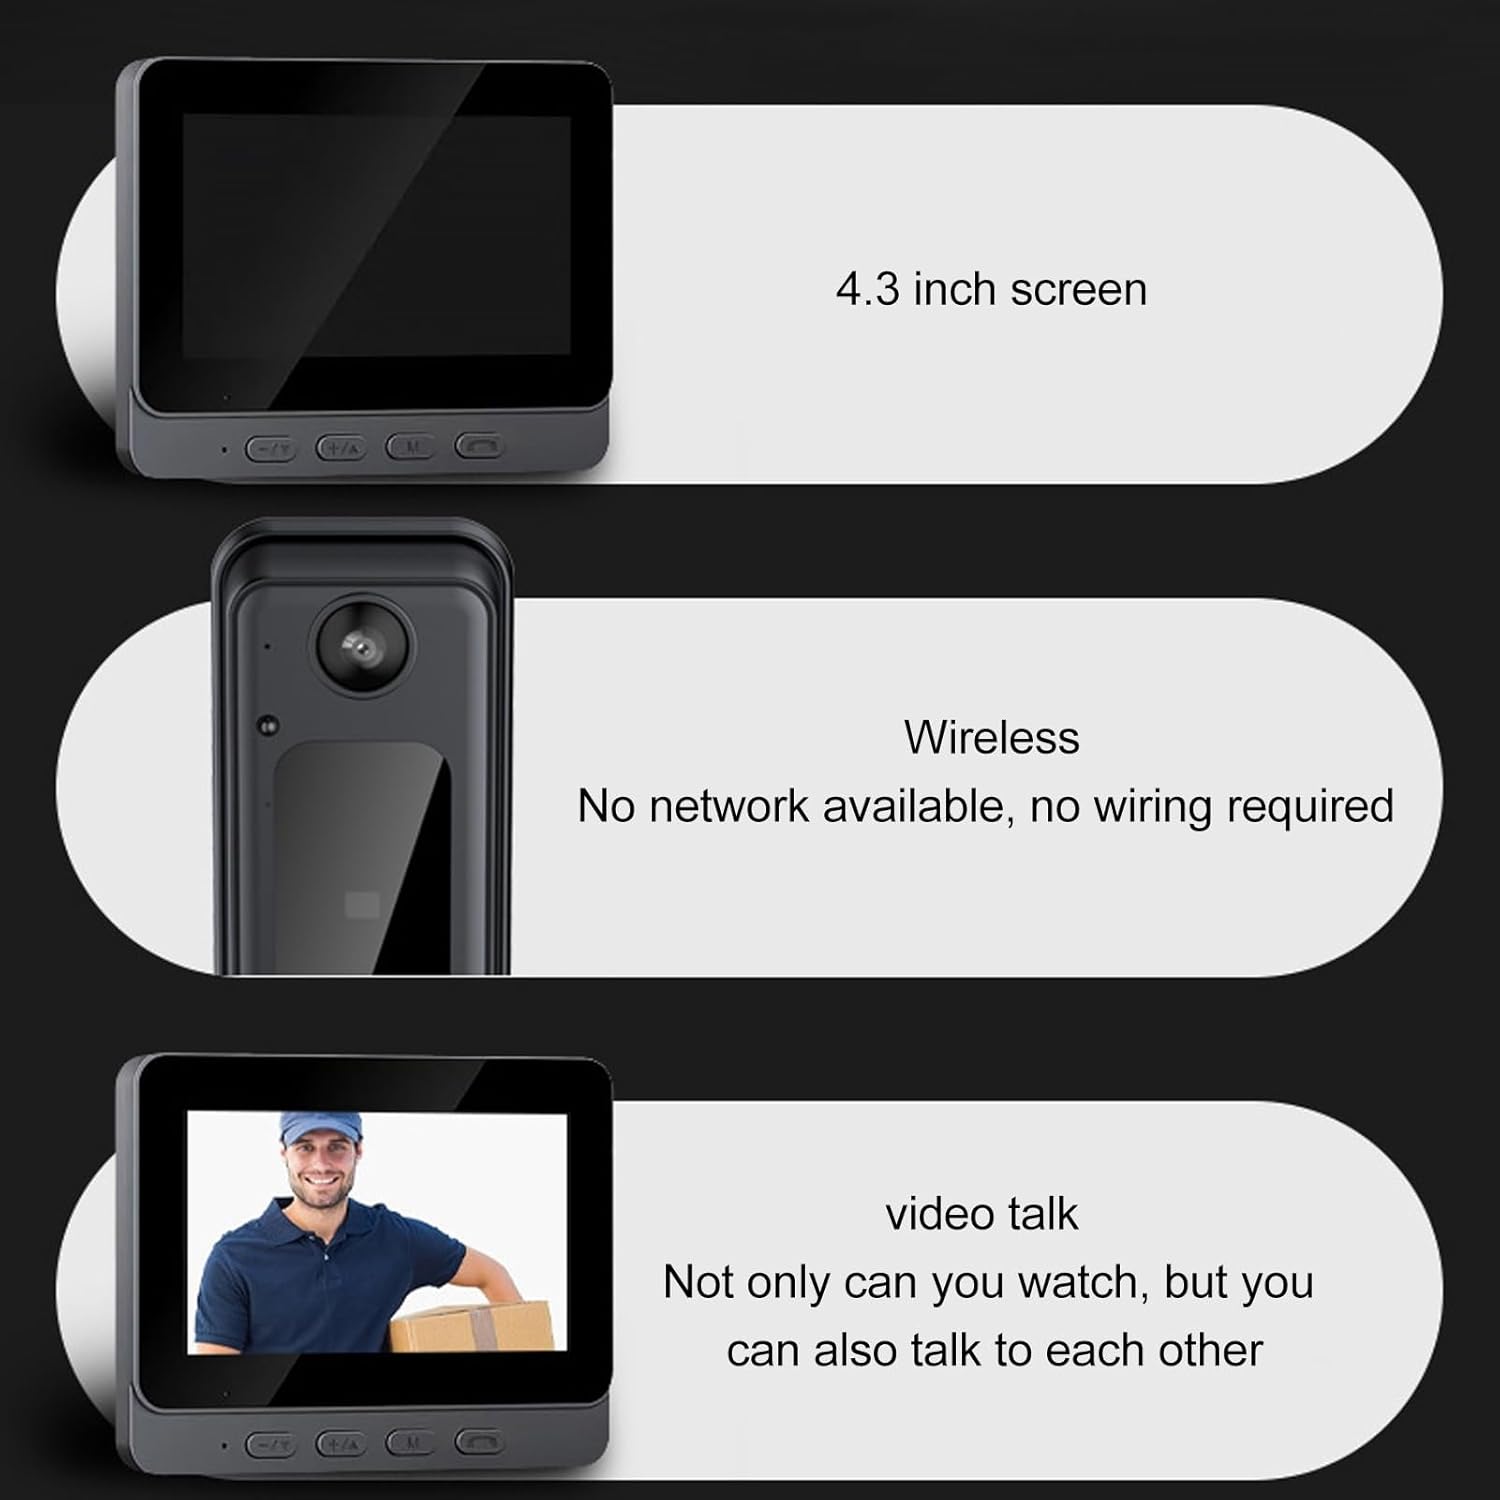
Image 4.3: The indoor monitor features a 4.3-inch screen, wireless connectivity, and supports two-way video communication.
5. Setup
5.1 Charging the Devices
Before initial use, fully charge both the outdoor doorbell unit and the indoor monitor. Connect the provided USB Type-C charging cable to the respective charging ports and a suitable power adapter (not included). The charging indicator will show the charging status.
5.2 Installing a Memory Card (Optional)
To enable automatic video recording and photo capture, insert a compatible small memory card (e.g., microSD card) into the designated slot on the indoor monitor. Ensure the card is inserted correctly until it clicks into place.

Image 5.1: The indoor monitor illustrating automatic recording and photographing capabilities when a memory card is installed.
5.3 Mounting the Outdoor Doorbell Unit
- Choose a suitable location near your door, ensuring a clear view of the entrance and within wireless range of the indoor monitor.
- Use the mounting bracket as a template to mark drilling points on the wall.
- Drill holes and insert wall plugs if necessary.
- Secure the mounting bracket to the wall using the provided screws.
- Attach the outdoor doorbell unit to the mounting bracket, ensuring it is firmly in place.

Image 5.2: The outdoor doorbell unit mounted, demonstrating its 170-degree ultra-wide-angle view.
5.4 Mounting the Indoor Monitor Unit
- Select a convenient location inside your home, such as a hallway or living room, where the monitor is easily accessible and within wireless range of the outdoor unit.
- Use the indoor monitor's mounting bracket to mark and drill holes.
- Secure the bracket to the wall.
- Slide the indoor monitor onto its bracket.

Image 5.3: Illustration of the system's wireless connectivity, emphasizing no need for complex wiring or networking.
6. Operating Instructions
6.1 Powering On/Off
Press and hold the Power Button on the indoor monitor to turn it on or off.
6.2 Answering a Visitor Call
- When a visitor presses the doorbell button, the indoor monitor will ring and display the live video feed from the outdoor unit.
- Press the "Answer" button (often indicated by a phone icon) on the indoor monitor to initiate two-way communication.
- To end the call, press the "End Call" button (often indicated by a hang-up phone icon).

Image 6.1: The indoor monitor showing a visitor, enabling visual calling and two-way communication.
6.3 Two-Way Audio Communication
The system features a high-fidelity microphone and powerful speakers, allowing for clear two-way audio communication between the indoor monitor and the outdoor doorbell unit. Adjust the volume using the +/- buttons on the indoor monitor.
6.4 Live View and Monitoring
You can manually activate the live view from the outdoor camera at any time by pressing a dedicated button on the indoor monitor (refer to your monitor's specific button layout for "Monitor" or "View"). This allows you to check your doorstep without a visitor pressing the doorbell.
6.5 Automatic Recording and Photo Capture
When a memory card is installed, the system will automatically record video or capture photos when the doorbell button is pressed. These recordings are stored on the memory card and can be reviewed via the indoor monitor's menu.
6.6 Night Vision Functionality
The outdoor doorbell unit is equipped with a high-power infrared night vision light and an ICR infrared filter. This allows the system to automatically switch to night mode in low-light conditions, providing clear visibility even in complete darkness.

Image 6.2: A visual comparison demonstrating the clear visibility provided by the high-definition night vision feature in dark environments.
7. Maintenance
- Cleaning: Use a soft, dry cloth to clean the surfaces of both units. Do not use abrasive cleaners or solvents.
- Battery Care: Recharge the indoor monitor and outdoor unit regularly to ensure continuous operation. Avoid fully discharging the batteries frequently.
- Firmware Updates: Check the manufacturer's website periodically for any available firmware updates to ensure optimal performance and security.
- Memory Card: If using a memory card, periodically back up important recordings and format the card to maintain performance.
8. Troubleshooting
| Problem | Possible Cause | Solution |
|---|---|---|
| Indoor monitor does not turn on. | Low battery; Power button not pressed correctly. | Charge the indoor monitor; Press and hold the power button for a few seconds. |
| No video/audio from outdoor unit. | Outdoor unit battery low; Out of wireless range; Interference. | Charge the outdoor unit; Move units closer; Check for obstructions or other wireless devices. |
| Poor video quality. | Dirty camera lens; Low light conditions (night vision not active); Wireless signal weakness. | Clean the camera lens; Ensure night vision is functioning; Improve wireless signal. |
| Cannot record videos/photos. | No memory card inserted; Memory card full or corrupted. | Insert a compatible memory card; Delete old files or format the card. |
9. Specifications
| Feature | Detail |
|---|---|
| Model Name | Yunseityp29xbovu16 |
| Camera Resolution | 8MP (records 1080P HD video) |
| Lens Angle | 170° Wide Angle Fisheye |
| Night Vision | High power infrared LED with ICR filter |
| Indoor Monitor Screen | 4.3-inch Clear Screen |
| Intercom | Dual-way audio with high fidelity microphone |
| Recording | Automatic video/photo recording (requires memory card) |
| Connectivity | Wireless (no network or wiring required) |
| Indoor/Outdoor Usage | Indoor, Outdoor |
| Recommended Use | Surveillance |
10. Warranty and Support
This product comes with a standard manufacturer's warranty. For detailed warranty terms, please refer to the warranty card included in your package or visit the official Yunseity website. For technical support, troubleshooting assistance, or to inquire about replacement parts, please contact Yunseity customer service through the contact information provided on their official website or your purchase platform.