
1. Introduction
This manual provides essential information for the installation and maintenance of your original Moulinex, Tefal, OBH Nordica, or Krups replacement electronic control board (PCB) with power cable. This component is designed for specific QuickChef and OptiChef hand blender models. Please read these instructions carefully before proceeding with any installation.
2. Safety Information
- Electrical Hazard: Always disconnect the appliance from the main power supply before attempting any installation, repair, or maintenance. Failure to do so can result in electric shock or serious injury.
- Professional Installation Recommended: Installation of this component requires technical knowledge and experience with electrical appliances. It is strongly recommended that installation be performed by a qualified technician.
- Component Handling: Avoid touching the electronic components on the PCB directly, as static electricity can damage them. Handle the board by its edges.
- Compatibility: Ensure this PCB is the correct replacement part for your specific hand blender model. Refer to the appliance's identification plate for model data.
- Original Parts: Use only original replacement parts to ensure proper function and safety.
3. Product Overview
This product is an original electronic control board (PCB) assembly, including a power cable with an EU Schuko plug, designed as a replacement part for compatible hand blenders. It manages the electrical functions of the appliance.
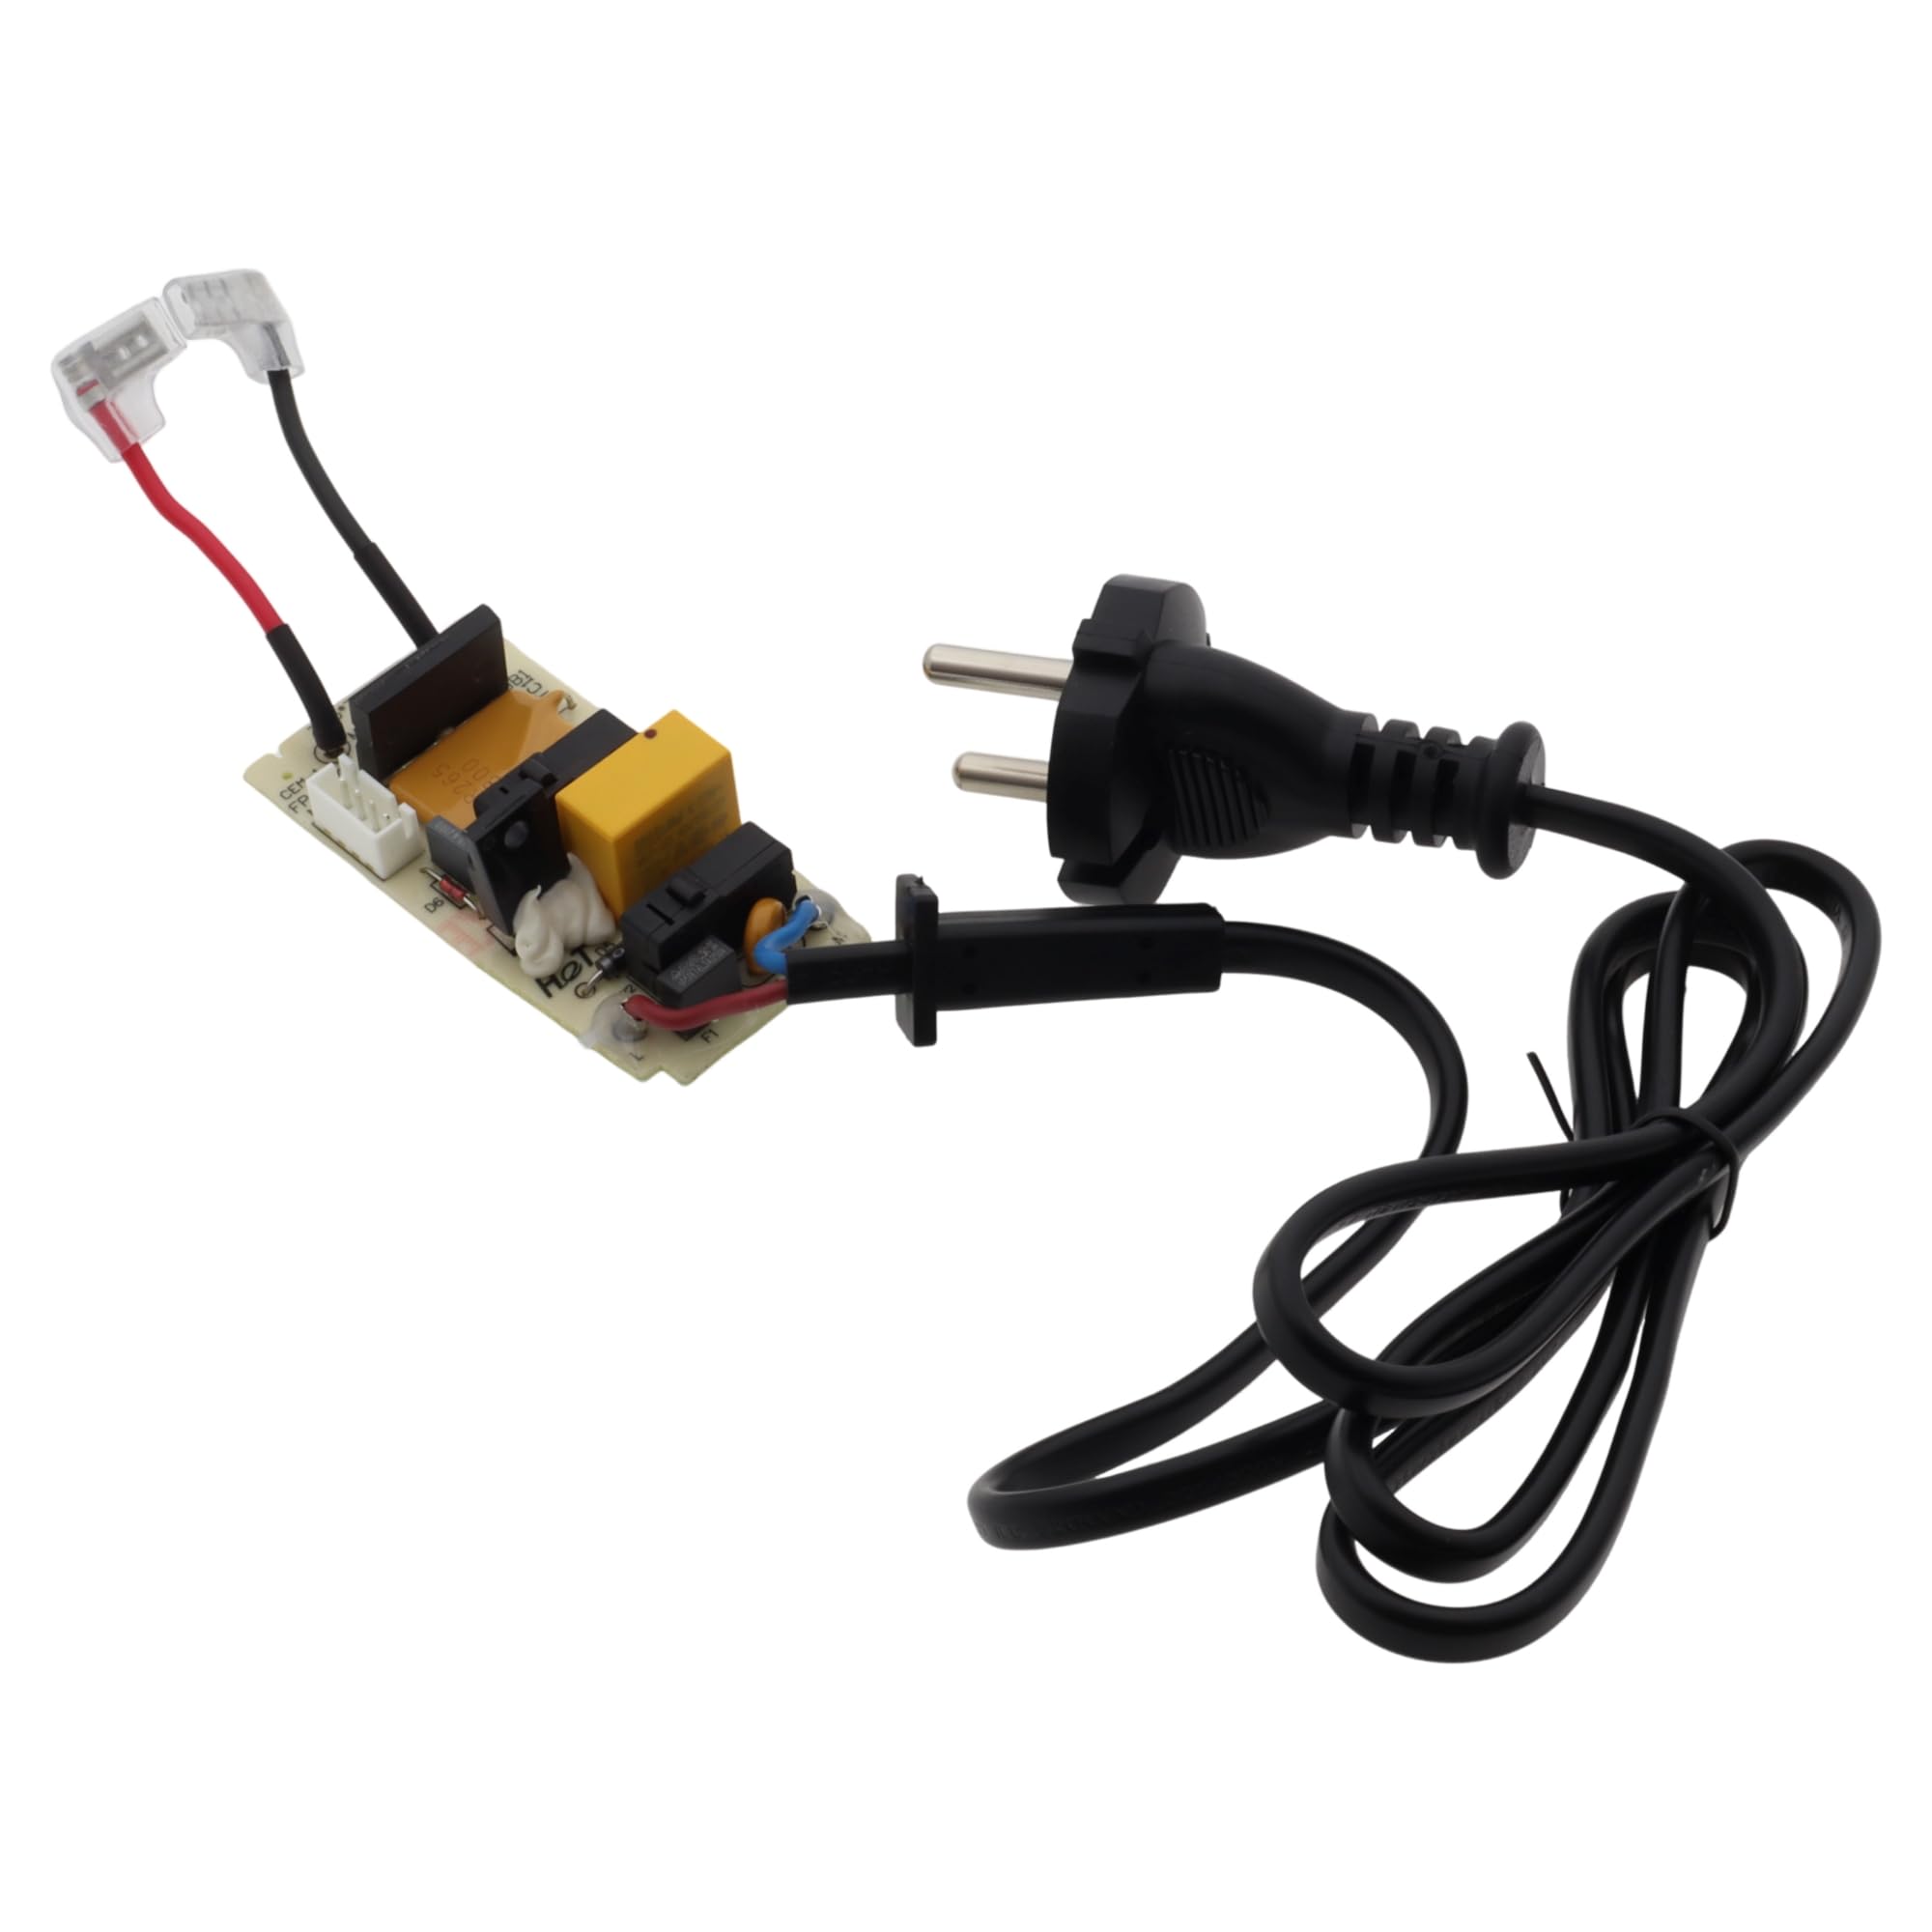
Image 1: Moulinex PCB and power cable with EU plug, top view. This image shows the integrated power cable with a standard European plug connected to the electronic control board.

Image 2: Moulinex PCB and power cable with EU plug, showing component side. This view highlights the various electronic components mounted on the circuit board, essential for the blender's operation.

Image 3: Moulinex PCB and power cable with EU plug, showing reverse side with larger components. This perspective reveals the underside of the PCB, including larger capacitors and other power regulation components.
4. Setup and Installation
This section outlines the general steps for replacing the PCB. Due to the electrical nature of this component, professional installation is highly recommended.
- Disconnect Power: Ensure the hand blender is completely unplugged from the electrical outlet before beginning any work.
- Disassemble Appliance: Carefully open the hand blender housing according to the manufacturer's service instructions for your specific model. Note the location and connection of all components.
- Identify and Remove Old PCB: Locate the existing electronic control board. Disconnect all wires and connectors attached to it. Pay close attention to the wiring scheme, taking photos if necessary, to ensure correct reassembly. Remove any screws or fasteners holding the old PCB in place.
- Install New PCB: Position the new Moulinex PCB in the same location as the old one. Secure it with the appropriate screws or fasteners.
- Connect Wiring: Carefully reconnect all wires and connectors to the new PCB, ensuring they match the original configuration. Verify that all connections are secure and properly seated.
- Reassemble Appliance: Close the hand blender housing, ensuring all parts fit correctly and no wires are pinched.
- Test Functionality: Plug the appliance back into the power outlet and test its operation according to its original user manual. If the appliance does not function correctly, immediately unplug it and re-check all connections or consult a qualified technician.
5. Operating Instructions
The electronic control board (PCB) is an internal component that enables the normal operation of your hand blender. Once correctly installed, the appliance should function as described in its original user manual. There are no direct operating instructions for the PCB itself. Always refer to your hand blender's specific user manual for operational guidance.
6. Maintenance
The PCB itself requires no routine user maintenance. To ensure the longevity of the component and the appliance:
- Keep the hand blender clean and dry. Avoid exposing the appliance to excessive moisture or liquids, which can damage internal electronics.
- Do not attempt to clean the PCB directly. If the appliance requires internal cleaning, it should be performed by a qualified service technician.
- There are no user-serviceable parts on the PCB. Any repairs or modifications to the board should only be carried out by authorized personnel.
7. Troubleshooting
If your hand blender does not function correctly after replacing the PCB, consider the following:
- No Power: Ensure the appliance is securely plugged into a working electrical outlet. Check the circuit breaker.
- Incorrect Installation: Verify that all wires and connectors are correctly attached to the PCB and that the board is properly seated. Refer to the installation steps.
- Incompatible Part: Double-check that this PCB is the correct replacement part for your specific hand blender model.
- Other Appliance Issues: The malfunction may not be related to the PCB. Other components of the hand blender might be faulty.
If troubleshooting steps do not resolve the issue, discontinue use and consult a qualified appliance repair technician or contact customer support.
8. Specifications
| Brand | Moulinex (also compatible with Tefal, OBH Nordica, Krups) |
| Product Type | Electronic Control Board (PCB) with Power Cable |
| Voltage | 230V |
| Plug Type | EU Schuko |
| Compatible Models (Series) | Moulinex QuickChef/OptiChef: DD64, DD65 series Tefal QuickChef/OptiChef: HB64, HB65 series OBH Nordica QuickChef/OptiChef: HN64, HN65 series Krups Perfect Mix: HZ65 series |
| Dimensions (Package) | 13 x 7 x 5 cm |
| Item Weight | 110 g |
9. Warranty and Support
As an original replacement part, this PCB is designed to meet the quality standards of Moulinex and its associated brands. Specific warranty terms for replacement parts may vary. Please retain your proof of purchase.
For technical support, warranty claims, or further assistance, please contact the seller from whom you purchased this product or refer to the official Moulinex (or relevant brand) customer service channels. When contacting support, please have your appliance model number and the purchase details of this replacement part available.
You can visit the Moulinex brand store for more information: Moulinex Store
