
1. Introduction
This manual provides detailed instructions for the assembly, operation, and maintenance of your MECHANIC MASTER C30Pro portable desktop computer case. Please read this manual thoroughly before beginning installation to ensure proper setup and optimal performance.
2. Product Overview
The C30Pro case features a modular, dual-layer construction designed for strength, customization, and ease of building. Its portable design includes an optional handle for convenient transport. The case supports multiple hardware mounting possibilities to maximize cooling capacity within its compact specifications.

Figure 2.1: Assembled MECHANIC MASTER C30Pro case in Elegant Black.

Figure 2.2: Internal view showcasing installed components within the C30Pro case.

Figure 2.3: All modular components of the C30Pro case laid out.
Video 2.1: An overview of the MECHANIC MASTER Cool Cube Series C30Pro case, highlighting its features and design.
Video 2.2: A detailed product display of the MECHANIC MASTER C30Pro case.
3. Specifications
| Feature | Specification |
|---|---|
| Brand | MECHANIC MASTER |
| Model Name | C30Pro |
| Motherboard Compatibility | Micro-ATX, Mini-ITX |
| Case Type | Desktop |
| Product Dimensions (LxWxH) | 16.8 x 8 x 12.3 inches (429 x 205 x 313 mm) |
| Item Weight | 12.54 pounds (5.7 Kilograms) |
| Material | Alloy Steel, Aluminum, Tempered Glass |
| Power Supply Mounting Type | Bottom Mount |
| Cooling Method | Water (supports up to 360mm AIO) |
| CPU Cooler Height Limit | 162mm (Air Cooler) |
| GPU Length Limit | Up to 420mm |
| USB 2.0 Ports | 2 |
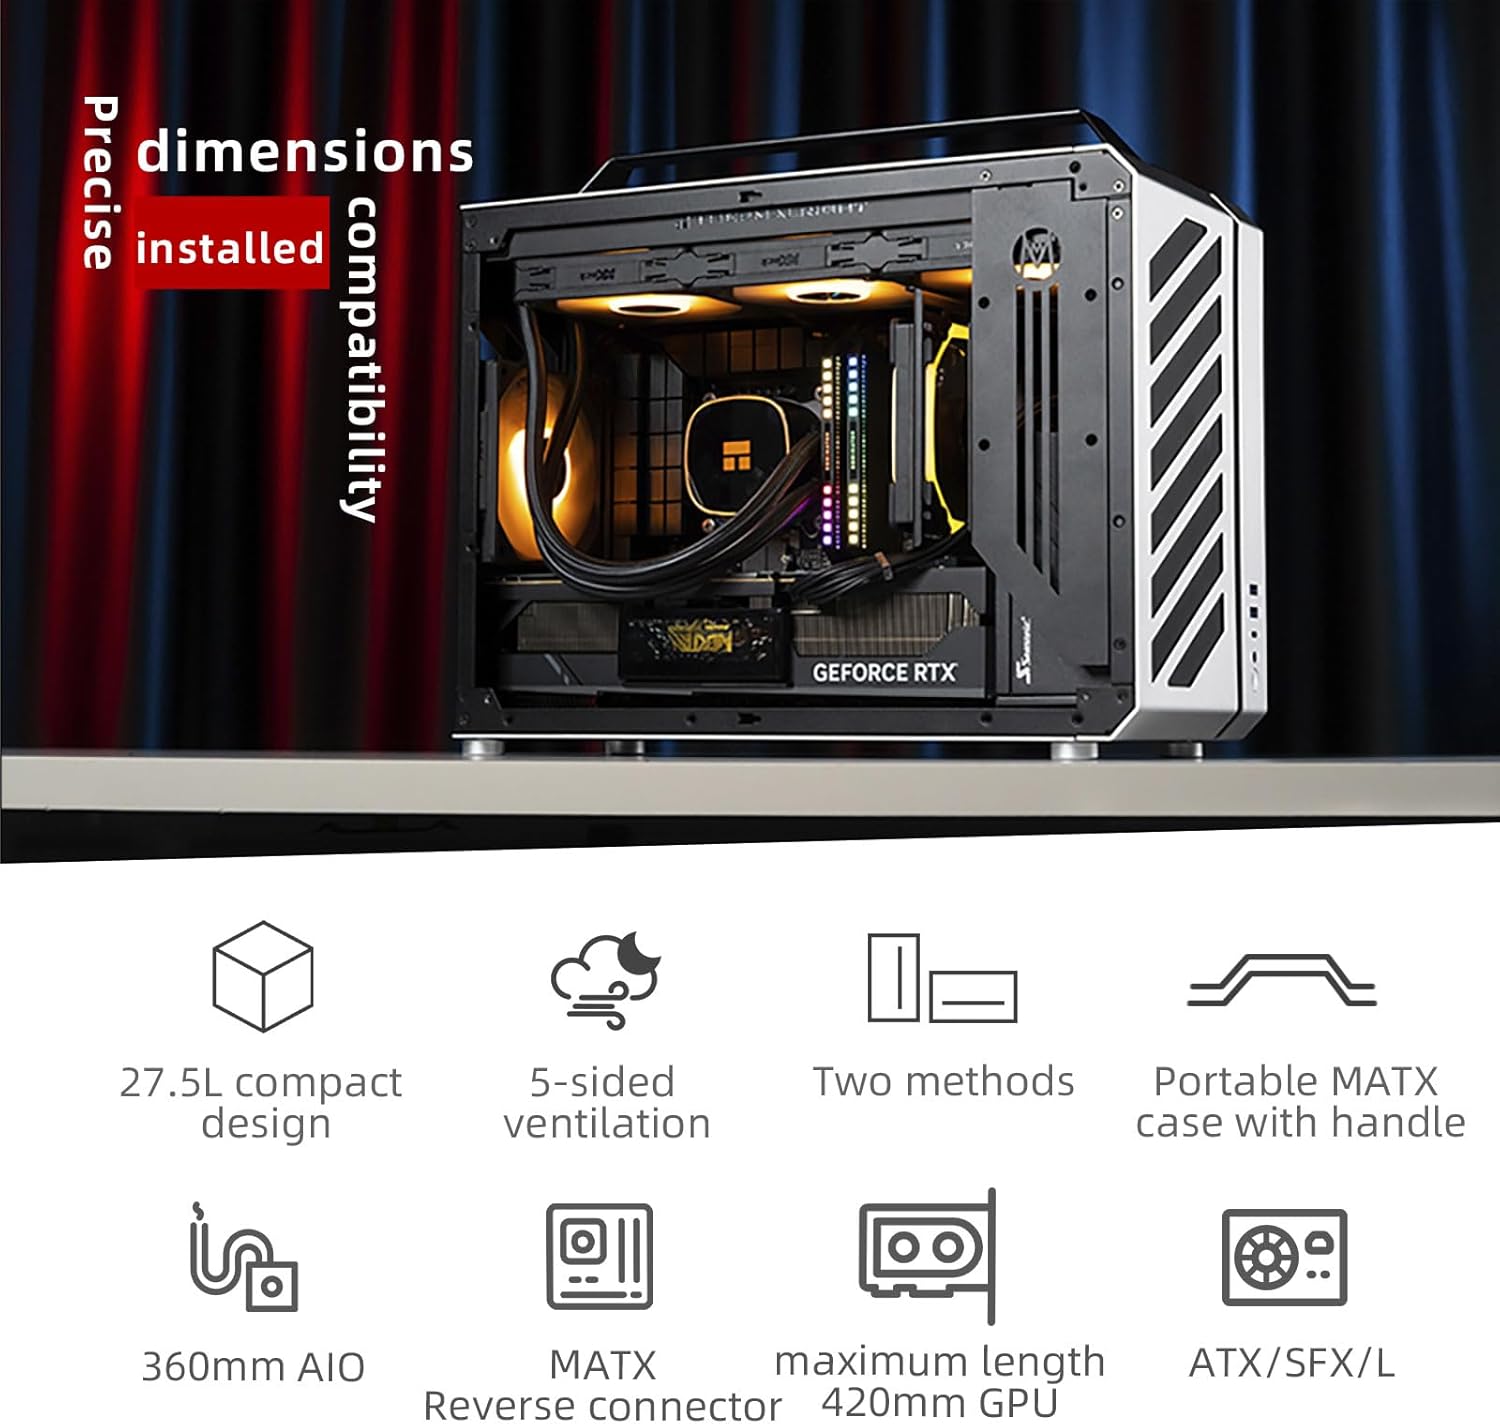
Figure 3.1: Detailed dimensions of the C30Pro case, including footrest and handle height.
4. Setup Guide
The modular design of the C30Pro case allows for flexible and straightforward component installation. It is recommended to lay the case on its side during installation for easier access.
4.1. Motherboard Installation
- Prepare your Micro-ATX or Mini-ITX motherboard. The case supports BTF (Back-To-Future) motherboards with hidden connectors.
- Install the I/O shield onto the motherboard.
- Carefully align the motherboard with the standoffs inside the case and secure it with screws.

Figure 4.1: Rear internal view demonstrating support for reverse-connector motherboards, facilitating cleaner cable management.
4.2. Power Supply Unit (PSU) Installation
The C30Pro supports ATX, SFX, and SFX-L power supplies. The PSU can be mounted in various positions depending on your cooling and GPU configuration.
- Determine the optimal PSU mounting position based on your chosen components.
- Secure the PSU using the provided screws.
4.3. Cooling System Installation
The case is designed to accommodate robust cooling solutions.
- Liquid Cooling: Supports up to 360mm All-In-One (AIO) liquid coolers.
- Air Cooling: Compatible with CPU air coolers up to 162mm in height.
- The case features a dedicated RAM cooling fan bracket for enhanced memory thermal performance.
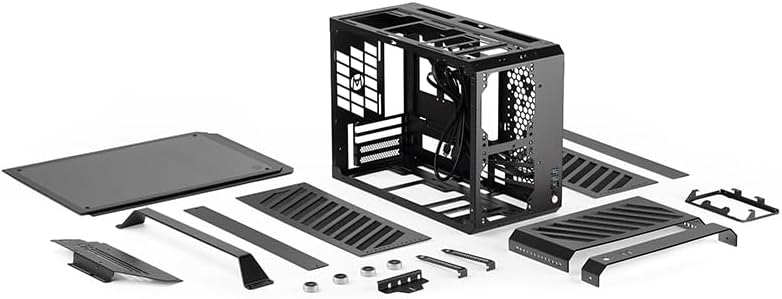
Figure 4.2: Close-up of the innovative RAM cooling fan bracket for improved memory thermals.
4.4. Graphics Card (GPU) Installation
The C30Pro supports graphics cards up to 420mm in length.
- Insert your GPU into the appropriate PCIe slot on the motherboard.
- Secure the GPU with the retention mechanism or screws.
4.5. Cable Management
Utilize the ample space and routing options behind the motherboard tray to manage cables effectively. This improves airflow and maintains a clean aesthetic.
4.6. Optional Handle Installation
The case includes an optional handle for portability. Attach the handle to the designated mounting points on the top panel using the provided screws.
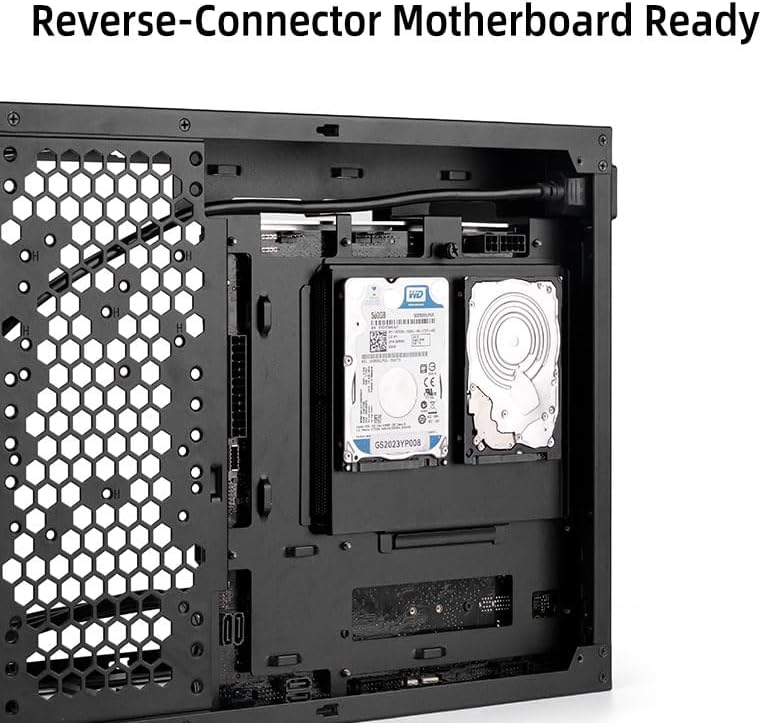
Figure 4.3: Rear view of the C30Pro case, illustrating the power input and the installed handle.
5. Operating Instructions
Once all components are securely installed and cables are connected:
- Connect the power cable to the PSU and a wall outlet.
- Connect your monitor, keyboard, mouse, and other peripherals to the appropriate ports.
- Press the power button on the front panel to start your computer.
6. Maintenance
Regular maintenance helps ensure the longevity and performance of your computer case.
- Dust Filters: The case features mesh panels that act as dust filters. Periodically remove these panels and clean them to maintain optimal airflow. Note that panels are screw-mounted, requiring a screwdriver for removal.
- Exterior Cleaning: Use a soft, damp cloth to clean the aluminum alloy and tempered glass surfaces. Avoid abrasive cleaners that may scratch the finish.
- Internal Cleaning: With the system powered off and unplugged, use compressed air to remove dust from internal components and fans.
7. Troubleshooting
- System Not Powering On: Double-check all power connections, including the 24-pin ATX, 8-pin CPU, and GPU power cables. Ensure the PSU switch is in the 'On' position.
- Front Panel USB Issues: If USB devices are not recognized, verify the front panel USB header is correctly connected to the motherboard. Some users have reported issues where only USB 2.0 devices work in certain ports, or USB 3.0 devices fail to connect; ensure all connections are firm and correctly oriented.
- Overheating: Ensure all case fans and CPU/GPU coolers are properly installed and functioning. Verify that dust filters are clean and not obstructing airflow.
- Loose Panels: If any panels feel loose, ensure all screws are tightened securely.
8. Warranty and Support
For warranty information, technical support, or service inquiries, please refer to the official MECHANIC MASTER website or contact your retailer. Keep your proof of purchase for warranty claims.


