Eapmic DT2W-1
Digital Induction Cooktop
User Manual
Model: DT2W-1
Introduction
Thank you for choosing the Eapmic Digital Induction Cooktop. This double-burner electric stove is designed for efficient and healthy cooking, featuring a durable vitro ceramic glass surface and intuitive controls. Please read this manual thoroughly before operation to ensure safe and optimal use of your appliance.
Important Safety Information
Always follow basic safety precautions when using electrical appliances to reduce the risk of fire, electric shock, and injury.
- Do not touch the ceramic plate immediately after cooking as it will be hot. Allow it to cool down.
- Ensure proper ventilation around the cooktop. The built-in cooling fan requires clear airflow.
- Keep out of reach of children. The cooktop includes a child safety lock feature.
- Do not immerse the appliance in water or any other liquid.
- Unplug the cooktop from the power outlet when not in use and before cleaning.
- The appliance features automatic shutdown and overheating protection for enhanced safety.
- Use only with compatible flat-bottomed cookware.
Package Contents
Verify that all items are present upon unpacking:
- 1 x Double-burner Ceramic Electric Hob
- 1 x Sponge Strip
- 1 x English Manual

Image: The Eapmic Digital Induction Cooktop shown with its power cord, a sponge strip, and the included English user manual.
Setup
- Unpacking: Carefully remove the cooktop and all accessories from the packaging. Retain packaging for future transport if needed.
- Placement: Place the cooktop on a stable, flat, and heat-resistant countertop surface. Ensure there is adequate space around the unit for ventilation. Do not block the cooling fan vents located on the underside.

Image: The underside of the cooktop, highlighting the cooling fan and stable rubber feet for countertop placement.
- Power Connection: Plug the 4.92 ft (1.5m) power cord into a standard 110-220V electrical outlet. Ensure the outlet is properly grounded.

Image: The cooktop with its power cord, ready for connection to an electrical outlet.
- Initial Cleaning: Before first use, wipe the ceramic glass surface with a damp cloth to remove any dust or residue from manufacturing.
Operating Instructions
Controls and Display
The cooktop features both touch controls and rotary knobs for precise adjustments. The LED display provides clear feedback on settings.

Image: A close-up of the cooktop's surface, detailing the control panel with touch buttons and rotary knobs for each burner.
Powering On/Off
- Press the power button (usually a touch icon) to turn the unit on.
- To turn off, press the power button again. The cooktop will automatically shut down after a period of inactivity or if overheating is detected.
Adjusting Power and Temperature
- Each burner has independent controls. Use the corresponding rotary knob or touch controls to adjust the power level.
- The cooktop offers 10 power levels, ranging from 100W to 2000W (100W, 400W, 600W, 800W, 1000W, 1200W, 1400W, 1600W, 1800W, 2000W).
- Temperature can be set within a range of 80°C-240°C (176°F-464°F).
Timer Function
- The integrated timer allows you to set cooking durations from 0 to 120 minutes.
- Activate the timer function using the dedicated touch button and adjust the time with the controls.
Cookware Compatibility
Unlike induction cooktops, this ceramic hob is compatible with any flat-bottomed pots and pans, including aluminum, stainless steel, ceramic, glass, copper, and cast iron. This provides great flexibility for your cooking needs.

Image: The cooktop actively heating a pot and a wok, demonstrating its dual cooking zones and compatibility with various cookware types.
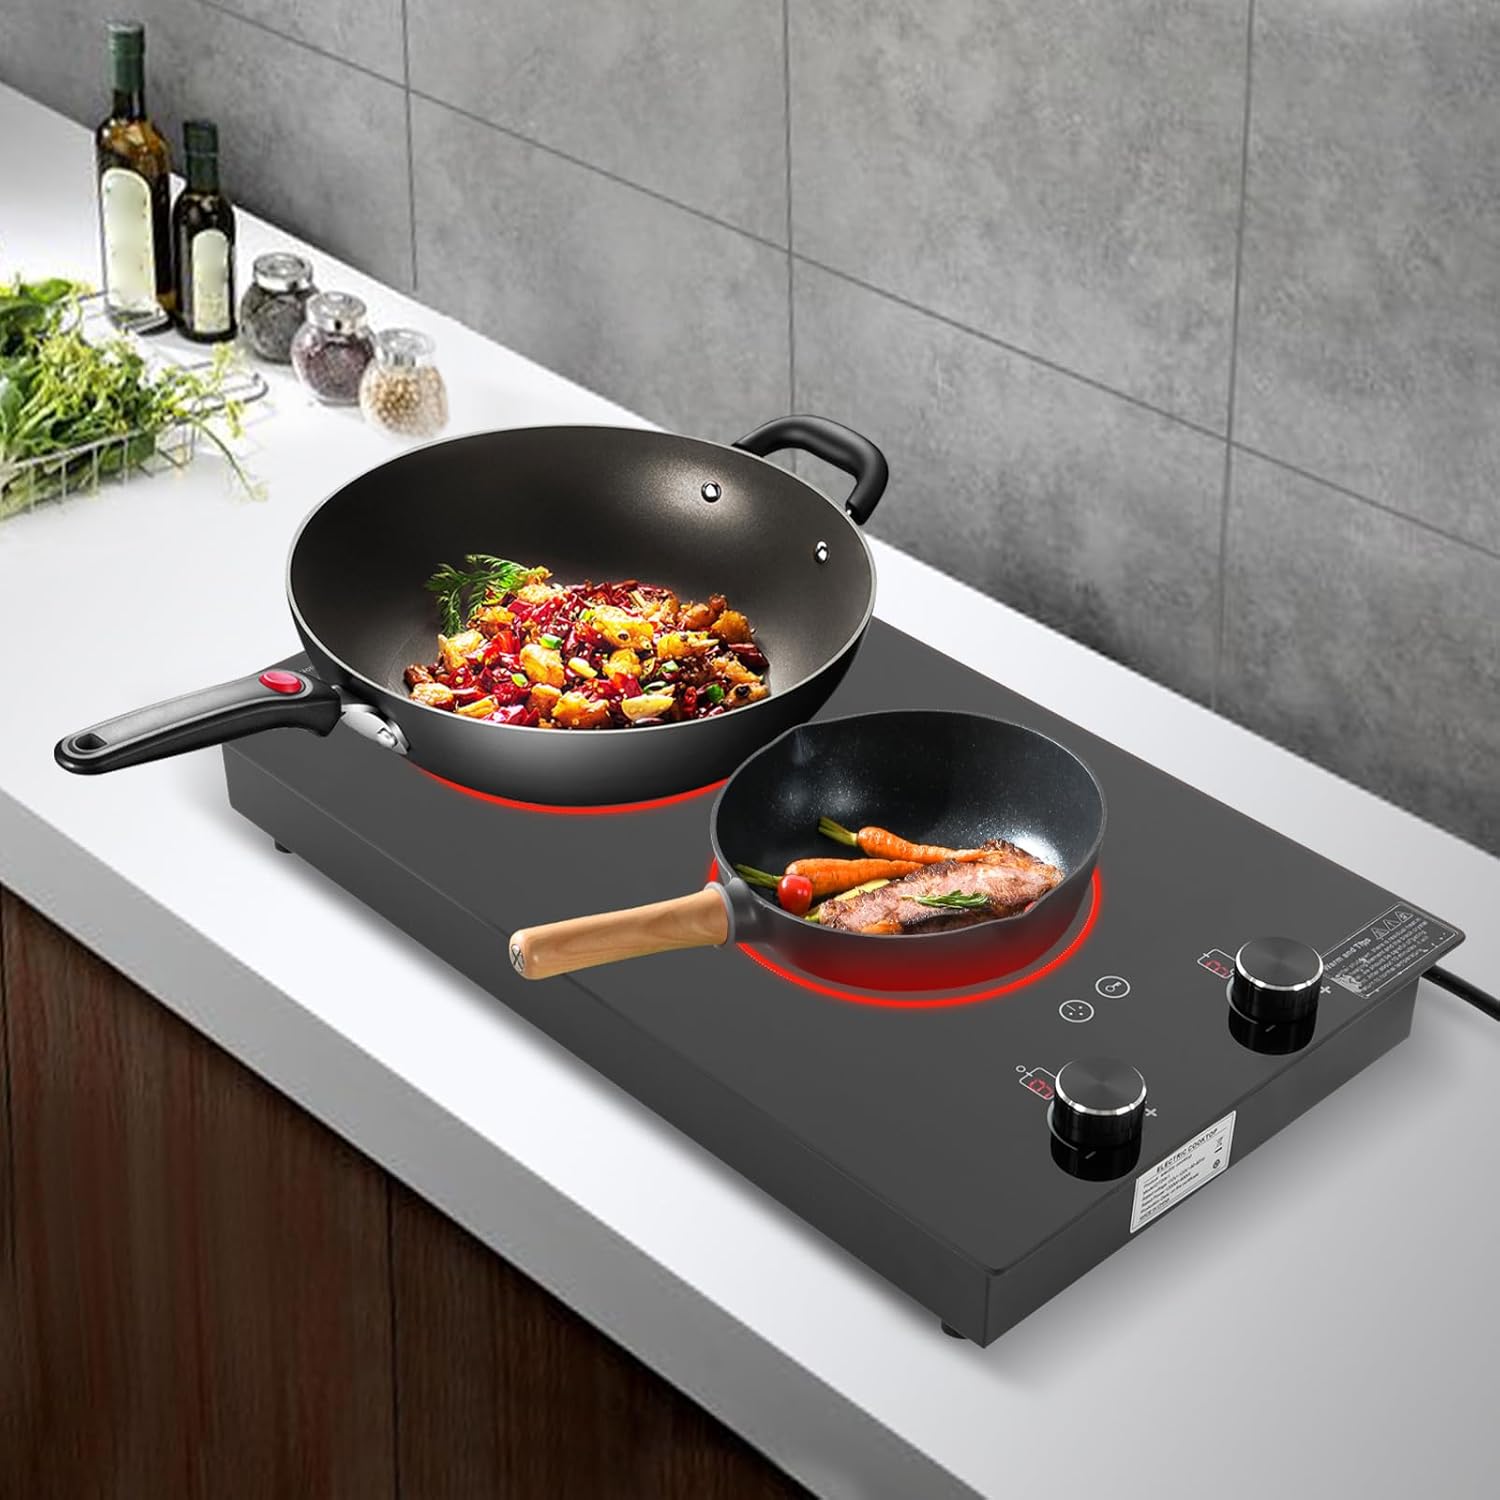
Image: An overhead perspective of the cooktop, showing a steamer pot on one burner and a frying pan with an egg on the other, illustrating simultaneous cooking.
Maintenance and Care
- Cleaning the Surface: After each use, allow the ceramic glass surface to cool completely. Wipe with a damp cloth and mild detergent. For stubborn stains, use a non-abrasive ceramic hob cleaner. Do not use abrasive pads or harsh chemicals.
- Cooling Vents: Regularly check and ensure the cooling vents on the underside of the unit are free from dust and debris to maintain optimal performance and prevent overheating.
- Storage: When not in use for extended periods, store the cooktop in a clean, dry place.
Troubleshooting
| Problem | Possible Cause | Solution |
|---|---|---|
| Cooktop does not power on. | Not plugged in; power outage; faulty outlet. | Ensure power cord is securely plugged in. Check circuit breaker. Try a different outlet. |
| Burner not heating. | Incorrect power setting; cookware not flat-bottomed or not placed correctly. | Increase power level. Ensure cookware has a flat bottom and is centered on the heating zone. |
| Cooktop shuts off during operation. | Overheating protection activated; timer expired. | Allow unit to cool down. Ensure vents are not blocked. Check timer settings. |
| Unusual noise during operation. | Cooling fan operating normally; loose component. | A slight fan noise is normal. If noise is excessive or unusual, discontinue use and contact support. |
Specifications
| Feature | Detail |
|---|---|
| Model | DT2W-1 |
| Material | Galvanised Sheet, Iron |
| Color | Black |
| Power Source | Corded Electric |
| Mount Type | Countertop |
| Display Type | LED |
| Control Mode | Touch, Knob |
| Voltage | 110-220V |
| Actual Power | 1800W + 1200W |
| Power Levels | 10 Gears (100W, 400W, 600W, 800W, 1000W, 1200W, 1400W, 1600W, 1800W, 2000W) |
| Temperature Range | 80°C-240°C / 176°F-464°F |
| Timing Range | 0-120 minutes |
| Power Cord Length | 1.5m / 4.92ft |
| Product Size (L*W*H) | 51cm * 28.8cm * 8cm / 20.1in * 11.3in * 3.1in |
| Net Weight | 5.13kg / 11.3lbs |

Image: The cooktop with its key dimensions clearly marked, providing a visual reference for its size.
Warranty and Support
Eapmic is committed to providing excellent customer service. If you have any questions, concerns, or require technical assistance with your Digital Induction Cooktop, please contact our customer support team. Refer to your purchase documentation or the seller's information for specific contact details.
We strive to solve any problems you may encounter and ensure your satisfaction with our product.
Ask a question about this manual
Ask about setup, troubleshooting, compatibility, parts, safety, or missing instructions. Manuals+ will review the question and use this page’s manual context to help answer it.