Introduction
The Espelho Automatic Pet Feeder is designed to simplify pet feeding by providing timed and portion-controlled meals for your cat or small dog. This manual provides essential information for setup, operation, and maintenance to ensure optimal performance and the well-being of your pet.
What's in the Box
Please ensure all components are present before setup.
- Cat Feeder x 1
- Power Cord x 1
- Adapter x 1
- Stainless Steel Bowl x 1
- Bowl Holder x 1
- Desiccant Bag x 1
- User Manual x 1

The package includes the main feeder unit, power adapter, power cord, stainless steel bowl, bowl holder, a desiccant bag to keep food fresh, and this user manual.
Setup
- Assembly: Place the stainless steel bowl into the bowl holder. Attach the bowl holder to the main feeder unit.

Image: Fully assembled Espelho Automatic Pet Feeder. The feeder is designed for easy assembly, simply connect the bowl and holder to the main unit.
- Power Supply: Connect the power adapter to the feeder and plug it into a wall outlet. For backup power, insert 3xD size batteries (not included) into the battery compartment at the bottom of the unit. This ensures your pet won't miss a meal during power outages.
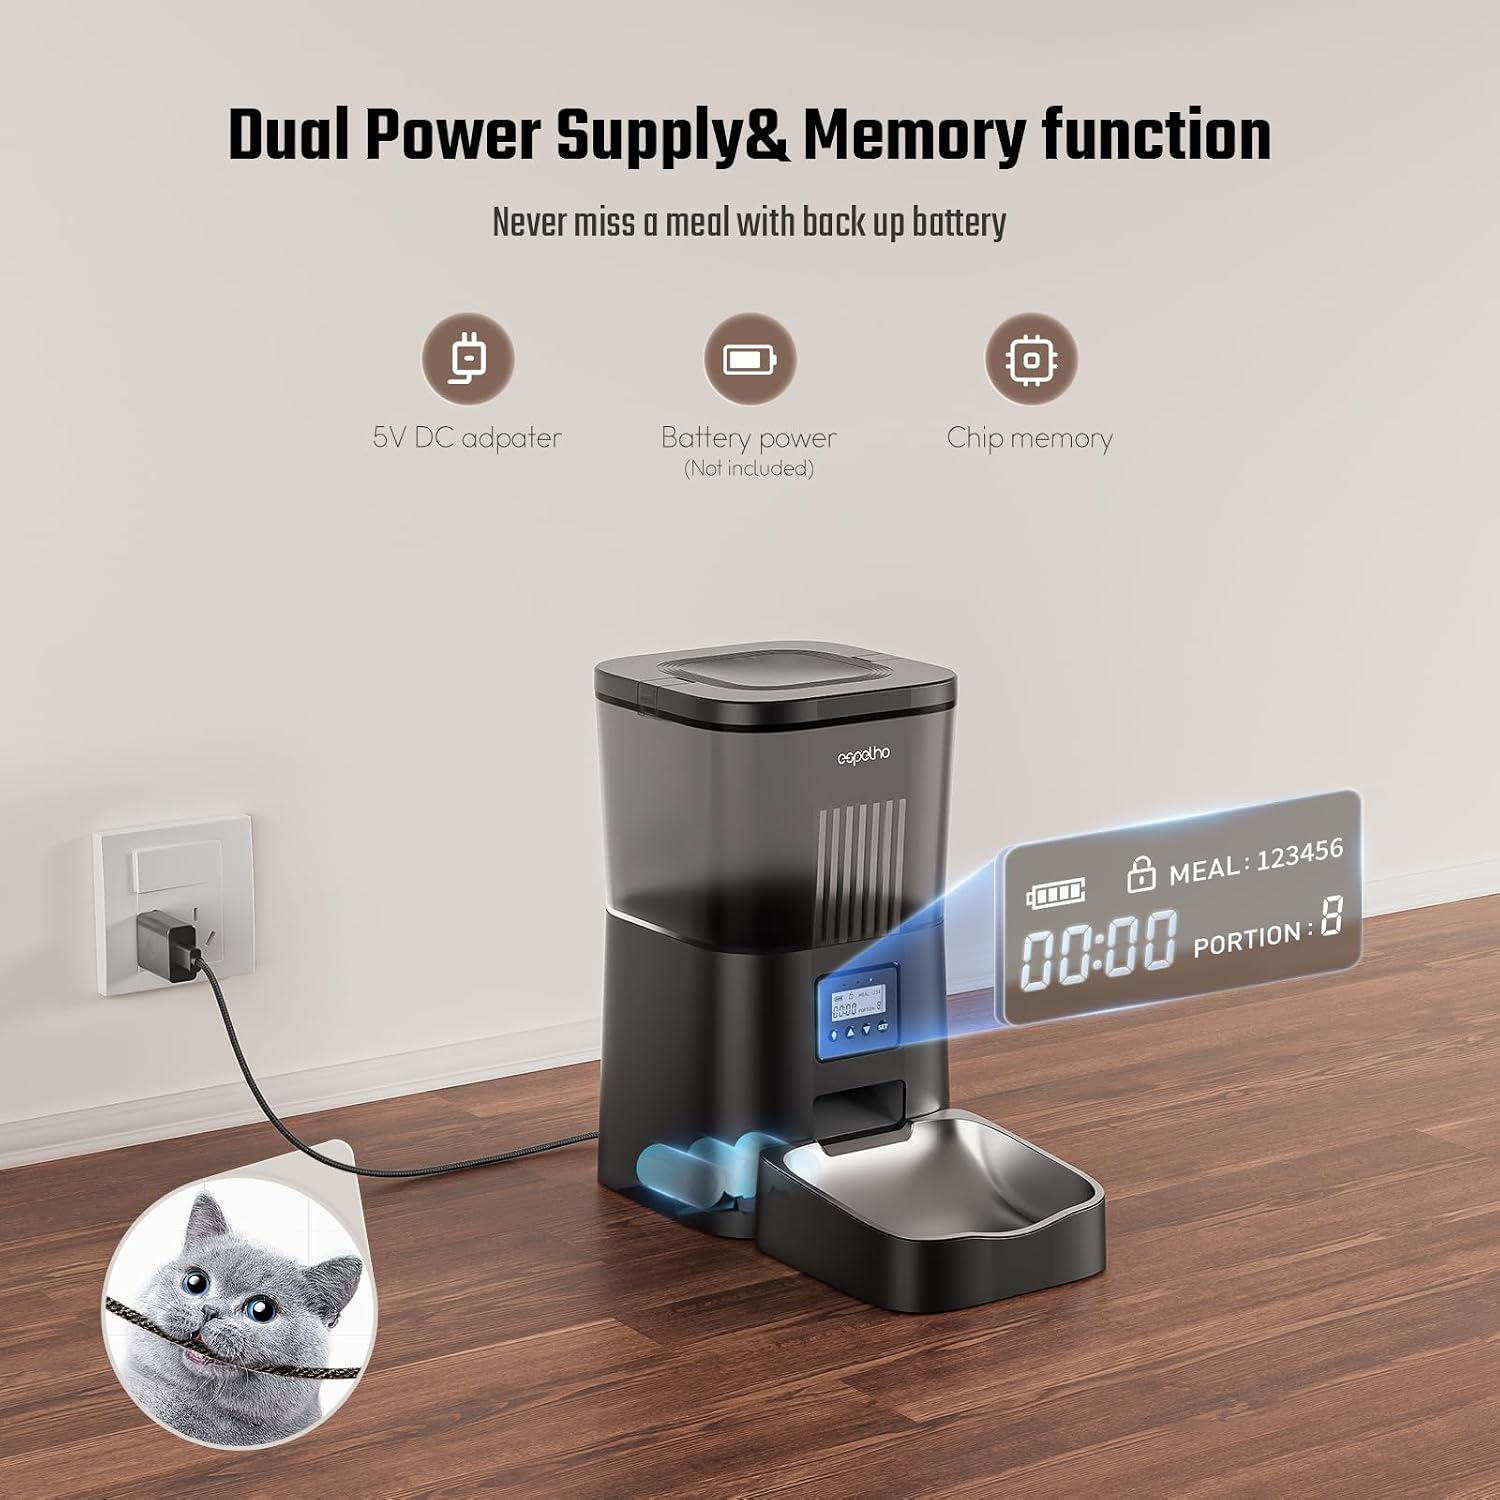
Image: Illustration of dual power supply options (AC adapter and D-cell batteries). The feeder supports both AC power and battery backup for uninterrupted operation.
- Fill Food Tank: Open the top lid and pour dry pet food into the 4L capacity tank. Ensure kibble size is between 0.07 to 0.4 inches (2-10mm) to prevent clogging. Place the desiccant bag in its designated slot under the lid to keep food fresh.

Image: Filling the 4L food tank with dry kibble. The large capacity tank holds enough food for extended periods, and the desiccant bag helps maintain freshness.

Image: Proper placement of the desiccant bag in the lid. The desiccant bag is crucial for keeping the pet food dry and fresh.
- Secure Lid: Close the lid securely to prevent pets from accessing food outside of scheduled meal times.

Image: The secure food locking lid prevents unauthorized access by pets. A secure lid ensures food safety and prevents overeating.
Operating Instructions
Setting Up Timed Feeding
- Unlock Screen: Press and hold the "down arrow" button for 3 seconds to unlock the screen and enable other buttons.

Image: Control panel buttons for setting the feeder. The control panel allows for easy programming of meal times and portions.
- Set Current Time: Use the "up" and "down" arrows to adjust the hour and minute. Press "SET" to confirm each setting.
- Program Meals: You can program up to 6 meals per day. For each meal, set the desired time (hour and minute) and the portion size (1-20 portions). One portion is approximately 6g.

Image: Setting up a personalized feeding plan with meal times and portions. Customize your pet's dining routine with precise meal scheduling.

Image: Chart showing recommended daily feeding portions based on intake. Refer to the portion setting chart for guidance on appropriate meal sizes.
- Save Settings: After setting all desired meals and portions, press "SET" to save.
Manual Feeding
To dispense food manually outside of programmed times, press and hold the "down arrow" button until the desired amount is dispensed. This is useful for extra treats or if your pet needs an immediate meal.
Voice Recorder
The feeder includes a built-in voice recorder. Press and hold the microphone button to record a 10-second message. This message will play automatically during each meal dispensing, calling your pet to eat.
Your pet will recognize your voice, making mealtime more engaging.
Anti-Clogging Technology
The feeder features an upgraded anti-clogging design with a double rotor and 45° slope to ensure smooth and uninterrupted food dispensing. This design is compatible with kibble sizes from 0.07 to 0.4 inches.

This technology prevents food jams, ensuring reliable feeding.
Maintenance
Cleaning
The feeder features a detachable design for easy cleaning. The food tank, stainless steel bowl, and bowl holder can be removed and washed.
IMPORTANT: Do not immerse the base part of the feeder in water at any time, as this will damage the control panel and other electronic components.
Regular cleaning ensures hygiene and prolongs the life of the feeder.
Troubleshooting
- Feeder Malfunction: If the equipment is malfunctioning or damaged, do not attempt to repair it yourself. Contact the seller immediately for assistance.
- Food Not Dispensing: Check if the food tank is empty or if the kibble size is too large (should be 0.07 to 0.4 inches). Ensure the anti-clogging mechanism is clear.
- Power Issues: Verify the AC adapter is securely plugged in. If using batteries, check if they are correctly installed and have sufficient charge.
Specifications
| Feature | Detail |
|---|---|
| Capacity | 4L |
| Meals Per Day | 1-6 |
| Portions Per Meal | 1-20 |
| Voice Recording | 10 seconds |
| Power Supply | AC Power, 3xD Batteries (backup) |
| Kibble Size | 0.07 - 0.4 inches (2-10mm) |
| Dimensions | 7.8 x 7.8 x 13 inches |
| Weight | 4.2 pounds |
| Material | Acrylonitrile Butadiene Styrene (ABS) |
Official Product Videos
4L Automatic cat feeder portion control
This video demonstrates the portion control features of the 4L automatic cat feeder, showing how to set and dispense precise meal sizes.
Warranty & Support
The Espelho Automatic Pet Feeder comes with a 1-year warranty.
For any questions, concerns, or support needs, please contact the seller directly. Espelho is committed to providing excellent customer service and ensuring the satisfaction of pet owners.

Our support team is ready to assist you with any inquiries.