
Introduction
This manual provides detailed instructions for the installation, operation, and maintenance of your AVNICUD Indoor Digital TV Antenna. Please read this guide thoroughly before use to ensure optimal performance and longevity of your device. This antenna is designed to receive free over-the-air (OTA) high-definition television broadcasts.

Image: The AVNICUD Indoor Digital TV Antenna, showing the main antenna panel, amplifier, and coaxial cable.
Product Components
Your AVNICUD Indoor Digital TV Antenna package includes the following items:
- Digital TV Antenna Panel
- Signal Amplifier (with USB power cable)
- 18 ft Coaxial Cable (integrated with antenna)
- USB Power Adapter (for amplifier)

Image: A detailed view of the signal amplifier, highlighting its internal components and smart IC chip for enhanced signal reception.
Setup Instructions
Follow these steps to connect and set up your digital TV antenna:
- Connect the Antenna: Locate the 'ANT IN' or 'CABLE IN' port on the back of your television or digital converter box. Connect the coaxial cable from the antenna to this port.
- Connect the Amplifier: The signal amplifier should be connected in-line with the coaxial cable, close to the TV. Ensure the amplifier is securely connected to both the antenna's coaxial cable and the TV's 'ANT IN' port.
- Power the Amplifier: Connect the USB power cable from the amplifier to a USB port on your TV or a separate USB power adapter (e.g., a phone charger). The amplifier requires power to function.
- Position the Antenna: Place the antenna in an optimal location. Refer to the 'Optimizing Reception' section for guidance.
- Scan for Channels: Turn on your TV. Access your TV's menu, navigate to 'Channel Scan' or 'Auto Program'. Select 'Antenna' or 'Air' as the input source. Initiate the channel scan. This process may take several minutes.

Image: Connection diagrams illustrating how to connect the antenna to both traditional televisions (via a digital terrestrial set-top box) and modern HDTVs.
Operating Instructions
Once the setup is complete and channels have been scanned, you can begin watching free over-the-air broadcasts.
- Channel Selection: Use your TV remote to browse and select channels as you normally would.
- Rescanning Channels: If you experience signal loss, new channels become available, or you move the antenna, perform a channel rescan. This ensures your TV updates its channel list.
Optimizing Reception
The quality of reception can vary based on location, obstacles, and antenna placement. Consider the following to optimize your signal:
- Antenna Placement: Experiment with different locations for the antenna. Generally, higher positions and locations closer to windows facing the broadcast towers yield better results. Avoid placing the antenna near large metal objects or other electronic devices that may cause interference.
- Common Placement Options: The antenna can be affixed to a window, mounted on a wall, placed behind the TV, or laid flat on a table.
- Check Signal Strength: Some TVs have a signal strength meter in their settings menu. Use this to gauge the effectiveness of different antenna positions.
- Identify Local Broadcast Towers: For best results, determine the direction of local broadcast towers. Websites like dtv.gov/maps or antennaweb.org can help you find available channels and tower locations in your area.

Image: Visual guide demonstrating various installation methods for the antenna, including placement on a window, wall, behind the television, or flat on a surface.
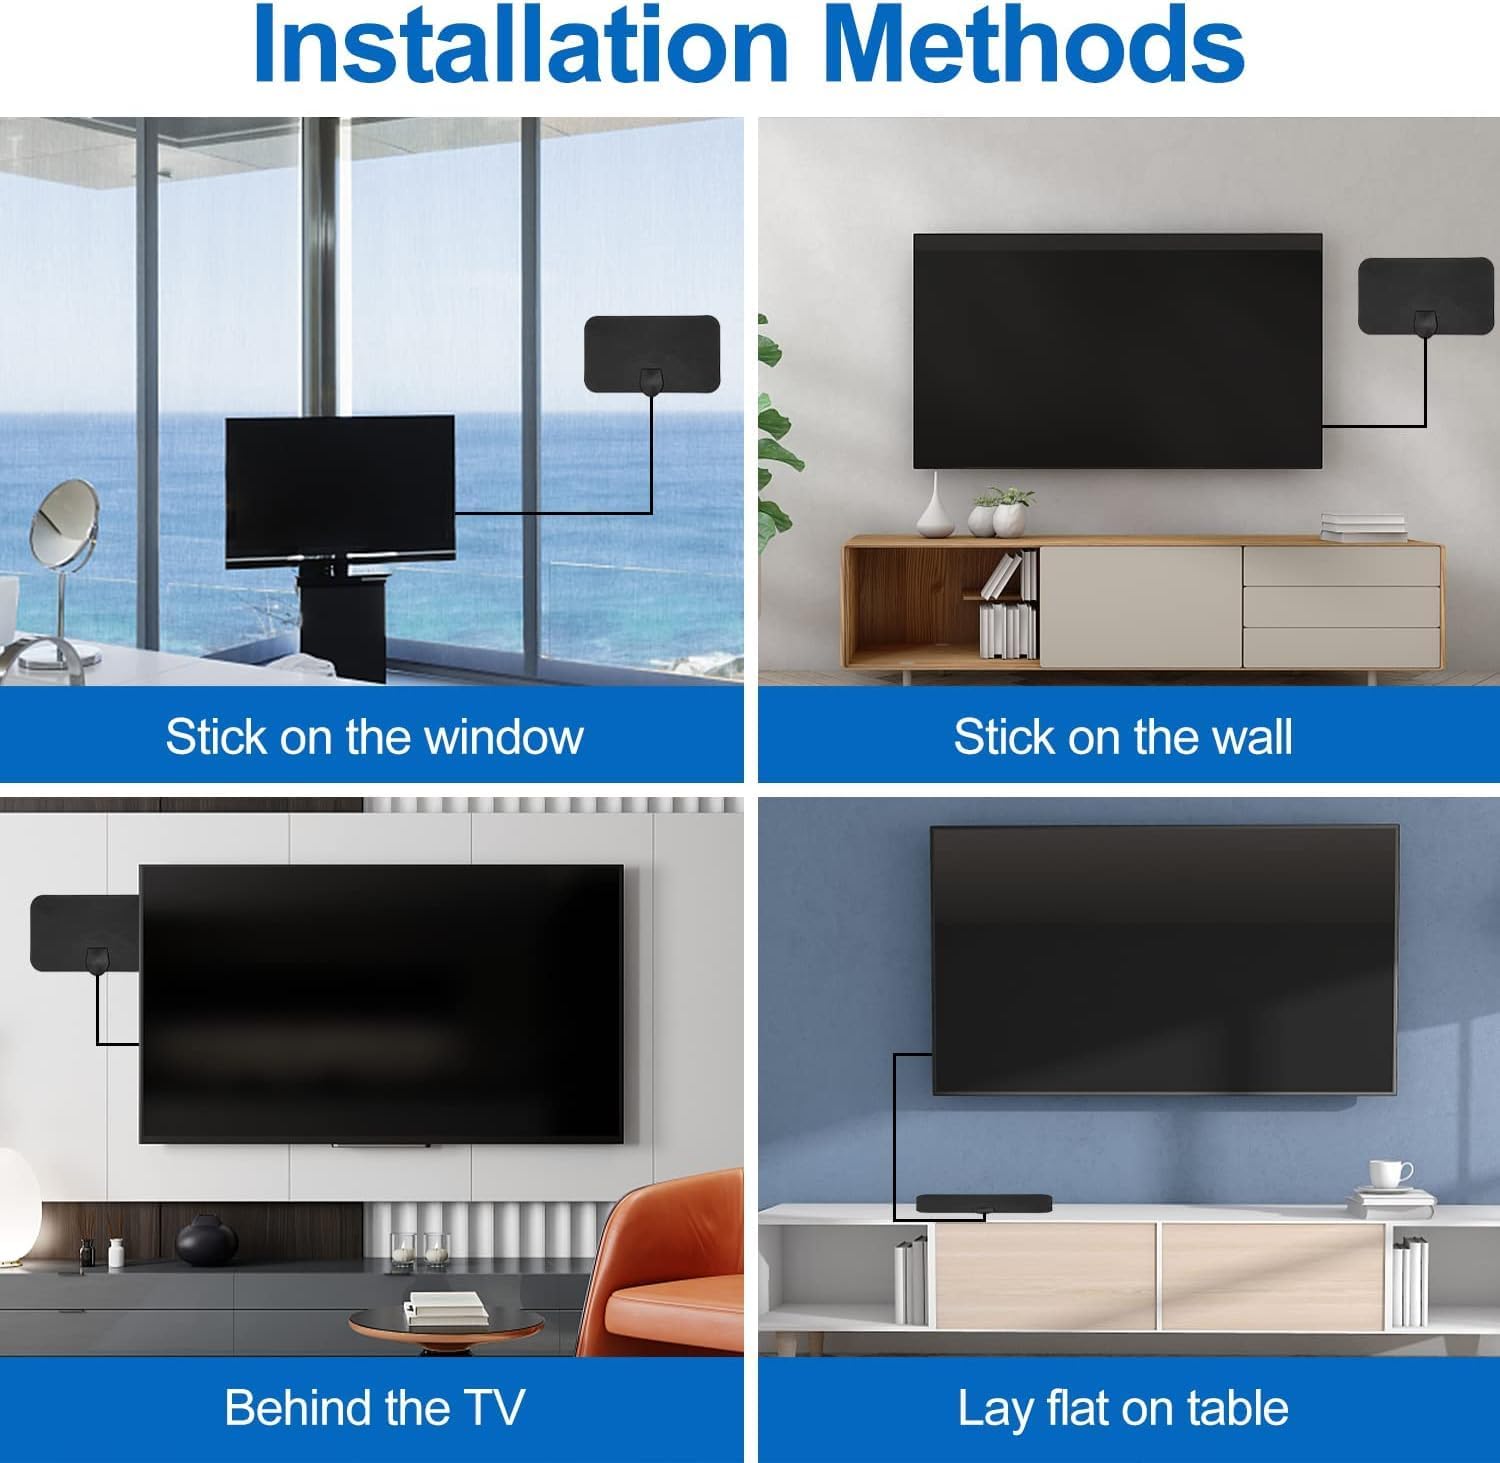
Image: An informational graphic encouraging users to verify channel availability in their specific location by visiting dtv.gov/maps or antennaweb.org prior to antenna purchase.
Troubleshooting
If you encounter issues with your antenna, try the following solutions:
- No Channels Found:
- Ensure all connections are secure, especially the coaxial cable to the TV and the amplifier.
- Verify the amplifier is powered via its USB connection.
- Perform a channel scan again.
- Try repositioning the antenna to a different location, preferably higher or closer to a window.
- Check dtv.gov/maps or antennaweb.org to confirm if digital broadcasts are available in your specific area.
- Poor Picture Quality/Pixelation:
- Adjust the antenna's position slightly. Even small movements can significantly impact signal quality.
- Ensure the antenna is not obstructed by large metal objects, appliances, or thick walls.
- Rescan for channels after adjusting the antenna.
- Check for potential sources of interference, such as other electronic devices, and move them away from the antenna if possible.
- Amplifier Not Working:
- Confirm the USB power cable is securely connected to both the amplifier and a working USB power source.
- Try a different USB port or power adapter.
Maintenance
The AVNICUD Indoor Digital TV Antenna requires minimal maintenance:
- Cleaning: Wipe the antenna panel with a soft, dry cloth to remove dust. Do not use liquid cleaners or abrasive materials.
- Storage: If storing the antenna, ensure it is kept in a dry, cool place away from direct sunlight and extreme temperatures.
- Cable Care: Avoid kinking or sharply bending the coaxial cable to prevent damage and signal loss.
Specifications
| Feature | Specification |
|---|---|
| Model Number | TV Antenna Indoor for ALL Tvs |
| Brand | AVNICUD |
| Antenna Type | Indoor Digital TV Antenna |
| Coaxial Cable Length | 18 feet |
| Amplifier | Included, USB powered |
| Package Dimensions | 8.78 x 6.77 x 1.18 inches |
| Item Weight | 5.7 ounces |
Warranty and Customer Service
Your AVNICUD Indoor Digital TV Antenna comes with a 12-month warranty from the date of purchase. This warranty covers manufacturing defects and ensures your product functions as intended under normal use.
For any questions, concerns, or warranty claims, please contact AVNICUD customer service. Our professional support team is available to assist you.
Please retain your proof of purchase for warranty validation.