1. Introduction
Thank you for choosing the Vpcok Direct Countertop Ice Maker Machine. This appliance is designed to provide you with fresh ice cubes quickly and efficiently, perfect for home use, kitchen, camping, and various gatherings. Please read this manual thoroughly before operating your ice maker to ensure safe and optimal performance. Keep this manual for future reference.

Figure 1: Vpcok Direct Countertop Ice Maker Machine
This image displays the Vpcok Direct Countertop Ice Maker Machine in black, alongside an ice scoop and a glass of iced coffee, highlighting its primary function and included accessory.
2. Product Overview
The Vpcok Direct Ice Maker is engineered for convenience and performance. Key features include:
- Fast and Energy Saving: Produces 9 bullet-shaped ice cubes in 6-8 minutes, with a daily capacity of up to 26.5 lbs.
- Compact and Portable: Designed with a compact size (22.2 x 29.4 x 29 cm) and a convenient handle for easy portability.
- Advanced Infrared Technology: Automatically stops operation when the ice basket is full or water level is low.
- Automatic Cleaning Function: Simplifies maintenance with a self-cleaning mode.
- Two Ice Sizes: Offers small and large ice cube options for various beverage needs.
- Low Noise Operation: Operates at less than 35 dB for a quiet environment.

Figure 2: Efficient Ice Production
This image illustrates the internal components of the ice maker, emphasizing its efficiency with details on daily ice production (26.5 lbs/24H), cycle time (9 cubes/6-8 minutes), and water tank capacity (1.5L).

Figure 3: Ice Cube Size Options
This image shows the two available ice cube sizes, small (2.5cm x 2.0cm) and large (3.0cm x 2.5cm), along with examples of beverages they are suitable for.
Video 1: Countertop Ice Maker Machine Overview
This video provides a comprehensive overview of the ice maker, demonstrating its features, operation, and portability for various uses.
3. Setup
- Unpacking: Carefully remove the ice maker from its packaging. Retain packaging materials for future storage or transport.
- Placement: Place the ice maker on a stable, level surface away from direct sunlight and heat sources. Ensure adequate ventilation around the unit.
- Initial Cleaning: Before first use, clean the interior of the ice maker. Refer to the "Maintenance and Cleaning" section for detailed instructions.
- Add Water: Open the top cover and remove the ice basket. Pour clean drinking water into the water tank up to the "MAX" fill line. Do not overfill.
- Power Connection: Plug the power cord into a grounded electrical outlet.

Figure 4: Initial Setup and Operation Steps
This image provides a visual step-by-step guide for setting up and operating the ice maker, from adding water to the ice production cycle.
4. Operating Instructions
The ice maker features a user-friendly control panel for easy operation.

Figure 5: Control Panel
This image highlights the ice maker's control panel, showing the ON/OFF/CLEAN button, SELECT button, and indicator lights for ADD WATER, ICE FULL, POWER, S (Small), and L (Large).
- Power On: Press the "ON/OFF" button on the control panel to turn on the ice maker. The "POWER" indicator will illuminate.
- Select Ice Size: Press the "SELECT" button to choose your desired ice cube size: "S" for small or "L" for large. The corresponding indicator light will illuminate.
- Ice Production: The ice maker will begin the ice-making cycle. The first batch of ice typically takes 6-8 minutes, depending on room temperature and selected ice size.
- Ice Full Indicator: When the ice basket is full, the "ICE FULL" indicator will light up, and the machine will automatically stop producing ice. Remove ice to resume production.
- Add Water Indicator: If the water level in the tank is too low, the "ADD WATER" indicator will light up. Add more water to the tank to continue ice production.

Figure 6: Low Noise Operation
This image depicts a person relaxing near the ice maker, emphasizing its low noise operation (less than 35 dB), making it suitable for various environments.
5. Maintenance and Cleaning
Regular cleaning ensures the longevity and hygiene of your ice maker.
- Automatic Cleaning: The ice maker is equipped with an automatic cleaning function. To activate, press and hold the "ON/OFF/CLEAN" button for 5 seconds. The machine will enter self-cleaning mode, circulating water to clean the internal components.
- Draining Water: After the self-cleaning cycle or when you need to drain the water, locate the water plug at the bottom of the fuselage. Remove the plug to allow the waste water to flow out. Ensure the machine is unplugged before draining.
- Manual Cleaning: For thorough cleaning, unplug the unit and wipe the interior with a soft cloth and mild detergent. Rinse thoroughly with clean water. Do not use abrasive cleaners or solvents.
- Exterior Cleaning: Wipe the exterior with a soft, damp cloth.
- Storage: If storing the ice maker for an extended period, ensure it is completely dry and drained. Store in a cool, dry place.
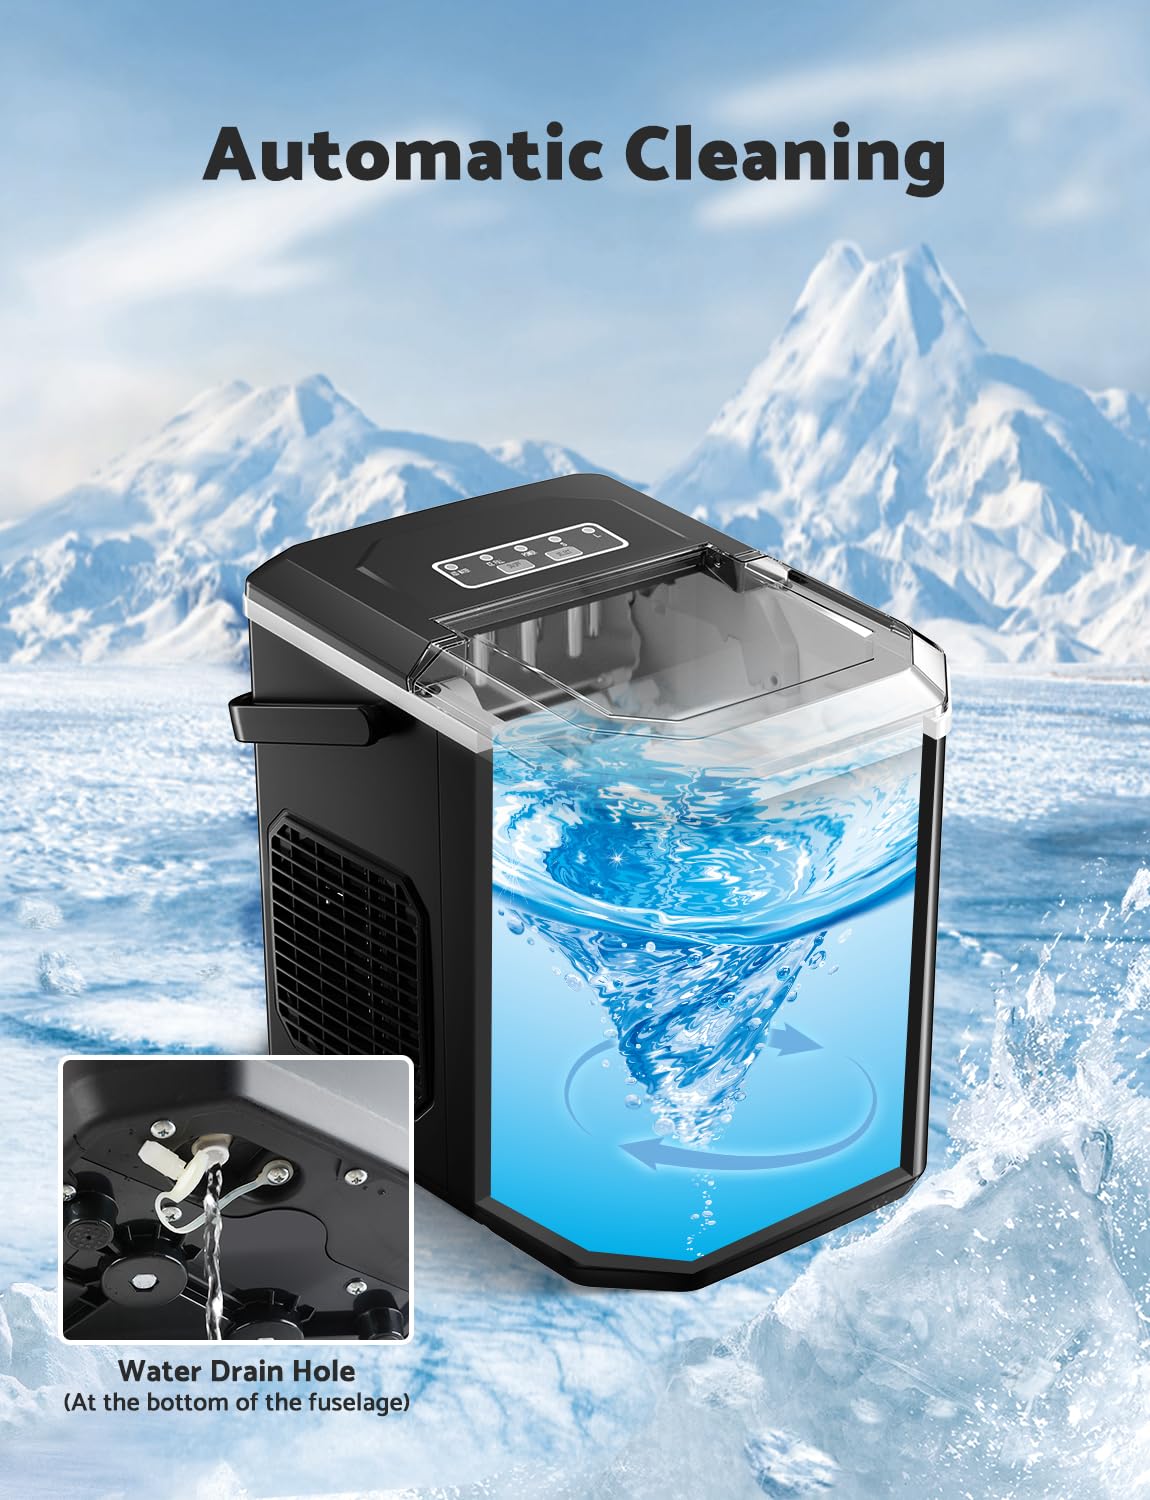
Figure 7: Automatic Cleaning
This image visually demonstrates the automatic cleaning function, showing water swirling within the ice maker's reservoir, indicating the self-cleaning process.
6. Troubleshooting
If you encounter issues with your ice maker, refer to the following common problems and solutions:
| Problem | Possible Cause | Solution |
|---|---|---|
| Ice maker not producing ice. | No water in the tank. | Add water to the tank up to the MAX line. |
| Ice full indicator is on, but basket is not full. | Ice cubes are stuck or blocking the sensor. | Gently move ice cubes away from the sensor. |
| Ice cubes are too small or soft. | Room temperature is too high or water is too warm. | Ensure the ice maker is in a cool environment. Use colder water. Select large ice cube size. |
| Machine is noisy. | Normal operation sounds (compressor, water pump). | This is normal. Ensure the unit is on a stable, level surface to minimize vibration. |
| Water leakage. | Drain plug not properly sealed. | Ensure the drain plug at the bottom is securely inserted. |
7. Specifications
| Feature | Detail |
|---|---|
| Model Name | HZB-12/G |
| Product Dimensions | 25D x 31W x 32H Centimetres (22.2 x 29.4 x 29 cm) |
| Capacity | Up to 26.5 lbs (12.02 kg) of ice per 24 hours |
| Ice Production Cycle | 9 cubes in 6-8 minutes |
| Water Tank Capacity | 1.5 Liters |
| Refrigerant | R600a |
| Material | Stainless Steel |
| Noise Level | Less than 35 dB |
| Country of Origin | China |

Figure 8: Compact Design and Dimensions
This image provides a visual representation of the ice maker's compact design, including its precise dimensions for easy placement on countertops.
8. Warranty and Support
Vpcok Direct stands behind the quality of its products. For any issues or inquiries regarding your ice maker, please contact our customer support team. We are committed to providing assistance and resolving any concerns you may have.
Contact Information: If you have any issue with this product at any time, please feel free to contact us.
Please retain your proof of purchase for warranty claims.
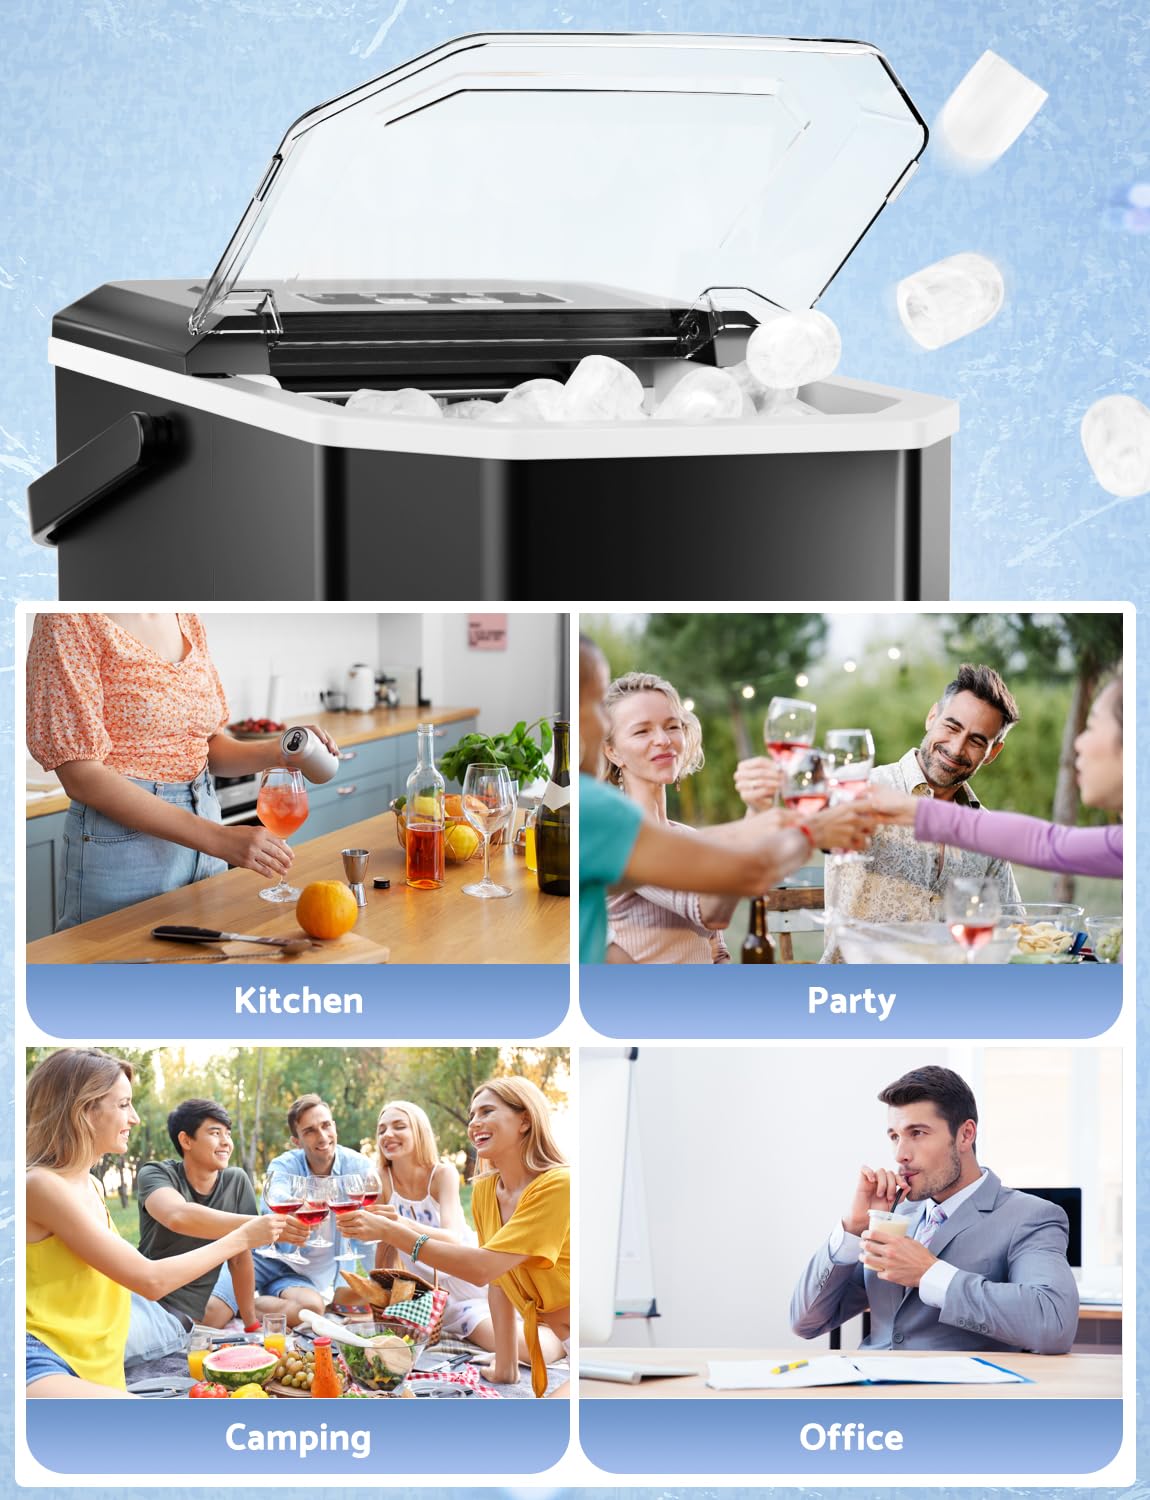
Figure 9: Versatile Usage Scenarios
This image showcases the ice maker's versatility, illustrating its use in different settings such as a kitchen, a party, a camping trip, and an office environment.