1. Safety Information
WARNING: Risk of electric shock. Disconnect power at the fuse or circuit breaker before installation or servicing.
- Read all instructions carefully before installation.
- Installation must be performed by a qualified electrician in accordance with national and local electrical codes.
- Ensure the supply voltage is 120V AC.
- Do not install near heat sources or in areas with excessive moisture beyond the product's rating.
- Do not modify the fixture. Any modifications may void the warranty and create safety hazards.
- Wear safety glasses and gloves during installation.
2. Package Contents
Verify that all components are present before beginning installation:
- LED Step Light Fixtures (12 units)
- Mounting Hardware (screws, wire nuts)
- Instruction Manual

Image: Overview of product dimensions and included mounting hardware.
3. Product Features
- 120V Line Voltage: Designed for standard household voltage, eliminating the need for an external transformer.
- 3 Selectable Light Colors (3CCT): Choose between 3000K Warm White, 4000K Natural White, and 5000K Daylight using a built-in switch.
- Smooth Dimming: Compatible with most household Triac dimmer switches (not included) for adjustable brightness.
- Easy Installation: Designed to fit into a single gang outlet box (not included) with a snap-in face plate.
- Indoor & Outdoor Use: Constructed from anti-rust aluminum, suitable for decks, stairs, pathways, patios, and retaining walls.
- Minimized Glare: Casts light downward to illuminate steps effectively while reducing glare.

Image: Detail of the 3CCT switch for color temperature selection.
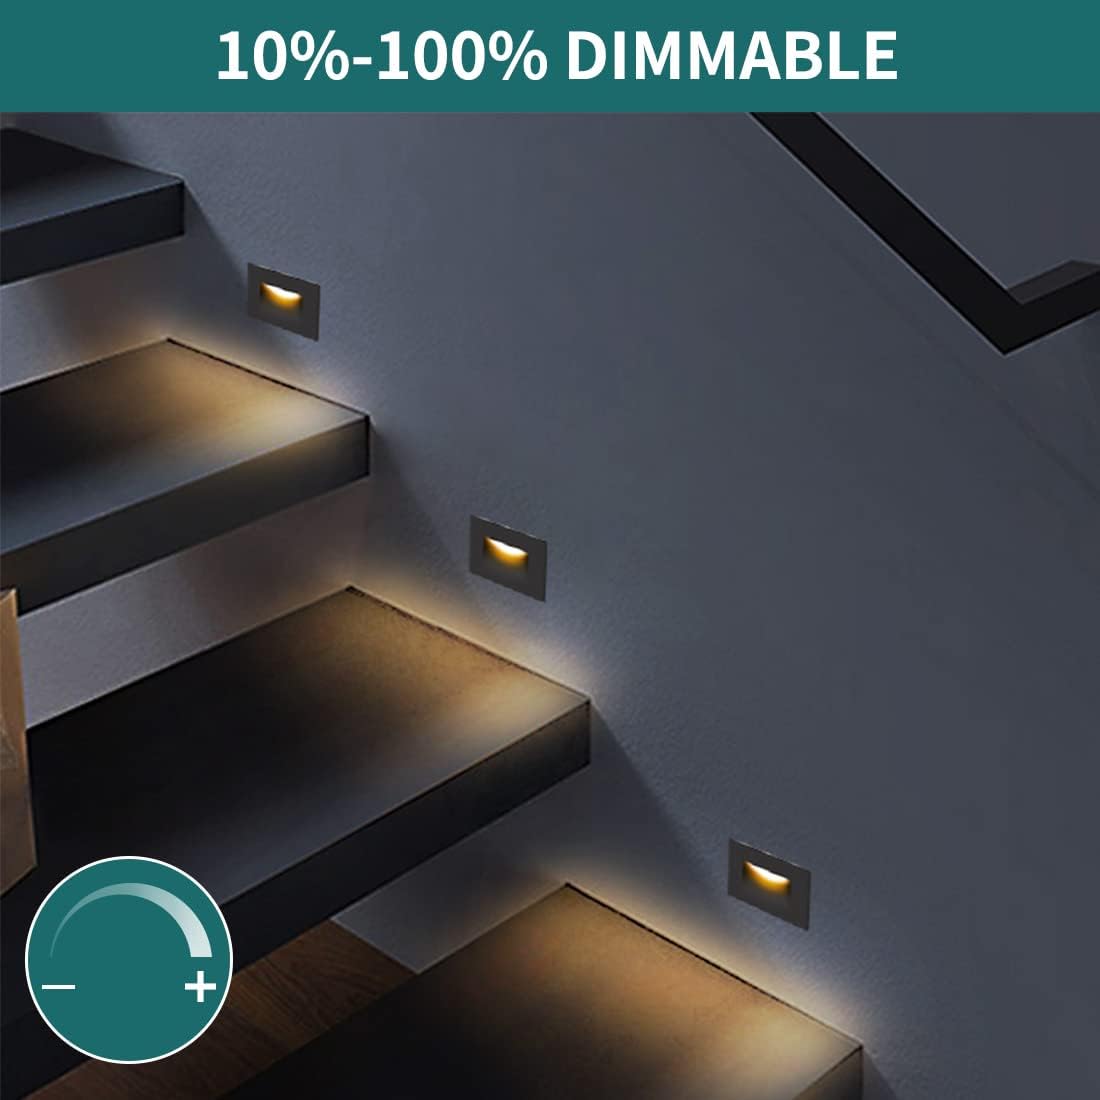
Image: The step light supports 10%-100% dimming.
4. Specifications
| Attribute | Value |
|---|---|
| Brand | kadision |
| Model Number | kadision-STP-04-3CT |
| Voltage | 120 Volts AC |
| Wattage | 3.5 watts |
| Brightness | 175 Lumens |
| Light Color | 3000K Warm White / 4000K Natural White / 5000K Daylight (Selectable) |
| Dimming | TRIAC Dimming (dimmer not included) |
| Material | Aluminum (ORB Finish) |
| Shade Material | Acrylic |
| Indoor/Outdoor Usage | Indoor, Outdoor (Moisture Resistant) |
| Mounting Type | Recessed Wall Mount (J-box Mount) |
| Item Dimensions (L x W x H) | 4.72"L x 2.84"W x 1.7"H |
5. Installation Instructions
Important: Ensure power is disconnected at the circuit breaker before starting installation.
- Prepare the J-box: Ensure a standard single gang outlet box (not included) is properly installed and secured in the desired location.
- Fix Mounting Frame: Attach the provided mounting frame to the J-box using appropriate screws. Ensure it is securely fastened.

Image: Secure the mounting frame to the J-box.
- Make Wire Connections: Connect the fixture's wires to the household wiring.
- Connect the black wire from the fixture to the live (black) wire from the J-box.
- Connect the white wire from the fixture to the neutral (white) wire from the J-box.
- Connect the green/ground wire from the fixture to the ground wire from the J-box.
Image: Connect the wires securely.
- Select Light Color Temperature (CCT): Before inserting the light body, locate the 3CCT switch on the back of the fixture. Select your desired color temperature (3000K, 4000K, or 5000K).
Image: Select desired color temperature using the 3CCT switch.
- Insert Light Body: Carefully tuck all wires into the J-box. Align the light fixture body with the mounting frame and snap it into place. Ensure it is flush with the wall.
Image: Insert wires and snap the light body into the J-box.
- Restore Power: Once installation is complete, restore power at the circuit breaker and test the light.

Image: The step lights are suitable for both indoor and outdoor applications.
6. Operation
6.1. Color Temperature Selection
The light fixture features a 3CCT switch located on the back of the unit. This switch allows you to select one of three color temperatures:
- 3000K Warm White: For a cozy and inviting ambiance.
- 4000K Natural White: For a balanced and neutral light.
- 5000K Daylight: For a bright and energetic illumination.
Note: The color temperature must be selected before the fixture is fully installed into the J-box, as the switch is on the rear of the unit.
Image: The 3CCT switch allows selection of light color temperature.
6.2. Dimming Function
These LED step lights are designed to be dimmable with most standard household TRIAC dimmer switches (not included). To utilize the dimming feature:
- Ensure you have a compatible TRIAC dimmer switch installed in your electrical system.
- Adjust the dimmer switch to control the brightness level of the step lights.
If flickering or inconsistent dimming occurs, verify the compatibility of your dimmer switch with LED fixtures.
Image: The step lights offer smooth dimming from 10% to 100% brightness.
7. Maintenance
The kadision LED Step Lights require minimal maintenance.
- Cleaning: Ensure power is off before cleaning. Wipe the fixture with a soft, damp cloth. Do not use abrasive cleaners or solvents, as these may damage the finish or acrylic lens.
- Inspection: Periodically inspect the fixture for any signs of damage or loose connections. If any issues are found, disconnect power and consult a qualified electrician.
- LED Longevity: The integrated LED light source is designed for long life and is not user-replaceable.
8. Troubleshooting
| Problem | Possible Cause | Solution |
|---|---|---|
| Light does not turn on. | No power supply. Loose wire connections. Faulty switch/dimmer. | Check circuit breaker. Ensure power is on. Verify all wire connections are secure (with power off). Test the switch/dimmer or bypass it temporarily. |
| Light flickers or dims inconsistently. | Incompatible dimmer switch. Loose wire connections. | Ensure a TRIAC LED compatible dimmer is used. Check wire connections (with power off). |
| Incorrect color temperature. | 3CCT switch set incorrectly. | Disconnect power, remove fixture, and adjust the 3CCT switch to the desired setting. Reinstall. |
If problems persist, contact customer support or a qualified electrician.
9. Warranty Information
kadision products are manufactured to high-quality standards. This product typically comes with a limited warranty covering defects in materials and workmanship from the date of purchase. Please refer to the specific warranty card included with your product or visit the official kadision website for detailed warranty terms and conditions.
Keep your purchase receipt as proof of purchase for warranty claims.
10. Customer Support
For technical assistance, troubleshooting, or warranty inquiries, please contact kadision customer support:
- Website: Visit the official kadision website for FAQs and support resources.
- Email: Refer to your product packaging or the kadision website for customer service email contact.
- Phone: Refer to your product packaging or the kadision website for customer service phone number.
When contacting support, please have your product model number (kadision-STP-04-3CT) and purchase date available.